Table of Contents
Advertisement
Introduction ...........................................2
minilogue Key Features .................................. 2
Block Diagram .................................................... 3
Controls and Connections ....................4
Front Panel Controls ........................................ 4
Rear Panel Connections .................................. 5
Turning the minilogue On and Off ............. 6
Playing Programs and Sequences ........8
Selecting and Playing a Program ................ 8
Using Favorites .................................................. 9
Playing the Sequencer ..................................10
Programs ............................................. 11
Program Architecture ....................................11
Creating Sounds ..............................................12
Saving a Program ............................................13
Basic Parameter Editing ................................14
Voice modes .....................................................23
Sequencer ..........................................................25
Table of contents
Edit Mode ............................................ 31
Other functions ................................... 47
Understanding MIDI ........................... 50
Program List ........................................ 54
Specifications ...................................... 56
MIDI Implementation Chart ............... 57
How to enter the Edit mode .......................31
PROGRAM EDIT mode ...................................33
SEQ EDIT mode ................................................37
GLOBAL EDIT mode ........................................40
Tuning .................................................................47
Restoring the Factory settings ...................47
Shortcuts using the SHIFT button .............49
MIDI-Related Settings ....................................52
E 1
Advertisement
Table of Contents

Related Manuals for Korg minilogue


Summary of Contents for Korg minilogue
-
Page 1: Table Of Contents
GLOBAL EDIT mode ........40 Front Panel Controls ........4 Other functions ........47 Rear Panel Connections ........5 Turning the minilogue On and Off ..... 6 Tuning ..............47 Restoring the Factory settings ....47 Playing Programs and Sequences ..8 Shortcuts using the SHIFT button .....49 Selecting and Playing a Program .... -
Page 2: Introduction
Introduction minilogue Key Features • 4-voice polyphonic synthesizer with onboard effects & sequencer. • All-new innovative redesign of analogue synth circuitry. • Instant recall of 100 factory Presets plus 100 additional user Programs. • 8 Voice Modes (mono, poly, unison, duo, etc.) offer maximum flexibility. -
Page 3: Block Diagram
Block Diagram AUDIO INPUT enable bypass VOICE 4 pre VCF mix pre lter OUTPUT post lter VOICE 3 pre VCF mix DELAY VOICE 2 pre VCF mix VOICE 1 pre VCF mix VOICE pre VCF mix VCO1 level AMP EG gate VCO 1 WAVE SHAPE... -
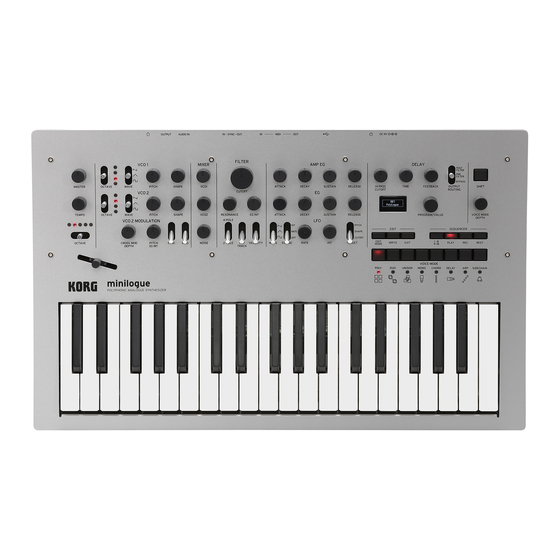
Page 4: Controls And Connections
Controls and Connections Front Panel Controls This diagram shows the layout of the front panel knobs, switches, and buttons. 11 12 13 17 18 MASTER knob FILTER DELAY CUTOFF knob HI PASS CUTOFF knob TEMPO knob RESONANCE knob TIME knob OCTAVE switch EG INT knob FEEDBACK knob... -
Page 5: Rear Panel Connections
Connect your equipment according to the needs of your own system. SYNC IN, OUT jacks AUDIO IN jack The minilogue steps can be synchronized with other devices using these jacks. A pulse sent from the audio output of another device or This standard 1/4" TS jack accepts a DAW can be used by connecting it to the SYNC IN jack. -
Page 6: Turning The Minilogue On And Off
Hold down the Power switch on the rear panel of the minilogue; once the “minilogue” logo appears in the display, take your finger off the Power switch. - Page 7 Turning the minilogue Off Any Program data in the minilogue that has not been saved will be lost when the power is turned off. Be sure to save any Program and other important data that you have edited (“Saving a Program”, p. 13).
-
Page 8: Playing Programs And Sequences
Voice mode settings. Enter the Play mode. When the minilogue is turned on, it will automatically enter the Play mode. In the Play mode, verify that all of the EDIT MODE and 1–8/9–16 buttons on the front panel are unlit. -
Page 9: Using Favorites
For details, refer to “Voice modes” (p. 23). Using Favorites Recalling your Favorite Programs The minilogue includes a Favorites func- tion, which can be used to instantly recall any one of the up to eight Programs that you have previously registered as Favorites on the minilogue. -
Page 10: Playing The Sequencer
Global settings. Playing the Sequencer Each Program in the minilogue includes sequence data. In this section, we’ll play the sequence data saved as part of the preset Programs. Turn the PROGRAM/VALUE knob to select a Program. -
Page 11: Programs
Programs Program Architecture Each minilogue Program includes settings for the Oscillators, Mixer, Filter, EGs and LFO, as well as a 16-Step Sequencer plus Effects. Try editing each related parameter, and enjoy changing the sounds of the mini- logue. Basic Parametres... -
Page 12: Creating Sounds
For details on how the pitch, sound, and volume change when using the knobs and switches, refer to “Basic Parameter Editing” (p. 14). We recommend that you save the Program on the minilogue after editing the sound. Any edits that you make will be lost if you turn off the power or recall a different Program. -
Page 13: Saving A Program
Saving a Program We recommend that you save your Program on the minilogue after editing the sound. Any edits that you make to the current program will be lost if you turn off the power or recall a different program before saving. -
Page 14: Basic Parameter Editing
The basic parameters are assigned to the knobs and switches on the front panel. VCO 1, VCO 2 VCO: Voltage Controlled Oscillator There are two oscillators in the minilogue. Os- cillator Parameters include the settings for the pitch of the sound (OCTAVE, PITCH) and the waveform (WAVE, SHAPE). - Page 15 PITCH knob [−1200...+1200] The pitch, or tuning, of the Oscillators can be set using one-cent steps. SHAPE knob [0...1023] This knob will determine the final shape, complexity, or duty-cycle (Square) of the selected waveform. 1023 VCO 2 MODULATION Oscillator 2 includes powerful oscillator sync, cross modulation, and ring modulation functions.
- Page 16 SYNC switch [OFF, ON] Oscillator sync is a popular effects for creating edgy synth leads. ON (up position): With this type of modulation, the phase of oscillator 2 is forc- ibly synchronized to the phase of oscillator 1. This adds harmonic overtones to the frequency of oscillator 2, making a complex waveform.
- Page 17 FILTER VCF: Voltage Controlled Filter The low-pass filter shapes the tone by selectively filtering cer- tain parts of the harmonic spectrum of the sound generated by the Oscillators and the Noise generator. CUTOFF knob [0...1023] This knob is used to set the cutoff frequency. Harmonic con- tent above the cutoff frequency will be filtered out.
- Page 18 EG INT knob [−100%...0...+100%] The Envelope Generator (EG) can be used to control the CUTOFF, or Filter fre- quency, over time using this EG INT (intensity) knob. To learn more about the EG settings (“EG”, p. 20). With this knob in the center position (0%), no EG is applied to the Filter. Rotating the knob to the left of center increases the EG intensity, but with the polarity of the EG inverted.
- Page 19 AMP EG VCA: Voltage Controlled Amplifier / EG: Envelope Generator The AMP (VCA) controls the output level of the minilogue, before the Master control. The AMP Envelope Generator provides a precise control signal that varies over time to modify the VCA level.
- Page 20 EG: Envelope Generator The EG provides a precise control signal that varies over time. This signal can be used to modify the Pitch of Oscillator 2, the Filter CUTOFF frequency, and the Speed or Intensi- ty of the LFO. The EG signal is available at the VCO 2 MODULATION PITCH EG INT knob, the FILTER EG INT knob, and the LFO EG MOD switch.
- Page 21 LFO: Low Frequency Oscillator The Low Frequency Oscillator creates a re- peating cyclical signal. You can choose one of three LFO waveforms. Depending on its target, the LFO can pro- vide vibrato (PITCH); Tonal changes to the Oscillators (SHAPE); or Wah-Wah (CUTOFF) effects WAVE switch The LFO can be set to a square wave ( ), a triangle wave ( ), or a sawtooth wave ( ).
- Page 22 DELAY The Delay effect is combined with a High Pass filter. This allows you to create a wide range of sounds. HI PASS CUTOFF knob [0...1023] Adjusts the cutoff frequency of the high-pass filter. Sounds and harmonic com- ponents below the HI-PASS CUTOFF frequency will be attenuated. Turning the knob to the right will increase the cutoff frequency.
-
Page 23: Voice Modes
Voice modes The minilogue is a 4-voice analog synthesizer. By changing the Voice mode, you can combine and allocate the voices in different ways. The Voice mode is set as a Program parameter, and you can see which Voice mode is being used by looking at which of the buttons 1–8 is lit. - Page 24 Button Voice mode Action VOICE MODE DEPTH knob effect [1/192...1/4] Voices 2, 3, and 4 will play in DELAY delayed sequence after voice 1 Turning the knob to the right will plays. make the delay time longer. [MANUAL 1, MANUAL 2, RISE 1, RISE 2, FALL 1, FALL 2, RISE FALL 1, Uses the arpeggiator to play up RISE FALL 2, POLY 1, POLY 2, RAN-...
-
Page 25: Sequencer
(step edit). Real-Time Recording Recording a performance This feature allows you to record your minilogue keyboard performance and to add overdubs in real time. Press the PLAY button in the SEQUENCER section to play the sequencer. -
Page 26: Step Recording
Step Recording Press the REC button in the SEQUENCER section while the sequencer is stopped. “STEP REC” and “STEP 1” will be indicated in the display. If the sequence has already been recorded, the note names will be indicated in the display. Select the step you wish to edit. - Page 27 Four Motion Sequences can be recorded on the minilogue, which can includes changes to all knobs and switches (except for the MASTER knob, TEMPO knob, and OCTAVE switches).
- Page 28 CLEAR in the SEQ EDIT mode, and you will be able to delete one of the previ- ously recorded Motion Sequences. Check that the minilogue is on the MOTION CLEAR function, in the SEQ EDIT mode. “MOTION CLEAR” will be indicated in the display. You can delete Motion Sequences one at a time here.
- Page 29 Editing sequence data (step edit) Using Step Edit, you can change the values of notes and gate times previously recorded into a sequence. Select the Program that includes the sequence data you wish to edit. Press the 1–8/9–16 button. “STEP EDIT 1–8” and “STEP EDIT 2, 3 9–16”...
-
Page 30: Other Editing Functions
Other editing functions Use the SEQ EDIT mode when setting the Step Length and Step Resolution parameters during sequence step recording, as well as for deleting sequence data, or for editing or deleting motions. For details, refer to “SEQ EDIT mode” (p. -
Page 31: Edit Mode
Edit Mode Although nearly all of the minilogue’s main parameters can be edited using the knobs and switches on the panel, other detailed parameters are accessed using the Edit mode. There are three sub-modes within the Edit mode: PROGRAM EDIT mode, SEQ EDIT mode, and GLOBAL EDIT mode. - Page 32 After you have configured the parameters in PROGRAM EDIT mode and/or SEQ EDIT mode, press the WRITE button to save your changes. The display will indicate the message “Where to write?”. If you do not save your changes and select another Program after you have configured the parameters in the PROGRAM EDIT mode and the SEQ EDIT mode, your settings will be lost.
-
Page 33: Program Edit Mode
PROGRAM EDIT mode The parameters of the PROGRAM EDIT mode are assigned to buttons 1–6. Button 1 Button 2 Button 3 Button 4 Button 5 Button 6 PROGRAM OTHER SET- SLIDER FUNC LFO SETTING INITIALIZE DUMP NAME TING PROGRAM LFO BPM Portamento Program Slider Assign... - Page 34 VCO 1 LEVEL VCO 2 LEVEL NOISE LEVEL CUTOFF RESONANCE FILTER EG INT AMP EG ATTACK AMP EG DECAY AMP EG SUSTAIN AMP EG RELEASE EG ATTACK EG DECAY EG SUSTAIN EG RELEASE LFO RATE LFO INT HPF CUTOFF DELAY TIME FEEDBACK PORTAMENTO VOICE MODE DEPTH...
- Page 35 LFO Key Sync [Off, On] With the LFO Key Sync set to On, the phase of the LFO will be reset with each note-on received from the keyboard. LFO Voice Sync [Off, On] Use the LFO Voice Sync to choose whether the phase of the LFO will be syn- chronized between voices.
- Page 36 Turn the PROGRAM/VALUE knob until “Press WRITE” is indicated in the dis- play. The WRITE button will blink. Press the WRITE button to send a SysEx Program dump from the minilogue’s MIDI OUT and USB B connector. The display will indicate the message “Pro-...
-
Page 37: Seq Edit Mode
SEQ EDIT mode The parameters of the SEQ EDIT mode are assigned to buttons 1–6. Button 1 Button 2 Button 3 Button 4 Button 5 Button 6 SEQ PARAM- MOTION MOTION EN- MOTION SEQ CLEAR ETER CLEAR ABLE SMOOTH Step Length All Clear Motion 1...4 Motion 1...4... - Page 38 Default Gate Time [0–100%] The Gate Time is the default value used for each step recorded using the Step Sequencer. Lower values are more staccato, higher values have a longer gate time. Button 3 (SEQ CLEAR) This function provides a convenient way to erase all data within a specific se- quence.
- Page 39 Button 5 (MOTION ENABLE) MOTION ENABLE [OFF, ON] By setting this function to OFF, you can disable a particular motion without de- leting the data. Press button 5 to select the Motion Sequence to configure. Turn the PROGRAM/VALUE knob, and select either “OFF” or “ON”. OFF: The Motion Sequence will be disabled, and the parameters will not change (the recorded Motion Sequence will not be deleted).
-
Page 40: Global Edit Mode
Master Tune [−50 Cent...+50 Cent] This adjusts the overall tuning of the entire minilogue in one-cent units (semi- tone = 100 cents), over a range of ±50 cents. 0: A4 is equal to 440 Hz. Transpose [−12 Note...+12 Note]... - Page 41 Button 2 (GLOBAL 2) These functions relate to performance aspects of the minilogue—knob opera- tion, velocity curves, local settings, and more. Knob Mode [Jump, Catch, Scale] The front panel knobs can operate in one of three modes: Jump: When you turn the knob, the parameter value will jump to the value indicated by the knob.
- Page 42 Local SW [Off, On] The local connection makes a link between the minilogue keyboard the sound- generating circuitry. Normally, this link is On. However, if you are using the minilogue with an external sequencer or sequencing software, you will want to set the local connection to OFF to eliminate the double-triggering of notes caused by MIDI echo.
- Page 43 In order to achieve synchronization with other units, the polarity of the SYNC IN jack may need to be changed. Rise: The minilogue will sync to the pulse as it rises to its crest (the highest point) of the waveform.
- Page 44 Clock Source [Auto (USB), Auto (MIDI), Internal] Many features of the minilogue can be sync’d to the tempo or BPM. This pa- rameter allows you to specify whether the clock source is internal, or an exter- nal MIDI Clock Source.
- Page 45 These parameters relate to the minilogue’s display and power settings. Brightness [1...10] Adjusts the display brightness. Continuous use of the minilogue while the brightness is set to a high value will have an adverse effect on the overall life of the display. Auto Power Off [Off, On]...
- Page 46 Button 7 (GLOBAL 7) These parameters allow you to perform a dump of all the internal data, either via MIDI or via USB. All Dump (USB) Turn the PROGRAM/VALUE knob until “Press WRITE” is indicated in the dis- play. The WRITE button will blink. Press the WRITE button to transmit the MIDI data dump via the USB B connec- tor.
-
Page 47: Other Functions
As you continue to play the minilogue for a while right after you’ve turned it on, the pitch and tone may gradually drift. If the pitch drift becomes notice- able, use the steps below to tune the instrument. - Page 48 Turn the PROGRAM/VALUE knob to select “Yes”, and press the WRITE button. The factory-set default data will be reloaded, and the minilogue will be re- stored to its factory default state. Press the EXIT button, or select “No” using the PROGRAM/VALUE knob and press the WRITE button to cancel the operation.
-
Page 49: Shortcuts Using The Shift Button
When the minilogue’s sound generator is not making any sound, auto-tuning occurs auto- matically; but you can use this function to re- tune the minilogue manually in Play mode if the tuning seems to be drifting. When in Play mode:... -
Page 50: Understanding Midi
You can also use the front panel knobs or buttons to transmit these control change messages, in order to control an external MIDI device. You can also synchronize the minilogue’s tempo to the MIDI clock of an ex- ternal MIDI sequencer or other device, so that the minilogue will play in time with the external device and with any changes you make. - Page 51 You also might want to use the minilogue as both an input de- vice for playing notes and as a MIDI tone generator. In either case, you’ll need to connect the MIDI OUT connector to the MIDI IN connector on both the minilogue and the external MIDI sequencer or computer.
-
Page 52: Midi-Related Settings
MIDI channel to match the MIDI channel of the external MIDI device. Use the button 4 (MIDI Ch) in the GLOBAL EDIT mode to set the minilogue’s MIDI channel (“MIDI Ch”, p. 44). When synchronizing to an external MIDI device, refer to that device’s Owner’s manual. - Page 53 MIDI device to receive clock data via MIDI. The minilogue will act as the master, and the tempo that is set using the TEMPO knob on the minilogue will be sent as MIDI timing clock data to operate the external MIDI device (sequencers, rhythm machines, and so on).
-
Page 54: Program List
Program List Program Name Category Voice Mode Slider Assign Author PolyLogue Poly Synth POLY PITCH BEND KORG Inc. PWM Strings Poly Synth POLY PITCH BEND KORG Inc. Flutter Pad Poly Synth POLY LFO INT KORG Inc. TraxBass Bass UNISON EG DECAY KORG Inc. - Page 55 Category Voice Mode Slider Assign Author Mega PopBass Bass POLY PITCH BEND Richard Devine OctaBass Bass MONO PITCH BEND KORG Inc. BassRide Bass MONO EG DECAY KORG Inc. Dark Bass Bass UNISON PITCH BEND Richard Devine Detuned Acid Bass MONO GATE TIME KORG Inc.
-
Page 56: Specifications
Specifications Keyboard: 37 keys (slim keyboard, velocity sensitive) Maximum polyphony: 4 voices Sound generating system: 2 VCO (square wave, triangle wave, sawtooth wave) 1 VCF (2-pole, 4-pole) 2 EG 1 VCA 1 LFO DELAY Input/output jacks: Headphones jack OUTPUT jack AUDIO IN jack SYNC IN jack (ø3.5 mm stereo mini-phone jack, 20V maximum input level) -
Page 57: Midi Implementation Chart
System Reset Notes *1: When the Global setting is "Enable Tx MIDI=On", the minilogue will transmit signals; and when the Global setting is "Enable RX MIDI=ON", the minilogue will receive signals. *2: When the Global setting is "Clock Source=Internal", the minilogue will not receive signals. The minilogue will receive signals when set to "Auto(MIDI)"...
Need help?
Do you have a question about the minilogue and is the answer not in the manual?
Questions and answers