Korg microSTATION Operation Manual
Music workstation
Hide thumbs
Also See for microSTATION:
- Setup sheet (16 pages) ,
- Easy start manual (75 pages) ,
- Setup manual (9 pages)
Table of Contents
Advertisement
Quick Links
Download this manual
See also:
Setup Manual
Advertisement
Table of Contents

Related Manuals for Korg microSTATION


Summary of Contents for Korg microSTATION
- Page 1 Operation guide...
-
Page 2: About This Manual
(Resonant structure and Electronic circuit page. Refer to this guide when you would like to learn Modeling System) is KORG’s proprietary sound more about an unfamiliar parameter. modeling technology which precisely reproduces the complex character and nature of both acoustic and microSTATION USB-MIDI Setup Guide electric instruments as well as electronic circuits in real This explains how to install the Korg USB‐MIDI driver world environments. emulates a wide variety of and set up the microSTATION. sound generation characteristics including instrument bodies, speakers & cabinets, acoustic fields, microSTATION Editor/Plug-In Editor User’s Guide microphones, vacuum tubes, transistors, etc. This explains how to set up and use microSTATION Editor/Plug‐In Editor and microSTATION Editor/Plug‐ * Apple and Mac are trademarks of Apple Inc., In Editor. registered in the US. and other countries. microSTATION Voice Name List * Windows XP, Windows Vista, and Windows 7 are registered trademarks of Microsoft Corporation in This lists the names of the multisamples, drum the U.S. and other counties. samples, and factory‐set combinations, programs, drum kits, user arpeggio patterns, and demo songs ... -
Page 3: Table Of Contents
Sequencer mode . . . . . . . . . . . . . . . . . . . . .23 Main features of the microSTATION ..1 Front and rear panels ..... . 2 Playing and Front panel . . . . . . . . . . . . . . . . . . . . . . . . . . . . . . . . - Page 4 Using Effects ....45 Effects . . . . . . . . . . . . . . . . . . . . . . . . . . . . . . . . . . . 66 An overview of MIDI . . . . . . . . . . . . . . . . . . . . . . . . . . . . . . . . . . . . 66 the microSTATION’s effects..45 Damper pedal, Foot pedal do not respond Effect I/O. . . . . . . . . . . . . . . . . . . . . . . . . . . . . . . . . 45 correctly . . . . . . . . . . . . . . . . . . . . . . . . . . . . 66 Effects in each mode . . . . . . . . . . . . . . . . . . . . . . . 46...
-
Page 5: Introduction To The Microstation
Introduction to the microSTATION Main features of the microSTATION EDS-i (Enhanced Definition Synthesis - Sequencer and Auto Song Setup function integrated) A high‐performance 16‐track MIDI sequencer is built into the microSTATION, allowing you to record up to This tone generation system integrates the main 128 songs with a total of 210,000 notes. With a high‐ functionality of the “EDS” (Enhanced Definition precision timing resolution of 1/480, it can capture Synthesis) system featured on the M3 and M50, every nuance of your performance. including the oscillators, filters, amps, LFO/EG, and The sequencer features intuitive operation, and effects, delivering rich and vivid sounds. provides numerous functions that allow you to The oscillator section uses 49 Mbytes (when calculated produce music quickly. Template songs for every style as 16‐bit linear data) of high‐quality PCM sources of music, a loop recording function, grid sequence sampled at 48 kHz and covering a wide variety of function, and arpeggiator will powerfully enhance sounds. The filter section that’s so important to ... -
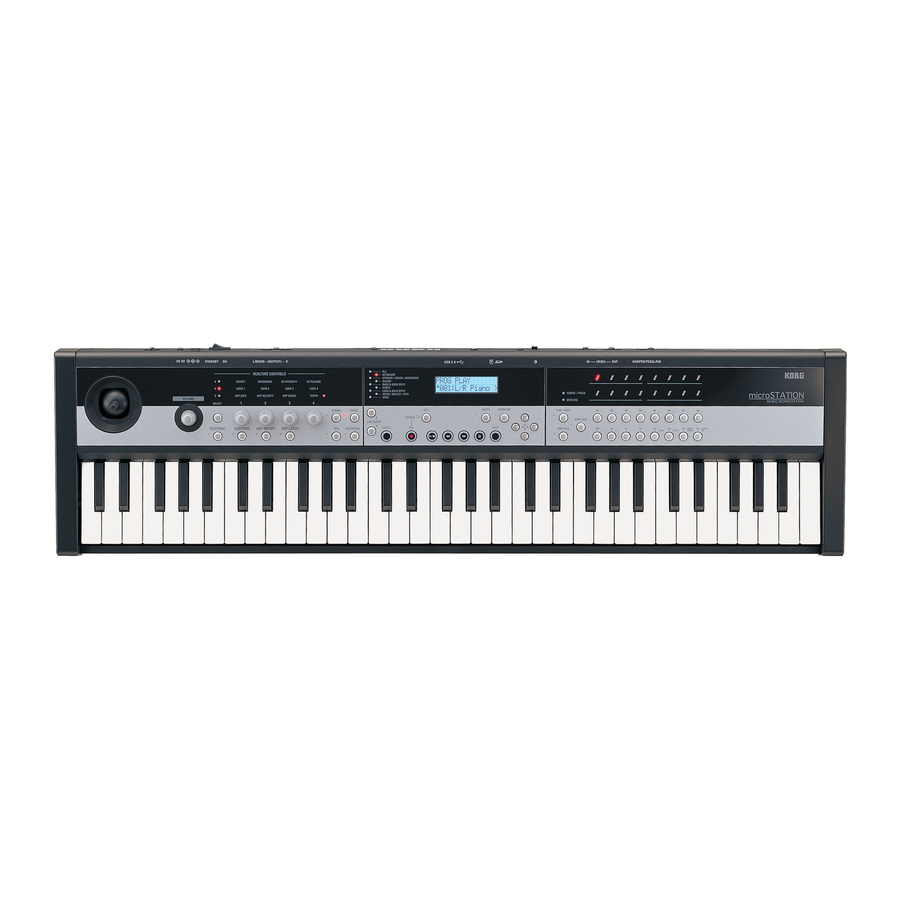
Page 6: Front And Rear Panels
Introduction to the microSTATION Front and rear panels Front panel 1. Joystick TEMPO LED If realtime control C mode is selected, and you use You can control synthesis parameters or effect knob 4 to specify the tempo, this LED will blink at parameters by moving the joystick up/down/left/right. quarter‐note intervals of the current tempo. (p. 9) 5. AUDITION button 2. VOLUME knob In Program mode, this button repeatedly plays a riff This knob adjusts the volume of the OUTPUT L/ (phrase) that’s appropriate for the selected sound. MONO, R outputs, as well as the volume of the When it is on, the LED at the left of the button will be headphone jack. (p. 11) lit‐up. 3. PHONES jack 6. Arpeggiator Connect your headphones here. -
Page 7: Compare Button
Front and rear panels Front panel 9. Sequencer GRID SEQ button If this button is on (the LED to the left of the button The buttons in this section are used for operations in will light‐up), the Grid Sequence function in Sequencer Sequencer mode, such as recording and playback. mode will be on. This lets you use the function buttons (p. 32). 01–16 and LEDs 01–16 to easily create drum patterns. LOCATE button NUM LOCK button REC button If this button is on (the LED to the left of the button KEY button will light‐up), function buttons 01–16 will operate as (Start/Stop) button numeric keys, a clear button, an enter button, and as (REW)/ (FF) button group up/down buttons when selecting a program or combination. (Pause) button LOOP button Function buttons 01–16 When the three buttons described above are off ... -
Page 8: Rear Panel
Introduction to the microSTATION Rear panel 1. Power supply 4. SD card slot You can insert an SD card here, and use it to save/load Be sure to read the “Turning the power on/off” section microSTATION programs, combinations, or song data. on page 11 and follow the correct procedure described (p. 57) there. Power switch 5. Contrast knob This switch turns the power on/off. (p. 11) This knob adjusts the contrast of the display for the best AC adapter connector viewing from any angle or under changing light conditions. -
Page 9: Basic Information
Basic Information About the microSTATION’s modes Basic Information Sequencer mode About the microSTATION’s Sequencer mode lets you record, playback, and edit MIDI tracks. You can: modes • Use the sixteen‐track MIDI sequencer to record and The microSTATION has numerous functions that let play back songs. you play and edit programs or combinations, record • Record a single MIDI track at a time, or record as and play back sequence data, and manage media. many as all sixteen tracks simultaneously. You can These functions are grouped into “modes.” The also record system exclusive messages. microSTATION has four modes. • Record using two arpeggiators. • Create up to 128 songs. Program mode • Use the microSTATION as a sixteen‐track multi‐ Programs are the basic sounds of the microSTATION. timbral sound module. In Program mode, you can: • Adjust settings for each track •... - Page 10 Introduction to the microSTATION PROGRAM Insert / Master / Total Effect OSC 1 IFX 1 MS1 (Multisample) MFX 1 Drum Kit MFX 2 MS2 (Multisample) IFX 5 MS3 (Multisample) MS4 (Multisample) Arpeggiator PITCH1 FILTER1 AMP1 OSC 2 MS1 (Multisample) Drum Kit...
-
Page 11: Basic Operating Methods
Basic Information Basic operating methods When you enter PROG EDIT, the upper line of the Basic operating methods display will indicate PROG EDIT. A “ ” symbol is shown at the left edge, indicating that you can use After you’ve turned on the power, use the following the button to move (return) to the previous page methods to select modes or pages, and edit the (in this case, PROG PLAY). settings. The lower line of the display shows the parameter group name or parameter name. In each mode, the editable parameters are organized into several Selecting modes groups. Depending on the mode, a group might be • In order to use a function of the microSTATION, divided into multiple sub‐groups, so there might be you must first select the appropriate mode. Press several levels of parameters. one of the front panel mode buttons to enter the The “ ”, “ ”, or “ ” symbols shown at the left corresponding mode. edge of the lower line indicate that you can move to COMBI button: Combination mode higher or lower parameter groups or parameters. PROG button: Program mode Use the buttons to move. - Page 12 Introduction to the microSTATION Selecting and executing a command For example, this is useful during recording. Each mode allows you to execute various commands, 1. Record on a desired track (Take 1). such as Copy. 2. Record once again on the same track (Take 2). For example in Program mode, it is convenient to copy arpeggiator or effect settings when you’re editing. 3. When you press the COMPARE button (the LED will light‐up), Take 1 will be recalled. 1. In PROG PLAY, press the button to enter PROG EDIT. 4. Press the button again (the LED will go dark), and Take 2 will be recalled. 2. Use the buttons to choose “Command,” and then press the button. 5. If you record onto the same track again (Take 3) from the state of step 3, the Compare function will recall Take 1. 6. If you record onto the same track again (Take 3) from the state of step 4, the Compare function will 3. Use the buttons to select the desired recall Take 2. In this way, you can recall the state ...
-
Page 13: Using Controllers
Basic Information Using Controllers Realtime Controls Using Controllers The realtime controls consists of four knobs and two In addition to using the keyboard, the microSTATION buttons (SELECT and EXTERNAL). lets you control the sound by using the joystick, knobs 1–4, damper pedal, and foot switch or foot pedal. These controls let you modify the tone, pitch, volume, effects, etc. in realtime as you play. Joystick The joystick moves in four directions: left, right, up (away from yourself), and down (towards yourself). You can use the realtime controls to: Each of the four directions can be used to control a different function, such as modulating Program or • Apply modulation to sounds, or control the tone. effects parameters. These assignments can be different • Control the arpeggiator. for every Program, but generally, they do the • Control an external MIDI device. following: 1. Press the REALTIME CONTROLS SELECT button to select the set of functions that you want to control (modes A–C), and then use knobs 1–4. The REALTIME CONTROLS SELECT button lets you choose one of the following three sets of functions. A mode and B mode: The knobs will modify the sounds or effects. C mode: The knobs will control the arpeggiator and ... - Page 14 Introduction to the microSTATION Damper pedal / Foot switch / Foot pedal The microSTATION has a rear panel DAMPER/ PEDAL/SW jack where you can connect either a damper pedal, a foot pedal, or a foot switch. Damper Pedal The damper pedal is also sometimes called the sustain pedal. It acts like the similarly‐named pedal on an acoustic piano; when you hold down the pedal, notes will continue to sustain even when you lift your hands off of the keyboard. In Combination and Sequence mode, you can also choose settings so that the damper will affect some sounds but not other sounds. Assignable Foot Switch This lets you use a simple footswitch, such as the Korg PS‐1, as an assignable controller. The footswitch can perform a wide variety of functions, such as: • An assignable source for modulating sounds and effects • Portamento on/off • Program select up or down • Sequencer start/stop or punch in/out •...
-
Page 15: Setup
(save) your changes. ʺConnections and powerʺ on page 8 of Easy Start If you edit a program and then select a different program or turn off the power, the changes you guide. made will be lost. The same is true for a You must use the included AC adapter only. Using combination. any other AC adapter may cause malfunctions. The settings you edit in Sequencer mode and Global/Media mode are remembered as long as the power is on, but will be lost when you turn off the Turning the power on power, so be sure to save all your data before turning the power off. 1. Lower the microSTATION’s VOLUME knob. 1. Lower the microSTATION’s VOLUME knob. If you have connected powered monitor speakers or Also turn the volume of your powered monitor a stereo amp, turn down the volume of these speakers or stereo amp down to zero. devices. 2. Turn off the power of your powered monitor or 2. Press the rear panel Power switch to turn on the stereo amp. power. 3. Press the rear panel Power switch to turn off the The display will show the model name and power. software version. The display will indicate “Now executing” while ... -
Page 16: Connections
MIDI keyboard Monitor OUTPUT Connections to MIDI equipment Connecting the AC adapter Mixer INPUT Powered Analog audio output monitors, etc. Connecting audio equipment Powered monitor Here’s how to connect the microSTATION to your analog amp or mixer. INPUT INPUT If you’ve connected a stereo audio amp, be aware that playing at high volume may damage your L/MONO speaker system. Be careful not to raise the volume excessively. OUTPUT L/MONO and R All of the factory sounds use these outputs. PHONES 1. -
Page 17: Connecting A Damper Pedal, Foot Pedal, Or Foot
This instrument also supports half‐damping. Here’s PEDAL/SW) to specify the function that will be how to connect an optional Korg DS‐1H damper pedal controlled by the pedal (p. 56, PG p. 65, to the DAMPER/PEDAL/SW jack and use it to control PG p. 296). the half‐damper effect. Perform the foot pedal calibration procedure to ensure that the pedal is operating correctly (PG 1. Connect an optional DS‐1H damper pedal to the p. 66). DAMPER/PEDAL/SW jack. You’ll be able to control the half‐damper effect if you’ve connected the DS‐1H. If you’ve connected a Connecting the microSTATION different switch‐type pedal, it will function as a damper switch. to a computer 2. After you turn the power on, select the option The microSTATION provides both MIDI and USB that’s connected to the jack, and choose the connectors as standard equipment. By connecting the appropriate Global/Media mode settings for microSTATION to your computer via USB, you can use “Type” and “Polarity” (GLOBAL/MEDIA: it as a controller and MIDI sound module for your Controllers ‐ PEDAL/SW) to specify the function DAW software with single cable convenience; and that will be controlled by the pedal and the ... -
Page 18: Connecting Midi Devices
MIDI OUT used to connect two or more MIDI devices, MIDI OUT MIDI patch bay performance data can be exchanged between the MIDI keyboard MIDI IN devices, even if they were made by different manufacturers. MIDI tone generator Controlling an external MIDI tone generator from microSTATION If you want to use the microSTATION’s keyboard and other controllers, sequencer, and arpeggiator to play or control an external MIDI sound module, use a MIDI cable to connect the microSTATION’s MIDI OUT connector to the MIDI IN connector of your external MIDI sound module. MIDI OUT MIDI IN MIDI keyboard microSTASTION Controlling microSTATION’s tone... -
Page 19: Playing And Editing Programs
Playing and editing programs About the microSTATION’s programs You can choose from the following nine categories. On the microSTATION, a “program” is the basic Category Explanation sound. You’ll use Program mode to play programs. All categories Programs are also used outside of Program mode. Acoustic piano, electric piano, clavi/ KEYBOARD In Combination mode you can combine multiple harpsichord, and organ sounds programs to create complex sounds. STRINGS/BRASS/ String, vocal, brass, woodwind, and WOODWIND reed sounds In Sequencer mode you can assign a program to each MIDI track of the internal sequencer, or use the GUITAR Acoustic and electric guitar sounds microSTATION as a sound module that’s played from ... -
Page 20: Using Controllers
In PROG PLAY when you turn Num Lock on and press the 14 (ENTER) button, the bank and number are For more about the arpeggiator, please see page 50. shown on the right side of the upper line of the display. Program memories Bank Prog No. Explanation These programs are loaded when the microSTATION is 000...127 Preloaded A...D shipped; they use a variety D:000...095 programs of multisamples, effects, and arpeggiators. Initial These are initialized 096...127... -
Page 21: Editing A Program
Playing programs Easy editing using the buttons and knobs Editing a program Using realtime controls to edit the Easy editing using the buttons sound or effects and knobs You can use the realtime controls (the SELECT button All of the microSTATION’s programs can be edited. and knobs 1–4) to modify the sound and control the arpeggiator. You can create original programs by editing the preload programs on the microSTATION without needing to use external software. By using the microSTATION Editor / Plug‐In Editor software that is installed on your computer, you’ll also be able to create original programs from scratch, starting from an initialized program. However, creating the sound you want from an ... -
Page 22: Restoring Settings You've Edited
Playing and editing programs Knob [3]: EG-INTENSITY Mode B controls This adjusts the filter EG intensity (the depth of how In mode B you can turn knobs 1–4 to control various the EG affects the filter). aspects of the sound such as volume, portamento time, pan, filter and amp EG, pitch LFO, and master effect Operating the knob will change the amount of how the send level. filter is affected by the EG. Normally, turning the knob toward the left will make the filter EG shallower, and In mode B, the most useful functions are assigned turning the knob toward the right will make it deeper. individually for each preload program. Since the filter EG operates relative to the filter cutoff Mode C controls frequency, both knobs 1 and 3 will control the tonal In mode C you can control the arpeggiator in realtime. change produced by the filter. For details on operation, refer to page 50. Level Saving the edits you made by moving the knobs The realtime control knobs are an ideal way to modify ... -
Page 23: Editing A Program In Detail
Playing programs Before you start editing Editing a program in detail You can create an original sound by editing a preload OSC 1/2 program. (p. 58 “Writing a Program or Combination”) OSC1 contains Oscillator/Pitch, Filter, Amp, EG, and LFO. The microSTATION provides OSC1 and OSC2, and you can combine these to create more complex Before you start editing programs. Note: Pitch EG is shared by OSC1 and OSC2. The three elements of sound: pitch, Effects tone, and volume The output from OSC 1/2 is sent to the insert effects, Sound is made up of three basic elements: pitch, tone, master effects, and total effect. In the mixer section ... -
Page 24: Summary Of The Edit Pages
Playing and editing programs Controlling the pitch Summary of the edit pages Here you can adjust the way that the oscillator’s pitch The PROG PLAY page lets you select and play will change. You can use the pitch EG or LFO to make programs. Here you can also use the realtime control the pitch vary over time. knobs to perform simple editing or adjust the arpeggiator settings. Varying the pitch according to keyboard The PROG EDIT page lets you edit the sound in position (Pitch Slope) additional ways. It is divided into the following On keyboard instruments such as piano or organ, the groups pitch will go up as you play toward the right end of the keyboard, and will go down as you play toward Group Summary the left end. Polyphonic or monophonic setting. Pitch OSC Common stretch, hold, and reverse settings. -
Page 25: Using Lfos And Envelopes (Egs)
Playing programs Using LFOs and Envelopes (EGs) • OSC1/OSC2: FltLFO1toA–FltLFO2toB, Using LFOs and Envelopes (EGs) AmpLFO1Int–AmpLFO2Int, P.LFO1 AMS Int, P.LFO2 AMS Int Using LFOs EGs (Envelope Generators) Each Oscillator has two LFOs: LFO1 and LFO2. There An envelope creates a modulation signal by moving is also a single Common LFO, shared by both from one level to another over a specified time, and Oscillators. While LFO1 and LFO2 are separate for then moving to another level over another period of each voice, the Common LFO is shared by all voices in time, and so on. the Program. This makes it useful when you want all The Program includes three EGs, for Pitch, Filter, and of the voices to have an identical LFO effect. Amp. These produce time‐varying changes in pitch, You can use these LFOs to modulate many different tone, and volume respectively. Program parameters, including: • Pitch (for vibrato) note-on Attack Level note-off Break Level •... - Page 26 Playing and editing programs Resonance Adjusting the amp Resonance emphasizes the frequencies around the cutoff frequency, as shown in the diagram below. In the Amp section you can use Amp EG, and LFO 1/2 When this is set to 0, there is no emphasis, and to control the volume. frequencies beyond the cutoff will simply diminish smoothly. Background - what does “Amp” mean? At medium settings, the resonance will alter the timbre of the filter, making it sound more nasal, or more Different sounds have characteristic shapes to their extreme. At very high settings, the resonance can be volume levels. heard as a separate, whistling pitch. For example, the volume of a piano note begins at a high volume the instant you play the note, and then decreases gradually. The volume of an organ note, on the other hand, remains constant as long as you continue pressing the key. Low resonance The volume of a note on a violin or wind instrument can be varied during the note by the musician (i.e., by High resonance regulating the amount of pressure on the bow or the force of the breath).
-
Page 27: Arpeggiator
Playing programs Arpeggiator Amp EG Total effect The Amp EG lets you control how the volume changes Total effect settings are made in PROG EDIT: TFX. The over the course of a note. total effect is typically used with effect types such as compressor, limiter, or EQ that add a finishing touch to Every instrument has its own characteristic volume the overall sound. envelope. This is part of what gives each instrument its identifiable character. Conversely, by changing the volume contour–for Assigning functions to knobs instance, applying a string‐like Amp EG curve to an organ multisample– you can produce interesting and For each program, you can use PROG EDIT: unusual sounds. Knob Assign to assign the function that knobs 1–4 will Piano perform when realtime control mode B is selected. 1. In PROG PLAY, press the button to enter PROG EDIT. Organ 2. Use the buttons to access “Knob Assign,” and press the button. 3. Press the button to choose knob 1. Strings Use PROG. EDIT: Amp EG to adjust the envelope. 4. Use the buttons to select the function that will be controlled by knob 1. -
Page 28: Playing And Editing Combinations
Playing and editing combinations About the microSTATION’s combinations 2. Use the CATEGORY SELECT buttons to choose a combination category. A “combination” consists of up to sixteen programs, which can be split or layered. This lets you create You can choose from the following nine categories. complex sounds that would not be possible for an Category Explanation individual program. You’ll use Combination mode to All categories play or edit combinations. Acoustic piano, electric piano, clavi/ This chapter explains the basics of using combinations, KEYBOARD harpsichord, and organ sounds such as how to use the panel buttons and perform STRINGS/BRASS/ String, vocal, brass, woodwind, and basic editing in Combination mode. -
Page 29: Using Controllers To Modify The Sound
Easy combination editing Performing with the arpeggiator The banks and numbers (Bank, Combi No.) shown in the table above are used to specify the writing‐ destination when writing a combination, and to specify the copy‐destination when executing a copy command. On the microSTATION itself, you can’t select a combination by specifying a bank and number from the table above. 2. Use function buttons 01–16 to switch the LEDs between lit and unlit; the corresponding timbre Performing with the will switch between Play and Mute status. arpeggiator Based on note data that it receives from the keyboard Simple editing using the or from the MIDI IN connector, the arpeggiator can generate a wide range of phrases and patterns knobs including arpeggios, guitar or keyboard backing riffs, bass phrases, or drum patterns. When the Realtime You can use the realtime controls knobs to perform a controls C mode is selected, you can use the knobs to variety of edits. vary the duration and dynamics of the arpeggiated For example, you can use the realtime controls knobs notes. to adjust the Filter cutoff or resonance. You can also ... -
Page 30: Editing A Combination
Playing and editing combinations Editing a combination You can create an original combination either by A suggested approach for editing a preload combination or by editing an initialized combination. You can then save (write) the editing edited combination. First, select a Program for each Timbre. (Note that you Note: If a combination uses a program that was being edited in Program mode, that program will use the don’t have to use all 16 Timbres!) edited sound. Next, create any desired keyboard or velocity splits, layers, or crossfades between the different Timbres. Summary of the edit pages After this, adjust the volumes of the Timbres, and set From the COMBI PLAY page, press the button to up any other Timbre parameters as desired. enter the COMBI EDIT page. The COMBI EDIT page lets you edit the sound in detail. To add finishing touches to the sound, set up the Insert, Master, and Total Effect as desired. These effects It is divided into the following groups. can be different from those associated with the Group Summary individual Programs in Program mode, if desired. -
Page 31: Changing The Program Assigned To
Strong Keyboard playing 4. Select a program for timbre 2 in the same way as Program B Soft dynamics Program A you did in step 2. Velocity Switch: Keyboard playing dynamics (velocity) switches between different programs. On the microSTATION, you can use a different Program for each of up to sixteen Timbres, and combine two or more of the above methods to create even more complex setups. Strong Keyboard playing Program A Soft dynamics Program D Program B Example: Program C B and C/D are split. -
Page 32: Velocity Switch Settings
Playing and editing combinations Key zone slope Key split and layer settings As an alternative to a “hard slope” where the sound changes abruptly, you can use the Slope parameter to Split and layer create a setup where the sound will gradually fade‐in Let’s try creating a combination using both a split and or fade‐out. a layer as shown in the illustration below. Starting from the example described above, let’s make Piano Timbre 1 some changes. Brass Timbre 2 Strings Timbre 3 1. Set the timbre 1 “Bottom” to G3 and the timbre 2 “Top” to G4 so that the two timbres overlap. C–1 2. Set the timbre 1 “Btm Slope” to 12 and the timbre 2 “Top Slope” to 12. 1. Select a piano program for timbre 1, a brass The sound will change gradually, rather than ... -
Page 33: Editing Parameters
Easy combination editing Editing parameters 1. Set the velocity zones of the two timbres so that MIDI channel they partially overlap. Use COMBI EDIT: Timbres ‐ Timbre 01–Timbre 16 2. Set the “Top Slope” and “Btm Slope” so that the “MIDI Ch.” to specify the MIDI channel for each sound changes gradually, rather than abruptly timbre. switching between velocity values 63 and 64. Editing parameters If you want to play a timbre from the microSTATION’s keyboard, you’ll need to set that timbre to the global MIDI channel (Gch). When you play the Adjusting the volume of each timbre microSTATION’s keyboard, you’ll hear the timbres The COMBI EDIT: Timbres ‐ Timbre 01–Timbre 16 that are set to match this MIDI channel. Normally “Volume” settings adjust the volume of each timbre. you’ll set this to Gch. If this is set to Gch, the MIDI channel of the timbre will always match the global MIDI channel even if you change the global MIDI channel. In the preload combinations, timbres where the Use function buttons 01–16 to switch between timbres. arpeggiator is assigned might have a MIDI channel setting other than Gch. Those timbres will sound ... -
Page 34: Altering Programs To
Playing and editing combinations Altering Programs to fit Arpeggiator settings within a Combination According to the note data thatʹs received from the keyboard or from the MIDI IN connector, the You can make various changes to Programs within the arpeggiator will automatically generate a wide range context of a particular Combination to make them fit of phrases or patterns including arpeggios, guitar or better with other Programs, or to create particular keyboard backing riffs, bass phrases, or drum patterns. sonic effects. These changes do not affect the original When the Realtime controls C mode is selected, you Programs, or how those Programs sound in other can use the knobs to vary the duration and dynamics Combinations. of the arpeggiated notes. For more about the arpeggiator, please see page 50. Transpose, Detune These parameters adjust the pitch of the timbre. Effects • In a layer‐type combination, you can set two or For details, please see “Using Effects” on page 45. more timbres to the same program, and create a richer sound by using “Transpose” to shift their pitch apart by an octave or by using “Detune” to create a slight difference in pitch between the two. -
Page 35: Creating Songs (Sequencer Mode)
Creating songs (Sequencer mode) Overview About the microSTATION’s Sequencer mode structure Sequencer Sequencer mode is structured as follows. For details on each mode and how to access each page, The microSTATION’s 16‐track MIDI sequencer can please see “Basic operating methods” on page 7. hold up to 128 songs and 210,000 MIDI events. You can record and play back MIDI data using sixteen MIDI tracks and one master track (containing tempo Songs data, etc.) to control the internal sound generator and A song consists of MIDI tracks 1–16, a master track, your external sound modules. song parameters such as the song name and With its broad range of capabilities such as the arpeggiator. arpeggiators, high‐quality effects, and controllers, the A maximum of 128 such songs can be created on microSTATION is the ideal environment for music microSTATION. production or live performance. MIDI tracks 1–16 each consist of setup parameters When you turn off the power, the settings made in located at the start location, and musical data within Sequencer mode, the song data, and any user the track. The master track consists of tempo and time pattern data that you recorded will not be backed up. If you wish to keep this data, you must save it signature data. -
Page 36: What Each Button Does
The Loop function will turn on/off each time you press To set the current playback position as this location, the button. When you turn the Loop function off, the hold down the WRITE button and press the LOCATE recording mode will return to its previous setting. button. You can’t turn the Loop function on during multi‐ Alternatively, you can use the song command track recording. “Location Point” to directly specify the location. PLAY/MUTE button REC button When you press this button (the LED at the upper left of the button will light‐up), you can use the function When you press this button, the microSTATION will buttons 01–16 located at the right to control the play/ enter record‐ready mode. From record‐ready mode mute status of each track. (the button will light‐up), press the Start/Stop button to begin recording (p. 34 “Let’s try recording”). GRID SEQ button KEY (REMOVE) button When you press this button (the LED at the upper left of the button and the LED at the left of the function Normally in each mode, you can specify a note LEDs will light‐up), the Grid Sequence function will number by holding down this button and pressing a turn on, allowing you to create drum patterns by using key. the function 01–16 buttons and LEDs 1–16 located at During loop recording, this button operates as the ... -
Page 37: Performing In Sequencer Mode
Performing in Sequencer mode Playing back Performing in Sequencer mode 2. Press the button to access the SEQ: Playing back PLAY ‐ LOOP ‐ P setting “Loop M:”. Playback methods In order to play back song data, you must first record 3. Set the first measure of the loop to 1, and the last the data or load song data into the microSTATION. measure to 4. Let’s start by loading a demo song and playing it back. For details on the loading procedure, please refer to the ”Loading the demo songs” section in the easy start guide. 4. Press the Start/Stop button to play back the demo 1. Press the MODE SEQ button to enter Sequencer song. mode. Measures 1 through 4 will play repeatedly. Note: During song playback/recording, you can also individually loop the MIDI track being played back (p. 36 “Loop playback settings”) 2. Use the buttons to select the song that you ... -
Page 38: Midi Recording
Creating songs (Sequencer mode) MIDI recording When you use the microSTATION’s sequencer to record, your keyboard performance and your use of the joystick and other controllers are recorded in realtime. “Q” specifies how the timing of the MIDI data you perform will be corrected while you realtime‐record In most cases, you’ll use “single track recording” to a MIDI track. (Previously‐recorded data will not where you record one track at a time. be corrected.) Note: As an alternate to single track recording, you can also use ”Multi‐track recording”(p. 44). For example, suppose that you played eighth notes while realtime‐recording, but your rhythm was slightly incorrect as shown in figure 1. If you Let’s try recording realtime‐record with “Q” set to in this case, the notes would automatically be adjusted to the timing We’ll use a Sequencer mode template to record a drum shown in illustration 2, below. If the “Q” setting is track and a bass track. Hi, your performance will be recorded at the actual timing; no correction will be applied. When you enter Sequencer mode on the microSTATION, the specified template will be loaded. This template assigns each track’s program, volume level, and pan setting etc. Note: Use the Global/Media mode GLOBAL/MEDIA: ... -
Page 39: Recording With The Loop Function
MIDI recording Recording with the Loop function Metronome pre-count 4. Just like you did when recording track 1, set the Specify the pre‐count when recording. recording‐related parameters (p. 34 “Recording the drum track” step 2). Metro Count: 2 5. Press the Start/Stop button to start recording. Play the keyboard to record while listening to the drum track. For details on these parameters, please refer to the During recording, the function 02 LED will blink at parameter guide. regular intervals. 3. Press the Start/Stop button to start recording. Use 6. Press the Start/Stop button to stop recording. the keyboard to record the drum pattern. The location will return to the beginning of the song When you start recording, the function 01 LED (or the place where you started recording). which indicates the track thatʹs being recorded will The function 02 LED will blink at irregular change from being steadily lit to blinking at regular intervals, indicating that this track has been intervals. recorded. 4. Press the Start/Stop button to stop recording. The 7. - Page 40 Creating songs (Sequencer mode) 5. Set the loop region to M: 001–004, so that measures The function 02 LED will blink at irregular 1–4 will be loop‐recorded. intervals, indicating that this track has been recorded. 6. Specify the recording‐related parameters (p. 34 “Recording the drum track” step 2). You can use the Rehearsal function when loop‐ Loop playback settings recording. You can individually loop the playback of MIDI tracks If you want to use the Rehearsal function, turn when playing‐back or recording a song. “AutoRehrsl” On. For example if you want to loop track 1, turn the SEQ EDIT: Tracks ‐ T01: TK01, Play Loop “Loop” setting Then set “Start M” and “End M” to specify the first The Rehearsal function suspends recording when and last measure that will play back repeatedly. you switch tracks during loop recording, while If “Play Intro” is turned On, the intro portion will play allowing the recorded content to continue playing back first, and then the specified region of measures as a loop. While recording is suspended (i.e., when will play repeatedly. rehearsal mode is on), nothing will be recorded even if you play the keyboard. This lets you find an Example settings appropriate sound by playing the keyboard to try • Track 1: “Loop”: On, “Start M”: 005, “End M”: 008, out various programs, or rehearse the phrase or ...
-
Page 41: Recording With The Arpeggiator
Note: The function 01 LED will blink at irregular will blink at regular intervals.) intervals, indicating that this track has been recorded. 4. Press the PLAY/MUTE button to turn it on. Then 8. Next youʹll record the guitar track. For a new song press the function 02 button to mute the bass with the default settings, an arpeggio suitable for performance of track 2. acoustic guitar is assigned to track 4. Press the At this time, the function 02 LED will be unlit, and function 04 button to select the guitar track. Then the 03 LED will be blinking at regular intervals. record the guitar chording in the same way as described earlier through step 7. 5. Play the keyboard to record the electric piano performance on track 3. 9. Press START/STOP to play back the drum and bass tracks you recorded. 6. When you press the function 02 button once again, the bass of track 2 will be heard. If you are not satisfied with your recording, hold Play/Mute function down the KEY button and play the key of the undesired note at the timing that it occurs. The microSTATION provides a Play/Mute function Alternatively, you can delete all events recorded on that lets you mute the specified MIDI tracks 1–16. For that track by holding down the KEY button and example, you can use this to mute the sound of a track pressing the REC button. that you temporarily don’t want to hear, or to hear only the rhythm section and ignore other existing ... -
Page 42: Grid Sequence Function
Creating songs (Sequencer mode) You can use the microSTATION’s grid sequence Grid Sequence function function to create this pattern by turning the “+” locations off and the “” locations on. You’ll use the function 01–16 buttons and function 01– What is the Grid Sequence function? 16 LEDs to make grid settings. You can use the function 01–16 buttons to specify a sequence of up to The grid sequence function lets you create phrases 64 grid steps. For example with a 4/4 time signature such as drum patterns by entering notes on a grid. and an 8‐beat rhythm, this lets you create a pattern up Even if you’re not comfortable recording the drums to eight measures long. With a 4/4 time signature and a from a keyboard, this method allows you to easily 16‐beat rhythm, the pattern can be up to four measures create drum patterns. long. What is the grid? Recording with the Grid Sequence Let’s think of an 8‐beat measure as an empty grid. First we’ll use vertical lines to indicate each of the 8th notes. ... - Page 43 MIDI recording Grid Sequence function turn off the Grid Sequence function and use SEQ Loop: 001–002 (two measures), “TS”: 4/4, “Q”: 8th ( ) EDIT: Track Edit ‐ Edit Time Sig, or press the REC + + + + + + + + + + + + + + + Open hi-hat (A button and use the “TS” field to change the time Close hi-hat (F signature for recording.
- Page 44 Creating songs (Sequencer mode) 11.Press the Start/Stop button to play back, and listen 21.Press function button 02 to specify the second to the kick pattern you entered. location, and then press the function 16 button to turn on the corresponding grid note. The function 09–16 LEDs will successively light‐up from left to right in time with the tempo, and you’ll The function 16 LED will light‐up. hear the kick at the grid notes that were already lit. When you’ve listened to the pattern, press the Start/ Stop button once again to stop. 12.Next we’ll enter the snare. Hold down the KEY This completes all input. Let’s listen to the pattern and press the D3 key. that you entered. 13.Press function button 01 to specify the first 22.Press the Start/Stop button to play the pattern, and location, and then press function 11, and 15 listen to it. buttons to turn on the corresponding grid notes. If you hold down the KEY button and press a key, The function 11 and 15 LEDs will light‐up. the grid on/off indications of the function LEDs will switch. C3 switches to the kick indication, D3 the snare, F 3 the closed hi‐hat, and A 3 the open hi‐hat indication. 14.Press function button 02 to specify the second Editing a pattern you entered using location, and then press buttons 11 and 15 to turn the Grid Sequence function on the corresponding grid notes.
-
Page 45: Preparations For Recording
MIDI recording Preparations for recording 5. Press the button to select the velocity value. Preparations for recording This section explains how to create a new song and adjust basic settings for recording, such as specifying a program, volume, and pan setting for each track. 6. Use the buttons to change the velocity value. Before you record, go to Global/Media mode and make sure that memory protect is turned off. (p. 59 “Memory protect”) 7. Change the velocity value of the other grid notes. Creating a new song 8. Press the Start/Stop button to play back the You’ll use the song command “Create New” to create a pattern, and listen to it. new song. When you play back, you’ll temporarily exit Grid Edit. 1. Press the MODE SEQ button to enter Sequencer mode. 2. Press the button to access the Menu. Using the keyboard to add a pattern to the pattern that you entered using 3. - Page 46 Creating songs (Sequencer mode) Use the buttons to select a program. The Saving the song setting parameters method is the same as when assigning a program to The “song setting parameters” you edit here can be each timbre in a combination (p. 27). saved as a template. Note: You can copy settings from a combination or If you use these settings frequently, you can save them program (PG p. 50, PG p. 51). as a template and then load them when necessary (PG p. 48 “Save Template”). 2. In the same way, use the function 01–16 buttons to select other tracks, and use the buttons to specify a program for those tracks. Using templates Set the parameters of each track, using the function 01–16 buttons to switch tracks. Loading a template as the default song 3. Use “Volume” to specify the volume of each track. Here’s how to load a template as the default song for ...
- Page 47 001:01. Press the REC button, and then press the Start/Stop button. Note: If you play the keyboard during the pre‐count 3. To perform the Auto Song Setup, press the that precedes recording, recording will start and the button or the REC button. arpeggiated phrase will simultaneously start When you use the function, you’ll automatically playing from the beginning. switch to Sequencer mode, and the settings of the 8. When you’re finished playing, press the Start/Stop combination will be assigned to the song. The song button. using these settings will be the first unused song. If you made a mistake, or want to re‐record for any The microSTATION will automatically be in reason, you can use the Compare function (press recording‐standby mode, and the metronome will play according to its settings. the COMPARE button) to re‐record as many times as you want. Multi‐track recording will automatically be turned on according to each timbre’s MIDI channel and arpeggiator settings. If you don’t need to record multiple tracks, one track will be assigned for recording. 4. Press the Start/Stop button to start realtime recording. To stop recording, press the Start/Stop button once again. Copying settings from a combination or program In Sequencer mode, you can use the song commands ...
-
Page 48: Multi-Track Recording
Creating songs (Sequencer mode) Multi-track recording Recording exclusive events On the microSTATION, “multi‐track recording” is the The parameter changes that are produced when you action of recording more than one track edit MIDI track parameters, effect parameters, or simultaneously. This is useful in the following exclusive messages received from an external MIDI situations. device, can be recorded to the desired MIDI track. • When multiple tracks of data from an external When this data is played back, it can control the song’s sequencer are being recorded via MIDI into the track parameters, effect parameters, or be transmitted microSTATION’s sequencer. to an external MIDI device (PG p. 55 “Recording • When the performance of a combination that uses internal parameter changes”). the arpeggiators is being recorded onto multiple GM, XG, or GS exclusive messages can be tracks using the Auto Song Setup function. recorded on a track, but will not be reproduced Multi‐track recording is not possible if Loop is on. by the microSTATION’s sound generator. As an example, here’s how to multi‐track record on tracks 1–8. Recording the changes of a MIDI 1. -
Page 49: Using Effects
Using Effects An overview of the microSTATION’s effects You can choose from 134 different types of high‐ Master Effects quality digital effects. The microSTATION provides Master Effects MFX1 and MFX2 are stereo‐in/stereo‐ five insert effects, two master effects, and one total out. “Send1” and “Send2” determine the send level to effect, together with a mixer section that controls the the Master Effects. routing of these effects. All of these are stereo in/out. With Master effects, only the Wet (processed) signal Specific parameters of these effects can also be will be output. The output signals from the Master controlled in real time from the microSTATION’s Effects are routed to the L/R bus with the output level controllers or via MIDI messages using Dynamic specified by “Return1” and “Return2”. These output Modulation (Dmod), by MIDI/Tempo Sync, or by signals are mixed with the output signals from the bus using a common LFO to apply synchronized changes specified by “Bus” L/R, then routed to the total effect. to multiple modulation effects. Selecting “000: No Effect” will mute the output. The processed signal will be output in one of the following ways, according to the type of effects. Effect I/O Mono In - Mono Out... -
Page 50: Effects In Each Mode
Using Effects Routing and effect Effects in each mode settings Program mode The insert effects, master effects, and total effect that For programs, you can use insert effects to process the are available in each mode have the same structure, final sound in the same way that you use the Filter and but the routing settings will determine how the Amplifier to process the sound from the oscillators program’s oscillators, the combination’s timbres, or the (OSC 1 & 2). Next, the master effects are used to create song’s tracks will be sent to each of the insert effects, overall ambience such as reverb, and you use the total master effects, and total effects. Here we’ll explain effect to make final adjustments. how to adjust routing settings in each mode, and how to edit the effect settings. Combination and Sequencer modes In Combination and Sequencer modes, you can insert effects to process the sound of each timbre/track Effect settings for a program program. Then you can use the master effects to create overall ambience, and use the total effect to make final adjustments. Routing In Combination mode, you can adjust these settings for ... - Page 51 Routing and effect settings Effect settings for a program 3. If you’re inputting the oscillator output to the 3. Turn “Chain” On. master effects without sending it to the insert If “Chain” is On, the insert effect will be connected effects, use the “OSC1 Send1,” “OSC1 Send2,” in series. “OSC2 Send1,” and “OSC2 Send 2” settings for the oscillators to specify the send levels to the master effects. These settings are available only if “Bus” is set to L/ Set “Chain To” to IFX2. R or Off. If IFX2 is selected, the insert effects will be connected in series in the order of IFX1 IFX2. The connection status is shown in the upper line of the display. If “Bus” is set to IFX1–IFX5, use the “Send1” and “Send2” parameters following the insert effect (PROG EDIT: IFX1–IFX5) to specify the send levels to the master effects. 4. Set the “Pan (CC#8),” “Bus,” “FXCtrl Bus,” 4. “FXCtrl Bus” sends the output of oscillators 1 and “Send1,” and “Send2” parameters to specify the 2 to the FX control bus. pan and routing of the signal following the insert Use this when you want to use a different sound to effect. control the sound that’s being input to an effect. You ...
-
Page 52: Master Effects
Using Effects Double-size effects 4. Turn “Chain” On. When “Chain” is On, master effects 1 and 2 will be Double‐size effects (D00: St.MltLmt–D13: Early Ref) series‐connected in the order of MFX1 MFX2. use twice as much processing area as other effects. D00: St.MltLmt–D10: Rotary OD can be used with insert effect 1, D00: St.MltLmt–D09: Vocoder can be used with insert effects 2–4, and D00: St.MltLmt–D13: Early Ref can be used with master effect 1. You cannot change the order of connection . When you use a double‐size effect, the next‐numbered The order is fixed as MFX1 MFX2. effect will be unavailable. For example if you’ve “ChainLevel” specifies the level from master effect selected a double‐size effect for IFX1, you won’t be able 1 to master effect 2. to use IFX2. If you’ve selected a double‐size effect for MFX1, you won’t be able to use MFX2. Master effects 5. Use the pages located at the right of PROG EDIT: MFX1 “MFX1 Select” to edit the parameters of 1. “Send1” and “Send2” settings (steps 3 or 9) master effect 1. determine the input level to the master effects. If “Send1” and “Send2” are set to 0, nothing will be input to the master effects. “Send1” corresponds to MFX1, and “Send2” corresponds to MFX2. Let’s adjust settings for master effect 1. For details on the parameters of each effect, please refer to PG p. 219 and following. 2. Access PROG EDIT: MFX1, and press the button. -
Page 53: Effect Settings For A Combination Or Song
Total effect You can make these settings in the same way as for a program (p. 48). Dynamic modulation (Dmod) for the master Note: The actual send level is determined by effects and total effect can be controlled on the multiplying this setting with the “Send1” or MIDI channel specified by “Ctrl Ch.” “Send2” value of oscillators 1 and 2 in the program selected by the timbre. If the program’s “Send1” or “Send2” setting is 0, the actual level will be 0 even if you raise the send level setting here. Dynamic modulation (Dmod) If “Bus” is set to IFX1–IFX5, the “Send1” and Dynamic modulation (Dmod) lets you use MIDI “Send2” (IFX1–IFX5) settings following the insert messages or the microSTATION’s controllers for effect will determine the send levels to the master realtime control of specific effect parameters. effects. Another way to control effect parameters is to use 2. “FXCtrl Bus” sends the timbre’s output to the FX MIDI/Tempo Sync, which allows the LFO speed of a control bus. Use this when you want to use a modulation effect or the delay time of a delay effect to different sound to control the input to an effect. be synchronized to the tempo of the arpeggiator or You can use the two FX control buses to control sequencer. effects with a great deal of flexibility. (PG p. 209 (PG p. 208 “Dynamic modulation to control an effect “FX Control Bus”) -
Page 54: Arpeggiator Function
1. Press the PROG button to enter Program mode, and select a program (p. 15 “Selecting a program”). As you switch through the programs, you’ll notice that the LED at the upper left of the ARP ON/OFF button will be lit for some of the programs The chord you played (p. 54 “Linking the arpeggiator to program, on the keyboard is sounded as an arpeggio combinations”)? (broken chord) The arpeggiator will start when you play the keyboard. For other programs as well, you can turn The microSTATION’s arpeggiator is also polyphonic, on the arpeggiator by pressing the ARP ON/OFF and can produce a variety of chordal transformations or button (the LED at the button’s upper left will light). phrases based on the pitch or timing of the notes you 2. As described in the following sections “Settings play on the keyboard. These functions let you use the via controllers” and “Settings in the display”, arpeggiator to play a wide range of patterns including operate the controllers and notice how the drum or bass phrases, and guitar or keyboard backing arpeggio changes. riffs. It is also effective to use the arpeggiator as part of ... -
Page 55: Arpeggiator Settings
Note: The arpeggio playback speed is affected by the “Resolution” setting (PROG EDIT: Arp Setup). Choose one of the preset arpeggio patterns P0–P4 or If the GLOBAL/MEDIA: MIDI ‐ MIDI Clock user arpeggio patterns 000–639. With the factory “Clock” parameter is set to External MIDI or settings, a wide variety of arpeggio patterns are stored External USB, or is set to Auto and MIDI clock is in 000–511 and in some of 512–639. being received, the PROG EDIT: Tempo “ =” will Select the arpeggio pattern setting, and use the indicate EXT, and the tempo will be synchronized buttons to choose the desired pattern. with an external MIDI device. In this case, you won’t be able to change the tempo on the You can also select a user arpeggio pattern by turning microSTATION itself. NUM LOCK on, using function buttons 01 (1)–10 (0) to directly specify a number, and then pressing the 14 Changing the duration of the arpeggiated (ENTER) button. notes P0: UP Switch the realtime controls to mode C, and turn knob 1 to adjust the duration of the arpeggiated notes. Turning the knob toward the left will shorten the notes, and turning the knob toward the right will lengthen them. When the knob is at the center position (12 o’clock), the duration will be as specified by the program’s “Gate” parameter (PROG EDIT: ARP Setup). Note: The state of the knob is saved when you write the ... - Page 56 Arpeggiator function P2: ALT1 Sounding the arpeggio in the order that you play the notes ALT1 The “Sort” setting lets you specify whether the arpeggiated notes will be heard in order of their pitch regardless of the order that you played them, or heard in the order that you played them. P3: ALT2 On: The arpeggiated notes will be heard in order of their pitch, regardless of the order that you played ALT2 them on the keyboard. Off: The order of the arpeggiated notes will be based on the order that you played them on the keyboard. Sort OFF, UP P4: RANDOM Sort RANDOM ON, UP Selecting the octave range where the Synchronizing the arpeggiator to the arpeggio is sounded keyboard...
-
Page 57: Mode
Using the arpeggiator while you play Performing with the arpeggiator in Combination Specifying the range of keys that will trigger Arpeggiator settings the arpeggiator The arpeggiator will start when you play keys inside Selecting the arpeggiator(s) to run the range specified by the “Top Key” and Turn the “Run” setting On for the arpeggiator(s) that “BottomKey” settings. Keys outside this range can be you want to run. The arpeggiator(s) that are turned On used to perform normally, regardless of the here will function when the ARP ON/OFF button is on. arpeggiator on/off status. However, the arpeggiator will run only if the “ARP Specifying the range of velocities that will Assign” setting of each timbre assigns arpeggiator A ... -
Page 58: Arpeggiator Synchronization
Arpeggiator function Checking the structure of a user arpeggio Linking the arpeggiator to pattern program, combinations Let’s take a look at how the combination “Category: BASS & BASS SPLIT 039: [<Moon Jam>]” is structured. You can specify whether or not the arpeggiator • Select combination Category: BASS&BASS SPLIT settings that are written in a program or combination 039: [<Moon Jam>] will change when you switch programs or • Look at the “ARP Assign” settings; notice that combinations. arpeggiator A is assigned to timbre 3, and With the factory settings, the former is selected. Use arpeggiator B is assigned to timbres 6 and 7. the latter when you want to keep the same arpeggio pattern running, and change only the program sound. This setting is made in “Load ARP” (GLOBAL/ MEDIA: Basic–ARP). (PG p. 59) Arpeggiator synchronization When you play the keyboard, arpeggiator B will play the program of timbre 6. (Timbre 7 is a dummy For details on synchronization between arpeggiators A and B, and synchronization between the arpeggiators and ... -
Page 59: Settings For The Entire Microstation, And Saving/Loading Data
Settings for the entire microSTATION, and saving/loading data How Global/Media mode is organized In Global/Media mode you can make settings that Adjusting how variations in velocity or apply to the entire microSTATION, such as master aftertouch will affect the volume or tone tune, key transpose, effect global switch, and global You can specify how volume or tone will change in MIDI channel. You can also adjust settings for the response to velocity or aftertouch received from MIDI IN. damper pedal / assignable foot switch / pedal, and save or load data to/from media. For details on how to access each page, please refer to (p. 7 “Basic operating methods”). (PG p. 57 “Vel Curve (Velocity Curve)”) Changes that you make in Global/Media mode are ... -
Page 60: Midi Setup
Settings for the entire microSTATION, and saving/loading data External control MIDI setup In GLOBAL/MEDIA: MIDI you can adjust MIDI‐ When you press the realtime controls EXTERNAL related settings for the entire microSTATION. button to choose external mode, the microSTATION’s knobs 1–4 can be used to control an external MIDI Specifying the global MIDI channel device. This lets you specify the global MIDI channel. The Each knob 1–4 will transmit the assigned MIDI control global MIDI channel is specified in Global/Media change on the MIDI channel that you’ve specified. You mode, and is the basic channel on which the can use a total of 128 such setups. microSTATION transmits and receives MIDI When the microSTATION is shipped from the factory, messages. setup memory contains preloaded external setups for controlling software synthesizers such as the Korg Legacy Collection, or the level and pan of DAW software. (PG p. 60 “Channel (Global MIDI Channel)”) External setups are edited in GLOBAL/MEDIA: MIDI ‐ External Setup (p. 57 “Editing an external setup”). -
Page 61: Saving & Loading Data
Saving & loading data Types of data that can be saved Saving & loading data Even if you switch programs in Program mode or switch to Combination mode, that setup will remain unchanged. This means that you can select a different microSTATION sound without changing the settings that control an external MIDI device, or Types of data that can be conversely, switch the settings that control the saved external MIDI device without changing the microSTATION’s sound. You can save the various types of data in the You’ll need to select the realtime control mode for microSTATION by writing it to internal memory, by each mode; Program, Combination, and saving it to an SD card (commercially available), or by Sequencer. sending it as a MIDI data dump. Editing an external setup Writing to internal memory The settings that you edit in Global/Media mode ... -
Page 62: Writing To Internal Memory
Settings for the entire microSTATION, and saving/loading data Preset data, on the other hand, is data that cannot be Writing from an edit page overwritten by the Write operation. This includes the 1. Make sure that the program that you want to save following data. is selected. • GM program 2. Enter an edit page, and choose “Write Program.” • GM drum kits 48(GM)–56(GM) • Preset template songs P00–P15 Saving to media The following data can be saved to various types of 3. Edit the program name as desired. media. Use the buttons to select the character location, • .PCG file: and use the buttons to specify the character for Programs, Combinations, Drum kits, Global ... -
Page 63: Memory Protect
Media mode memory area. Then when you modify the parameters in Global/Media mode, the data in the About the Program and Combination edit memory area will be modified. If you wish to save this buffer modified data in internal memory, you must Write it. When you select a program in PROG PLAY or a When you write this data, the data in the memory area combination in COMBI PLAY, the program or is written into the global settings. combination data is called into the microSTATION’s If you turn off the power without writing, the edit buffer. modified data in the memory area will be lost. When you then use the various Program or Editing will affect the data that has Combination pages to edit the parameters, your been called into the memory area. changes will affect the data in the edit buffer. Edit When you Write, the Memory Area If you wish to save this modified data into internal ... -
Page 64: Loading Data
Settings for the entire microSTATION, and saving/loading data Cautions when saving Saving to media (Media–Save) • When you format media on the microSTATION, or For details on the data that can be saved on storage execute a Save operation for the first time, a media. For details, please see “Types of data that can directory named Korg/MICRO_ST will automatically be created in the root directory. When be saved” on page 57. you save data, an automatically named file will be Song data in the microSTATION’s Sequencer mode created below that directory. cannot be written into internal memory. This data When saving, the data will automatically be will disappear when the power is turned off. In assigned a filename extension of “.PCG,” “.SNG,” order to keep this data, you must write it to the SD or “.MID” etc. according to its type. Please note that card (commercially available). When you’ve come up with settings that you like, it’s a good idea to if you use your computer to change this extension, save them, so that even if you subsequently edit it will be considered an undefined file when you those settings, you’ll always be able to reload the attempt to load it into the microSTATION, and will ... - Page 65 The selected combination of bank A will be loaded want to load, and then press the button. into C127. 6. In Combination mode, set the category to ALL, turn Num Lock on, and specify 384 to select combination C127. 4. Choose All PCG, and press the button. The display will indicate “OK?” 5. To begin the Load operation, press the button. All data of the .PCG file will be loaded into the Note: The bank and number are shown in the upper microSTATION. right of the display in the COMBI PLAY page when you turn Num Lock on and press the 14 (ENTER) Never remove the media while data is being button. loaded. Note: You can also load programs or combinations by Loading a song (.SNG) for use in Sequencer bank. Please refer to PG p. 68. mode In this example, we’ll explain how to load a song. Loading individual items from a PCG file We will assume that this song uses programs, drum ...
-
Page 66: Media Utility
Settings for the entire microSTATION, and saving/loading data 3. Use the buttons to select the SNG file that Media utility you want to load, and then press the button. Formatting media Here’s how to format media. 4. Select the song data that you want to load, and press the button. New media that you’ve just purchased, or media that has been used by another device, cannot be used on the microSTATION in that state. You must first format the media so that it can be used on the microSTATION. If you want to load all of the song data, choose All When you format media, all data that had been SNG. saved on that media will be deleted. Before you proceed, make sure that the media does not The display will ask “OK?” contain important data. 5. To begin the Load operation, press the button. After formatting, you cannot return the media to its previous state by pressing the COMPARE The specified data will be loaded into the button. microSTATION. Never remove the media while data is being 1. Make sure that the media you want to format is ... -
Page 67: Appendix
Appendix Restoring the factory settings 2. Remove the SD card from the microSTATION. Loading the preloaded data 3. Using your computer, copy the preload data The original preload data is backed up in the (PRELOAD.PCG) from the “Factory Preload microSTATION, so you can restore any or all of the Sounds” folder of the included disc to the Programs, Combinations, Drum Kits, User Arpeggio “MICRO_ST” folder on the SD card. Patterns, and Global settings to their original factory If the “MICRO_ST” folder already contains a settings. folder named PRELOAD.PCG, it will be overwritten. To return the microSTATION to its factory‐set state, you can load the preload data from an SD card to 4. Choose MEDIA/Load ‐ Load PCG. which you copied it, or dump the data to the microSTATION from microSTATION / Plug‐In Editor running on a USB‐connected computer. The preload data is provided on the accessory disc included with the microSTATION. You can also 5. Select the PCG data (file name: PRELOAD.PCG) download the latest data from the following website. that you want to load, and press the button. Korg website: “http://www.korg.com/” Never turn off the power while the data is being loaded. -
Page 68: Troubleshooting
PG p. 61 Display Is the VOLUME knob set to an appropriate position? p. 2 The power is turned on, but nothing is shown Is the Master Volume assigned to Foot Pedal on the display. The microSTATION functions Assign, and is that pedal volume lowered? PG p. 65 normally when you play the keyboard or perform other operations. If a specific oscillator doesn’t sound in program mode, is its “Play/Mute” set to Play? p. 17 ... -
Page 69: Programs And Combinations
Song does not play correctly after being a DC component will be output at the maximum loaded level, producing silence.) Are the programs used by the song the same as • When using S03: St.Limitr or S06: St.Gate, and the when the song was created? “Env Sel” of these effects is set as either FX Ctl1 or When saving the song, it is best to use Save All so FX Ctl2, and “Trigger Monitor” is On (editable only that the programs are saved together with the song. by using microSTATION Editor / Plug‐In Editor). Then when loading, load both the .PCG and the • When using D09:Vocoder, and the “Mod Src” of this .SEQ data. PG p. 69 effect is set as either FX Ctl1 or FX Ctl2, and “Modulator High Mix” is set to other than 0 Playback does not start when you press the (editable only by using microSTATION Editor / Start/Stop button in Sequencer mode Plug‐In Editor). Is the Clock (Global/Media: MIDI–MIDI Clock) set ... -
Page 70: Damper Pedal, Foot Pedal Do Not Respond
Appendix SMF you loaded in Media mode won’t play MIDI correctly Use the song command GM Initialize to restore the The microSTATION does not respond to settings. PG p. 49 incoming MIDI data Set Global/Media: Basic, Bank Map to GM(2). Are all MIDI cables or USB cables connected PG p. 59 correctly? p. 14 Is the MIDI data being received on the channel on When the grid sequence function is on, you which it is being transmitted? PG p. -
Page 71: Connections With A Computer
Troubleshooting Connections with a computer Your software does not respond to the Connections with a computer microSTATION Is the USB cable connected correctly? The microSTATION does not respond to MIDI Did you install the driver? data sent from outside Has your computer detected the connected Is the USB cable connected correctly? p. 14 microSTATION? If you are using Windows XP, go to Control Panel ... -
Page 72: Error Messages
Appendix Error messages Various messages File exists Meaning: When executing a file rename command, an identically‐named file existed on the media. Action: Delete the existing file, or specify a different Access denied name. Meaning: This will appear if you attempt to execute the song command “Memory Status” while File invalid playing or recording on the sequencer. Meaning: You attempted to load or open a file whose Action: Stop the sequencer before you execute the song file format was incorrect. command “Memory Status.” File not found Meaning: When performing a file delete command, the specified file did not exist. Action: Check the media or file. Can’t calibrate Meaning: Calibration could not be performed correctly. File read only Meaning: You attempted to delete a file, but that file had ... - Page 73 Meaning: When you were editing a song or track in Action: Delete other song data to increase the amount Sequencer mode, the total amount of all song of free memory. data exceeded the sequence data memory capacity, so no further editing is possible. Not formatted Action: Delete other song data to increase the amount Meaning: You attempted to perform a logical format of free memory. (quick format) on the media, but the media Meaning: During realtime recording in Sequencer had not been physically formatted. mode, the microSTATION ran out of memory Action: Use a computer to physically format (full to hold the recorded data, so recording was format) the media. forcibly stopped. Action: Delete other song data to increase the amount of free memory. Read failed Memory Protected Meaning: An error occurred while reading data from Meaning: The program, combination, song, drum kit, or the media. user arpeggio pattern in the microSTATION’s internal memory is protected.
- Page 74 Appendix SMF data error Meaning: You attempted to load a file that was not a Standard MIDI File. SMF div. error Meaning: You attempted to load a Standard MIDI File that was timecode‐based. SMF format error Meaning: You attempted to load a Standard MIDI File of a format other than 0 or 1. SMF has no data Meaning: When loading a Standard MIDI File, the file contained no events. Source is empty Meaning: There was no data in the track you specified as the source. Action: Specify a track that contains performance data. Stop & Retry Meaning: This will appear if you press the GRID SEQ button during sequencer playback or recording.
-
Page 75: Specifications And Option
Allows creation of sequence loops for drums etc., with up to 64 grids per note function Template songs 16 preset/16 user template songs Format Korg (microSTATION) format, SMF (formats 0 and 1) supported Demo songs 3 songs Global Master tune, transpose, MIDI settings... -
Page 76: Option
2.6 Kg / 5.73 lbs Power Consumption AC adapter, Easy start guide Accessories Accessory disc (microSTATION Parameter Guide (PDF), Operation Guide (PDF), USB-MIDI Setup Guide (PDF), External Setups (PDF), KORG USB-MIDI driver, microSTATION Editor/Plug-In Editor etc.) Option XVP-10 Expression/Volume Pedal... -
Page 77: Operating Requirements
In Editor on the operating system. This means that USB port required (a USB host controller made by Intel you can’t use this editor to edit two or more is recommended) microSTATION units simultaneously. Operating system: Microsoft Windows XP Home Edition/Professional/ x64 Edition Service Pack 3 or later Microsoft Windows Vista Service Pack 2 or later (including 64‐bit Edition) Microsoft Windows 7 (including 64‐bit Edition) Macintosh Computer: USB port required Operating system: Mac OS X 10.4.11 or later microSTATION Editor, microSTATION Plug-In Editor Windows Computer: CPU: Intel Pentium III / 1 GHz or better, Pentium D or Core Duo or better is recommended Memory: 512 MB or more (1 GB or more is recommended) Monitor: 1,024 x 768 pixels, 16‐bit color or better A computer that satisfies the operating requirements of Windows XP, Windows Vista or Windows 7 and has a USB port Operating system: Microsoft Windows XP Home Edition/Professional Edition Service Pack 3 or later, Windows Vista Service Pack 2 or later, and Windows 7 However, only the stand‐alone version will run on 64‐... -
Page 78: Midi Implementation Chart
*3: RPN (LSB,MSB)=00,00: Pitch bend range, 01,00: Fine tune, 02,00: Coarse tune *4: Valid if assigned as a MIDI control change in Global/Media External Setup. *5: In addition to Korg exclusive messages, Inquiry, GM System On, Master Volume, Master Balance, Master Fine Tune, and Master Coarse Tune are supported. - Page 79 MIDI Implementation Chart Operating requirements...
- Page 80 Please also retain your receipt as proof of purchase otherwise your product may be disqualified from the manufacturer’s or distributor’s warranty. 4015-2 Yanokuchi, Inagi-city, Tokyo 206-0812 Japan © 2010 KORG INC.
Need help?
Do you have a question about the microSTATION and is the answer not in the manual?
Questions and answers