Advertisement
Quick Links
Advertisement

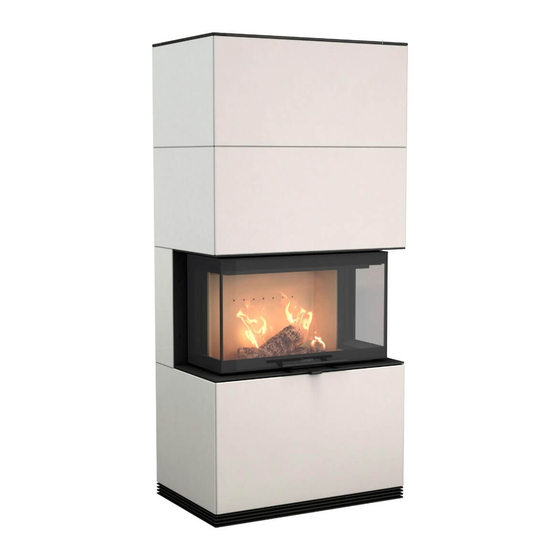
Summary of Contents for Contura C i5AN
- Page 1 Installation instruction C i5AN C i51A C i51T C i51S www.contura.eu...
- Page 2 See rating plate on the insert Intended area of use Heating of rooms in residential buildings Fuel Wood MANUFACTURER Name NIBE AB / Contura Address Box 134, Skulptörvägen 10 SE-285 23 Markaryd, Sweden CHECKS According to AVCP System 3 European standard...
-
Page 3: Table Of Contents
A warm welcome to the Contura family. We hope you will get a great deal of pleasure from your new insert. As a new owner of a Contura insert, you have secured a product with timeless design and long service life. -
Page 4: Technical Specifications
Walls behind This manual contains instructions about Before installing a stove or erecting a If your Contura i51 is to be installed how to assemble and install the Contura chimney, it is necessary for you to make against a combustible wall, the wall i51. -
Page 5: Surround
SURROUND Surround Only handle the stone with clean hands or gloves. Handle the if necessary. To avoid abnormally large gaps and uneven lines, stone carefully so as not to damage fragile corners and edges. it is important that the stove and steel stand are straight and stable. -
Page 6: Chimney
CHIMNEY Chimney The stove is type approved in accordance with EN 13240 and Carefully check that the chimney is sealed and that there is no obtained values are presented in the Performance declaration, leakage around soot hatches and flue connections. diameter of external connection is Ø150 mm . -
Page 7: Supply Of Combustion Air
SUPPLY Supply of combustion air Supply of combustion must be provided. Combustion air can be provided directly via a duct from outside, or indirectly via a vent in the outer wall of the room where the stove is placed. The amount of combustion air that is used for combustion is approx. -
Page 8: Installation Distance
INSTALLATION DISTANCES Installation distances C i51 Important! The dimension diagrams only show the minimum permitted the flue. The minimum distance to combustible parts of the installation distances for the stove. When connecting to a building or interior decoration in front of the stove must steel flue, also note the safety distance requirements of be at least 1.5 m. -
Page 9: Positioning The Insert
INSERT PLACEMENT Positioning the insert If the protective screen is selected – read these instructions before installing the insert or chimney. 10 mm Position the floor section and check that the minimum permitted distance to combustible material is kept. Measure to the centre of the floor section. The rear edge of the floor section will align with the complete rear edge of the surround. - Page 10 INSERT PLACEMENT Check that the transport locking device of the counterweight is removed according to the insert instructions before assembling the surround. Position the spirit level as illustrated Place a spirit level on the moulding below the door, and and adjust the rear feet until the stove adjust the front feet to the specified measurement from is level.
-
Page 11: Assembling The Stand
STAND ASSEMBLY Assembling the stand M5 x 20 Spacers Allen screw 4 90°... - Page 12 STAND ASSEMBLY 13 mm 13 mm...
- Page 13 STAND ASSEMBLY x 16 M5 x 9...
- Page 14 STAND ASSEMBLY M4 x 6 M i n 3 0 m Ensure that the disc base can be pushed around the stand. Adjust the base height with the rubber feet. On heavily sloping floors the insert and stand may need to be raised further.
- Page 15 INSTALLATION OF SURROUND Installation of surround Place a foam sheet on the floor to prevent the stone corners from becoming damaged when handling. The stone must lie flush against the stand.
- Page 16 INSTALLATION OF SURROUND This panel can be removed for servicing. Lock it in place by inserting a screw through the moving catch in the front panel. Do not tighten the screw – it must be possible to M6 x 20 move the catch upwards to detach the panel.
- Page 17 INSTALLATION OF SURROUND M6 x 12 Allen screw 4 M6 x 25 Allen screw 4 M6 x 25 Allen screw 4...
- Page 18 INSTALLATION OF SURROUND Allen screw 4...
- Page 19 INSTALLATION OF SURROUND Allen screw 4...
-
Page 20: Assembling Grate And Top
INSTALLING GRATE AND TOP Assembling grate and top For rear connection M6 x 10 Allen screw 4... - Page 21 INSTALLING GRATE AND TOP...
- Page 22 INSTALLING GRATE AND TOP For top connection M6 x 10 Allen screw 4...
- Page 23 INSTALLING GRATE AND TOP...
- Page 24 INSTALLING GRATE AND TOP Disc base...
- Page 25 INSTALLING GRATE AND TOP Adjust the rubber feet on the disc base so that the gap up to the stone is 5 mm. Final inspection of the installation It is extremely important that the installation is inspected by an authorised inspection body before the stove is used.
- Page 28 NIBE AB · Box 134 · SE-285 23 · Markaryd · Sweden www.contura.eu Contura reserves the right to change dimensions and procedures described in these instructions at any 811245 IAV SE-EX Ci51 Sten-3 time without special notice. The current edition can be 2015-11-24 downloaded from www.contura.eu...


Need help?
Do you have a question about the C i5AN and is the answer not in the manual?
Questions and answers