
Related Manuals for Contura C 450T


Summary of Contents for Contura C 450T
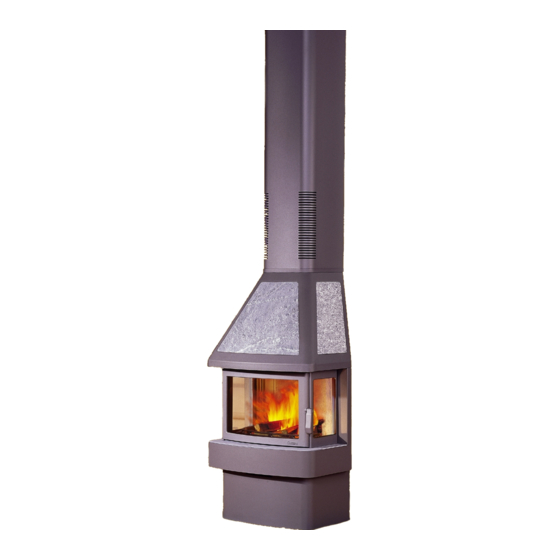
- Page 1 Installation Installation Instruction Istruzioni di montaggio Guide d’installation Instruction Installationsanleitung C 450 C 450T www.contura.eu...
- Page 2 PERFORMANCE DECLARATION No. C450-CPR-130605-SE-1 PRODUCT Product type Stove lit with solid biofuels Type designation Contura 450 / 450T Manufacturing number See rating plate on the stove Intended area of use Heating of rooms in residential buildings Fuel Wood MANUFACTURER Name...
-
Page 3: Table Of Contents
A warm welcome to the Contura family. We hope you will get a great deal of pleasure from your new stove. As a new owner of a Contura stove, you have secured a product with timeless design and long service life. -
Page 4: Technical Details
This folder contains instructions on how to assemble and install Chimney stoves in the Contura 450. To guarantee the function and safety of the stove we recommend that it is installed by a professional. The draught in the chimney must generate a neg ative pressure of at Our Handöl agents can recommend a suitable installer. -
Page 5: Installation Distances To Walls And Ceiling
Installation distances to walls and ceiling Lay the floor plate against the wall. Stand the stove on the plate. Important. An extra side window with a heat-reflect ing Measure to make sure that the stove is no closer to the wall than the surface must be fitted when placing the stove in a corner with minimum distances specified in the diagrams below. -
Page 6: Air Supply
Air supply Combustion air for the stove can be supplied through a duct Important! directly from outside, or indirectly through a vent in the wall of To prevent condensation in air ducts which pass through heated the room where the stove is installe d. The amount of combustion areas, the duct must be insulated with 30 mm of mineral wool air used for combustion is approximately 25 m³/h. -
Page 7: Unpacking
Unpacking Important! Unscrew the plinth and remove the transport lugs before lifting the stove off the delivery pallet. The cast-iron door and fire-bed may be removed to make the stove lighter and easier to move. If the stove has soapstone in the hood, remove this as shown in the diagram on page 8. - Page 8 Remove the grate disc by lifting up the edge opposite the draught Remove the cast-iron cover strips under the side windows. control fitting. Unscrew the metal brackets from the rear edge of the side Lift the cast-iron fire-bed at one side and tilt it so that it windows.
-
Page 9: Fitting The Fire-Box Surrond
Fitting the fire-box surround Remove the cast-iron cover strips below the side windows. Unscrew the metal brackets from the rear edge of the side windows. Vermiculite holder Vermiculitehållare Slot the two front fire-bricks. Screw the retaining brackets back Fit the rear fire-brick. into place and replace the cover strips. -
Page 10: Installing The Heat-Retaining Blocks
Installing the heat-retaining blocks Contura 450T Carefully remove the soapstone panels from the hood and place the five olivine blocks as shown. Use the screws against which the back edge of the soapstone panels rest to adjust the level of the soapstones in relation to the hood. Carefully replace the soapstone panels. -
Page 11: Top Flue Connection To Steel Chimney
Top flue connection to a steel chimney When connecting the stove to a steel chimney, always refer below show the required gap betwee n the chimney and any to the installation instructions supplied by the chimney combustible material. The stove can support a maximum manufacturer. - Page 12 Assemble one or more chimney modules before fitting the Fit the rear chimney panel by slotting the folded edges into the chimney hood into place. Lift the chimney hood up into the grooves on the chimney hood at the same time as you hook the chimney shaft and then slide it gently down into place over the top edge into place.
-
Page 13: Rear Flue Connection To Masonry Chimney
Rear flue connection to masonry chimney Mark out the centre of the hole to be made in the wall for a rear Check the height to make sure that the hole aligns with the flue connection. Make a hole at least 180 mm in diameter and then chimney connection on the rear of the stove. -
Page 14: High-Level Rear Flue
High-level rear flue Fit the flue sleeve as described on page 11. To determine the right height for the hole in the wall, hold the connecting flue in place against the stove. Adapt the length of the connecting flue and push it into place Cut away the punched metal covers on the rear panel and the in the flue sleeve. - Page 15 Carefully ease the chimney hood into place on the stove hood, inserting the pressed metal lugs on the rear panel into the slots on the chimney hood. Lock the rear panel in place by securing it as shown with the Finally place the soapstone tile on the top of the chimney hood.
-
Page 16: Installing The Decorative Border
Installing the decorative border Fold down the rim around the border by pulling it straight forward. Place the soapstone tiles on the ledge as shown. The tiles may be left loose or fixed in place with silicone (not supplied). Fitting extra side panels Hook the retaining brackets for the extra Slide the extra glass into place flush windows into place on the stove body at... -
Page 17: How To Use The Stove
How to use the stove Under normal conditions we recommend that the stove burns Pulling out the damper bar opens the grate disc. It is only 2–2.5 kg of wood per hour. The maximum permissible amount necessary to do this for a short time when is 3–3.5 kg per hour. - Page 20 NIBE AB · Box 134 · 285 23 Markaryd · Sweden www.contura.eu Contura reserves the right to change dimensions and procedures described in these instructions at any 011035 IAV EX C450/C450T-11 time without special notice. The current edition can be 2014-01-23 downloaded from www.contura.eu...
Need help?
Do you have a question about the C 450T and is the answer not in the manual?
Questions and answers