Table of Contents
Advertisement
Quick Links
Advertisement
Table of Contents
Troubleshooting

Related Manuals for Toshiba e-Studio 901


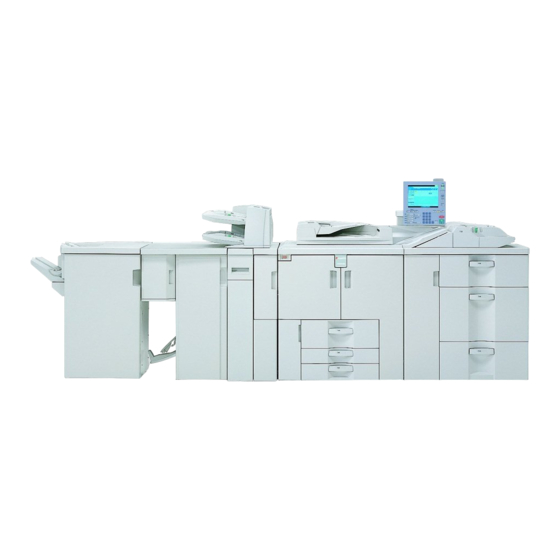
Summary of Contents for Toshiba e-Studio 901
-
Page 1: Troubleshooting
MULTIFUNCTIONAL DIGITAL SYSTEMS Operator's Manual Troubleshooting... - Page 2 Introduction This manual contains detailed instructions and notes on the operation and use of this machine. For your safety and benefit, read this manual carefully before using the machine. Keep this manual in a handy place for quick reference. Do not copy or print any item for which reproduction is prohibited by law. Copying or printing the following items is generally prohibited by local law: bank notes, revenue stamps, bonds, stock certificates, bank drafts, checks, passports, driver's licenses.
-
Page 3: Manuals For This Machine
Manuals for This Machine Refer to the manuals that are relevant to what you want to do with the machine. ❖ About This Machine Be sure to read the Safety Information in this manual before using the ma- chine. This manual provides an introduction to the functions of the machine. It also explains the control panel, preparation procedures for using the machine, how to enter text, and how to install the CD-ROMs provided. - Page 4 Note ❒ Manuals provided are specific to machine types. ❒ Adobe Acrobat Reader/Adobe Reader must be installed in order to view the manuals as PDF files. ❒ “PostScript3 Supplement” includes descriptions of functions and settings that might not be available on this machine.
-
Page 5: Table Of Contents
TABLE OF CONTENTS Manuals for This Machine ..................i How to Read This Manual ..................1 Symbols ........................1 Names of Major Items ....................2 1. When the Machine Does Not Operate As Wanted Indicators........................3 Panel Tone......................4 Checking Machine Status and Settings...............5 When an Indicator to the Left of a Function Key is Lit........8 When You Have Problems Operating the Machine..........9 When a Job is Not Performed................14 2. - Page 6 When a Message is Displayed ................48 When a Message is Displayed on the Control Panel ..........48 When a Message is Displayed on the Client Computer...........54 5. Adding paper, Toner and Staples Loading paper ...................... 59 Loading paper into Tray 1 (Tandem Tray) ............... 59 Loading Paper into the A3/11”...
-
Page 7: How To Read This Manual
How to Read This Manual Symbols This manual uses the following symbols: Indicates important safety notes. Ignoring these notes could result in serious injury or death. Be sure to read these notes. They can be found in the “Safety Information” section of About This Ma- chine. -
Page 8: Names Of Major Items
Names of Major Items Major items of this machine are referred to as follows in this manual: • Auto Document Feeder → ADF • Finisher SR5000 → Finisher • Booklet Finisher BK5000 → Booklet Finisher... -
Page 9: Indicators
1. When the Machine Does Not Operate As Wanted This chapter explains basic troubleshooting procedures that are applicable to all functions of this machine. Indicators This section explains Indicators displayed when the machine requires the user to remove misfed paper, add paper, or perform other procedures. x: Misfeed indicator Appears when a misfeed occurs. -
Page 10: Panel Tone
When the Machine Does Not Operate As Wanted Panel Tone The following table explains the meaning of the various beep patterns that the machine produces to alert users about left originals and other machine condi- tions. Beep pattern Meaning Cause Two long beeps. -
Page 11: Checking Machine Status And Settings
Checking Machine Status and Settings Checking Machine Status and Settings You can check the machine's system status. ❖ Maintenance Info You can check the following items under [Maintenance Info]: • [Remaining Toner] Displays the amount of remaining toner. • [No Staples] Displays where the staple is empty. - Page 12 When the Machine Does Not Operate As Wanted ❖ Inquiry You can check the following items under [Inquiry]: • [Machine Repairs] Displays the machine number and contact number that are required for service. • [Sales Representative] Displays the sales representative's telephone number. •...
- Page 13 Checking Machine Status and Settings Note ❒ [Output Tray Full], [Original Misfeed], [Paper Misfeed], and [Cover Open] appear only when these errors occur. ❒ For details about how to locate and remove misfeeds, see “Checking Jammed Paper” or “Removing Jammed Paper”. Reference p.88 “Locating Jammed Paper”.
-
Page 14: When An Indicator To The Left Of A Function Key Is Lit
When the Machine Does Not Operate As Wanted When an Indicator to the Left of a Function Key is Lit When an indicator to the left of a function key lights up, press the corresponding function key. Then, follow the instructions displayed on the control panel. Problem Cause Solution... -
Page 15: When You Have Problems Operating The Machine
When You Have Problems Operating the Machine When You Have Problems Operating the Machine The following chart gives explanations of common problems and messages. If other messages appear, follow the instructions displayed. Important ❒ Check the contact address and Serial No. of Machine shown in the call service message, and then contact your service representative. - Page 16 When the Machine Does Not Operate As Wanted Problem Cause Solution The scanned originals ex- • Press [Store File] to store pages that “ Memory is full. ceed the number of have been scanned. Delete unneces- Do you want to sheets/pages that can be sary files with [Delete File].
- Page 17 When You Have Problems Operating the Machine Problem Cause Solution Misfeeds occur frequently. The tray's end fence may • Remove the paper. See p.87 “Re- not be set properly. moving Jammed Paper”. • Check the end fence is set properly. See p.70 “Changing the Paper Size”.
-
Page 18: Document Server
When the Machine Does Not Operate As Wanted ❖ Document Server Problem Cause Solution The number of scanned To store scanned pages as a file, press “ Exceeded max. pages exceeds the capaci- [Store File]. Scanned data is stored as a number of pages ty per file of the Docu- file in the Document Server. - Page 19 When You Have Problems Operating the Machine Problem Cause Solution Copier or Scanner func- To cancel a job in progress, first press “ Original is be- [Exit], and then press the {Copy} key or tion is in use. ing scanned by {Scanner} key.
-
Page 20: When A Job Is Not Performed
When the Machine Does Not Operate As Wanted When a Job is Not Performed If you cannot execute a function, it may be that the machine is being held up by another function. If you cannot execute a function, terminate any other functions currently active, and then try executing the function again. - Page 21 When a Job is Not Performed Mode after you select Copy Printer Mode before you select × × × Copy Operations for Copying → → → × Stapling → → × Sort × × × × × Interrupt Copy- Operations for Copying ×...
- Page 22 When the Machine Does Not Operate As Wanted Stapling is not available. Simultaneous operation become possible after you press [New Job] key. Note ❒ Stapling cannot be used at the same time for multiple functions. ❒ If the machine is capable of executing multiple functions simultaneously, specify which function should have priority in “Print Priority”.
-
Page 23: Troubleshooting When Using The Copy Function
2. Troubleshooting When Using the Copy Function This chapter explains likely causes of and possible solutions for copier function problems. When a Message Appears This section explains the machine's main messages. If other messages appear, follow the instructions they contain. Important ❒... - Page 24 Troubleshooting When Using the Copy Function Message Cause Solution The Punch function can- The following paper sizes are available Cannot punch this not be used with paper for Punch mode: paper size. size selected. • 2 holes: A3L, B4L, A4KL, B5KL, A5KL, B6L, A6L, 12”×18”L, 11”×17”L, Legal(8 ”×14”)L, Let-...
- Page 25 When a Message Appears Message Cause Solution You selected the Maga- Make sure originals for the Magazine Magazine or Book- zine or Booklet function or Booklet function are scanned using let mode is not for originals scanned us- the same function. available due to ing different functions, mixed image mode.
-
Page 26: Connect Copy
Troubleshooting When Using the Copy Function Message Cause Solution The destination list is be- Wait until the message disappears. Do Please wait. ing updated from the net- not switch off the power while this work using message is displayed. SmartDeviceMonitor for Admin. - Page 27 When a Message Appears Message Cause Solution Cover settings on the two Make the same settings on both ma- The Cover Sheet machines do not match. chines. setting(s) of the sub-machine is different from the main machine. Slip Sheet settings on the Make the same settings on both ma- The Slip Sheet two machines do not...
-
Page 28: Display During Connect Copy
Troubleshooting When Using the Copy Function Display During Connect Copy This section explains about the display during Connect Copy. Problem Cause Solution [Connect Copy] is not dis- The sub-machine's main Turn on the sub-machine's main power. played. power is off. [Connect Copy] is not dis- Functions that cannot be Cancel the functions selected on the... -
Page 29: If Connect Copy Is Cancelled
If Connect Copy is Cancelled If Connect Copy is Cancelled This section explains about causes and remedies when Connect Copy is can- celled. Problem Cause Solution The machine cancels The main machine's Turn on the sub-machine's main power Connect Copy. main power is off, or the or operation switch, and then press operation switch has... -
Page 30: If You Cannot Exit From Connect Copy
Troubleshooting When Using the Copy Function If You Cannot Exit from Connect Copy This section explains about causes and remedies if you cannot exit from Connect Copy. Problem Cause Solution Press the {Stop} key on the main ma- There is no response when Scanning is in progress. -
Page 31: When You Cannot Make Clear Copies
When You Cannot Make Clear Copies When You Cannot Make Clear Copies This section explains likely causes of and possible solutions for unclear copies. Problem Cause Solution Copies appear dirty. Image density is too high. Adjust the image density. See “Adjust- ing Copy Image Density”, Copy/Docu- ment Server Reference. - Page 32 Troubleshooting When Using the Copy Function Problem Cause Solution Images appear only par- The paper is damp. Use paper that has been stored in the tially. recommended temperature and hu- midity condition. See “Copy Paper”, About This Machine. Black lines appear. The exposure glass is Clean them.
-
Page 33: When You Cannot Make Copies As Wanted
When You Cannot Make Copies As Wanted When You Cannot Make Copies As Wanted This section explains likely causes of and possible solutions for unclear copies. ❖ Basic Problem Cause Solution Misfeeds occur frequently. The number of sheets Load paper only as high as the upper loaded exceeds the capac- limit markings on the side fence of the ity of the machine. - Page 34 Troubleshooting When Using the Copy Function Problem Cause Solution When sorting, the pages The memory became full You can interrupt copying when the are divided into two in the middle of sorting memory becomes full. See “Memory blocks. and the pages were deliv- Full Auto Scan Restart”, General Set- ered in two blocks.
- Page 35 When You Cannot Make Copies As Wanted ❖ Stamp Problem Cause Solution The stamp position is The paper orientation is Check the paper orientation and stamp wrong. wrong. position. The stamp is not printed The back side stamp posi- Reset the back side stamp position. See on the back side of sheets tion is incorrect for the “Back Side Stamp Position in Duplex”,...
-
Page 36: When Memory Is Full
Troubleshooting When Using the Copy Function ❖ Connect Copy Problem Cause Solution You cannot staple, The main and sub-ma- Press [Connect Copy] to cancel Connect punch, or Z-fold. chines do not have the Copy. same option installed. You get different copy re- The Copy Quality setting Make the same Copy Quality setting sults from the main and... -
Page 37: Troubleshooting When Using The Printer Function
3. Troubleshooting When Using the Printer Function This chapter explains likely causes of and possible solutions for printer function problems. When a Message Appears during Installation of the Printer Driver This section explains what to do if a message appears when installing the printer driver. -
Page 38: Windows 2000
Troubleshooting When Using the Printer Function Windows 2000 This section explains the procedure under Windows 2000. On the [Start] menu, point to [Settings], and then click [Printers]. Double-click the Add Printer icon. Follow the instructions in Add Printer Wizard. If the CD-ROM drive is D, the source files of the printer driver are stored in the following location: •... -
Page 39: Windows Nt 4.0
When a Message Appears during Installation of the Printer Driver Windows NT 4.0 This section explains the procedure under Windows NT 4.0. On the [Start] menu, point to [Settings], and then click [Printers]. Double-click the Add Printer icon. Follow the instructions in Add Printer Wizard. If the CD-ROM drive is D, the source files of the printer driver are stored in the following location: •... -
Page 40: If Usb Connection Fails
Troubleshooting When Using the Printer Function If USB Connection Fails This section explains how to troubleshoot a problem related to USB connection. Problem Cause Solution The machine is not auto- The USB cable is not con- Turn off the power of the machine, re- matically recognized. -
Page 41: When A Message Appears
When a Message Appears When a Message Appears This section describes the principal messages that appear on the panel display. If a message not described here appears, act according to the message. Reference Before turning the main power off, see “Turning On/Off the Power”, About This Machine. -
Page 42: Alert Messages
Troubleshooting When Using the Printer Function Alert Messages This section describes the machine Alert messages. Message Cause Solution An error has occurred in Turn off the main power switch, and Problem with Hard the hard disk drive. back on again. If the message appears Disk. -
Page 43: Checking The Error Log
When a Message Appears Checking the Error Log If files could not be stored due to printing errors, identify the cause of the errors by checking the error log on the control panel. Press the {Printer} key to display the printer screen. ANR103S Press [Error Log]. -
Page 44: When You Cannot Print
Troubleshooting When Using the Printer Function When You Cannot Print Use the following procedures if printing does not start even after performing [Print]. Problem Cause Solution Printing does not start. The power is off. Check the cable is securely plugged into the power outlet and the machine. - Page 45 When You Cannot Print Problem Cause Solution The destination list is be- Wait until the message disappears. Do “ Updating the ing updated from the net- not switch off the power while this destination work using message is displayed. Depending on list...
-
Page 46: Other Printing Problems
Troubleshooting When Using the Printer Function Other Printing Problems This section explains likely causes of and possible solutions for problems that can occur when printing from a computer. Problem Cause Solution Print has smudges. Settings for thick pa- • PCL 5e/6 and PostScript 3 per have not been Select [Thick] in the [Type:] list on the [Paper] made when printing... - Page 47 Other Printing Problems Problem Cause Solution Images are printed at The tray's side fences Check the side fences are locked. See p.70 slant. might not be locked. “Changing the Paper Size”. Print is slanted. The paper is feeding Load the paper correctly. See p.59 “Loading in at a slant.
- Page 48 Troubleshooting When Using the Printer Function Problem Cause Solution There is considerable Processing time de- If the data-in lamp is blinking, data has been delay between the pends on data vol- received by the printer. Wait for a moment. print start instruction ume.
- Page 49 Other Printing Problems Problem Cause Solution ❖ RPCS There is considerable Processing time de- delay between the pends on data vol- Select the lower value for [Resolution:] on print start instruction ume. High volume the [Print Quality] tab in the printer driver's and actual printing.
- Page 50 Troubleshooting When Using the Printer Function Problem Cause Solution Duplex printing is Duplex printing can- Change the Paper Type setting for the tray to malfunctioning. not be done with a [2 Sided Copy] on the System Settings menu. tray for which [1 Sided See “System Settings”, General Settings Copy] has been speci- Guide.
-
Page 51: When Scanning Is Not Done As Expected
4. Troubleshooting When Using the Scanner Function This chapter explains likely causes of and possible solutions for scanner function problems. When Scanning is Not Done as Expected This section explains causes and remedies when scan results are not as expected. Problem Cause Solution... -
Page 52: When You Cannot Send Scanned Files
Troubleshooting When Using the Scanner Function When You Cannot Send Scanned Files The following sections explain likely causes of and solutions for Network Deliv- ery and E-mail Sending-related problems. When Stored Files Cannot be Accessed This section explains likely causes of and possible solutions for job access-relat- ed problems. -
Page 53: When Stored Files Cannot Be Edited
When You Cannot Send Scanned Files When Stored Files Cannot be Edited This section explains likely causes of and possible solutions for the TWAIN driv- er failing to operate. Problem Cause Solution Stored files cannot be Limits have been imposed using Contact the administrator. -
Page 54: When A Message Is Displayed
Troubleshooting When Using the Scanner Function When a Message is Displayed This section explains likely causes of and possible solutions for error messages that may appear on the machine's control panel. When a Message is Displayed on the Control Panel This section explains causes and remedies if an error message appears on the display of the control panel. - Page 55 When a Message is Displayed Message Cause Solution You have loaded paper of • Place the original correctly. Cannot detect a size not shown on the original size. • Specify the scan size. paper size selector. Place original • When placing an original directly again, then press on the exposure glass, the lifting/ the Start key.
- Page 56 Troubleshooting When Using the Scanner Function Message Cause Solution You have tried to delete The files can be deleted by the file ad- The selected files without the authori- ministrator. To delete a file which you file(s) contained ty to do so. are not authorized to delete, contact the file(s) without administrator.
- Page 57 When a Message is Displayed Message Cause Solution The sender's name was A sender's name should be specified Sender has not not specified. before sending e-mail. Send e-mail after been specified. specifying the sender's name. The maximum e-mail size • Increase the size of [Max. E-mail Size]. Exceeded max.
- Page 58 Troubleshooting When Using the Scanner Function Message Cause Solution The maximum number of Check the files stored by the other func- Exceeded max. files that can be stored in tions, and then delete unneeded files. number of files the document server has See “Document Server”, Copy/Docu- which can be used been exceeded.
- Page 59 When a Message is Displayed Message Cause Solution Because of insufficient Try one of the following measures: Memory is full. hard disk space, the first Cannot scan. The • Wait for a while, and then retry the page could not be scanned data will scan operation.
-
Page 60: When A Message Is Displayed On The Client Computer
Troubleshooting When Using the Scanner Function When a Message is Displayed on the Client Computer This section explains likely causes of and possible solutions for the main error messages displayed on the client computer when using the TWAIN driver. Important ❒... - Page 61 When a Message is Displayed Message Cause Solution • The machine's main • Set the main power switch to “On”. Scanner is not power switch is off. available. Check • Check whether the machine is con- the scanner con- • The machine is not nected to the network correctly.
- Page 62 Troubleshooting When Using the Scanner Function Message Cause Solution • The main power • Check whether the main power Cannot find "XXX" switch of the previ- switch of the scanner used for the scanner used for ously used scanner is previous scan is turned off.
- Page 63 When a Message is Displayed Message Cause Solution Failed to authenticate the Contact the administrator of the machine. Cannot register user at the authentication the user because server because the ad- the scanner's ad- dress book is full. dress book is full.
- Page 64 Troubleshooting When Using the Scanner Function...
-
Page 65: Adding Paper, Toner And Staples
5. Adding paper, Toner and Staples This chapter explains troubleshooting procedures that are applicable to all the machine's functions. Loading paper This section explains what to do when paper runs out and needs reloading. R CAUTION: • When loading paper, take care not to trap or injure your fingers. Note ❒... - Page 66 Adding paper, Toner and Staples Carefully pull out the paper tray until it stops. ANQ001S Square the paper and place it print side down. • Whole tray pulled out ANQ002S • Left half of the tray pulled out ANQ003S Carefully slide the paper tray fully in. Note ❒...
-
Page 67: Loading Paper Into The A3/11" × 17" Tray Unit
Loading paper Loading Paper into the A3/11” × 17” Tray Unit The following procedure explains how to load paper into the A3/11” × 17” tray unit. To use the A3/11” × 17” tray unit, you must replace Tray 1. Important ❒... -
Page 68: Loading Paper Into Tray 2 And 3
Adding paper, Toner and Staples Loading Paper into Tray 2 and 3 The following procedure explains how to load paper into Tray 2 and 3. Important ❒ Various sizes of paper can be loaded in Tray 2 and 3 by adjusting the positions of side fence and end fence. -
Page 69: Loading Paper Into The Large Capacity Tray (Lct)
Loading paper Loading Paper into the Large Capacity Tray (LCT) The following procedure explains loading paper into the large capacity tray (LCT). The LCT is identified as Tray 4, Tray 5, and Tray 6. Important ❒ Various sizes of paper can be loaded in Tray 4 and Tray 5 by adjusting the po- sitions of side fence and end fence. -
Page 70: Loading Paper Into The Wide Large Capacity Tray (Wide Lct)
Adding paper, Toner and Staples Reference p.70 “Changing the Paper Size” p.78 “Changing to a Size that is Not Automatically Detected” Loading Paper into the Wide Large Capacity Tray (Wide LCT) The following procedure explains loading paper into the wide large capacity tray (Wide LCT). -
Page 71: Loading Paper Into The Multi Bypass Tray (Tray 7)
Loading paper Note ❒ The tray can hold up to 1,000 sheets in Tray 4 and 6, and 2,000 sheets in Tray 5. ❒ If you load paper that cannot be automatically detected, specify its size us- ing the control panel. Reference p.70 “Changing the Paper Size”... - Page 72 Adding paper, Toner and Staples Set the end fence. ANQ068S To remove the end fence, slide it to the right. ANQ069S Press the elevator switch on the multi bypass tray (Tray 7). APF030S The green lamp of the elevator switch is blinking while the tray is going up and down, and keeps lit when it stops.
-
Page 73: Loading Paper In The Interposer
Loading paper Loading Paper in the Interposer The following procedure explains loading paper into the interposer. Important ❒ Load paper on the side already printed (the front side). If you are using the Booklet Finisher (Saddle Stitch), load sheets print side down. ❒... - Page 74 Adding paper, Toner and Staples Note ❒ To set the paper in the interposer, align the orientation of originals in the ADF as shown below. ANR026S ❒ When paper is loaded which cannot be detected automatically, the user must set the paper size on the control panel. Reference p.78 “Changing to a Size that is Not Automatically Detected”...
- Page 75 Loading paper ❖ Paper orientation Note ❒ Press the {Tray Paper Setting} key, specify Letterhead as “Paper Type” for the paper tray you want to use. See “Tray Paper Settings”, General Settings Guide.
-
Page 76: Changing The Paper Size
Adding paper, Toner and Staples Changing the Paper Size This section explains how to change a paper size. Procedures for changing the paper size differ depending on the tray (tray 1 or other optional paper tray units). Make sure you are following the appropriate procedure before you begin. - Page 77 Changing the Paper Size Release the lock on the side fence. ANQ015S While pressing down the release lever, slide the side fences until they are aligned the paper size you want to load. ANQ016S Slide the end fence until it is aligned with the size of paper to you want to load.
-
Page 78: Changing The Paper Size In The Large Capacity Tray (Tray 4 And 5)
Adding paper, Toner and Staples Square the paper and load it print side up. Re-lock the side fences again. ANQ018S Carefully slide the paper tray fully in. Check the size on the display. Note ❒ If there is space between the side fence and paper, bring the side fence flush against the edge of the paper. - Page 79 Changing the Paper Size Pull out the screws fixing the side fence. ANQ020S Set the side fences to the size you want. ANQ021S Fasten the side fence with the screws. ANQ022S...
- Page 80 Adding paper, Toner and Staples Set the end fence along the paper size. ANQ023S Square the paper and set it in the tray. ANQ024S Set the paper size selector in the innermost part of the tray to the new paper size.
- Page 81 Changing the Paper Size ” × 11”K into the Large Capacity Tray (Tray 4 and 5) Load A4K, 8 ” × 11”K. Follow the procedure below to set the end fence for A4K, 8 Set the end fence according to the paper size. ANQ076S ”...
-
Page 82: Changing The Paper Size In The Wide Large Capacity Tray
Adding paper, Toner and Staples Changing the Paper Size in the Wide Large Capacity Tray The following procedure explains how to change a paper size in the wide large capacity tray (Wide LCT). Important ❒ Check that the paper edges are aligned at the left side. ❒... - Page 83 Changing the Paper Size Fasten the side fence with the screws. ANQ063S Release the lock on the back fence. ANQ064S Square the paper and set it in the tray. ANQ066S...
-
Page 84: Changing To A Size That Is Not Automatically Detected
Adding paper, Toner and Staples Tightly fit the back fence to the loaded paper and then re-lock the back fence again. ANQ067S Carefully slide the paper tray fully in. Check the size on the display. Changing to a Size that is Not Automatically Detected If you load a paper size that is not selected automatically, you need to specify the paper size with the control panel. - Page 85 Changing the Paper Size Select the tray number on the screen. Press [Paper Size] tab. Select a combination of the specified paper size and orientation, and then press [OK]. The paper size and orientation appear.
- Page 86 Adding paper, Toner and Staples Press the {Tray Paper Setting} key. The initial display is shown. Note ❒ If you want to print on paper that is selected automatically after printing on a paper size that is not selected automatically, you must return the set- ting to “Auto Detect”.
-
Page 87: Pausing Copy When Using Finisher
Pausing Copy When Using Finisher Pausing Copy When Using Finisher You can pause a large volume of copies when using Finisher. Press the {Suspend/Resume} key. The key lights up. ANQ082S Remove the stack of paper from the finisher shift tray. ANQ083S Press the {Suspend/Resume} key. -
Page 88: Adding Toner
Adding paper, Toner and Staples Adding Toner This section explains adding and storing toner. R WARNING: • Do not incinerate used toner or toner containers. Toner dust might ig- nite when exposed to an open flame. Dispose of used toner containers in accordance with local regulations. - Page 89 Adding Toner ❒ If toner remains in the bottle, you cannot remove the bottle. Do not remove the bottle forcibly. ❒ Be sure to set the new toner bottle in the lower hole first. ❒ Store toner containers in a cool, dry place free from direct sunlight. ❒...
-
Page 90: Inserting Toner
Adding paper, Toner and Staples Inserting Toner The following describes how to replace toner. Important ❒ Do not shake the toner bottle with its mouth down after removing it. Residual toner may scatter. ANR001S Used Toner Toner cannot be re-used. Bring the stored used container to your sales representative or service represen- tative for recycling through our recycling system. -
Page 91: Adding Staples
Adding Staples Adding Staples This section explains what to do when staples need replacing. R CAUTION: • Keep your hands clear of the booklet finisher tray when pulling out or push- ing in the finisher's staple unit. You can trap your fingers if you do not. Important ❒... -
Page 92: Booklet Finisher (Saddle Stitch)
Adding paper, Toner and Staples Booklet Finisher (Saddle Stitch) The following procedure explains how to add staples to the Booklet Finisher. ANR003S... -
Page 93: Clearing Misfeeds
6. Clearing Misfeeds This chapter explains what to do when paper or originals misfeed (become jammed inside the machine). Removing Jammed Paper R CAUTION: • The inside of the machine could be very hot. Do not touch any parts other than specified in this document when removing misfed paper. -
Page 94: Locating Jammed Paper
Clearing Misfeeds Locating Jammed Paper If a misfeed happens, remove the misfed paper or original following the proce- dures stated on the sticker on the rear of main unit front cover. A misfeed has occurred in the place corresponding to the letter displayed on the control panel. - Page 95 Removing Jammed Paper After each step is complete, press [Next]. To go back to the previous step, press [Previous]. Press [Entire View], the entire machine is displayed. When all jammed paper are removed, restore the machine to the original state. Note ❒...
-
Page 96: Removing Jammed Paper
Clearing Misfeeds Removing Jammed Paper The following procedure explains how to remove jammed paper. Important ❒ The fusing section of this machine might be very hot. Caution should be taken when removing misfed paper. ❒ When removing jammed sheets, take care to touch only those areas explicitly indicated in the manual. - Page 97 Removing Jammed Paper • When C is lit ANR007S • When D is lit...
- Page 98 Clearing Misfeeds • When M is lit (when Booklet Finisher is installed) ANR018S...
- Page 99 Removing Jammed Paper ANR019S • When N1 is lit (when Z-Folding Unit is installed) ANS008S • When N2 or N3 is lit (when Z-Folding Unit is installed) ANS009S...
- Page 100 Clearing Misfeeds • When P1 is lit (when ADF is installed) ANR011S • When P2 is lit (when ADF is installed) ANR027S • When Q1 or Q2 is lit (when Interposer is installed) ANR016S...
- Page 101 Removing Jammed Paper • When Q3 or Q4 is lit (when Interposer is installed) ANR017S...
- Page 102 Clearing Misfeeds • When R is lit (when Finisher is installed) ANR021S...
- Page 103 Removing Jammed Paper • When U is lit (when Large Capacity Tray is installed) ANR012S • When U is lit (when Wide Large Capacity Tray is installed) ANR013S...
- Page 104 Clearing Misfeeds • When V is lit (when Multi Bypass Tray (Tray 7) is installed) ANR020S • When Z1 is lit ANR009S • When Z4 is lit ANR010S...
-
Page 105: When Z-Folded Paper Is Not Properly Aligned
Removing Jammed Paper Note ❒ Inside the finisher, or inside the front cover, there is a sticker explaining how to remove misfed paper. ❒ If a detailed removal instruction appears on the right of the screen, follow it. ❒ You can also use the procedure indicated in [System Status] to remove jammed paper. -
Page 106: Removing Jammed Staples
Clearing Misfeeds Removing Jammed Staples This section explains how to remove jammed staples. R CAUTION: • Keep your hands clear of the booklet finisher tray when pulling out or push- ing in the finisher's staple unit. You can trap your fingers if you do not. Important ❒... -
Page 107: Booklet Finisher (Saddle Stitch)
Removing Jammed Staples Booklet Finisher (Saddle Stitch) The following procedure explains how to remove jammed staples from the Booklet Finisher. ANR023S... -
Page 108: Removing Punch And Staple Waste
Clearing Misfeeds Removing Punch and Staple Waste This section explains how to remove punch and staple waste. Note ❒ While “ ” or “ Hole Punch Receptacle is full. Waste Staple Recepta- ” is displayed, you cannot use the Punch function or the Staple cle is full. -
Page 109: Remarks
7. Remarks This chapter describes how to maintain and operate the machine. Where to Put Your Machine This section provides precautions for installation, movement and disposal. Machine Environment Choose your machine's location carefully. Environmental conditions greatly affect its performance. Optimum environmental conditions The following describes precautions when locating the machine. -
Page 110: Moving
Remarks Environments to avoid • Locations exposed to direct sunlight or other sources of strong light (more than 1,500 lux). • Locations directly exposed to cool air from an air conditioner or heated air from a heater. (Sudden temperature changes can cause condensation to form inside the machine.) •... -
Page 111: Power Connection
Where to Put Your Machine ❒ Do not take off the holding stand. ❒ Protect the machine from strong shocks. Impact can damage the hard disk and cause stored files to be lost. As a precautionary measure, files should be copied to another computer. -
Page 112: Access To The Machine
Remarks Access to the Machine Place the machine near the power source, providing the clearance areas shown. Rear: more than 20 cm (7.8”) Right: more than 3 cm (1.1”) Front: more than 55.5 cm (21.6”) Left: more than 40 cm (15.7”) Note ❒... -
Page 113: Maintaining Your Machine
Maintaining Your Machine Maintaining Your Machine If the exposure glass or ADF belt is dirty, copy clarity may be reduced. Clean these parts if they are dirty. Important ❒ Do not use chemical cleaners or organic solvents, such as thinner or benzene. If such substances get inside the machine or melt plastic parts, a failure might occur. -
Page 114: Cleaning The Auto Document Feeder
Remarks Cleaning the Auto Document Feeder The following procedure explains how to clean the ADF. ANQ081S Wipe the surface of the belt, moving it. -
Page 115: Earth Leakage Circuit Breaker
Earth Leakage Circuit Breaker Earth Leakage Circuit Breaker This section explains how to test the earth leakage circuit breaker. For details, see “Guide to Components”, About This Machine. R WARNING: • Do not turn the earth leakage circuit breaker from the off to the on po- sition. - Page 116 Remarks Turn the switch to the on position. ANQ089S Turn on the main power switch of the machine. Note ❒ If the power does not come on, check if the earth leakage circuit breaker is in the off position. If so, do not turn it to the on position. Contact your sales or service representative immediately.
-
Page 117: Index
INDEX Access to the Machine Earth Leakage Circuit Breaker Adding Edit Paper Enquiry Staples Environment Toner Environments to avoid Adding Staples Error Log Booklet Finisher Exposure Glass Finisher Alert Messages Auto Document Feeder (ADF) Finisher Booklet Finisher How to Read This Manual Cannot Browse the Network If USB Connection Fails to Send a Scan File... - Page 118 When a Message Appears Names of Major Options Copy Function Printer Function Scanner Function Operations are Not Possible Scanner Function (Client Computer) When Messages Appear When a Message Appears during Optimum environmental conditions Installation of the Printer Driver Other Printing Problems When an Indicator to the Left of a Function Key is Lit When the Machine...
- Page 119 In accordance with IEC 60417, this machine uses the following symbols for the main power switch: a means POWER ON. c means STAND BY. Copyright © 2006...
- Page 120 MULTIFUNCTIONAL DIGITAL SYSTEMS Operator's Manual Troubleshooting 2-17-2, HIGASHIGOTANDA, SHINAGAWA-KU, TOKYO, 141-8664, JAPAN R060520B8300-TTEC OME06008100 Ver00 2006-09 EN B235-7412 2006 TOSHIBA TEC CORPORATION All rights reserved...
Need help?
Do you have a question about the e-Studio 901 and is the answer not in the manual?
Questions and answers