Christie Boxer 30 Installation And Setup Manual
Hide thumbs
Also See for Boxer 30:
- Technical reference (65 pages) ,
- Installation and setup manual (52 pages) ,
- User manual (48 pages)
Table of Contents
Advertisement
Quick Links
Advertisement
Table of Contents

Related Manuals for Christie Boxer 30


Summary of Contents for Christie Boxer 30
- Page 1 Ins tallation a n d S e t u p M a n u a l 020-102017-01 Boxer 30...
- Page 2 The warranty does not apply to any product where the serial number has been removed or obliterated. The warranty also does not apply to any product sold by a reseller to an end user outside of the country where the reseller is located unless (i) Christie has an office in the country where the end user is located or (ii) the required international warranty fee has been paid.
- Page 3 China RoHS compliance information 关于中国《 子信息 品 染控制管理 法》的 明 Environmentally Friendly Use Period 保使用期限 The year number in the centre of the label indicates the Environmentally Friendly Use Period, which is required to mark on the electronic information product sold in China according to the China RoHS regulations. 本...
-
Page 4: Table Of Contents
Optimizing the integrator zoom and focus......26 Boxer 30 Installation and Setup Manual... - Page 5 Boxer 30 signal connectivity........
-
Page 6: Introduction
Read all safety and warning guidelines before installing or operating the projector. This projector must be operated in an environment that meets the operating range specification. Use only the attachments and/or accessories recommended by Christie. Use of others may result in the risk of fire, shock, or personal injury. -
Page 7: Installation Safety And Warning Guidelines
High leakage current (when connected to IT power systems). • Tools provided in the toolbox shall be used by Christie qualified technicians only. • This product must be located and positioned in a way as to restrict audience members from direct access to enter the light beam path. -
Page 8: Product Safety Labels
Indicates the presence of a hot surface. To avoid personal injury, always allow the projector to cool down for a minimum of 10 minutes before performing maintenance or service procedures. Boxer 30 Installation and Setup Manual 020-102017-01 Rev. 1 (11-2015) -
Page 9: Projector Overview
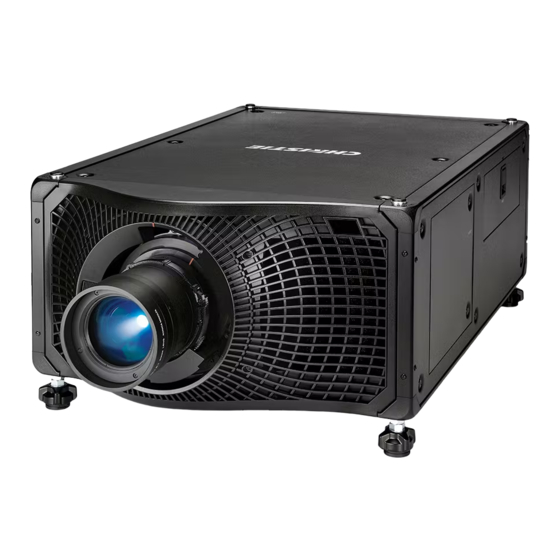
Projector overview Learn about the Boxer 30 projector. The Boxer 30 is a professional quality, easy-to-use projector using Digital Light Processing (DLP technology from Texas Instruments. Integrating smoothly into traditional projection environments, the Boxer 30 interfaces with local networks throughout the world, for multimedia presentations from a variety of formats, to offer stunning wide screen images. -
Page 10: Contact Your Dealer
New LCD display to provide information at-a-glance How the projector works The Boxer 30 accepts a variety of input signals for projection on front or rear projection screens, typical in commercial or other large screen applications. High-brightness light is generated by six mercury vapor lamps, then modulated by three Digital Micromirror Device (DMD) panels responding to incoming data streams of digitized red, green and blue color information. -
Page 11: List Of Components
Verify all components were received with the projector. • Power cord for full brightness, six lamp operation • Power cord for limited power, single lamp operation • IR remote keypad Boxer 30 Installation and Setup Manual 020-102017-01 Rev. 1 (11-2015) -
Page 12: Installation And Setup
AC Input 2. A different power cord is provided for each power source. A 30A rated wall breaker is required at the installation when using Input 1. A 15A rated wall breaker is required at the installation when using Input 2. Boxer 30 Installation and Setup Manual 020-102017-01 Rev. 1 (11-2015) -
Page 13: Projector Components
Mounting and rigging holes M12 x 1.75 holes for projector feet installation and offer mounting and rigging points. User interface air filter door Provides to the user interface air filter. Boxer 30 Installation and Setup Manual 020-102017-01 Rev. 1 (11-2015) -
Page 14: Ir Remote Keypad
One of the two IR sensors on the projector will detect the signal and relay the commands for internal processing. The remote also offers a connector for wired connections to the projector. Boxer 30 Installation and Setup Manual 020-102017-01 Rev. 1 (11-2015) - Page 15 Installation and setup Boxer 30 Installation and Setup Manual 020-102017-01 Rev. 1 (11-2015)
-
Page 16: Side Panel Display Components
ID. Positioning the projector Position the projector in relation to the screen. 1. Postition the projector with the lens perpendicular to the screen. Boxer 30 Installation and Setup Manual 020-102017-01 Rev. 1 (11-2015) -
Page 17: Leveling The Projector
Installing the projector lens Only use lenses designed for Boxer 30 projectors. Installing a lens not designed for Boxer 30, results in a warning that the lens is not present. 1. Remove the lens caps from the lens. -
Page 18: Calibrating The Lens Motor
Calibrate the lens motors when any of the following conditions are met: • After a lens change. • After the projector is moved and/or jostled. • After any manual adjustment is made to the zoom or focus. Boxer 30 Installation and Setup Manual 020-102017-01 Rev. 1 (11-2015) -
Page 19: Removing The Projection Lens
Packaging tape is required to ensure safe shipment of the projection lens to restrain the zoom ring from rotating during shipping. Connecting to AC power The Boxer 30 projectors can operate in full or limited power modes, depending on the available or required AC power source. Power mode... -
Page 20: Turning The Projector On
Power requirements (on page 38) Projector LED status indicators Identify the LED state colors and meaning. State Description Blue Solid Standby Lamps are off. Video electronics are off. Projector status is OK. Boxer 30 Installation and Setup Manual 020-102017-01 Rev. 1 (11-2015) -
Page 21: Projector Led Shutter Indicators
State Description Solid magenta Shutter closed The shutter is closed. In standby, the shutter is always automatically closed and the magenta light is muted. Shutter open The shutter is open. Boxer 30 Installation and Setup Manual 020-102017-01 Rev. 1 (11-2015) -
Page 22: Lamp States
When powering off the projector, allow the projector to complete its cool down cycle. Do not immediately unplug the projector if this can be avoided. 2. To turn off power to the projector, disconnect from AC power. Boxer 30 Installation and Setup Manual 020-102017-01 Rev. 1 (11-2015) -
Page 23: Adjusting Offset
The boresight adjustment balances the tilt of the lens mount to compensate for screen-to-projector tilt. 1. Close the shutter on the projector. 2. Unlock the three lens mount stabilization screws. Boxer 30 Installation and Setup Manual 020-102017-01 Rev. 1 (11-2015) - Page 24 The Boresight test pattern assists with adjusting the boresight for the three focus points. 5. To focus the bottom boresight guide, adjust the blue boresight screw. Adjust the screw 1/4 inch. If you get to the end, further unlock the corresponding stabilization screw. Boxer 30 Installation and Setup Manual 020-102017-01 Rev. 1 (11-2015)
-
Page 25: Adjusting The Fold Mirror
Notice. Failure to comply with the following may result in property damage. • Misalignment of the fold mirror may cause permanent damage to the product. 1. From the Test Pattern menu, select the Integrator Rod test pattern. Boxer 30 Installation and Setup Manual 020-102017-01 Rev. 1 (11-2015) -
Page 26: Optimizing The Integrator Zoom And Focus
Optimizing the integrator zoom and focus 1. From the Test Pattern menu, select the Integrator Rod test pattern. The Integrator Rod test pattern includes guided information for integrator zoom and focus adjustments. Boxer 30 Installation and Setup Manual 020-102017-01 Rev. 1 (11-2015) -
Page 27: Adjusting Dmd Convergence
When adjusting the convergence, you are adjusting red and green to blue. 1. From the Test Pattern menu, select the Convergence test pattern. Boxer 30 Installation and Setup Manual 020-102017-01 Rev. 1 (11-2015) -
Page 28: Aligning The Image With Lens Zoom And Focus
• Vertical convergence and rotation is done by adjusting two knobs. Christie recommends rotating a single knob a maximum of a quarter rotation before adjusting the second knob a quarter rotation. For example, if using one hand, turn the left knob a quarter rotation and then the right knob a quarter rotation, and so on. -
Page 29: Running Auto Setup To Optimize Display Settings
You can also select the test patterns from MENU > Test Pattern. 2. Scroll through the list of test patterns. 3. Select the required test pattern. 4. To confirm your selection, select Enter. Boxer 30 Installation and Setup Manual 020-102017-01 Rev. 1 (11-2015) -
Page 30: Connecting Devices And Establishing Communication
Accepts video signals, Ethernet, and IR. USB 1/USB 2 Connects a USB flash drive that has been formatted with a FAT32 file system. Can be used for upgrades, backups, restores,a nd interrogators. Boxer 30 Installation and Setup Manual 020-102017-01 Rev. 1 (11-2015) -
Page 31: Connecting A Video Source Using Displayport
Physically connects a remote control to the projector. 3D Sync In/3D Sync Out Supported for 3D-enabled projectors. Ethernet Connects to the web user interface and can send Christie serial commands. RS232 Sends Christie serial commands using a standard RS232 serial cable. -
Page 32: Connecting A Video Source Using Dvi
The RS232 port located on the IMXB faceplate uses Christie-proprietary protocol and is intended for Christie accessories or automation controllers only. For more information, on the serial commands, see the Boxer 30 Serial API Commands Technical Reference (P/N: 020-102096-XX). 1. Use an RJ-45 cable to connect the Ethernet hub or switch to the Ethernet port, located on the projector IMXB faceplate. -
Page 33: Configuring The Rs232 Port
Ethernet is setup to obtain an IP address automatically if a DHCP server is on the network. To modify IP settings, or manually enter an address. Christie recommends using the Ethernet port on the IMXB as the HDBaseT port is limited to 100 Mb/s. You cannot change the IP settings using the web interface. -
Page 34: Specifications
Nominal white (full white, after calibration) y = 0.300 +/- 0.050 y = 0.300 +/- 0.050 Gamma Nominal 2.2 ± 5% Control signal compatibility Ethernet port Interface 10Base-T/100Base-TX Connector Female RJ-45 Boxer 30 Installation and Setup Manual 020-102017-01 Rev. 1 (11-2015) -
Page 35: Optional Input Cards
Control signal compatibility (on page 34) Temperature sensor thresholds The projector shutdowns within one minute of an error threshold being reached. Location Warning Error Remarks (°C) (°C) Air intake IMXB CPU Boxer 30 Installation and Setup Manual 020-102017-01 Rev. 1 (11-2015) -
Page 36: Warning Thresholds For Fans
Learn the warning thresholds (in RPMs) for each fan. All fan warnings are set to ~75% of their normal operating speeds. Location Warning Bulb blower B3 Bulb blower B2 Bulb blower B1 Boxer 30 Installation and Setup Manual 020-102017-01 Rev. 1 (11-2015) -
Page 37: Warning Threshold For Liquid Cooling Module
Card cage intake 1600 Card cage intake 1600 Warning threshold for liquid cooling module Learn the warning thresholds (in RPMs) for the liquid cooling components. Location Warning Liquid cooling pump 180 RPM Boxer 30 Installation and Setup Manual 020-102017-01 Rev. 1 (11-2015) -
Page 38: Power Requirements
1207 x 838 x 654 (mm) (includes skid) 47.5 x 33 x 25.75 (inches) Projector weight Without lens 73 kg (160 lbs) Shipping without lens (includes packaging) 95 kg (210 lbs) Operating position Omni-directional Boxer 30 Installation and Setup Manual 020-102017-01 Rev. 1 (11-2015) -
Page 39: Accessories
This product conforms to the following regulations related to product safety, environmental requirements and electromagnetic compatibility (EMC). Safety • CAN/CSA C22.2 No. 60950-1 • ANSI/UL 60950-1 • IEC 60950-1 • EN 60950-1 • IEC 62471-1 Boxer 30 Installation and Setup Manual 020-102017-01 Rev. 1 (11-2015) -
Page 40: Approvals
China Ministry of Information Industry Order No.39 (02/2006) on the control of pollution caused by electronic information products, hazardous substances concentration limits (SJ/T11363-2006), and the applicable product marking requirements (SJ/T11364-2006). Boxer 30 Installation and Setup Manual 020-102017-01 Rev. 1 (11-2015) -
Page 41: Environment
Learn about the environment requirements for projector while operating and not operating. Operating environment Temperature 5 to 40°C (41 to 104°F) Humidity (non-condensing) 10 to 80% Altitude 3000 meters (10,000 feet) maximum Non-operating environment Temperature -40 to 70°C (-40 to 158°F) Boxer 30 Installation and Setup Manual 020-102017-01 Rev. 1 (11-2015) -
Page 42: Boxer 30 Signal Connectivity
Specifications Boxer 30 Installation and Setup Manual 020-102017-01 Rev. 1 (11-2015) - Page 43 Corporate offi ces Worldwide offi ces USA – Cypress Australia Eastern Europe and India Singapore ph: 714-236-8610 ph: +61 (0) 7 3624 4888 Russian Federation ph: +91 (080) 6708 9999 ph: +65 6877-8737 ph: +36 (0) 1 47 48 100 Canada –...
Need help?
Do you have a question about the Boxer 30 and is the answer not in the manual?
Questions and answers