Table of Contents
Advertisement
Quick Links
Advertisement
Table of Contents

Related Manuals for Cafection TOTAL LITE


Summary of Contents for Cafection TOTAL LITE
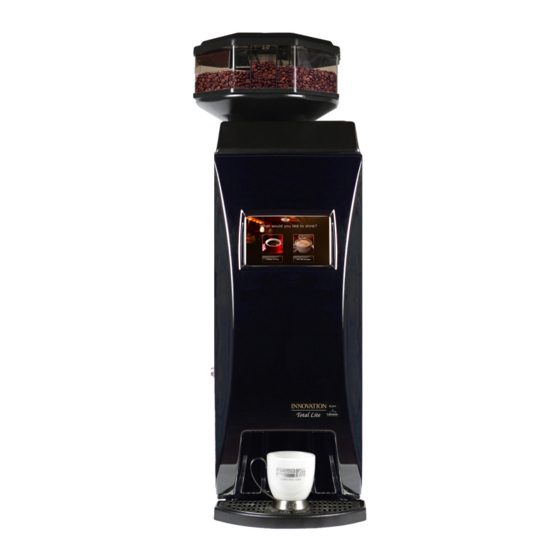
- Page 1 SERVICE AND INSTALLATION MANUAL for INNOVATION TOTAL LITE Manufactured by: Cafection Enterprises Inc. 2355, Dalton, Quebec, (Quebec) G1P 3S3 Canada Tel.: 1-800-561-6162 Fax: 1-800-463-2739 avalon@cafection.com www.cafection.com Revision 1 IMAGE SHOWS MACHINE WITH OPTIONNAL SHORT BEAN CANISTER...
-
Page 2: Table Of Contents
6.7.2 System 2 tab ................29 6.7.3 Tools tab ..................29 6.7.4 Network tab ................30 6.7.5 Admin tab .................. 31 Audit Screen ..................... 6.8.1 Permanent counters ..............32 6.8.2 Erasable and counters ............. 33 6.8.3 User counters ................33 TOTAL LITE Revision 1... - Page 3 Preventive Maintenance (PM) Schedule ..........Brewer Assembly ................. Water Outlet Valves ................Hot Water Tank ..................10 SERVICING PARTS ....................10.1 Draining the Hot Water Tank ..............10.2 Shutdown / Storage ................10.2.1 Storing the Brewer Assembly ..........63 TOTAL LITE Revision 1...
- Page 4 Single-Cup Brewer Table of Contents Continued 10.3 Brewer Assembly ..................10.4 Microcontroller (EPROM) ................ 10.5 Main Board....................11 Troubleshooting ....................... 11.1 Warning message list ................11.2 Error message list ..................11.2 Error message list (continued) ............... TOTAL LITE Revision 1...
-
Page 5: Introduction
The INNOVATION TOTAL LITE brewer offers 3 choices of whole bean coffee that can be mixed with soluble products upon request as well as gourmet hot chocolate, americano and hot water. -
Page 6: Safety Instructions
Damage is done to the power cord; · The equipment doesn’t work properly; · The temperature of the power cord or plug increases dramatically during use; · Unusual conditions occur. FAILURE TO COMPLY CAN CAUSE EQUIPMENT DAMAGE OR INJURIES. TOTAL LITE Revision 1... -
Page 7: Warranty
Procedures and Conditions for Goods Returned All warranty claims and products returns processed by our technical department is available Monday through Friday from 8:30 to 16:30 eastern time or alternatively by email service@cafection.com Warranty Policy Cafection provides a warranty period as follow unless otherwise confirmed in writing: ·... -
Page 8: Returned Product Procedures
E-mail order@cafection www.cafection.com Cafection is committed to providing prompt and efficient service and an excellent customer service. Our intention is to process all returns within 15 days after the date of receipt to ensure the ongoing satisfaction of our customers. -
Page 9: Reference Drawings
TOTAL LITE SERVICE MANUAL FOR INNOVATION Single-Cup Brewer REFERENCE DRAWINGS External View 3 Whole bean canister Plastic top lid Plastic front (Fascia) Metal door Touchscreen Door lock Back splash Drip tray grill Drip tray TOTAL LITE Revision 1... -
Page 10: Rear View
TOTAL LITE SERVICE MANUAL FOR INNOVATION Single-Cup Brewer Rear View Plastic top fitting part Door for easy tank access Water tank Outlet valve Overflow cup Breaker box Level glides Overflow tray Water inlet Back panel TOTAL LITE Revision 1... -
Page 11: Internal View
Single-Cup Brewer Internal View Soluble canisters Main board (See P. 16) COM connection Coffee grinder (Behind the protector) Filter paper Soluble mixing chamber Brewer Front panel Spout Waste basket Hot water Soluble products #1 and #2 Coffee TOTAL LITE Revision 1... -
Page 12: Brewer Assembly
The platinum brewing system is in a class of it’s own in the single cup coffee business and is specifically designed for Cafection units. Its vacuum extraction process, joined with a high quality filter paper, brews a coffee of unsurpassed quality to meet the taste profile of the most dicerning coffee drinkers. -
Page 13: Brewing Process
The piston follows its course heading to its low dead point. Distribution of coffee through the spout begins once the piston is below the coffee exit. Meanwhile, the brew chamber lifts to allow the paper to advance thereby discarding the spent grounds into the waste chute. TOTAL LITE Revision 1... -
Page 14: Hot Water Tank
TOTAL LITE SERVICE MANUAL FOR INNOVATION Single-Cup Brewer Hot Water Tank Water level switch Heater safety switch Water tank lid Water float Thermostat probe Heating element Overflow exit Tank Valve exit TOTAL LITE Revision 1... -
Page 15: Main Board (Pcb)
J6 - 24V DC output J3 - 24V AC input This is a schematic reference drawing only. Not to scale. The equipment should always be unplugged from the electrical outlet before servicing any components within this main board assembly. TOTAL LITE Revision 1... -
Page 16: Main Board (Pcb) Descriptions
DS15 - Water level switch ON DS19 - Water level switch OFF DS16 - N/A DS17 - N/A DS20 - N/A DS25 - N/A DS27 - N/A DS26 - N/A DS24 - N/A DS23 - N/A TOTAL LITE Revision 1... - Page 17 4. Replace remaining parts in the reverse order; 5. Plug the machine in and turn on the unit; 6. At start-up, the screen will indicate the microchip version #, see picture below; Slot Notch Microcontroller Version # Casing Slot TOTAL LITE Revision 1...
-
Page 18: Compact Flash Card
Single-Cup Brewer COMPACT FLASH CARD Removing main board protection 1. TURN THE MACHINE OFF! FAILURE TO COMPLY CAN CAUSE EQUIPMENT DAMAGE OR INJURIES 2. Remove the main board protection by unscrewing the four screws shown below. Unscrew TOTAL LITE Revision 1... -
Page 19: Removing The Compact Flash Card
If it happens DO NOT PUSH ANYMORE or damage could be done. Flip the card and push it back in. Compact flash card version At start-up, the screen will indicate the GUI (compact flash card) version #, see picture below; TOTAL LITE Revision 1... -
Page 20: Service Software
We highly recommend you to change this password. User level 4: Administrative tasks. Sales counters (audits) and password modification. Factory password for this level: admin We highly recommend you to change this password. User level 5: For development purposes. For cafection only. TOTAL LITE Revision 1... -
Page 21: Service Screen
. BE CAREFUL because water is VERY HOT! 4. This button is used to enter carafe mode. For more information see next page. 5. This button is used to reset the waste bin counter. 6. This button is used to exit service mode. TOTAL LITE Revision 1... -
Page 22: Carafe Mode
If you want to quit carafe mode you need the get back in setup mode and press the ‘‘fill a carafe’’ button so it turns back to white. If you want to make carafes with a Total Lite, you will need to order an extended base. TOTAL LITE Revision 1... -
Page 23: Status Screen
If so, type in your password with the virtual keyboard and then press return. Depending upon the password you enter, you will gain access to different service tabs. See section 6.1 for details about user levels. TOTAL LITE Revision 1... -
Page 24: Recipes Screen
2. This button allows the operator to have a sample of the drink but without the ingredients. No soluble powder or coffee beans will be dispensed. 3. This button allows the operator to have a sample of a complete drink. Note : Samples are not registered in the products counters. TOTAL LITE Revision 1... -
Page 25: Liquids And Ingredients. Tab
20 units = 1 second. The box beside numeric keypad will show an estimated conversion of the value VS liquid amount or value VS ingredient weight when you modify a setting. TOTAL LITE Revision 1... -
Page 26: Brew Cycle Tab
Single-Cup Brewer 6.6.3 Brew cycle tab There are four different brew cycles in the TOTAL LITE. The brew cycle is automatically selected depending on water level in the coffee recipe. For brewer water quantities equal or bellow 100 units, Cycle #4 will be selected. It is a quick cycle for low water levels. -
Page 27: Fast Settings Tab
4. Assign your settings to a cup size (small, medium, large). Press one of the 3 buttons at the bottom of the screen. All drinks will be automatically set in the liquids and ingredients tables. N.B.: The fast settings does not take in charge the gourmet selection, which can only be edited manually. TOTAL LITE Revision 1... -
Page 28: System Screen
7. These buttons are used to enable or disable each size of coffee cups. If only one size is available, the size selection screen will be skipped in the drink selection process. 8. This button is used to reset the system back to factory settings. 9. TO SAVE any parameters change press this button. TOTAL LITE Revision 1... -
Page 29: System 2 Tab
2. After pushing this button the screen below will pop-up and you will be able to set time and date. 3. This button is used to see the coin acceptor status. Note: if there is no coin acceptor in the machine or it is not plugged correctly, this box won’t be visible. TOTAL LITE Revision 1... -
Page 30: Network Tab
C.Get wireless network status Wifi (Wireless Network) section will not keep in memory the wireless network settings. The “ESSID”, “Protcol” and “Password” boxes will always be empty. To check the status of the wireless link, press this button. TOTAL LITE Revision 1... -
Page 31: Admin Tab
If the user enters a wrong number five times, the key icon will be locked. To unlock it you will simply have to enter and exit service mode by pressing ‘‘SW1’’ (as shown in section 4.7) twice. TOTAL LITE Revision 1... -
Page 32: Audit Screen
To get to the screen below press the setup (white) button (SW1 as shown in section 4.7) on the main board inside the door of the machine and press the AUDITS tab. This tab indicates the amount of drinks sold since the machine as been built. TOTAL LITE Revision 1... -
Page 33: Erasable And Counters
It also indicates the total sales, free vends and vends in cash value. 1. This button is used to reset the erasable counters. See next page for more information about how the user counter works. TOTAL LITE Revision 1... - Page 34 -The erasable and permanent sales counts of the Long espresso drink will be increased by 2 under Free vends, Regular. -The erasable and permanent sales counts of the Hot Chocolate drink will be increased by 5 under Free vends, Small. TOTAL LITE Revision 1...
-
Page 35: Initial Setup
Water pressure should be at least 20 PSI and no more than 80 PSI. Tools Required #2 Philips screwdriver Regular medium pliers Adjustable wrench Level indicator Other tools may be required depending on the type of water supply tubing and location. TOTAL LITE Revision 1... -
Page 36: Clearances
0.8 gallon us (3.0 l) 115 VAC Water valves: 1 simple valve ; 1 double valve 15 A circuit Heating element: 1250 watts 60 Hz Chute TOP VIEW Levellers position Hole for the chute Levellers position Drip tray TOTAL LITE Revision 1... -
Page 37: Unpacking
6. Plastic Top 7. Front Panel 8. Filter Paper 9. Chute Base (optional) 10. Chute (optional) 11. 3 Bean Canister (individually packaged) * The keys for the unit are attached to the back panel of the unit. TOTAL LITE Revision 1... -
Page 38: Levelling The Equipment
* You can easily access to the switches by opening the door on the top of the back panel Heater safety switch Heating element wire Water level switch (float) Left side view Water level switch (float) Heater safety switch Right side view TOTAL LITE Revision 1... -
Page 39: Adjusting The Tank Overflow Float
Unpack the 3 beans canister. Remove the tape from transmission. Install the canister on the shelf by aligning the 3 transmissions of the canister with the 3 motors already fixed on the shelf. 3 Beans canister Transmissions Motors TOTAL LITE Revision 1... -
Page 40: Lock The 3 Bean Canister
Place the part on the back of the 3 beans canister with the 6-32 screw already in place. 7.5.4 Install the Plastic Top Simply place the plastic top on the top of the machine as illustrated. TOTAL LITE Revision 1... -
Page 41: Water Line Connection
5. Turn the water valve on, sending water to the brewer. If there are any leaks, tighten connections to stop leakage. This procedure does not take into consideration the installation of a water filtration system. Please refer to the water filter manufacturer installation instructions and incorporate them into the above. TOTAL LITE Revision 1... -
Page 42: Electrical Connection
5. Once the brewing equipment is ready, the selection screen will appear. Off position The main power switch turns the equipment off and on. This switch should be turned OFF when servicing any (AC line voltage) electrical components on the equipment. TOTAL LITE Revision 1... -
Page 43: Water Temperature
Unit safety measures In the event of a temperature probe failure, the tank may start to boil. This will cause it to overflow into the “Overflow Cup” and will automatically shut off the unit. Electronic thermostat TOTAL LITE Revision 1... -
Page 44: Loading Products
2. Remove the plastic top 3. Remove the cap of the canister 4. Do not overfill the canister For the 3 beans canister: Unlock the cover of the canister and open the plastic top cap. Do not overfill the canister. TOTAL LITE Revision 1... -
Page 45: Chute System Installation
3. Insert the large waste chute into the chute base; 4. Install the front panel onto the chute by aligning the prongs to the left of the catch and clip onto the left side of the brewer assembly. TOTAL LITE Revision 1... -
Page 46: Filter Paper Installation
6. Make sure that it is feeding straight. Verify that it stays within the first guide. Improper filter paper feeding will cause a vacuum leak and may cause grounds to spill inside the equipment. TOTAL LITE Revision 1... -
Page 47: Installation Testing
Verify that it is on straight and tube is secure Water temperature is acceptable See water temperature Products are loaded Load the product Brewer and area are clean and tidy Please tidy up All switches are in the right position Toggle on or off TOTAL LITE Revision 1... -
Page 48: Cleaning And Sanitizing
Disposable towels, wet-strength and lint-free · Mild nonabrasive detergent for exterior cleaning · Urn cleaner packets for coffee parts · Spare parts if extensive cleaning is to be done at the shop · Garbage bags for the waste bin TOTAL LITE Revision 1... -
Page 49: Cleaning And Sanitizing Schedule
It is important to keep the brewer and its surroundings clean and tidy. Inspect your brewer both inside and out upon each visit and clean where needed. Please make sure that the unit is clean, safe and functioning before you leave. TOTAL LITE Revision 1... -
Page 50: Automatic Rinsing Function
Rinse both parts under water and dry thoroughly with a clean dry cloth or towel. Reinstall the drip tray onto the brewer and make sure that it is stable. WARNING, drip tray may be full of HOT liquid! TOTAL LITE Revision 1... -
Page 51: Emptying The Waste Bin
It is very important not to yank on the filter paper. Doing so may prevent the brewer from functioning properly. * If you are using the internal waste bin provided with the unit, we recommend to set the counter to 25 cycles. TOTAL LITE Revision 1... -
Page 52: Interior Parts Cleaning & Sanitizing
6. Reinstall all parts in the reverse order. 7. Order a coffee to confirm that all parts or switches have been replaced. Caution! The rinse water is HOT. Be careful not to get any on you while proceeding with the above steps. TOTAL LITE Revision 1... -
Page 53: Soluble Canisters
4. Clean and sanitize under hot water and air dry completely; 5. Reinstall all parts and reload products in the reverse order. 6. Order a beverage to confirm that all parts or switches have been replaced. TOTAL LITE Revision 1... -
Page 54: Coffee Brewer
2. Lift off the funnel and pull out of the brew chamber; 3. Rinse thoroughly under hot water; 4. Air dry completely; 5. Reinstall all parts in the reverse order. 6. Order a large coffee to confirm that all parts have been replaced correctly. TOTAL LITE Revision 1... -
Page 55: Fan
1. Turn off the unit and unplug it to stop the fan; 2. Remove the guard for access; 3. Wipe clean with a dry disposable towel; 4. Replace parts in the reverse order. 5. Tighten gently TOTAL LITE Revision 1... -
Page 56: Stainless Coffee Chute
7. Make sure it is dry before reinstalling. Repeat the steps in reverse order after cleaning for the reinstallation. Stainless coffee chute screw Stainless coffee chute Black connnector (at the back) Red connector (in the front) TOTAL LITE Revision 1... -
Page 57: Plastic Chute Of The 3 Bean Canister
4. Unlock the 3 bean canister; 5. Remove the 3 bean canister; 6. Clean the interior of the plastic chute (accessible by the rear). Repeat these steps in reverse order when the cleaning is done. Plastic chute TOTAL LITE Revision 1... -
Page 58: Preventive Maintenance
Preventive Maintenance (PM) Schedule All parts should be visually inspected upon each visit and cleaned as needed. Parts Monthly Quarterly 10,000 25,000 60,000 100,000 Brewer Inspect Replace Outlet Valves Inspect Water Tank Inspect TOTAL LITE Revision 1... -
Page 59: Brewer Assembly
· if there are coffee grounds in the delivered product; · if the spent coffee grounds remain wet. Screen and Seal Cylinder Brew Chamber Teflon Seal TOTAL LITE Revision 1... -
Page 60: Water Outlet Valves
8. Reinstall by repeating in the reverse order Tank guard Tank Lid Fig. 1.1 Valves Valves Fig. 1.2 Double valve Simple valve If you choose to install a water filtration system, it is recommended that the filter be checked on a monthly basis. TOTAL LITE Revision 1... -
Page 61: Hot Water Tank
Upon visual inspection, you may wish to replace the element, probe and the water level and heater safety switch. Use a scale remover product such as Scale Kleen by Everpure. See the manufacturer instructions for more details. Element Probe TOTAL LITE Revision 1... -
Page 62: Servicing Parts
5. Direct the tube into the pail and remove the red plug. Warning, water may be hot!; 6. Drain the water from the water tank completely; 7. Reinstall by repeating these steps in the reverse order. Red plug Drain tube TOTAL LITE Revision 1... -
Page 63: Shutdown / Storage
Do not sit the brewer on its right side (wheels and yoke) or straight up as these positions are not sturdy and could cause it to fall. TOTAL LITE Revision 1... -
Page 64: Brewer Assembly
1 o’clock; Align the left edge of the brewer on the left bracket support; Push the brewer back completely into the dog drive motor; Slide the brewer’s retaining pin up and then left. drive TOTAL LITE Revision 1... -
Page 65: Microcontroller (Eprom)
5. Plug the machine in and turn on the unit; 6. At start-up, the LCD will indicate the microchip version #; 7. Test the new features outlined in the documentation supplied with the new microcontroller. Slot Notch Microcontroller PLCC Version # Extractor Slot Casing TOTAL LITE Revision 1... -
Page 66: Main Board
5. Plug in the brewer and turn it on; 6. Verify on the screen that all is functioning. All cables must be replaced in the correct order and direction before turning the power on or the board will fail and be damaged. TOTAL LITE Revision 1... -
Page 67: Troubleshooting
When a bill is inserted the same value of coins must be available for change in the coin changer tubes. If not enought coins, the bill will be returned. There is an exception for $1.00 bills. No need for change in the coin acceptor tube to accept the $1.00 bills. TOTAL LITE Revision 1... -
Page 68: Error Message List
Check for any water in the overflow drip tray. Make sure no water is touching the two probe wires. The status of the overflow tray probes can be monitored thru DS18 green LED. When the tray is dry, DS18 is off. TOTAL LITE Revision 1... -
Page 69: Error Message List (Continued)
This message will be on screen after powering ON the coffee brewer until water tank gets full. Water temperature not high enough. The TOTAL LITE will stop dispensing drinks if actual water temperature is below the ‘Warming up’ temperature in the service menu, ‘system’ tab. To disable this feature set the warming up temperature to 0. - Page 70 □ □ □ □ □ □ □ □ □ □ □ □ □ TOTAL LITE Revision 1...
- Page 71 □ □ □ □ □ □ □ □ □ □ □ □ □ □ TOTAL LITE Revision 1...
- Page 72 □ □ □ □ □ □ □ □ □ □ □ □ □ □ TOTAL LITE Revision 1...
Need help?
Do you have a question about the TOTAL LITE and is the answer not in the manual?
Questions and answers