Table of Contents
Advertisement
Quick Links
Advertisement
Table of Contents

Subscribe to Our Youtube Channel
Related Manuals for DELVCAM DELV-FPV-7


Summary of Contents for DELVCAM DELV-FPV-7
- Page 1 Delvcam DELV-FPV-7 User Guide...
-
Page 2: Table Of Contents
IMPORTANT SAFETY INSTRUCTIONS: Please read User Guide before using this product. Please keep User Guide for future reference. Please read the cautions to prevent possible danger and loss of property. FEATURES: High resolution: 800×480; High brightness: 400cd/㎡; ... -
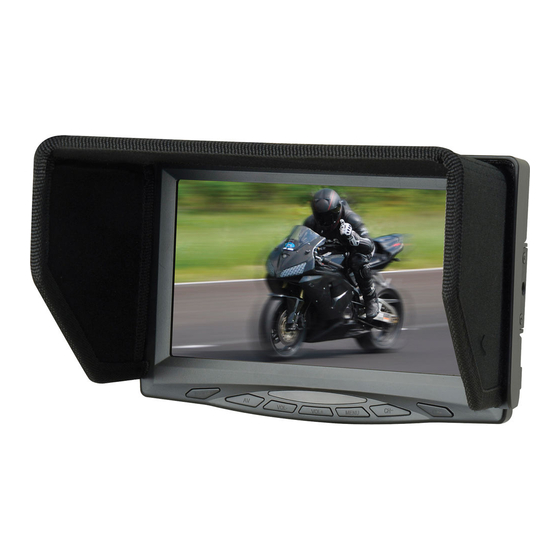
Page 3: Product Description
1. PRODUCT DESCRIPTION 1. POWER: ON/OFF (Light turns to green when power on). 2. AV: Video & 5.8G switch. 3. VOL-: Volume down; value of menu option decrease. 4. VOL+: Volume up; value of menu option increase. 5. MENU: To activate OSD menu & main menu. 6. -
Page 4: Remote Control
1. Antenna port 2. Speaker 3. VESA Mounting interface 2. REMOTE CONTROL 1. MUTE 2. NO USE 3. Video & 5.8G switch 4. ◄: Volume down or to adjust the value of function 5. To switch display mode 6. Power on / off 7. -
Page 5: Aerial Photography Signal Receiver
3. AERIAL PHOTOGRAPHY SIGNAL RECEIVER 3-1 Frequency Chart * Note: Dual receivers frequency: Band 3&4 0: ON; 1:OFF Frequency / L.O. Band 1 B1:5.865GHz/5.385GHz B2:5.845GHz/5.365GHz B3:5.825GHz/5.345GHz B4:5.805GHz/5.325GHz B5:5.785GHz/5.305GHz B6:5.765GHz/5.285GHz B7:5.745GHz/5.265GHz B8:5.725GHz/5.245GHz Band 2 C1:5.733GHz/5.253GHz C2:5.752GHz/5.272GHz C3:5.771GHz/5.291GHz C4:5.790GHz/5.310GHz C5:5.809GHz/5.329GHz C6:5.828GHz/5.348GHz C7:5.847GHz/5.367GHz C8:5.866GHz/5.386GHz Band 3 D1:5.705GHz/5.225GHz... - Page 6 Frequency Control Demo GENERAL transmitter setting with DELV-DUALFPV-7ss DJI Transmitter setting with DELV-DUALFPV-7 Radio signal receiving antenna...
-
Page 7: Wiring Instructions
1. Connected to the wireless receiving antenna port. 2. When a product with wireless module connected with antenna, and then connecting with flying camera system, you can receive the sound and image signals. 4. WIRING INSTRUCTIONS 4-1 Video output cable 1. - Page 8 ITEMS OPTIONS Brightness 0 - 100 Contrast 0 - 100 Color 0 - 100 Language English, Chinese ITEMS OPTIONS Volume 0 - 100 ITEMS OPTIONS Normal, Down (To reversal image up and down) Normal, Right (To reversal image left and right) ZOOM 16:9、4:3 S AUTO...
- Page 9 ITEMS OPTIONS C-SYS AUTO、PAL、NTSC、SECAM ITEMS OPTIONS SLEEP 0 - 240 TIME User-definable OFF-TIME User-definable ON-TIME User-definable...
-
Page 10: Vesa Installation Instructions Figure
VESA INSTALLATION INSTRUCTIONS FIGURE Screw ( Diameter 4mm×Length 20mm) 7. ACCESSORIES Standard accessories:... -
Page 11: Parameters
1. Sun Shade 1 piece 2. 12V DC adapter 1 piece 3. AV input cable 1 piece 4. AV output cable 1 piece 5. VESA battery plate 1 piece 6. Battery plate 2 Pieces 7. Remote control 1 piece 8. 5.8GHz wireless AV receiver 1 piece 9. -
Page 12: Trouble Shooting
9. TROUBLE SHOOTING CASE(condition) COUNTER MEASURE Check the contrast, brightness, Only black & white picture hue and color are proper or not, and adjust Check power input No picture connection. Check if the battery installed properly or the battery is out. Remote control doesn’t work Remote signal interfered by some obstruction.
Need help?
Do you have a question about the DELV-FPV-7 and is the answer not in the manual?
Questions and answers