Table of Contents
Advertisement
Quick Links
Advertisement
Table of Contents

Related Manuals for DELVCAM DELV-HD8TS


Summary of Contents for DELVCAM DELV-HD8TS
- Page 1 DELV-HD8TS HDMI-VGA-VIDEO MONITOR With Dual Composite video/Audio and TOUCHSCREEN...
-
Page 2: Table Of Contents
Thank you for purchasing the DELVCAM HD-7 High Definition liquid crystal display monitor. This product employs new integrate circuits and high quality TFT LCD modules. It operates with low power consumption, emits no radiation, and is a compact form factor. The color TFTLCD is the most suitable display for VGA,VCD, DVD and GPS system for motorcars and ships. - Page 3 SETUP INSTRUCTIONS 1. Please use the adapter attached in the accessory. 2. Do not expose this product to direct sunlight, heat or humid conditions. 3. Keep away from strong light while using this product so as to obtain the clearest and the most colorful picture.
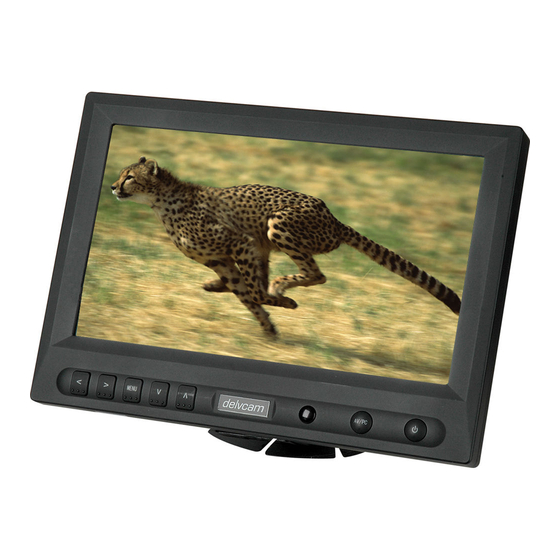
- Page 4 CONTENTS 1. Product description Description of monitor Picture 1(A) 1. Logo : Power on/off :AV1/AV2/PC/HDMI switch. 4. Infrared ray receiving window :Subject selection key, or to adjust the brightness directly. :Subject selection key, or to adjust automatically at VGA mode. :To activate OSD menu and Infrared ray receiving window :Decrease the volume level or to adjust settings on the set menu :Increases the volume level or to adjust settings on the set menu...
-
Page 5: Remote Controller
Remote controller Picture 2 :Power on/off : MUTE : To activate OSD menu. : Volume down or to adjust the value of setting function : Volume up or to adjust the value of setting function : Selection key, to adjust the brightness directly. : Selection key, to adjust phase directly. -
Page 6: Matched Cable
Matched cable Picture 3 (AV cable) 1. Connect the No.1 SKS input jack to the SKS input jack which is on the back of the monitor 2. No.2 Black 9-pin plug for VGA signal input (Connect it with No.1 jack on picture 4) 3. -
Page 7: Connection
Connection 1. Connect the SKS input jack in supplied accessories to the SKS input jack which is on the back of the monitor tightly, after make sure them surely connected together, then connect the other side of the SKS jack with relevant jacks. Do them according to the following description: 2. -
Page 8: Osd In Pc Mode
OSD in PC mode: OSD in AV mode: (Color) You can press “ ”/“ ” on the unit or on the remote controller to select the items: (Adjust) (OSD) (Function) (Sound),and confirm buy pressing “ ”/“ ” on the unit or on the remote controller, then push “ ”/“... -
Page 9: Description Of Osd
Description of OSD: ●. OSD In PC mode: (Color): After enter into “Color” item of OSD, use “ ”/“ ”to select and then push“ ”/“ ”to adjust. ※Brightness: To adjust the brightness. ※Contrast: To adjust the contrast of image. ※ Color Temp:To adjust the contrast of Color Temp. Color temperature of OSD is adjustable. - Page 10 (Adjust): ※ Auto Config:To adjust automatically .If the auto-adjust is not satisfy your request, you can adjust manually. ※ H Position:To adjust the picture in horizontal. ※ V Position:To adjust the picture in vertical. ※ Phase:To adjust the phase. ※ Clock:To adjust the clock, make field and line synchronization.
- Page 11 (OSD): ※ Language:2 languages for OSD as below: 简体中文 English ※ H Position:To adjust the OSD position in horizontal. ※ V Position:To adjust the OSD position in vertical. ※ OSD Timeout:To adjust the clock. ※ Transparent:To adjust the level of transparent.
- Page 12 (Function): ※ Reset:Back to original setting. ※ Display Ratio:To change the display ratio,16:9/4:3. ※ LR Rotation:To change the picture left/right. ※ UD Rotation:To change the picture up/ down.
- Page 13 (Sound): ※ Volume: To adjust the volume. OSD In AV mode: (Color) ※Brightness: To adjust the brightness. ※Contrast: To adjust the contrast. ※Hue: To adjust the hue adjust in NTSC mode. ※Saturation: To adjust the saturation.
- Page 14 (OSD) ※ Language:2 languages for OSD as below: 简体中文 English ※ H Position: To adjust the OSD position in horizontal. ※ V Position:To adjust the OSD position in vertical. ※ OSD Timeout:To adjust the clock. ※ Transparent:To adjust the level of transparent.
- Page 15 (Function) ※ Reset:Back to original setting. ※ Display Ratio:To change the display ratio,16:9/4:3. ※ LR Rotation:To change the picture left/right. ※ UD Rotation:To change the picture up/ down. (Sound) ※ Volume: To adjust the volume.
-
Page 16: Parameter
3.Parameter Display panel TFT LCD 8.0inch 1440000 Pixels 4. Accessories Resolution 800×480 (VGA) Power adapter Up resolution 1920×1440(VGA) Brightness 300 cd/㎡(without touch screen) Car power adapter Contrast 500:1 SKS cable Viewing angle 70°/70°,50°/60° (L/R,U/D) Video signal input 0.7~1.4Vp-p/75Ω 9-pin VGA cable VGA signal input H:30~60kHz V:60~75Hz... -
Page 17: Troubleshooting
5. Trouble shooting 1. Only display black and white image Please make sure that the color level settings of saturation brightness and contrast is proper. 2. No image after connected to power Please check whether the AV or VGA cable is tightly connected to VGA output, and make sure that you use standard power adopter to the monitor. -
Page 18: Safety Precautions
SAFETY PRECAUTIONS 1. To prevent fire or shock hazard, do not expose this equipment to an environment of high humidity and/or dust. Do not use in an unprotected outdoor installation or any area classified as overly damp or wet. 2. The temperature for installation should be kept between 0°C ~ 60°C. Avoid direct sunlight exposure or extreme changes of temperature over a short period of time. - Page 19 Notes: ________________________________________________________ ________________________________________________________ ________________________________________________________ ________________________________________________________ ________________________________________________________ ________________________________________________________ ________________________________________________________ ________________________________________________________ ________________________________________________________ ________________________________________________________ ________________________________________________________ ________________________________________________________ ________________________________________________________...
Need help?
Do you have a question about the DELV-HD8TS and is the answer not in the manual?
Questions and answers