Table of Contents
Advertisement
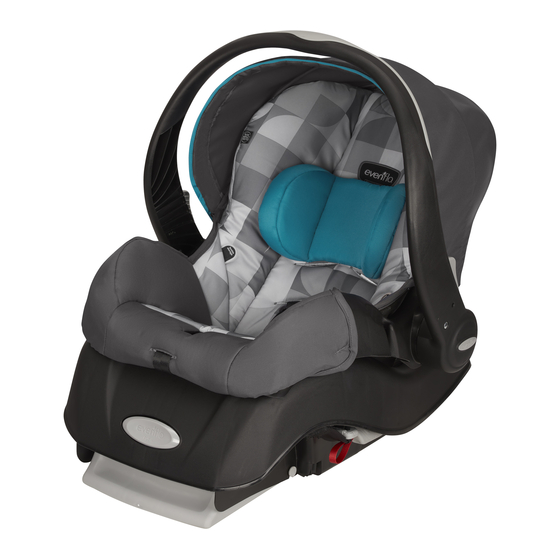
Embrace
Rear-facing Child
Restraint System
Owner's Manual
Keep for future use
Rear-facing
1.8 to 15.8 kg
(4 to 35 lbs)
43 to 76 cm
(17 to 30 in.)
Para instrucciones en Español,
llamar al: 1-800-233-5921
WARNING:
To reduce the risk of serious injury
or death, read this owner's manual prior
to installing and using this child restraint.
© 2015 Evenflo Company, Inc.
35/Advanced
™
25700968
3/15
Advertisement
Table of Contents

Related Manuals for Evenflo Embrace 35


Summary of Contents for Evenflo Embrace 35
- Page 1 Embrace 35/Advanced ™ Rear-facing Child Restraint System Owner’s Manual Keep for future use Rear-facing 1.8 to 15.8 kg (4 to 35 lbs) 43 to 76 cm (17 to 30 in.) Para instrucciones en Español, llamar al: 1-800-233-5921 WARNING: To reduce the risk of serious injury or death, read this owner’s manual prior to installing and using this child restraint.
-
Page 2: Table Of Contents
More children are killed every year as passengers in car U.S. REGULATORY NOTICE crashes than by any other type of injury. To reduce the risk This child restraint meets all the requirements of of SERIOUS INJURY or DEATH, read this owner’s manual and Federal Motor Vehicle Safety Standard 213. -
Page 3: Premature Infant Use
WARNING PREMATURE INFANT USE Before using this child restraint for preterm or low General Warnings birth weight infants, you must read and follow the • This product contains magnets. Before use, consult guidelines in this section. According to the U.S. National Highway Traffic Safety your family doctor about the compatibility of this Administration, a properly installed child restraint product with pacemakers and similar devices. -
Page 4: Warnings
WARNING WARNING Air Bag Warnings Location Warnings • ALWAYS read and follow exactly the instructions • DO NOT use this restraint in the front seat of a vehicle equipped with an air bag. Interaction that accompany your vehicle and child restraint. between a rear facing restraint and air bags may •... -
Page 5: Latch Warnings
WARNING WARNING Vehicle Seat Belt Warnings – cont. LATCH Warnings • DO NOT use this child restraint in a vehicle • The LATCH (Lower Anchors and Tethers for equipped with seat belts that only lock during a CHildren) system is intended to be used ONLY as sudden stop or crash (emergency locking retractor –... -
Page 6: Recall Information For U.s. Customers
ONLY the Embrace 35 convenience base with lollipops or ice cream on a stick. The object can the Embrace 35 carrier. The Embrace 35 carrier injure the child if the vehicle swerves or hits a bump. WILL NOT LOCK safely into any other convenience •... -
Page 7: Public Notice For Canadian Customers
Public Notice for Canadian Customers Storing Your Instructions • Child restraints could be recalled for safety reasons. You must register this restraint to be reached in a public notice. Send your name, address, the re- straint’s model number, and manufacturing date to Evenflo Company, Inc. -
Page 8: Visual Glossary
35 Carrier. ONLY use the Embrace 35 Carrier with this base. Adjustment Foot Level Window Embrace Convenience Base This base DOES NOT work with the Embrace 35 Carrier. NEVER use it with Level the Embrace 35 Carrier. Adjustment Button Vehicle Seat Belt/Lower Anchor... -
Page 9: Front/Back View
Visual Glossary Visual Glossary Front View Back View Canopy Carrier Release Handle Handle Harness Slots Harness Slots SensorSafe Chest Clip Instruction Handle Handle Storage Area Release Release Seat Pad (behind seat pad) Buckle Harness Release Straps Harness Harness Straps Release Carrier Button Harness... -
Page 10: Using The Embrace Handle
Using the Embrace Handle Using the Embrace Handle To change handle positions, squeeze both red IMPORTANT: Always secure the child in the carrier. Handle Releases and rotate the handle to the desired Refer to “Securing your Child in the Carrier” on page 33. position. -
Page 11: Installation Checklist
Proper Installation Installation Checklist WITH 1. Secure convenience base to the vehicle seat. the Convenience Base Convenience base is securely installed with lower anchor connector assembly (shown) Child Requirements (pages 20-22). Weight: 1.8 – 15.8 kg (4 – 35 lbs) Height: Top of head must be at least 25 mm (1 inch) Convenience base is securely installed with below the top of the child restraint seat back. -
Page 12: Installing The Convenience Base With The Lower Anchor Connector Assembly
Installing the Convenience Base Before you begin, be sure the with the Lower Anchor Connector vehicle is on a level surface. Place the base on the vehicle seat Assembly and check the level indicator WARNING • This lower anchor connector assembly is intended to be used ONLY as described in these instructions. -
Page 13: Installing Convenience Base With Vehicle Seat Belt
Installing the Convenience Base Know Your Lower Anchor with the Vehicle Seat Belt Connector Assembly The lower anchor connector assembly that comes with WARNING your child restraint will be one of the types below. SecureRight Quick Connector • The carrier MUST be locked firmly into the Adjuster... -
Page 14: The Vehicle Seat Belt
Secure the base to your vehicle seat by routing the vehicle seat belt through the openings on the sides of the base. IMPORTANT: Some ELR vehicle belts can be switched so that they lock when tightened. It may not be necessary WARNING to use a locking clip in these situations. -
Page 15: Releasing The Carrier From The Base
Releasing the Carrier from the Base Position 2 The level indicator must be completely green If you have fully adjusted the convenience base and the level indicator is still not level, use a tightly rolled towel or small blanket beneath the front edge of the base. -
Page 16: Proper Installation Without The Convenience Base
Proper Installation Installation Checklist WITHOUT 1. Place the child in the carrier. The child’s back and bottom are flat against the Convenience Base the back and bottom surfaces of the carrier. Top of child’s head is at least 25 mm (1 inch) Child Requirements below the top of the child restraint seat back. -
Page 17: Installing The Carrier Without The Convenience Base
Installing the Carrier without the LAP AND Convenience Base LAP BELT SHOULDER BELT Route ONLY the lap portion of the vehicle seat belt through the vehicle belt slots on the carrier. In vehicles with a lap and shoulder belt , DO NOT route the shoulder belt through the belt slots. -
Page 18: Securing The Child In The Carrier
Securing the Child in the Carrier Canadian OR U.S. Models U.S. Models ONLY Position 1 Position 4 Place the baby into the carrier. Baby’s bottom and back should be flat against the seat. If there is a gap, baby will not be comfortable. Squeeze both handle releases and move the handle to either Position 1 (Canadian OR U.S. -
Page 19: Removing The Child From The Carrier
Removing the Child from the Carrier Press the red buckle release , and remove the buckle tongues. The harness straps must be snug against the child. A snug strap should not allow any slack. It lies in Align the two sides of the a relatively straight line chest clip and snap... -
Page 20: Changing The Harness Position
Changing the Harness Position As your child grows, you will need to change the harness Insert both harness strap position so they are routed through the slots straps into the new closest to the child’s shoulders. The shoulder harness harness position slots. straps should ALWAYS be as close as possible to, but... -
Page 21: Changing The Crotch Strap Position
Changing the Crotch Strap Position As your child grows, you will need to change the crotch Loosen the harness strap position so that it is in the slot closest to your child. straps (p. 35) and move The crotch strap should ALWAYS be as close as possible the strap out of the to, but NEVER under, the child’s bottom. -
Page 22: Removing The Lower Anchor Connector Assembly
Removing the Lower Anchor Connector Assembly Tilt and slide the adjuster Press the adjuster release to loosen the lower anchor button to loosen the lower connector assembly. anchor connector assembly Adjuster Release Adjuster Button When the lower anchor connector assembly is not in use, you MUST securely store it in the area provided in... - Page 23 WARNING While holding the belts and Remove locking clip from vehicle seat belt when buckle tongue , thread not used with a child restraint, or the vehicle seat the locking clip onto the belt will not properly restrain an adult or child. vehicle seat belt, and slide it Serious injury could occur.
-
Page 24: General Information About Sensorsafe
General Information about SensorSafe General Information about SensorSafe Battery Usage Secure your child into the child restraint as you would normally. The SensorSafe Receiver Plug monitors both • To preserve battery life, always store the SensorSafe the Chest Clip Transmitter and the vehicle. When you Chest Clip in the un-clipped position. -
Page 25: Using Sensorsafe
Using SensorSafe Using SensorSafe Plug in the SensorSafe Receiver. Park the vehicle and turn off the ignition. Within 2 seconds of parking your vehicle and turning Locate the 16PIN OBDII off the ignition you will hear the SensorSafe reminder, port in your vehicle. -
Page 26: Using As An Infant Carrier
WARNING Using as an Infant Carrier Secure the child in the carrier by following “Securing the NEVER • place this carrier near the edges of counter Child in the Carrier” on page 33. tops, tables, or other high surfaces. The child’s movements can cause the carrier to slide and fall. -
Page 27: Securing Your Child Restraint In Aircraft
Securing Your Child Restraint in Aircraft Installing Convenience Base in Aircraft The Federal Aviation Administration (FAA) recommends that you secure your child for air travel IMPORTANT: Before installing the child restraint, make in an appropriate child restraint based on your child’s sure the aircraft seat is in a fully upright position. - Page 28 Installing Convenience Base in Aircraft Installing Convenience Base in Aircraft Placing the Carrier in the Base Secure the carrier to the base by placing it into the base and pressing down on the front and back. The carrier MUST locked firmly into the base.
-
Page 29: Installing Carrier Without Convenience Base In Aircraft
Installing Carrier without Convenience Installing Carrier without Convenience Base in Aircraft Base in Aircraft Aircraft Seat Belt Place the child restraint on the aircraft seat rear-facing, as shown above. Route the aircraft seat belt through the belt slots the carrier, as shown above. Position 4 Move the handle out of the way by squeezing both handle releases... -
Page 30: Installing The Canopy
Installing the Canopy Installing Carrier without Convenience Base in Aircraft Insert front canopy end into the holder Repeat on the other side. Installing the Accessories The aircraft seat belt must be as tight as possible. Route the excess seat belt strap back through the Not available on all models. -
Page 31: Installing The Accessories
Installing the Accessories Replacement Parts Not available on all models. Not available on all models. Styles may vary. To order replacement parts you can order online at www.evenflo.com or contact Evenflo. When you Place the optional contact us, please have the product model number and Boot over the child date of manufacture (found on the back of the child... -
Page 32: Limited Warranty
APPLICABLE LAW, ANY IMPLIED WARRANTY OF MERCHANTABILITY OR FITNESS FOR A PARTICULAR PURPOSE ON THIS PRODUCT IS HEREBY DISCLAIMED. EVENFLO SHALL NOT BE LIABLE FOR ANY INCIDENTAL, CONSEQUENTIAL, SPECIAL OR PUNITIVE DAMAGES OF ANY KIND FOR BREACH OF THE EXPRESS LIMITED WARRANTY ON THIS PRODUCT, OR ANY WARRANTY IMPLIED BY OPERATION OF LAW. - Page 33 After thoroughly reading and following these instructions, store them in the carrier behind the seat pad, as shown. www.evenflo.com USA: 1-800-233-5921, 8 AM – 5 PM E.T. Canada: 1-937-773-3971 México: 01-800-706-12-00...
Need help?
Do you have a question about the Embrace 35 and is the answer not in the manual?
Questions and answers