Table of Contents
Advertisement
Meijer.com
Para instrucciones en Español, llamar al: 1-800-233-5921
OWNER'S MANUAL
Keep for future use.
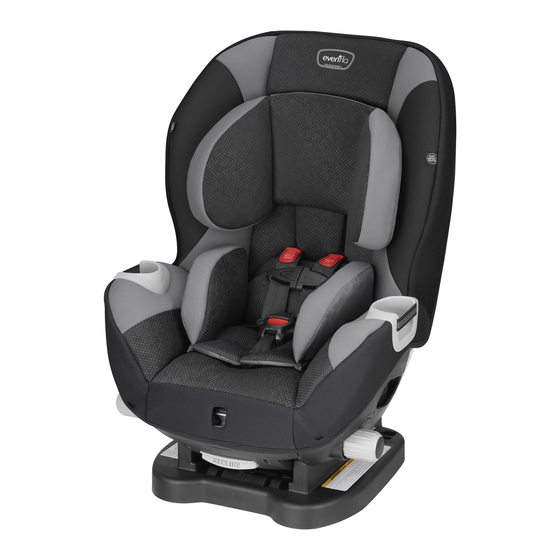
Triumph
™
Child Restraint System
Child Requirements
Weight: 2.3 – 29.4 kg (5 – 65 lbs)
Height: 48 – 127 cm (19 – 50 inches)
WARNING
WARNING
To reduce the risk
of SERIOUS INJURY or
DEATH, read this owner's
manual prior to installing
and using this child
restraint.
25700784 5/12
© 2012 Evenflo Company, Inc.
Advertisement
Table of Contents

Related Manuals for Evenflo Triumph


Summary of Contents for Evenflo Triumph
- Page 1 Weight: 2.3 – 29.4 kg (5 – 65 lbs) Height: 48 – 127 cm (19 – 50 inches) WARNING WARNING To reduce the risk of SERIOUS INJURY or DEATH, read this owner’s manual prior to installing and using this child restraint. 25700784 5/12 © 2012 Evenflo Company, Inc.
-
Page 2: Table Of Contents
Premature infants may have difficulty breathing when Visual Glossary ............8 in a sitting position. Using the Triumph Rear-facing ..... 10 Using the Triumph Forward-facing ....12 The American Academy of Pediatrics recommends Rear-facing Installation Using the Seat Belt ..... 14 that children ride in the rear-facing position to Rear-facing Installation Using LATCH...... -
Page 3: Warnings
DO NOT use the child restraint. Consult vehicle owner’s to strike your child. manual, try a different seating location or call Evenflo. Premature Infants • DO NOT use this or any child restraint with a premature infant until after consulting your doctor. - Page 4 WARNING WARNING Meijer.com Forward-facing Warnings • ALWAYS be sure that the LATCH hook is fully engaged onto • If your child weighs more than 29.4 kg (65 lbs) or their the LATCH anchor point by pulling hard on the LATCH strap. MUST shoulders are above the highest harness level, you If it is not totally engaged, the LATCH system will not secure...
-
Page 5: Safe Practices
• DO NOT attach additional padding, toys, or other devices not made by Evenflo to the child restraint. Items • Child restraints could be recalled for safety reasons. not tested with the child restraint could injure the child. You must register this restraint to be reached in a re- •... -
Page 6: Visual Glossary
Meijer.com Visual Glossary Visual Glossary Your vehicle components may be significantly different than pictured. Consult your owner’s manual to help you identify your vehicle components. Front Seat Lap Fold-down Armrest and Shoulder Belts Consult your vehicle’s owners manual. Rear Front Headrests Headrests Tether Anchors... -
Page 7: Using The Triumph Rear-Facing
Meijer.com Using the Triumph ™ Installation Checklist Rear-facing WARNING Child Requirements for Rear-facing: When using this restraint rear-facing, DO NOT loosen the vehicle seat belt to provide more leg room as this will • Weight: 2.3 to 18 kg (5 to 40 lbs) prevent the child restraint from protecting your child. -
Page 8: Using The Triumph Forward-Facing
Meijer.com Using the Triumph ™ Installation Checklist Forward-facing WARNING Child Requirements for Forward-facing: If your child weighs more than 29.4 kg (65 lbs) or • Weight: 10 to 29.4 kg (22 to 65 lbs) their shoulders are above the highest harness level,... -
Page 9: Rear-Facing Installation Using The Seat Belt
Meijer.com Rear-facing Installation Adjust the recline to Using the Seat Belt Position #1 by lifting the back of the seat slightly while pulling WARNING the Recline Right lever NEVER turn a child restraint forward-facing with an infant weighing less than 10 kg (22 lbs) or less than one year of age. - Page 10 Meijer.com WARNING The seat belt must be as tight as possible. • To avoid a strangulation hazard, you MUST tightly roll Put your full weight into or fold excess tether strap and secure with the strap/ the child restraint as you rubber band.
-
Page 11: Rear-Facing Installation Using Latch
Meijer.com Rear-facing Installation Know Your LATCH The LATCH system that comes with your child Using LATCH restraint will be one of the two types below. SecureRight™ Quick Connector™ LATCH is a system for attaching the child restraint to Adjuster your vehicle seat. It is to be used in place of your Strap vehicle’s seat belts, and can be used in vehicles with LATCH anchors. - Page 12 Meijer.com Correct Incorrect IMPORTANT: Make sure both LATCH Quick Connectors Crossing your arms, insert the ends of the LATCH are facing upward and the straps are not twisted. strap in the rear-facing belt path openings, as shown (front openings). Note: Make sure the adjust- ment buckle enters the opening on the correct side Using your full...
-
Page 13: Forward-Facing Installation Using The Seat Belt
Meijer.com Forward-facing Installation WARNING Using the Seat Belt If the vehicle seat belts are not routed correctly, the child restraint may not protect your child in a crash. The Intermediate Recline Position (Position #2) and Full Upright Position (Position #3) are ONLY for forward-facing use the child must weigh... - Page 14 Pull the end of the strap to tighten. Remove all slack in the strap. Note: If your tether strap does not reach the vehicle tether anchor bracket, call Evenflo’s ParentLink for a tether extender. WARNING • To avoid a strangulation hazard, you MUST tightly roll or fold excess tether strap and secure with the strap/rubber band.
-
Page 15: Forward-Facing Installation Using Latch
Meijer.com Forward-facing Know Your LATCH The LATCH system that comes with your child Installation Using LATCH restraint will be one of the two types below. SecureRight™ Quick Connector™ LATCH is a system for attaching the child restraint to Adjuster Strap your vehicle seat. - Page 16 Meijer.com Remove the LATCH strap from the rear- facing position (front openings). Refer to your vehicle owner’s manual to locate the lower anchors on your vehicle seat. Attach the left hook , or clip , to the left anchor and the right hook to the right anchor. DOUBLE CHECK that each LATCH hook or clip is fully engaged...
-
Page 17: Using The Locking Clip
Remove all slack in the strap. Locking Clip Note: If your tether strap does not reach the vehicle Consult your vehicle tether anchor bracket, call Evenflo’s ParentLink for a owner’s manual before tether extender. installing the locking clip. -
Page 18: Securing Your Child In The Child Restraint
Meijer.com Securing Your Child Thread the locking clip onto in the Child Restraint the seat belt and slide it into place. Re-buckle the seat belt. Locking clip must be placed within 13 mm (0.5 in.) of seat belt buckle. Place baby in the child restraint. The baby’s back and bottom should be flat against the restraint. -
Page 19: Adjusting The Crotch Strap
Meijer.com The harness straps must be snug against the child. A snug strap should not allow any slack. It lies in a relatively straight line without sag- ging. It does not press on the child’s flesh or push the child’s body into an unnatural position. -
Page 20: Removing Child From The Restraint
Meijer.com Removing Child from the Restraint Removing the LATCH System To unfasten the chest clip, push the release button and pull apart. Press the adjuster release button to loosen harness strap. Press the red buckle release , and remove the buckle tongues. -
Page 21: Removing The Tether Strap
Meijer.com Removing the Tether Strap Removing the Seat Pad You will need to remove your seat pad The tether strap that comes with your child for cleaning. restraint will be one of the two types below. Unbuckle harness straps and disconnect chest clip. Press the adjuster release Tilt and slide the to loosen... -
Page 22: Installing The Accessories
Meijer.com Installing the Accessories WARNING Not available on all models. Use the Body Pillow and Infant Head Support with the child restraint in the rear-facing position ONLY. The optional Body Pillow is used to help support your child by placing it in the restraint, as shown. -
Page 23: Replacement Parts
(found on the back of the child restraint). sole obligation under this express limited warranty shall be, at Evenflo’s option, to repair or replace any Product that is determined to be defective by Evenflo and determined to be covered by this warranty. - Page 24 Meijer.com...
- Page 25 Meijer.com • USA: 1-800-233-5921, 8 AM to 5 PM E.T. • Canada: 1-937-773-3971 • México: 01-800-706-12-00...
Need help?
Do you have a question about the Triumph and is the answer not in the manual?
Questions and answers