Sign In
Upload
Manuals
Brands
Ricoh Manuals
All in One Printer
C3030
Ricoh C3030 Manuals
Manuals and User Guides for Ricoh C3030. We have
4
Ricoh C3030 manuals available for free PDF download: Operating Instructions Manual, General Settings Manual, How To Do
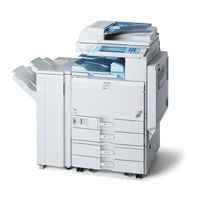
Ricoh C3030 Operating Instructions Manual (964 pages)
Brand:
Ricoh
| Category:
All in One Printer
| Size: 57.91 MB
Table of Contents
Français
13
What You Can Do with this Machine
5
Copier, Facsimile, Printer, and Scanner Functions
5
Utilizing Stored Documents
6
Paperless Fax Transmission and Reception
7
Fax Transmission and Reception through the Internet
8
Using the Scanner in a Network Environment
9
Administrating the Machine/Protecting Documents (Security Functions)
10
Monitoring the Machine Via Computer
11
Preventing an Unauthorized Copy
12
Table of Contents
13
Notice
15
Notice to Wireless LAN Interface (Optional) Users
15
How to Read this Manual
18
Symbols
18
Safety Information
19
Safety During Operation
19
Positions of WARNING and CAUTION Labels
23
ENERGY STAR Program
25
Recycled Paper
26
Machine Types
26
1 Getting Started
27
Guide to Components
27
Options
29
Control Panel
31
Display
33
Simplified Display
33
When the Authentication Screen Is Displayed
35
User Code Authentication (Using the Control Panel)
35
User Code Authentication (Using a Printer Driver)
36
Login (Using the Control Panel)
36
Log off (Using the Control Panel)
37
Login (Using a Printer Driver)
37
Login (Using Web Image Monitor)
38
Log off (Using Web Image Monitor)
38
Changing Modes
39
System Reset
40
Turning on the Power
41
Turning on the Main Power
41
Turning on the Power
42
Turning off the Power
42
Turning off the Main Power
43
Saving Energy
44
2 Entering Text
45
Available Characters
45
Keys
45
How to Enter Text
46
3 Appendix
49
Dos and Don'ts
49
Saving Color Copies
50
Software and Utilities Included on the CD-ROM
51
Viewing the Contents of the CD-ROM
52
Printer Drivers for this Printer
52
TWAIN Driver
54
LAN-Fax Driver
55
Desktopbinder Lite
56
Smartdevicemonitor for Admin
57
Desktopbinder-Smartdevicemonitor for Client
58
Installing the Operating Instructions
59
PDF Manuals
60
Opening the Installed Operating Instructions
61
Opening from the Icon
61
Opening from the [Start] Menu
61
Opening from the CD-ROM
62
Copy Paper
63
Recommended Paper Sizes and Types
63
Unusable Paper
66
Paper Storage
67
Index
68
English
75
How to Read this Manual
79
Symbols
79
Display Panel
80
Accessing User Tools (System Settings)
81
Changing Default Settings
81
Quitting User Tools
82
Menu Protect
82
Connecting to the Interfaces
83
Connecting to the Ethernet Interface
84
Connecting to the USB Interface
85
Connecting to the IEEE 1394 Interface
86
Connecting to the IEEE 1284 Interface
87
Connecting to the IEEE 802.11B (Wireless LAN) Interface
88
1 Connecting the Machine
83
Network Settings
91
Settings Required to Use the Printer/Lan-Fax
91
Settings Required to Use Internet Fax
94
Settings Required to Use E-Mail Function
98
Settings Required to Use Scan to Folder Function
102
Settings Required to Use the Network Delivery Scanner
105
Settings Required to Use Network TWAIN Scanner
108
Settings Required to Use Document Server
110
Using Utilities to Make Network Settings
113
Connecting the Machine to a Telephone Line and Telephone
122
Connecting the Telephone Line
122
Selecting the Line Type
123
General Features
125
Output Tray Settings
128
2 System Settings
125
Tray Paper Settings
129
Timer Settings
134
Interface Settings
136
Network
136
Parallel Interface
140
Ieee 1394
141
IEEE 802.11B
143
Print List
144
File Transfer
146
Administrator Tools
153
Program / Change / Delete LDAP Server
161
Programming the LDAP Server
162
General Features
167
3 Copier / Document Server Features
167
Reproduction Ratio
172
Edit
176
Stamp
182
Background Numbering
182
Preset Stamp
183
User Stamp
186
Date Stamp
187
Page Numbering
189
Input/Output
192
Adjust Color Image
195
Settings for the Document Server
196
General Features
197
4 Facsimile Features
197
Scan Settings
200
Send Settings
201
Reception Settings
204
Initial Settings
210
Reception File Setting
215
Reception Report E-Mail
216
Program / Change / Delete Scan Size
217
Deleting a Scan Size
218
Registering Fax Information
219
Deleting Fax Information
222
Forwarding
223
Programming an End Receiver
224
Quitting the Forwarding Function
226
Forwarding Mark
226
Parameter Settings
227
Changing the User Parameters
233
Special Senders to Treat Differently
234
Authorized Reception
235
Reception File Print Quantity
236
Forwarding
236
Print 2 Sided
236
Memory Lock
237
Paper Tray
237
Programming/Changing Special Senders
237
Authorized RX (Authorized Reception)
239
Reception File Print Qty
239
Forwarding
240
Print 2 Sided
241
Memory Lock
241
Paper Tray
241
Programming Initial Set up of a Special Sender
242
Deleting a Special Sender
245
Box Settings
246
Programming/Changing Personal Boxes
246
Deleting Personal Boxes
249
Programming/Changing Information Boxes
250
Deleting Information Boxes
253
Programming/Changing Transfer Boxes
254
Deleting Transfer Boxes
257
Printing the Box List
258
Test Print
259
Printing the Configuration Page
260
Interpreting the Configuration Page
260
5 Printer Features
259
Maintenance
262
System
263
Host Interface
267
PCL Menu
268
PS Menu
270
PDF Menu
271
General Settings
273
6 Scanner Features
273
Scan Settings
275
Send Settings
277
Address Book
279
Managing Names in the Address Book
282
Sending Fax by Quick Dial
282
Sending E-Mail by Quick Dial
282
Sending Scanned Files to a Shared Folder Directly
283
Preventing Unauthorized User Access to Shared Folders from the Machine
283
Managing Users and Machine Usage
283
7 Registering Addresses and Users for Facsimile/Scanner Functions
279
Registering Names
284
Changing a Registered Name
285
Deleting a Registered Name
286
Authentication Information
287
Registering a User Code
288
Changing a User Code
289
Deleting a User Code
291
Displaying the Counter for each User
292
Printing the Counter for each User
293
Printing the Counter for All User
294
Clearing the Number of Prints
295
Fax Destination
296
IP-Fax Destination
304
E-Mail Destination
309
Registering an E-Mail Destination
309
Changing an E-Mail Destination
311
Deleting an E-Mail Destination
312
Registering Folders
313
Using SMB to Connect
313
Using FTP to Connect
319
Using NCP to Connect
324
Registering Names to a Group
330
Registering a Group
330
Registering Names to a Group
331
Adding a Group to Another Group
333
Displaying Names Registered in a Group
334
Removing a Name from a Group
335
Deleting a Group Within Atnother Group
336
Changing a Group Name
338
Deleting a Goup
339
Registering a Protection Code
340
Registering a Protection Code to a Single User
340
Registering a Protection Code to a Group User
342
Registering SMTP and LDAP Authentication
343
SMTP Authentication
343
LDAP Authentication
345
Maintenance
347
8 Other User Tools
347
Changing the Display Language
348
Inquiry
349
Counter
351
Displaying the Total Counter
351
9 Appendix
353
Specifications for the Main Unit
353
Auto Document Feeder
357
Specifications for Options
358
Information about Installed Software
363
Expat
363
Netbsd
364
Sablotron
366
Jpeg Library
366
Sasl
367
Md4
368
Md5
368
Samba(Ver 3.0.4)
369
Rsa Bsafe
369
Open SSL
370
Open LDAP
375
Index
377
How to Read this Manual
395
Symbols
395
Indicators
397
When the Machine Does Not Operate as Wanted
397
Checking Machine Status and Settings
398
When an Indicator to the Right of a Function Key Is Lit
401
When You Have Problems Operating the Machine
402
This Machine
406
When a Job Is Not Performed
407
Troubleshooting When Using the Copy Function
411
When a Message Appears
411
When You Cannot Make Clear Copies
414
When You Cannot Make Copies as Wanted
416
When Memory Is Full
419
Troubleshooting When Using the Facsimile Function
421
Adjusting the Volume
421
When a Message Appears
424
When You Cannot Send or Receive Fax Messages as Wanted
431
When Memory Is Full
435
If an Error Report Is Printed
436
Turning off the Main Power / in the Event of Power Failure
437
When an Error Occurs Using Internet Fax
438
Error Mail Notification
438
Error Report (E-Mail)
438
Server-Generated Error E-Mail
438
Troubleshooting When Using the Printer Function
439
When a Message Appears During Installation of the Printer Driver
439
Windows 95/98/Me
439
Windows 2000
440
Windows XP, Windows Server 2003
440
Windows NT 4.0
441
If USB Connection Fails
442
When a Message Appears
443
Status Messages
443
Alert Messages
444
Checking the Error Log
445
When You Cannot Print
446
Other Printing Problems
449
When Pictbridge Printing Does Not Work
457
Using the Scanner Function
459
When Scanning Is Not Done as Expected
459
When You Cannot Send Scanned Files
460
When Stored Files Cannot be Accessed
460
When You Cannot Browse the Network to Send a Scanned File
460
When the TWAIN Driver Cannot be Started
460
When Stored Files Cannot be Edited
461
When the Network Delivery Function Cannot be Used
461
Operations Are Not Possible When Messages Appear
461
When a Message Is Displayed
462
When a Message Is Displayed on the Control Panel
462
When a Message Is Displayed on the Client Computer
469
Adding Paper, Toner and Staples
473
Loading Paper
473
Loading Paper into the Paper Trays
473
Loading Paper into the Large Capacity Tray
475
Changing the Paper Size
477
Changing the Paper Size in the Paper Tray
477
Adding Toner
483
Inserting Toner
484
Sending Fax Messages When Toner Has Run out
485
Used Toner
485
Maintenance
486
Adjusting the Color Registration
486
Auto Color Calibration
488
Adding Staples
490
Booklet Finisher
491
500-Sheet Finisher
492
1000-Sheet Finisher
493
Replacing the Stamp Cartridge
494
Clearing Misfeeds
497
Removing Jammed Paper
497
Locating Jammed Paper
498
Removing Jammed Paper
499
Removing Jammed Staples
505
Booklet Finisher
505
500-Sheet Finisher
506
1000-Sheet Finisher
507
Removing Punch Waste
508
Booklet Finisher
508
Remarks
511
Where to Put Your Machine
511
Machine Environment
511
Moving
512
Power Connection
513
Access to the Machine
514
Maintaining Your Machine
515
Cleaning the Exposure Glass
515
Cleaning the Exposure Glass Cover
516
Cleaning the Auto Document Feeder
516
Cleaning the Dustproof Glass
517
Index
519
How to Read this Manual
529
Symbols
529
Getting Started
531
Enhanced Security
531
Glossary
532
Setting up the Machine
533
Security Measures Provided by this Machine
535
Using Authentication and Managing Users
535
Preventing Information Leaks
535
Limiting and Controlling Access
537
Enhanced Network Security
538
Authentication and Its Application
539
Administrators and Users
539
Administrators
539
User
540
The Management Function
541
About Administrator Authentication
542
About User Authentication
543
Enabling Authentication
544
Authentication Setting Procedure
544
Administrator Authentication
545
Specifying Administrator Privileges
545
Registering the Administrator
548
Logging on Using Administrator Authentication
551
Logging off Using Administrator Authentication
554
Changing the Administrator
555
User Authentication
557
User Code Authentication
557
Basic Authentication
561
Windows Authentication
570
Creating the Server Certificate
577
LDAP Authentication
578
If the Fax Number Cannot be Obtained
578
Integration Server Authentication
585
If User Authentication Is Specified
594
User Code Authentication (Using the Control Panel)
594
User Code Authentication (Using a Printer Driver)
594
Login (Using the Control Panel)
595
Log off (Using the Control Panel)
596
Login (Using a Printer Driver)
597
Login (Using Web Image Monitor)
597
Log off (Using Web Image Monitor)
597
Auto Logout
598
Authentication Using an External Device
599
Preventing Information Leaks
601
Guarding against Unauthorized Copying
601
Unauthorized Copy Prevention
602
Data Security for Copying
603
Printing Limitations
604
Notice
605
Printing with Unauthorized Copy Prevention and Data Security for Copying
605
Printing a Confidential Document
608
Choosing a Locked Print File
608
Printing a Locked Print File
609
Deleting Locked Print Files
611
Changing Passwords of Locked Print Files
612
Unlocking Locked Print Files
614
Specifying Access Permission for Stored Files
615
Assigning Users and Access Permission for Stored Files
616
Specifying Access Privileges for Files Stored Using the Scanner and Fax Functions
619
Assigning the User and the Access Permission for the User's Stored Files
622
Specifying Passwords for the Stored Files
625
Unlocking Files
627
Preventing Data Leaks Due to Unauthorized Transmission
629
Restrictions on Destinations
629
Protecting the Address Book
632
Address Book Access Permission
632
Encrypting the Data in the Address Book
635
Deleting Data on the Hard Disk
638
Overwriting the Data on the Hard Disk
638
Managing Access to the Machine
647
Preventing Modification of Machine Settings
647
Menu Protect
648
Limiting Available Functions
652
Specifying Which Functions Are Available
652
Managing Log Files
654
Specifying Delete All Logs
654
Transfer Log Setting
655
Enhanced Network Security
657
Enabling/Disabling Protocols
657
Preventing Unauthorized Access
657
Access Control
658
Specifying Network Security Level
659
Encrypting Transmitted Passwords
663
Driver Encryption Key
663
Group Password for PDF Files
665
IPP Authentication Password
667
Protection Using Encryption
668
SSL (Secure Sockets Layer) Encryption
669
User Settings for SSL (Secure Sockets Layer)
672
Setting the SSL / TLS Encryption Mode
673
Snmpv3 Encryption
675
Specifying the Extended Security Functions
679
Changing the Extended Security Functions
679
Settings
681
Other Security Functions
686
Fax Function
686
Scanner Function
687
Limiting Machine Operation to Customers Only
688
Settings
688
Troubleshooting
693
Authentication Does Not Work Properly
693
A Message Appears
693
Machine Cannot be Operated
695
Appendix
697
Operations by the Supervisor
697
Logging on as the Supervisor
697
Logging off as the Supervisor
698
Changing the Supervisor
699
Resetting an Administrator's Password
700
Machine Administrator Settings
702
System Settings
702
Maintenance
704
Copier / Document Server Features
704
Facsimile Features
705
Printer Features
706
Scanner Features
707
Settings Via Web Image Monitor
708
Settings Via Smartdevicemonitor for Admin
710
Network Administrator Settings
711
System Settings
711
Facsimile Features
712
Scanner Features
712
Settings Via Web Image Monitor
712
Settings Via Smartdevicemonitor for Admin
714
File Administrator Settings
715
System Settings
715
Facsimile Features
715
Printer Features
715
Settings Via Web Image Monitor
716
User Administrator Settings
717
System Settings
717
Settings Via Web Image Monitor
718
Settings Via Smartdevicemonitor for Admin
718
Document Server File Permissions
719
The Privilege for User Account Settings in the Address Book
720
User Settings
723
Copier / Document Server Features
723
Printer Functions
727
Scanner Features
729
Facsimile Features
730
System Settings
732
Web Image Monitor Setting
738
Functions that Require Options
753
Index
754
Copying Book Originals
772
Copying Originals such as Books
776
Notice
781
Symbols
782
Functions Requiring Optional Configurations
783
Display
784
Simplified Display
785
User Tools Menu (Copier and Document Server Features)
786
Placing Originals
791
Originals
791
Sizes and Weights of Recommended Originals
791
Sizes Detectable by the Auto Paper Select
792
Missing Image Area
794
Placing Originals
795
Original Orientation
795
Placing Originals on the Exposure Glass
797
Placing Originals in the Auto Document Feeder
797
Batch Mode
799
SADF Mode
800
Mixed Size Mode
801
Original Size
802
Copying
805
Basic Procedure
805
Interrupt Copy
806
Left Original Beeper
807
Job Preset
807
Job List
809
Job List Screen
810
Checking Jobs in the Print Queue
811
Changing the Order of Jobs
811
Holding Print Jobs
812
Deleting Jobs
812
Checking Job History
813
Copying from the Bypass Tray
814
When Copying Onto Regular Size Paper
816
When Copying Onto Custom Size Paper
817
When Copying Onto OHP Transparencies or Thin Paper
818
When Copying Onto Thick Paper
819
When Copying Onto Envelopes
820
Color Functions
821
Selecting a Color Mode
821
Convert Colors
822
Erase Color
823
Color Background
824
Color Balance
825
Color Balance Program
826
Color Adjustment
828
Image Adjustment
829
User Color
833
Copier Functions
837
Adjusting Copy Image Density
837
Selecting the Original Type Setting
839
Selecting Copy Paper
840
Preset Reduce/Enlarge
843
Zoom
845
Auto Reduce/Enlarge
846
Size Magnification
848
Directional Magnification (%)
849
Directional Size Magnification (MM)
851
Sort
852
Stack
856
Staple
857
Punch
860
Duplex
862
One-Sided Combine
866
Two-Sided Combine
868
Series Copies
871
Booklet/Magazine
873
Margin Adjustment
879
Erase
880
Background Numbering
886
Preset Stamp
887
User Stamp
889
Date Stamp
894
Page Numbering
898
Image Repeat
903
Double Copies
906
Centering
907
Positive/Negative
909
Mirror
910
Covers
911
Designate
912
Chapters
914
Slip Sheets
915
Storing Data in the Document Server
917
Storing a Program
919
Changing a Stored Program
920
Deleting a Program
921
Recalling a Program
921
Programming Defaults in Initial Display
922
Document Server
923
Relationship between Document Server and Other Functions
923
Document Server Display
924
Simplified Display
925
Preview Display
926
Using the Document Server
927
Storing Data
927
Changing User Name, File Name or Password of a Stored Document
932
Checking the Details of a Stored Document
933
Searching for a Stored Document
934
Printing a Stored Document
936
Deleting a Document
942
Displaying a Document in Document Server with Web Image Monitor
943
Downloading Stored Documents
944
Appendix
945
Function Compatibility
945
Supplementary Informations
947
Advertisement
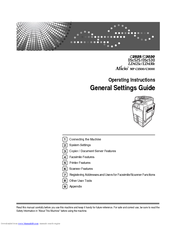
Ricoh C3030 General Settings Manual (317 pages)
Gestetner DSc535: Operating Instruction
Brand:
Ricoh
| Category:
Copier
| Size: 8.46 MB
Table of Contents
Operating Instructions
1
Manuals for this Machine
4
Table of Contents
6
How to Read this Manual
10
Symbols
10
Display Panel
11
Accessing User Tools (System Settings)
12
Changing Default Settings
12
Quitting User Tools
13
Menu Protect
13
1 Connecting the Machine
14
Connecting to the Interfaces
14
Connecting to the Ethernet Interface
15
Connecting to the USB Interface
16
Connecting to the IEEE 1394 Interface
17
Connecting to the IEEE 1284 Interface
18
Connecting to the IEEE 802.11B (Wireless LAN) Interface
19
Network Settings
22
Settings Required to Use the Printer/Lan-Fax
22
Settings Required to Use Internet Fax
25
Settings Required to Use E-Mail Function
29
Settings Required to Use Scan to Folder Function
33
Settings Required to Use the Network Delivery Scanner
36
Settings Required to Use Network TWAIN Scanner
39
Settings Required to Use Document Server
41
Using Utilities to Make Network Settings
44
Connecting the Machine to a Telephone Line and Telephone
53
Connecting the Telephone Line
53
Selecting the Line Type
54
2 System Settings
56
General Features
56
Output Tray Settings
59
Tray Paper Settings
60
Timer Settings
65
Interface Settings
67
Network
67
Parallel Interface
71
Ieee 1394
72
IEEE 802.11B
74
Print List
75
File Transfer
77
Administrator Tools
84
Program / Change / Delete LDAP Server
92
Programming the LDAP Server
93
3 Copier / Document Server Features
98
General Features
98
Reproduction Ratio
103
Edit
107
Stamp
113
Background Numbering
113
Preset Stamp
114
User Stamp
117
Date Stamp
118
Page Numbering
120
Input/Output
123
Adjust Color Image
126
Settings for the Document Server
127
4 Facsimile Features
128
General Features
128
Scan Settings
131
Send Settings
132
Reception Settings
135
Initial Settings
141
Reception File Setting
146
Reception Report E-Mail
147
Program / Change / Delete Scan Size
148
Deleting a Scan Size
149
Registering Fax Information
150
Registering Fax Information
151
Deleting Fax Information
153
Forwarding
154
Programming an End Receiver
155
Quitting the Forwarding Function
157
Forwarding Mark
157
Parameter Settings
158
Changing the User Parameters
164
Special Senders to Treat Differently
165
Authorized Reception
166
Reception File Print Quantity
167
Forwarding
167
Print 2 Sided
167
Memory Lock
168
Paper Tray
168
Programming/Changing Special Senders
168
Authorized RX (Authorized Reception)
170
Reception File Print Qty
170
Forwarding
171
Print 2 Sided
172
Memory Lock
172
Paper Tray
172
Programming Initial Set up of a Special Sender
173
Deleting a Special Sender
176
Box Settings
177
Programming/Changing Personal Boxes
177
Deleting Personal Boxes
180
Programming/Changing Information Boxes
181
Deleting Information Boxes
184
Programming/Changing Transfer Boxes
185
Deleting Transfer Boxes
188
Printing the Box List
189
5 Printer Features
190
Test Print
190
Printing the Configuration Page
191
Interpreting the Configuration Page
191
Maintenance
193
System
194
Host Interface
198
PCL Menu
199
PS Menu
201
PDF Menu
202
6 Scanner Features
204
General Settings
204
Scan Settings
206
Send Settings
208
7 Registering Addresses and Users for Facsimile/Scanner Functions
210
Address Book
210
Managing Names in the Address Book
213
Sending Fax by Quick Dial
213
Sending E-Mail by Quick Dial
213
Sending Scanned Files to a Shared Folder Directly
214
Preventing Unauthorized User Access to Shared Folders from the Machine
214
Managing Users and Machine Usage
214
Registering Names
215
Changing a Registered Name
216
Deleting a Registered Name
217
Authentication Information
218
Registering a User Code
219
Changing a User Code
220
Deleting a User Code
222
Displaying the Counter for each User
223
Printing the Counter for each User
224
Printing the Counter for All User
225
Clearing the Number of Prints
226
Fax Destination
227
Fax Destination
229
IP-Fax Destination
235
E-Mail Destination
240
Registering an E-Mail Destination
240
Changing an E-Mail Destination
242
Deleting an E-Mail Destination
243
Registering Folders
244
Using SMB to Connect
244
Using FTP to Connect
250
Using NCP to Connect
255
Registering Names to a Group
261
Registering a Group
261
Registering Names to a Group
262
Adding a Group to Another Group
264
Displaying Names Registered in a Group
265
Removing a Name from a Group
266
Deleting a Group Within Atnother Group
267
Changing a Group Name
269
Deleting a Goup
270
Registering a Protection Code
271
Registering a Protection Code to a Single User
271
Registering a Protection Code to a Group User
273
Registering SMTP and LDAP Authentication
274
SMTP Authentication
274
LDAP Authentication
276
8 Other User Tools
278
Maintenance
278
Changing the Display Language
279
Inquiry
280
Counter
282
Displaying the Total Counter
282
9 Appendix
284
Specifications for the Main Unit
284
Auto Document Feeder
288
Specifications for Options
289
Information about Installed Software
294
Expat
294
Netbsd
295
Sablotron
297
Jpeg Library
297
Sasl
298
Md4
299
Md5
299
Samba(Ver 3.0.4)
300
Rsa Bsafe
300
Open SSL
301
Open LDAP
306
Index
308
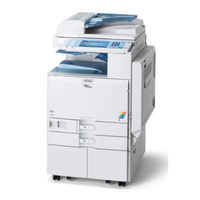
Ricoh C3030 Operating Instructions Manual (136 pages)
Troubleshooting
Brand:
Ricoh
| Category:
All in One Printer
| Size: 5.13 MB
Table of Contents
Operating Instructions
1
Troubleshooting
1
Manuals for this Machine
3
Table of Contents
5
How to Read this Manual
9
Symbols
9
1 When the Machine Does Not Operate as Wanted
11
Indicators
11
Checking Machine Status and Settings
12
When an Indicator to the Right of a Function Key Is Lit
15
When You Have Problems Operating the Machine
16
Document Server
19
This Machine
20
When a Job Is Not Performed
21
Troubleshooting When Using the Copy Function
25
When a Message Appears
25
When You Cannot Make Clear Copies
28
When You Cannot Make Copies as Wanted
30
Duplex Troubleshooting
33
When Memory Is Full
33
Troubleshooting When Using the Facsimile Function
35
Adjusting the Volume
35
When a Message Appears
38
When You Cannot Send or Receive Fax Messages as Wanted
45
When Memory Is Full
49
If an Error Report Is Printed
50
Turning off the Main Power / in the Event of Power Failure
51
When an Error Occurs Using Internet Fax
52
Error Mail Notification
52
Error Report (E-Mail)
52
Server-Generated Error E-Mail
52
Troubleshooting When Using the Printer Function
53
When a Message Appears During Installation of the Printer Driver
53
Windows 95/98/Me
53
Windows 2000
54
Windows XP, Windows Server 2003
54
Windows NT 4.0
55
If USB Connection Fails
56
When a Message Appears
57
Status Messages
57
Alert Messages
58
Checking the Error Log
59
When You Cannot Print
60
Other Printing Problems
63
When Pictbridge Printing Does Not Work
71
5 Troubleshooting When Using the Scanner Function
73
When Scanning Is Not Done as Expected
73
When You Cannot Send Scanned Files
74
When Stored Files Cannot be Accessed
74
When You Cannot Browse the Network to Send a Scanned File
74
When the TWAIN Driver Cannot be Started
74
When Stored Files Cannot be Edited
75
When the Network Delivery Function Cannot be Used
75
Operations Are Not Possible When Messages Appear
75
When a Message Is Displayed
76
When a Message Is Displayed on the Control Panel
76
When a Message Is Displayed on the Client Computer
83
Adding Paper, Toner and Staples
87
Loading Paper
87
Loading Paper into the Paper Trays
87
Loading Paper into the Large Capacity Tray
89
Changing the Paper Size
91
Changing the Paper Size in the Paper Tray
91
Adding Toner
97
Inserting Toner
98
Sending Fax Messages When Toner Has Run out
99
Used Toner
99
Maintenance
100
Adjusting the Color Registration
100
Auto Color Calibration
102
Adding Staples
104
Booklet Finisher
105
500-Sheet Finisher
106
1000-Sheet Finisher
107
Replacing the Stamp Cartridge
108
Clearing Misfeeds
111
Removing Jammed Paper
111
Locating Jammed Paper
112
Removing Jammed Paper
113
Removing Jammed Staples
119
Booklet Finisher
119
500-Sheet Finisher
120
1000-Sheet Finisher
121
Removing Punch Waste
122
Booklet Finisher
122
Remarks
125
Where to Put Your Machine
125
Machine Environment
125
Moving
126
Power Connection
127
Access to the Machine
128
Maintaining Your Machine
129
Cleaning the Exposure Glass
129
Cleaning the Exposure Glass Cover
130
Cleaning the Auto Document Feeder
130
Cleaning the Dustproof Glass
131
Index
133
Advertisement
Ricoh C3030 How To Do (2 pages)
Change Default File Type When Scanning
Brand:
Ricoh
| Category:
All in One Printer
| Size: 0.12 MB
Advertisement
Related Products
Ricoh Aficio C3000
Ricoh Aficio MP C3000SPF
Ricoh Aficio MP C3000SP
Ricoh C3828
Ricoh c3224
Ricoh Aficio MP MP C3500/C4500
Ricoh Aficio MP C3300SPF
Ricoh C3535
Ricoh C3210e
Ricoh Aficio MP C3500SP
Ricoh Categories
All in One Printer
Printer
Digital Camera
Copier
Printer Accessories
More Ricoh Manuals
Login
Sign In
OR
Sign in with Facebook
Sign in with Google
Upload manual
Upload from disk
Upload from URL