Sign In
Upload
Manuals
Brands
Lexmark Manuals
All in One Printer
4600 Series
Lexmark 4600 Series Manuals
Manuals and User Guides for Lexmark 4600 Series. We have
9
Lexmark 4600 Series manuals available for free PDF download: User Manual, Menus And Messages Manual, Service Manual, Setup Manual, Manual, Quick Reference Manual
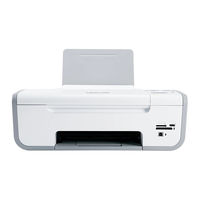
Lexmark 4600 Series User Manual (144 pages)
Lexmark Printer User's Guide
Brand:
Lexmark
| Category:
All in One Printer
| Size: 3.37 MB
Table of Contents
Table of Contents
3
Safety Information
9
Introduction
10
Finding Information about the Printer
10
Customer Support
11
Limited Warranty
12
Setting up the Printer
13
Bypassing Security Warnings During Software Installation
13
Setting up the Printer as a Copier Only
13
Understanding the Parts of the Printer
20
Using the Printer Control Panel Buttons and Menus
22
Using the Printer Control Panel
22
Using the Printer Menus
23
Menus List
24
Using the Copy Menu
25
Using the Scan Menu
26
Using the Photo Menu
26
Using the Pictbridge Menu
27
Using the Setup Menu
27
Saving Settings
28
Changing Temporary Settings into New Default Settings
29
Using the Printer Software
30
Installing Printer Software
30
Installing the Optional XPS Driver (Windows Vista Users Only)
31
Using the Windows Printer Software
32
Using the Macintosh Printer Software
33
Switching between the Rear USB Port and the Quick Connect Laptop Port (Selected Models Only)
34
Using Windows
34
Installing the Printer on a Wireless Network (Selected Models Only)
36
Wireless Network Compatibility
36
Information You will Need to Set up the Printer on a Wireless Network
36
Installing the Printer on a Wireless Network
37
Wireless Installation Instructions (France Only)
37
Configuring an IP Address Manually
38
Interpreting the Colors of the Wi-Fi Indicator Light
38
Changing Wireless Settings after Installation
39
Using the Network Setup Menu
39
Installing the Printer on Other Computers
40
Advanced Wireless Setup
41
Creating an Ad Hoc Wireless Network
41
Adding a Printer to an Existing Ad Hoc Wireless Network
44
Frequently Asked Questions
45
What Is a Network
45
How Are Home Networks Configured
45
Why Do I Need an Installation Cable
47
How Do I Attach the Installation Cable
48
What Is the Difference between Infrastructure and Ad Hoc Networks
48
Finding the Signal Strength
49
How Can I Improve Wireless Signal Strength
50
What Is an SSID
51
How Do I Find out What Type of Security My Network Is Using
51
Can I Use My Printer on a USB and a Wireless Connection at the same Time
51
What Is a MAC Address
52
How Do I Find the MAC Address
52
What Is an IP Address
52
What Is TCP/IP
53
How Do I Locate IP Addresses
53
How Are IP Addresses Assigned
54
What Is a Key Index
54
Loading Paper
55
Loading Various Paper Types
55
Iron-On Transfers
57
Banner Paper
58
Loading Original Documents on the Scanner Glass
59
Using the Automatic Paper Type Sensor
60
Printing
61
Printing Basic Documents
61
Printing a Document
61
Printing Web Pages
61
Printing Multiple Copies of a Document
62
Collating Printed Copies
62
Printing the Last Page First (Reverse
63
Printing Multiple Pages on One Sheet (N-Up)
63
Printing Documents from a Memory Card or Flash Drive
64
Printing Specialty Documents
65
Choosing Compatible Specialty Paper Types
65
Printing Envelopes
66
Printing Labels
66
Printing on Custom-Size Paper
67
Saving and Deleting Print Settings
68
Managing Print Jobs
69
Pausing Print Jobs
69
Resuming Print Jobs
70
Canceling Print Jobs
71
Working with Photos
73
Inserting a Memory Card
73
Inserting a Flash Drive
74
Retrieving and Managing Photos
75
Transferring Photos from a Memory Device to the Computer
75
Transferring Photos from a Memory Card to a Flash Drive
77
Printing Photos
77
Printing Photos Using the Printer Control Panel
77
Printing Photos from the Computer Using the Printer Software
78
Printing Photos from a Memory Device Using the Printer Software
79
Applying Color Effects to Photos Using the Printer Control Panel
80
Printing Photos from a Pictbridge-Enabled Digital Camera
81
Printing Photos Stored on a Memory Device Using the Proof Sheet
82
Printing Photos from a Digital Camera Using DPOF
83
Copying
84
Making Copies
84
Copying Photos
84
Enlarging or Reducing Images
84
Adjusting Copy Quality
85
Making a Copy Lighter or Darker
85
Collating Copies Using the Printer Control Panel
85
Repeating an Image on One Page
86
Copying Multiple Pages on One Sheet (N-Up)
86
Canceling a Copy Job
87
Scanning
88
Scanning Original Documents
88
Scanning Color or Black-And-White Original Documents
90
Scanning Photos for Editing
90
Scanning to a Computer over a Network
90
Canceling Scan Jobs
91
Faxing
92
Sending a Fax Using the Computer
92
Receiving a Fax
93
Maintaining the Printer
95
Maintaining Print Cartridges
95
Installing Print Cartridges
95
Removing a Used Print Cartridge
96
Refilling Print Cartridges
97
Using Genuine Lexmark Print Cartridges
97
Aligning Print Cartridges
98
Cleaning the Print Cartridge Nozzles
98
Checking Ink Levels
99
Wiping the Print Cartridge Nozzles and Contacts
100
Preserving the Print Cartridges
101
Cleaning the Scanner Glass
101
Cleaning the Exterior of the Printer
101
Ordering Supplies
102
Ordering Print Cartridges
102
Ordering Paper and Other Supplies
103
Resetting to Factory Settings
103
Troubleshooting
104
Using the Printer Troubleshooting Software (Windows Only)
104
Setup Troubleshooting
104
Incorrect Language Appears on the Display
104
Power Button Is Not Lit
105
Software DID Not Install
105
Page Does Not Print
106
Solving Printer Power Problems
109
Removing and Reinstalling the Software
109
Enabling the USB Port in Windows
110
Wireless Troubleshooting
111
Wireless Troubleshooting Checklist
111
Printing a Network Setup Page
112
Wireless Configuration Does Not Continue after the USB Cable Is Attached
112
Cannot Print over Wireless Network
113
Cannot Print and There Is a Firewall on the Computer
116
Wi-Fi Indicator Light Is Not Lit
116
Wi-Fi Indicator Light Is Green but the Printer Does Not Print (Windows Only)
116
Wi-Fi Indicator Light Is Blinking Orange During Installation (Windows Only)
118
Wi-Fi Indicator Light Is Blinking Orange During Installation (Macintosh Only)
121
Wi-Fi Indicator Light Is Still Orange
123
Wireless Print Server Not Installed
125
Communication Not Available" Message Displays When Printing Wirelessly
125
Communication with Printer Lost When Connected to Virtual Private Network (VPN)
125
Resetting the Internal Wireless Print Server to Factory Default Settings
125
Notices
127
Product Information
127
Edition Notice
127
United States Government Rights
128
Exposure to Radio Frequency Radiation
129
Industry Canada Compliance Statement
129
European EC Directives Conformity Statement for Radio Products
130
Noise Emission Levels
132
Power Consumption
133
Power Saver
134
Off Mode
134
Total Energy Usage
134
Networking Glossary
138
Index
140
Advertisement
Lexmark 4600 Series Service Manual (126 pages)
MFP option
Brand:
Lexmark
| Category:
All in One Printer
| Size: 4.32 MB
Table of Contents
Edition: May
2
Table of Contents
3
Table of Contents
7
Safety Information
7
Preface
10
Conventions
10
General Information
11
Overview
11
Features
11
Scanner Specifications
12
Tools Required for Service
13
Acronyms
13
Diagnostic Information
15
Start
15
Power-On Self Test (POST) Sequence
16
Symptom Tables
16
Reading Is Not Performed
16
Scan Module Does Not Move to Home Position
16
Error Codes and Messages
17
Service Error Codes
17
Sub Error Codes for 8Xx and 2Xx Error Codes
17
User Attendance Messages
20
Service Checks
27
The Power Does Not Come on
27
Frequent Paper Jam, Double Feed, or Skew
27
Image Does Not Appear
27
Image Unclear
28
Large Jitter
28
Reading Position Deviation
28
Strange Sound Generated (ADF)
28
Strange Sound Generated (Flatbed)
29
Scanner Failure
29
Front Scan Module Output Level Error
29
Rear Scan Module Output Level Error
30
Front Scan Module Lamp Level too Low
30
Front Scan Module Cable Failure or SCC Card Failure CCD Channel Failure
30
Rear Scan Module Cable Failure or SCC Card Failure CCD Channel Failure
30
Cable/Scc Failure
30
Cable/Scc Failure
31
Front Calibration Strip
31
Modem/Config ID Mismatch
31
Hd/Config ID Mismatch
32
Control Panel and Menus
32
Control Panel and Buttons
32
Legend
33
Home Screen
34
Legend
34
LCD Touch-Screen Buttons
36
Sample Screen One
36
Information on LCD Touch-Screen Buttons
37
Sample Screen Two
38
Information on LCD Touch-Screen Buttons
39
Other LCD Touch-Screen Buttons
40
Features
41
Menus
41
Menu Map
41
Diagnostic Aids
43
Accessing Service Menus
43
Diagnostics Menu
44
Entering Diagnostics Menu
44
Available Tests
44
Event Log
45
Display Log
45
Print Log
45
Clear Log
46
Scanner Tests
46
ASIC Test
46
Feed Test
46
Scanner Manual Registration
46
Sensor Tests
47
Configuration Menu (CONFIG MENU)
48
Entering Configuration Menu
48
Available Menus
48
Panel Menus
48
Format Fax Storage
49
ADF Edge Erase
49
FB Edge Erase
49
Automatic Scanner Registration
50
Event Log
51
Jobs on Disk
51
Disk Encryption
51
Wipe Disk
52
Key Repeat Initial Delay
53
Key Repeat Rate
53
Wiper Message
53
Exit Configuration Menu
53
Paper Feed Jams
54
Identifying Jams
54
Access Doors and Trays
55
Understanding Jam Messages
55
Clearing Jams
56
Clearing ADF Jams
56
290, 291, 292, and 294 Scanner Jams
56
Repair Information
57
Handling ESD-Sensitive Parts
57
Service Guidelines
57
Removal Procedures
58
Removals
58
Parts Replacement
58
Alignment Screws
58
Flatbed CCD Optical Unit
59
ADF Optical Unit
59
Document Input Tray Removal
59
ADF Lower Cover Removal
60
ADF Outer Cover Removal
63
ADF Upper Cover Removal
64
ADF Lamp Removal
64
ADF Motor/Distribution Board Removal
67
ADF Optical Unit Removal
68
ADF Sensor Board Removal
69
ADF Upper Cover Sensor Removal
69
Document Cover Assembly Removal
70
Paper Feed Assembly Removal
72
Paper Feed Motor Removal
73
Paper Feed Roller Removal
74
Paper Length Sensor Removal
75
Paper Present/Paper Feed 1 Sensors Removal
76
Paper Stop Removal
77
Pick Pad Removal
77
Scanner Cushion Removal
78
Control Panel Keypad Board Removal
79
Control Panel Assembly Removal
80
LCD HV Inverter Board Removal
82
Control Panel Display Assembly Removal
83
Flatbed Cover with Glass Removal
84
Carriage Transport Belt Removal
85
Flatbed CCD Optical Unit Removal
86
Flatbed Lamp Assembly Removal
88
Flatbed Lamp Inverter Board Removal
90
Bottom Plate Removal
91
Hard Disk Drive, A1 Board, Scanner Control Board, Power Supply Board, and Modem Board Removals
92
Scanner Control Board Removal
93
Hard Disk Drive Assembly Removal
94
Modem Board Removal
95
Power Supply Board Removal
95
A1 Board Removal
96
Control Cooling Fan Removal
97
Document Cover Sensor Removal
98
Connector Locations
99
Scanner Mechanism Overview and Locations
99
External View
99
Internal Components
100
Connectors
101
Scanner Control Board
101
Modem Board
106
Power Supply Board
107
A1 Board
108
Preventive Maintenance
111
Safety Inspection Guide
111
Lubrication Specifications
111
Scheduled Maintenance
111
Index
113
Parts Catalog
113
How to Use this Parts Catalog
113
Assembly 1: ADF Assembly
114
Assembly 2: Control Panel
116
Assembly 3: Lower Scanner
118
Assembly 3: Lower Scanner
119
Assembly 4: Electronic Boards
120
Part Number Index
125
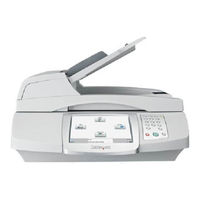
Lexmark 4600 Series User Manual (123 pages)
Scanner MFP Option
Brand:
Lexmark
| Category:
Printer Accessories
| Size: 2.9 MB
Table of Contents
Safety Information
2
Table of Contents
3
Chapter 1: Learning about the MFP
7
Basic Functions of the Scanner
7
Automatic Document Feeder and Flatbed
7
Understanding the MFP Control Panel
8
Home Screen and Home Screen Buttons
10
Using the LCD Touch-Screen Buttons
13
Sample Screen Two
15
Other Touch-Screen Buttons
16
Menus
19
Chapter 2: Copying
20
Quick Copy
20
Multiple Page Copying
20
Using the Flatbed
21
Understanding the Copy Screens and Options
21
Copying from One Size to Another
23
Making Transparencies
23
Copying to Letterhead
23
Copying Photographs
23
Making Copies Using Media from a Selected Tray
24
Copying Mixed-Sized Media
24
Setting the Duplex Option
25
Reducing and Enlarging Copies
25
Adjusting Copy Quality
25
Setting Collation Options
26
Placing Separator Sheets between Copies
26
Setting Paper Saving Options
26
Placing the Date and Time at the Top of each Page
27
Placing an Overlay Message on each Page
27
Creating a Custom Job (Job Build)
27
Canceling a Copy Job
28
Copy Tips
28
Chapter 3: E-Mail
29
Entering an E-Mail Address
29
Using a Shortcut Number
29
Using the Address Book
30
E-Mailing to a Profile
30
Adding E-Mail Subject and Message Information
30
Changing the Output File Type
31
E-Mailing Color Documents
31
Creating an E-Mail Shortcut
31
Creating an E-Mail Profile
32
Canceling an E-Mail
32
Understanding E-Mail Options
32
E-Mail Server Setup
34
Address Book Setup
34
Chapter 4: Faxing
35
Sending a Fax
35
Using Fax Destination Shortcuts
36
Using the Address Book
36
Sending Faxes from a Computer
36
Creating Shortcuts
37
Understanding Fax Options
38
Changing the Fax Resolution
39
Adjusting the Darkness Setting
39
Sending a Fax at a Later Time
39
Cancel an Outgoing Fax
40
Viewing a Fax Log
40
Fax Tips
40
Chapter 5: FTP
41
Entering the FTP Address
41
Using a Shortcut Number
41
Using the Address Book
41
Creating Shortcuts
42
FTP Options
42
FTP Tips
44
Chapter 6: Scanning to a PC or USB Flash Memory Device
45
Create a Scan to PC Profile
45
Understanding Scan to PC Options
46
Scanning to a USB Flash Memory Device
47
Scanning Tips
47
Chapter 7: Printing
48
Printing from a USB Flash Memory Device
48
Canceling a Print Job
49
Canceling a Job from a Computer Running Windows
50
Canceling a Job from a Macintosh Computer
50
Printing the Menu Settings Page
51
Printing a Network Setup Page
51
Printing a Font Sample List
51
Printing a Directory List
51
Printing Confidential and Held Jobs
52
Printing and Deleting Held Jobs
53
Printing on Specialty Media
55
Loading Standard Trays and Optional Trays
56
Setting the Paper Type and Paper Size
58
Loading the Multipurpose Feeder
58
Loading the 2000-Sheet Drawer
61
Loading the Envelope Feeder
63
Linking Trays
65
Chapter 8: Understanding Paper and Specialty Media Guidelines
66
Supported Print Media
66
Selecting Print Media
73
Storing Print Media
76
Avoiding Jams
77
Chapter 9: Installing and Removing Options
79
Installing Memory or Option Cards
79
Accessing the MFP System Board
79
Installing or Removing a Memory Card
82
Installing or Removing a Flash Memory or Firmware Card
84
Installing an Option Card
86
Replacing the Shield
87
Chapter 10: Maintaining the MFP
88
Determining the Status of Supplies
89
Ordering Supplies
89
Recycling Lexmark Products
90
Cleaning the Scanner Glass and Backing Material
90
Cleaning the Automatic Document Feeder
91
Scanner Registration
92
Removing the Scanner Top
93
Moving the MFP
94
Chapter 11: Clearing Jams
95
Identifying Jams
95
Access Doors and Trays
96
Understanding Jam Messages
97
Clearing Printer Jams
98
Clearing Scanner Jams
98
Chapter 12: Administrative Support
99
Adjusting Control Panel Brightness
99
Restoring Factory Default Settings
99
Adjusting Screen Timeout
100
Adjusting Power Saver
100
Configuring the MFP
101
Encrypting the Hard Disk
107
Hard Disk Wiping
108
Using the Restricted Server List Function
108
Chapter 13: Troubleshooting
109
Understanding MFP Messages
109
Online Technical Support
109
Checking an Unresponsive MFP
109
Locating the Port Name and IP Address
109
Solving Copy Quality Problems
110
Solving Scan Quality Problems
110
Solving Fax Problems
111
Solving Paper Feed Problems
111
Notices
112
Conventions
112
Electronic Emission Notices
112
Other Telecommunications Notices
117
Noise Emission Levels
118
Energy Star
119
Waste from Electrical and Electronic Equipment (WEEE) Directive
119
Index
120
Advertisement
Lexmark 4600 Series Menus And Messages Manual (135 pages)
Lexmark Printer User Guide
Brand:
Lexmark
| Category:
All in One Printer
| Size: 2.13 MB
Table of Contents
Table of Contents
3
Chapter 1: Using the MFP Menus
5
Understanding the Multifunction Printer (MFP) Control Panel
5
Home Screen
8
Using the LCD Touch-Screen Buttons
11
Sample Screen One
11
Information on LCD Touch-Screen Buttons
13
Sample Screen Two
15
Information on LCD Touch-Screen Buttons
15
Other LCD Touch-Screen Buttons
17
Features
18
Menus
19
Menu Map
19
Paper Menu
20
Default Source
20
Paper Size/Type
20
Configure MP
23
Envelope Enhance
23
Substitute Size
24
Paper Weight
25
Paper Loading
26
Custom Types
26
Custom Names
26
Custom bin Names
27
Universal Setup
27
Bin Setup
28
Reports
29
Network/Ports
31
Tcp/Ip
31
Ipv6
33
E-Mail Server Setup
34
Wireless
35
Standard Network or Network <X
36
Standard USB or USB <X
37
Standard Parallel or Parallel <X
39
Serial <X
41
Netware
43
Appletalk
44
Lexlink
44
Settings
45
General Settings
45
Copy Settings
52
Fax Settings
57
E-Mail Settings
66
FTP Settings
70
Scan to USB Settings
74
Print Settings
76
Finishing Menu
77
Quality Menu
80
Utilities Menu
81
Setup Menu
82
Postscript Menu
84
Pcl Emulation Menu
85
Pdf Menu
88
Html Menu
89
Image Menu
89
Security
90
Set Date and Time
96
Help Pages
97
Manage Shortcuts
98
Chapter 2: Understanding MFP Messages
100
Status Messages
100
Fax Status Messages
103
Cancel Jobs Messages
103
Password and PIN Messages
104
Copy, E-Mail, Fax, FTP, and Scan Button Messages
104
Attendance Messages
104
Functions Disabled Transitional Messages
124
Index
125
Lexmark 4600 Series Setup Manual (52 pages)
Printer and Scanner Setup Guide
Brand:
Lexmark
| Category:
All in One Printer
| Size: 2.36 MB
Table of Contents
Stability Information
2
Safety Information
7
Table of Contents
8
Chapter 1: Getting Started
10
Conventions
10
Using this Book
10
Turning off the Printer
10
Selecting a Location for Your Printer and MFP
10
Customizing Your MFP Option
11
Drivers and Options
12
Where to Begin
12
Chapter 2: MFP Adjustable Stand Setup
13
Assembling the MFP Adjustable Stand
13
Installing a 250- or 500-Sheet Drawer
14
Installing a Duplex Unit
15
Positioning the Printer
16
Installing the Finisher or Mailbox
17
Installing the Scanner
18
Chapter 3: Low Profile Stand Setup
19
Assembling the Low Profile Stand
19
Installing a 250- or 500-Sheet Drawer
20
Installing a Duplex Unit
21
Positioning the Printer
22
Installing the Scanner Shelf
23
Installing the Scanner
24
Chapter 4: Caster Base Setup
25
Installing the Caster Base
26
Installing the Scanner Shelf
26
Installing the Scanner
27
Chapter 5: Scanner Stand Setup
29
Positioning the Scanner Stand
29
Installing Output Options
30
Chapter 6: Scanner Option Setup
31
Positioning the Scanner
31
Chapter 7: Setting up the Printer
33
Removing the Print Cartridge Packaging
33
Ordering Print Cartridges
34
Loading Paper
36
Chapter 8: Installing Printer Memory or Option Cards
37
Accessing the Printer System Board
37
Installing a Memory Card
39
Installing a Firmware Card
40
Installing an Interface Card and Cable
41
Replacing the Shield
42
Chapter 9: Scanner Setup
43
Installing the Printer Operator Panel Cover
43
Unlocking the Scanner
44
Attaching Cables and Power Cords
44
Installing Drivers
45
Fax Setup
46
Assigning a Printer Ip Address
47
Verifying the Ip Settings
48
Verify MFP Setup
49
Testing a Scan to Pc Profile
50
Chapter 10: Distributing MFP User Information
51
Finding User Instructions
51
Distributing User Information
51
Limiting MFP Use
51
Chapter 11: Solve Setup Problems
52
Getting more Help
52
Lexmark 4600 Series Setup Manual (35 pages)
Printer and Scanner
Brand:
Lexmark
| Category:
Printer
| Size: 1.97 MB
Table of Contents
Stability Information
2
Table of Contents
6
Chapter 1: Getting Started
8
Conventions
8
Using this Book
8
Turning off the Printer
8
Selecting a Location for Your Printer and MFP
8
Customizing Your MFP Option
9
Drivers and Options
10
Where to Begin
10
Chapter 2: Caster Base Setup
11
Installing the Caster Base
11
Installing the Scanner Shelf
12
Installing the Scanner
13
Chapter 3: Scanner Cabinet Setup
14
Positioning the Scanner Cabinet
14
Installing Output Options
15
Chapter 4: Scanner Option Setup
16
Positioning the Scanner
16
Chapter 5: Setting up the Printer
17
Removing the Print Cartridge Packaging
17
Loading Paper
19
Chapter 6: Installing Printer Memory or Option Cards
20
Accessing the Printer System Board
20
Installing a Memory Card
21
Installing a Firmware Card
22
Installing the Interface Card
23
Replacing the Shield
24
Chapter 7: Scanner Setup
25
Installing the Printer Operator Panel Cover
25
Unlocking the Scanner
26
Attaching Cables and Power Cords
27
Installing Drivers
28
Fax Setup
29
Assigning a Printer Ip Address
30
Verifying the Ip Settings
31
Verify MFP Setup
32
Chapter 8: Distributing MFP User Information
34
Finding User Instructions
34
Distributing User Information
34
Limiting MFP Use
34
Chapter 9: Solve Setup Problems
35
Getting more Help
35
Lexmark 4600 Series Manual (42 pages)
Printer, Option, and Stand Compatibility Guide
Brand:
Lexmark
| Category:
All in One Printer
| Size: 2.31 MB
Table of Contents
Table of Contents
2
Lexmark CS310, CS410, and CS510 Series
3
Lexmark CX310, CX410, and CX510 Series
4
Lexmark MS310, MS410, MS510, and MS610 Series
5
Lexmark MS710 and MS810 Series
6
Output Options
7
Lexmark MX310, MX410, and MX510 Series
10
Lexmark MX610 Series
11
Lexmark MX710 Series
12
Lexmark MX810 Series
14
Lexmark C546Dtn and X546Dtn
15
Lexmark C730 Series
16
Lexmark C740 Series
17
Lexmark C792
18
Lexmark C925
20
Lexmark C950 Series
22
Lexmark T650 Series
25
Lexmark X650 Series
27
Lexmark X658E
28
Lexmark X730 Series
29
Lexmark X740 Series
30
Lexmark X792
31
Lexmark X925
32
Lexmark X950 Series
34
Caster Base 22G0544
37
Caster Base 22G0544 for Mfps
37
Caster Base 22G0544 with Scanner and Shelf 21J0050
38
Printer Stand 16N1708
39
Printer Stand 16N1708 with or Without Scanner Shelf 10B1755
39
Printer Stand 16N1708 with or Without Scanner Shelf 21J0055
39
Notices
41
Edition Notice
41
Index
42
Lexmark 4600 Series Setup Manual (38 pages)
Lexmark Printer/Scanner Setup Guide
Brand:
Lexmark
| Category:
All in One Printer
| Size: 2.21 MB
Table of Contents
Stability Information
2
Safety Information
5
United States Government Rights
5
Static Sensitivity Notice
6
Turning off the Printer
7
Selecting a Location for Your Printer and MFP
7
Customizing Your MFP Option
8
Step 3: Installing the Duplex Unit
10
Step 4: Unboxing the Printer
10
Step 5: Preparing the Printer
11
Removing the Print Cartridge Packaging
11
Loading Paper
14
Step 9: Unlocking the Scanner
19
Step 11: Installing Output Options
21
Accessing the Printer System Board
22
Installing a Memory Card
23
Installing the Interface Card
25
Replacing the Access Cover Plate
27
Installing Drivers
31
Other Options
31
Fax Setup
32
Assigning a Printer IP Address
33
Verifying the Ip Settings
33
Printing a Menu Settings Page
35
Printing the Help Pages
35
Testing a Scan to PC Profile
36
Step 17: Solving Setup Problems
37
Getting more Help
37
Lexmark 4600 Series Quick Reference Manual (3 pages)
Lexmark X4600 Quick Reference
Brand:
Lexmark
| Category:
All in One Printer
| Size: 0.47 MB
Advertisement
Related Products
Lexmark 4600MFP
Lexmark 43W
Lexmark 4564
Lexmark 4200 Series
Lexmark OptraImage 443
Lexmark 4036-308
Lexmark 4039-12R
Lexmark 4039-12L
Lexmark 4039-12R plus
Lexmark 4039-12L plus
Lexmark Categories
Printer
All in One Printer
Printer Accessories
Software
Print Server
More Lexmark Manuals
Login
Sign In
OR
Sign in with Facebook
Sign in with Google
Upload manual
Upload from disk
Upload from URL