Table of Contents
Advertisement
Quick Links
Advertisement
Table of Contents

Related Manuals for Oce 9300


Summary of Contents for Oce 9300
- Page 1 Océ 9300 User Manual...
- Page 2 Océ-Technologies B.V. This manual contains a description of the Océ 9300 system and a detailed explanation of the plot functions. The introduction (chapter 1), gives a general description of the working methods employed in using the copier and we recommend that you read at least this chapter.
-
Page 3: Table Of Contents
Table of Contents Chapter 1 Getting started The Océ 9300 printer 8 The printer operating panel 9 Buttons 10 Display 11 Turning the printer on or off 12 Chapter 2 Installing the printer Connect the printer to your host environment 14... - Page 4 HP-RTL 60 CalComp 61 CalComp print origin 61 Checksum parameter 62 CalComp pen priority 62 Merge mode 63 End of Message parameter 63 Synchronization code parameter 64 Double synchronization code parameter 65 CalComp step size 66 Océ 9300 User Manual...
- Page 5 Raster formats 67 CALS 67 NIRS 67 TIFF 67 C4 (EDMICS) 67 PostScript level 2 68 PostScript data format selection 68 Manual data format selection 68 PostScript page layout 69 Default PostScript page size 69 Chapter 6 Advanced menu functions Introduction 72 End of plot time out 73 Selecting the media saver 74...
- Page 6 Operating panel 107 Appendix C Safety information Instructions for safe use 110 Safety data sheets 111 Safety data sheet Océ 9300 printer 112 Appendix D Miscellaneous How to read this manual 114 User survey 115 Addresses of local Océ organizations 117 Index 119 Océ...
-
Page 7: Getting Started
Océ 9300 User Manual Chapter 1 Getting started This chapter contains a general description Océ 9300 of how to install and set up the printer to be ready for use. -
Page 8: The Océ 9300 Printer
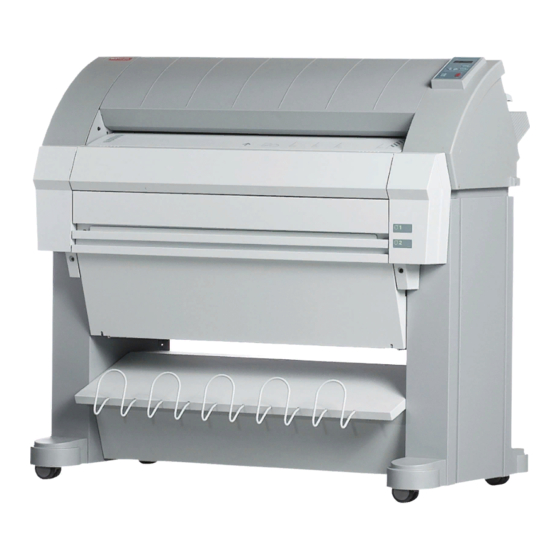
The Océ 9300 printer The Océ 9300 is a wide-format printing system. The machine is equipped with an automatic 1- or 2-roll dispenser. The Océ 9300 prints on paper, transparencies, vellum, and polyester film. Its powerful digital technology offers users optimal ease of use and the reliability that you have come to expect of Océ. -
Page 9: The Printer Operating Panel
The printer operating panel The operating panel located on the right-hand side of the printer console is easy to use (see figure 1). The panel consists of buttons and a display. READY previous next/select program cancel/ continue [1] Printer operating panel During normal operation, the printer can process print jobs and provide a 2-line display of the current printer status (e.g. -
Page 10: Buttons
Browse buttons at the same menu level, or to display the next or previous option from the option list. This button is used to cancel the current print job or to ‘Cancel/continue’ continue after an operator-recoverable error. Océ 9300 User Manual... -
Page 11: Display
Display The two-line LCD display provides status information on print jobs in normal mode, and displays menu items in Program mode. The following messages may appear during normal operation: indicates the actual status of the printer, e.g. ‘READY’, Status messages ‘PROCESSING’... -
Page 12: Turning The Printer On Or Off
Set the on/off switch, located at the back of the printer, to position ‘0’ (see figure 2). Turning the printer off during a print job may cause a loss of Attention: information or a paper jam. Océ 9300 User Manual... -
Page 13: Installing The Printer
Océ 9300 User Manual Chapter 2 Installing the printer This chapter describes how to connect your printer to your host environment and how to configure the printer to meet your specific needs. -
Page 14: Connect The Printer To Your Host Environment
To ensure proper operation, please follow the steps below when connecting your host to the Océ 9300. Make sure that both the host and the Océ 9300 are turned OFF (see ‘Centronics’ on page 15). Connect the appropriate interface cable to your local host and the corresponding interface connector to the Océ... -
Page 15: Centronics
Centronics Connection through the Centronics interface is direct and data transfer is fast. You must set two parameters: the transmission type and the plot time-out. Connecting Centronics Turn off the printer and host. Connect one end of the Centronics cable to the computer’s Centronics parallel port. -
Page 16: Serial
Select the ‘ ’ item using the button. CONNECTIONS Press ‘next/select’ to enter the ‘ ’ menu. CONNECTIONS Select the ‘ ’ item using the button. SERIAL Press ‘next/select’ to enter the ‘ ’ menu. SERIAL Océ 9300 User Manual... -
Page 17: Baud Rates
Select the ‘ ’ item using the button. PROTOCOL Press ‘next/select’ to enter the ‘ ’ menu. PROTOCOL Select the ‘ ’ item using the button. XOFF Press ‘next/select’ to enter the ‘ ’ menu. XOFF Select the appropriate setup using the button. -
Page 18: Bits Combination
Setting the parity and stop bits Press ‘Program’ to enter the main menu. Select the ‘C ’ item using the button. ONFIGURATION Press ‘next/select’ to enter the ‘C ’ menu. ONFIGURATION Select the ‘ ’ item using the button. CONNECTIONS Océ 9300 User Manual... -
Page 19: Port Type
Press ‘next/select’ to enter the ‘ ’ menu. CONNECTIONS Select the ‘ ’ item using the button. SERIAL Press ‘next/select’ to enter the ‘ ’ menu. SERIAL Select the ‘ ’ item using the button. TRANSMISSION Press ‘next/select’ to enter the ‘ ’... -
Page 20: Turnaround Delay
’ item using the button. TURNAROUND Press ‘next/select’ to enter the ‘ ’ menu. TURNAROUND Select the required delay using the button. Press ‘next/select’ to confirm the selected delay. Press ‘Program’ to leave the main menu. Océ 9300 User Manual... -
Page 21: Inter-Character Delay
Inter-character delay The printer offers possible delays from 0 to 10 seconds, with increments of 0.01 second. The default is 1.0. Setting the inter-character delay Press ‘Program’ to enter the main menu. Select the ‘C ’ item using the button. ONFIGURATION Press ‘next/select’... -
Page 22: Configuring The Printer's Memory
Turn the printer off and then on again. If you do not restart the printer, the new memory allocation is not Note: activated. Any print data in the printer’s memory (files in the queue) will be lost when you turn off the printer. Océ 9300 User Manual... -
Page 23: Bitmap Buffer
Bitmap buffer This buffer defines a percentage of the total RAM memory that can be used as the bitmap partition. This value will be set between two values, depending on the RAM configuration. The installed RAM can be divided into the following sections: Bitmap partition Processing area for files The size of the bitmap partition determines the max. - Page 24 Any print data in the printer’s memory will be lost when you turn off the printer. 58 % 82 % 39 % 88 % 29 % 90 % The presented memory percentages are only an indication and may vary Note: slightly from one firmware release to another. Océ 9300 User Manual...
-
Page 25: (Re)Load Media And Toner
Océ 9300 User Manual Chapter 3 (Re)load media and toner This chapter describes how to insert new media, how to add toner and how to program the media settings. -
Page 26: Inserting A New Print Media Roll
If there is no match of material type and format, you must refill the empty roll. Océ 9300 User Manual... -
Page 27: Reloading Rolls
Defining automatic roll switching Press ‘Program’ to enter the main menu. Select the ‘ ’ item using the button. MEDIA SETTINGS Press ‘next/select’ to enter the ‘ ’ menu. MEDIA SETTINGS Select ‘ ’ using the button. MEDIA MODE Press ‘next/select’ to enter the ‘ ’... - Page 28 Make sure that the knob is to the right, and that paper appears as shown in figure 7. [7] Pressing the knob While pressing the knob, align the roll with the appropriate lines on the roll holder. This line must be completely visible. Océ 9300 User Manual...
- Page 29 Place the roll holder with the material in the drawer (see figure 8). [8] Repositioning the roll Feed the material between the input guide plates against the rollers. Turn the rollers until the material is visible (see figure 9). You can also refer to the sticker inside the drawer.
-
Page 30: Cutting Print Media To Attain A Straight Leading Edge
Pull back the material until it is visible and positioned correctly (see figure 9 on page 29). Close the drawer. Press the button ‘Cancel/Continue’. Reloading roll 2 Open the cover to get access to roll 2 (see figure 10). [10] Opening the lower compartment Océ 9300 User Manual... - Page 31 Remove the roll holder (see figure 11). [11] Removing the roll holder from the lower compartment While pressing the knob, remove the empty core from the roll holder (see figure 7 on page 28). While pressing the knob, slide the roll holder into the roll of print material (see figure 7 on page 28).
- Page 32 If you want to cut the paper to get a straight leading edge, see ‘Cutting print media to attain a straight leading edge’ on page 30. Otherwise continue with the next step. Close the lower paper compartment. Press the ‘Cancel/Continue’ button. Océ 9300 User Manual...
-
Page 33: Printing Using The Manual Feed
Printing using the manual feed Manual feed can be selected in two ways: Via remote control commands added to the print file (by means of Plot Director or drivers.) By changing the ‘MEDIA MODE’ in program mode. If the user wants to use manual feed, he or she must: Program the media settings on the printer;... -
Page 34: Programming Media Settings
Vellum 16 lb. Vellum Contrast paper 34 lb. paper Fluor paper 25 lb. paper Pastel paper 20 lb. paper ** The sticker on this polyester roll indicates ‘4 mil’, but the thickness is really 4.5 mil. Océ 9300 User Manual... - Page 35 Programming media width settings Press ‘Program’ to enter the main menu. Select the ‘ ’ item using the button. MEDIA SETTINGS Press ‘next/select’ to enter the ‘ ’menu. MEDIA SETTINGS Select ‘ 1’, ‘ 2’, ‘ ’ using the button. ROLL ROLL MANUAL FEED...
- Page 36 Select the ‘ ’ using the button. TIMEOUT Press ‘next/select’ to enter the ‘ ’ menu. TIMEOUT Select the desired time-out using the button. Press ‘next/select’ to confirm the selected time-out. Press ‘Program’ to exit the main menu. Océ 9300 User Manual...
-
Page 37: Refilling Toner
Refilling toner If the message ‘REFILL TONER’’ --- > Press Continue appears in the display, you must refill the toner immediately. Refilling toner Use only Océ B4 toner. Attention: Unscrew the access nut on the left side of the printer and open the left cover (see figure 15). - Page 38 Pull the waste toner bag from the holder and seal the bag with the cap provided (see figure 18). [18] Replacing the waste toner bag Slide a new waste toner bag over the holder. Close the cover and tighten the access nut. Press the ‘Continue’ button to resume printing. Océ 9300 User Manual...
-
Page 39: Printing Files
Océ 9300 User Manual Chapter 4 Printing files This chapter describes how to print files. -
Page 40: Printing Files
Printing files The Océ 9300 can be connected to a host environment, which may be either a stand alone PC/Workstation or a PC/Workstation connected to a network. It accepts various standard format CAD/CAM vector and EDMS raster data files from the host environment and converts these into high quality plots (see figure 19). -
Page 41: Océ Application
Océ application The following application is available: Plot Director (MS-Windows 3.x, 95/98 and NT) Océ drivers Please refer to the Océ website (www.oce.com) for obtaining the latest Note: drivers. ADI driver for AutoCAD R13C3 (Windows 95/98), ADI driver for AutoCAD R13C4 (MS-DOS, Windows 95/98, NT 4.0), ADI driver for AutoCAD R14 (Windows 95/98, NT 4.0),... -
Page 42: Cut Method
If Synchro Cut is selected, the bounding box of the plot sets hard clip limits. If Plot Center is ON, the plot is shifted left/right to be centered on the page. Océ 9300 User Manual... -
Page 43: Leading/Trailing Edge
Programming Plot Center Press ‘Program’ to enter the main menu. Select ‘ ’ item using the button. MEDIA SETTING Press ‘next/select’ to enter the ‘ ’ menu MEDIA SETTING Select the ‘ ’ item using the button. PLOT POSITION Press ‘next/select’ to enter the ‘ ’... -
Page 44: Demo Plot
Demo plot After installing the Océ 9300, we recommend that you generate a demo plot in order to make sure that the printer works properly. Making a demo plot Press ‘Program’ to enter the main menu. Select the ‘ item using the button. -
Page 45: Customizing Defaults
Océ 9300 User Manual Chapter 5 Customizing defaults This chapter explains how to set certain Océ 9300 defaults, such as pen settings and languages, to accommodate frequently-used print jobs. -
Page 46: Defining Pen Settings
A pen can be selected by the plot file to draw a line or to fill a polygon. All lines or polygons on the plot can be drawn with a predefined pattern or shade of gray. Pen pattern 16 is the default. The following pen patterns are available: white black [20] Available pen patterns Océ 9300 User Manual... - Page 47 Defining the pen settings Press ‘Program’ to enter the main menu. Select the ‘C ’ item using the button. ONFIGURATION Press ‘next/select’ to enter the ‘C ’ menu. ONFIGURATION Select the ‘ ’ option using the button. PEN MENU Press ‘next/select’ to enter the ‘ ’.
-
Page 48: Defining Language Settings
Defining language settings The Océ 9300 accepts print files in various data formats (languages). You can change the settings for PostScript, VDF, BGL, HP-GL, HP-GL/2, HP-RTL, CalComp, CALS, TIFF or EDMICS. Automatic language sensing Automatic language sensing (ALS) is the mechanism which the system uses to detect the language (data format) of a file for which the format has not been specified in the file header. -
Page 49: Data Format Recognition
Data format recognition To optimize your printer’s language recognition capabilities and reduce the risk of errors, each of the above-mentioned data formats can be individually set ‘ON’ or ‘OFF’. The default is ‘ON’. Optimizing data format recognition Press ‘Program’ to enter the main menu. Select the ‘C ’... -
Page 50: Manual Data Format Selection
Press ‘next/select’ to enter the ‘ ’ menu. SELECT FORMAT Select the required language using the button. Press ‘next/select’ to confirm the selected language. Press ‘Program’ to exit the main menu. When PostScript is selected, RCF headers are not recognized. Note: Océ 9300 User Manual... -
Page 51: Océ Languages (Vdf/Bgl)
DATA FORMAT Press ‘next/select’ to enter the ‘ ’ menu. DATA FORMAT Select the ‘ ’ item using the button. OCE SETUP Press ‘next/select’ to enter the ‘ ’menu. OCE SETUP Select the ‘ ’ item using the button. ORIGIN Press ‘next/select’... -
Page 52: Océ Step Size
Océ step size The Océ 9300 offers four different step sizes: 12.5 µm, 25 µm, 50 µm and 100 µm (see figure 22). Be careful when choosing the step size: the wrong step size will negatively affect the scale of your drawing. The default is 25. -
Page 53: Océ Pen Priority
DATA FORMAT Press ‘next/select’ to enter the ‘ ’ menu. DATA FORMAT Select the ‘ ’ item using the button. OCE SETUP Press ‘next/select’ to enter the ‘ ’menu. OCE SETUP Select the ‘ ’ item using the button. PEN PRIORITY Press ‘next/select’... -
Page 54: Hp-Gl
’ is set to no, the printer responds to the HP-GL instruction PAGE ADVANCE SP0 as select pen zero. Any vectors following the SP0 will be printed with the defined pen attributes (width and pattern). The default is Yes. See also ‘Defining pen settings’ on page 46. Océ 9300 User Manual... -
Page 55: Merge Mode
Setting the HP-GL page advance Press ‘Program’ to enter the main menu. Select the ‘C ’ item using the button. ONFIGURATION Press ‘next/select’ to enter the ‘C ’ menu. ONFIGURATION Select the ‘ ’ item using the button. DATA FORMAT Press ‘next/select’... -
Page 56: Hp-Gl/2 Print Origin
’ is set to no, the printer responds to the HP-GL instruction PAGE ADVANCE SP0 as select pen zero. Any vectors following the SP0 will be printed with the defined pen attributes (width and pattern). The default is No. See also ‘Defining pen settings’ on page 46. Océ 9300 User Manual... -
Page 57: Hp-Gl/2 Pen Priority
Setting the HP-GL/2 page advance Press ‘Program’ to enter the main menu. Select the ‘C ’ item using the button. ONFIGURATION Press ‘next/select’ to enter the ‘C ’ menu. ONFIGURATION Select the ‘ ’ item using the button. DATA FORMAT Press ‘next/select’... -
Page 58: Designjet Compatibility
Press ‘next/select’ to enter the ‘ ’ menu. DATA FORMAT Select the ‘ ’ item using the button. SETUP Press ‘next/select’ to enter the ‘ ’ menu. SETUP Select the ‘ ’ item using the button. MERGE Océ 9300 User Manual... -
Page 59: Line Attribute
SETUP Select the ‘LINE ATTRIBUTE’ item using the button. Press ‘next/select’ to enter the ‘LINE ATTRIBUTE’ menu. Select ‘OCE ROUND’ or ‘HP DEFAULT’ using the button. Press ‘next/select’ to confirm the selected setting. Press ‘Program’ to leave the main menu. -
Page 60: Hp-Rtl
HP-GL/2 format mode. Without this command, the plot results will be unpredictable and the printer will stop. The following HP-RTL statements are not recognized by the Océ 9300 and will be treated as no-ops: ESC*v#a, ESC*v#b, ESC*v#c, ESC*v#i, ESC*v#W[data], ESC*b#l and ESC&b#V[data]. -
Page 61: Calcomp
CalComp The Océ 9300 supports use of the CalComp graphics language. CalComp print origin The term “print origin” refers to the point on the paper at which a drawing starts: Upper right, upper left, center, lower right and lower left. -
Page 62: Checksum Parameter
’ item using the button. CALCOMP SETUP Press ‘next/select’ to enter the ‘ ’ menu. CALCOMP SETUP Select the ‘ ’ item using the button. PEN PRIORITY Press ‘next/select’ to enter the ‘ ’ menu. PEN PRIORITY Océ 9300 User Manual... -
Page 63: Merge Mode
Select the required pen priority using the button. Press ‘next/select’ to confirm the selected pen priority. Press ‘Program’ to exit the main menu Merge mode This option determines what happens when two or more colors intersect at the same point of a plot, especially in area fills. The default setting is ‘On’. Only the last color specified is printed for a given line or area. -
Page 64: Synchronization Code Parameter
SYNC CODE Press ‘next/select’ to enter the ‘ ’. menu. SYNC CODE Select the required sync code using the button. Press ‘next/select’ to confirm the selected sync code. Press ‘Program’ to exit the main menu. Océ 9300 User Manual... -
Page 65: Double Synchronization Code Parameter
Double synchronization code parameter The synchronization code parameter is significant in all cases in which CalComp format is selected or auto-recognized, when select format is set to Auto or a remote control command for CalComp has been sent. The double synchronization parameter allows one or two synchronization characters to identify the beginning of a message of print data. -
Page 66: Calcomp Step Size
’ item using the button. STEP SIZE Press ‘next/select’ to enter the ‘ ’menu. STEP SIZE Select the required value using the button. Press ‘next/select’ to confirm the selected value. Press ‘Program’ to exit the main menu. Océ 9300 User Manual... -
Page 67: Raster Formats
Raster formats CALS CALS stands for Computer Aided Acquisition and Logistics Support. The Océ 9300 printer supports CALS type 1 files. (Untiled, compatible with CCITT Group 4 format). NIRS NIRS is a subset of CALS. The data format consists of a CALS header followed by an NIRS header, followed by TIFF raster data. -
Page 68: Postscript Level 2
Your PostScript document can be printed on any PostScript printer, in most cases without any decrease in output quality. The Océ 9300 PostScript driver translates the application’s internal data into PostScript, and also simplifies the selection of printer features. -
Page 69: Postscript Page Layout
PostScript page layout The orientation of the printed page on the roll can be either landscape or portrait. Selecting the PostScript page layout Press ‘Program’ to enter the main menu. Select the ‘C ’ item using the button. ONFIGURATION Press ‘next/select’ to enter the ‘C ’... - Page 70 The page size defined in the PostScript driver overrides the default Note: PostScript page size setting. Manual feed and Autoscale-to-format are not supported by the PostScript driver. These functions can, however, be activated via the printer operating panel. Océ 9300 User Manual...
-
Page 71: Advanced Menu Functions
Océ 9300 User Manual Chapter 6 Advanced menu functions This chapter describes certain advanced printing functions. -
Page 72: Introduction
Introduction The Océ 9300 makes certain advanced printer menu functions available to the user, such as: End of Plot time out (see page 73). Media saver (see page 74). Replot (see page 79). Quality Setup (see page 80) Transformation (see page 83) Password setting for display (see page 87) Dump configuration (see page 88). -
Page 73: End Of Plot Time Out
End of plot time out Normally, print files end with an instruction that tells the printer that the file is finished. However, some print data files do not have an end-of-print instruction. In such cases, the print is considered 'finished' when the printer does not receive any more graphic commands. -
Page 74: Selecting The Media Saver
Selecting the media saver The Océ 9300 offers two options for optimizing usage of print media: Nesting and Autoposition. This applies to both vector and raster formats. The media saver can also be disabled. The media saver is cleared in the following situations:... - Page 75 Select the ‘ ’ item using the button. MEDIA SAVER Press ‘next/select’ to enter the ‘ ’ menu. MEDIA SAVER Select the ‘ ’ item using the button. S MODE Press ‘next/select’ to enter the ‘ ’ menu. S MODE Select the ‘...
-
Page 76: Autoposition
Select the ‘ ’ item using the button. AUTO POSITION Press ‘next/select’ to select the required setting. Press ‘Program’ to exit the main menu. De-selecting the media saver Use the above procedure and select media saver OFF. Océ 9300 User Manual... -
Page 77: Media Saver Time-Out
Media saver time-out As explained in the previous section, when the media saver queue is full, the drawings are printed. However, to prevent unnecessary delays for prints in partially filled queues, a time-out of 1 to 60 minutes can be set, after which the contents of the queue are printed. -
Page 78: Media Saver Plot Size
S PLOT SIZE Press ‘next/select’ to enter the ‘ ’ menu S PLOT SIZE Select the required setting using the button. Press ‘next/select’ to confirm the selected setting. Press ‘Program’ to exit the main menu. Océ 9300 User Manual... -
Page 79: Replot
Replot Normally, files are discarded after being processed and printed. The replot function overrides this feature, preventing the file from being discarded. To make extra copies/prints from the operating panel, you must select ‘ REPLOT ’. ENABLE The default is ‘off’. Enabling replot Press ‘Program’... -
Page 80: Quality Setup
Select the Poster mode on/off using the button. Press ‘next/select’ to confirm the Poster mode. Press ‘Program’ to leave the main menu . This setting can be overridden by Plot Director, the drivers, or the setting Note: on the scanner operating panel. Océ 9300 User Manual... -
Page 81: Rendering
Rendering The rendering function can be divided into clustered or cloud. With this option you can change the first 16 pen patterns into another 16 gray-shaded pen patterns [25] The rendering function gray-shaded patterns Clustered must be used if your originals contain large gray areas. Attention: Use cloud to get an optimal result with line drawings. -
Page 82: Image Type
Image type The Océ 9300 has an optimized quality mode for scaling down raster files in order to deliver the best possible quality. The default setting is PHOTO. will use scaling in order not to lose thin lines when scaling down raster files or converting the resolution of the file to the resolution of the rpinter(300 dpi). -
Page 83: Transformation
Transformation The Océ 9300 allows the user to change the position of the image on the print in the following ways: Image rotation and scaling functions. This applies only to vector languages and is possible only when the media saver is switched off. -
Page 84: Autoscaling
Users can enlarge drawings to poster size in order to make presentations to large audience. They can also reduce documents to easily mail them or archive them in standard A3 (11x17") or A4 (8.25x11") books. Océ 9300 User Manual... - Page 85 Best fit Mode: In this mode, the drawing will be reduced to match either the length or the width of the format loaded in the machine, with no loss of information (no clipping). Only plots larger than the loaded media size are scaled or rotated; all others are printed without scaling.
- Page 86 AUTOSCALE Press ‘next/select’ to enter the ‘ ’ menu. AUTOSCALE Select ‘ 1’ or 0’ using the button. ‘ BEST FIT Press ‘next/select’ to confirm the required setting Press ‘Program’ to exit the main menu. Océ 9300 User Manual...
-
Page 87: Password
Password Because the printer may be operated in your work environment by users with differing skill levels, three menu access levels can be set for security reasons. The display menu allows fully authorized users to access these different printer menu levels, from the locked level to the full menu levels, by means of passwords. -
Page 88: Dump Configuration
UTILITIES Press ‘next/select’ to enter the ‘ ’ menu. UTILITIES Select the ‘ ’ item using the button. DUMP CONFIG Press ‘next/select’ to confirm ‘ ’. DUMP CONFIG Press ‘Program’ to leave the main menu. Océ 9300 User Manual... -
Page 89: Service
Service This menu is only meant for the Océ service technician. Advanced menu functions... - Page 90 Océ 9300 User Manual...
-
Page 91: Solving Problems
Océ 9300 User Manual Chapter 7 Solving problems This chapter describes problems that may occur while using the Océ 9300. -
Page 92: Solving Problems
Solving problems This chapter documents problems that may occur with the Océ 9300, and describes how to solve them. There are three types of printer warnings/errors: Warnings Operator-recoverable errors (printer) Machine-recoverable errors Printer warnings Warnings appear in the display. The printer will continue to print, but print quality may diminish. -
Page 93: Operator Recoverable Errors
Operator recoverable errors The printer stops immediately when it detects an operator-recoverable error. An error message displays on the panel. The user must take action to solve the problem. Message Description ERROR FEED Print media in feed table or feed table not closed TABLE Remove the paper and/or close the feed table PAPER REMOVED... -
Page 94: Clearing Paper Jams
[27] Lowering the feed table Remove the jammed material. Check thoroughly to make sure that no scraps of material remain. Note: Close the feed table. Close the cover of the roll unit. Turn the printer on. Océ 9300 User Manual... - Page 95 If the paper jam cannot be cleared by opening the feed table, then open the fuser section. Clearing paper jams in the fuser section Turn the printer off. Unscrew the access nut on the left-hand side of the machine and open the cover (see figure 28).
-
Page 96: Machine-Recoverable Errors
Turn off the printer and check the entire paper path. See ‘Clearing paper jams’ on page 94. Then turn the printer on again. If no error number appears in the display, you can continue printing. If the machine error remains, call the key operator. Océ 9300 User Manual... -
Page 97: Overview And Tables
Océ 9300 User Manual Appendix A Overview and tables... -
Page 98: Product Specifications
Product specifications The Océ 9300 is a wide-format, low- to mid-volume copying and printing system. Printer Technology electrophotography (LED head) Photoconductive drum organic photoconductor (OPC) Printing speed 3 m/min (10 feet/min) Warm-up time none, once it is turned on Media feed... -
Page 99: Interfaces
BUSY. When the transfer is complete, the printer sends ACKNOWLEDGE to the computer and another cycle can begin. Serial protocols Two types of computer-to-printer handshaking, (and their variants), are available on the Océ 9300 printer: Hardware XON/XOFF Depending on the emulation selected, handshake protocols can be set either through the software or the control panel. -
Page 100: Ethernet Protocol
Ethernet protocol If the printer is equipped with an Ethernet interface, it can be connected to: TCP/IP IPX (Novell Netware) Ethertalk network. NETBIOS (over TCP/IP). For additional details, refer to the Ethernet print server user manual. Océ 9300 User Manual... -
Page 101: Centronics Port Configuration
Centronics port configuration The Centronics parallel port is located at the rear of the printer. It is an Amphenol 36-pin female mini- connector. The following table describes the Centronics port pin assignments. For further details, refer to the IEEE P1284 standard. Printer Pin No. -
Page 102: Serial Port Configuration
CTS Clear to send Host to printer TX Transmit data ------------------ GNDProtective ground Printer to host RXReceived print data Host to printer RTSReady to send Printer to host DSRData set ready DTR is the dialog signal. [32] Serial connector Océ 9300 User Manual... -
Page 103: Print Media That Can Be Used
We therefore recommend using only approved Océ media in the Océ 9300. A full list of Océ materials suitable for use in the Océ 9300, including plain paper, transparencies, colored paper and various polyester films is available from your Océ representative. - Page 104 (16.5") or 10 feet. This is also the limit for prints (A3) and multiple copies made on the Océ 9300. For single copies/prints made on the Océ 9300 printer or hybrid, the maximum length may be up to 15 meters (about 50 feet), but...
-
Page 105: Hardware Components And Operating Panel
Océ 9300 User Manual Appendix B Hardware components and operating panel... -
Page 106: Océ 9300
Océ 9300 Feed table printer Operating panel printer Paper roll 1 Paper roll 2 Océ 9300 User Manual... -
Page 107: Operating Panel
Operating panel READY previous next/select program cancel/continue Display Previous button Next/select button Cancel/continue button Program button Indicator Browse buttons Hardware components and operating panel... - Page 108 Océ 9300 User Manual...
-
Page 109: Safety Information
Océ 9300 User Manual Appendix C Safety information... -
Page 110: Instructions For Safe Use
Make sure that the machine is placed on a level, horizontal surface, stable and strong enough to support the weight of the machine. See the Océ 9300 safety data sheet in this appendix for information about the weight of the machine. -
Page 111: Safety Data Sheets
Safety data sheets The disclaimer below is valid for all safety data sheets in this Disclaimer manual. These safety data sheets have been compiled to the best of our knowledge as a compact guide to safe handling of this product. We reserve the right to revise safety data sheets as new information becomes available. -
Page 112: Safety Data Sheet Océ 9300 Printer
Safety data sheet Océ 9300 printer PRODUCT SAFETY DATA SHEET Number E-708-a-US Date August 1999 Model Océ 9300 Description Electrostatic printer, instant printing, console model, plain paper, organic photoconductive drum, powder toner Max. process speed 3 m/min 1 roll 2 roll... -
Page 113: Miscellaneous
Océ 9300 User Manual Appendix D Miscellaneous... -
Page 114: How To Read This Manual
How to read this manual The consistent style that is used in this manual enables you to quickly become familiar with the use of this manual and ultimately the Océ 9300. Each section or subsection contains a description of the feature or Description operation identified in the title. -
Page 115: User Survey
User survey Did you find this manual to be accurate? Were you able to operate the product after reading this manual? Does this manual provide adequate background information? Is the format of this manual convenient in size, easy to read and layed out well? Did you find the information you were looking for? Always Most of the times... - Page 116 City: Country: Please return this sheet to: Océ-Technologies B.V. Attn: ITC-User Documentation P.O. Box 101 5900 MA Venlo The Netherlands Send you comments by E-mail to: itc-userdoc@oce.nl For the addresses of local Océ organizations see: www.oce.com Océ 9300 User Manual...
-
Page 117: Addresses Of Local Océ Organizations
Addresses of local Océ organizations Océ-Australia Ltd. Océ-Danmark A.S. P.O.Box 363 Kornmarksvej 6 Brøndby Ferntree Gully MDC VIC 3165 DK 2605 Australia Denmark Océ-Österreich GmbH Océ-France S.A. Postfach 95 32, Avenue du Pavé Neuf, 1233 Vienna 93161 Noisy-le-grand, Cedex Austria France Océ-Belgium N.V./S.A. - Page 118 190 MacPherson Road Singapore 348548 Océ España SA Business Park MAS BLAU C/Osona 2, 2-3a Planta 08820 El Prat del Llobregat (Barcelona) Spain Océ-Svenska AB P.O.box 1231 S-164 28 Kista Sweden Océ-Schweiz AG Sägereistrasse 29 CH8152 Glattbrugg Switzerland Océ 9300 User Manual...
-
Page 119: Index
end-of-plot time-out 73 Index flush media saver 77 framing 18 full menus 87 auto roll selection 34, 36 Automatic language sensing 48 automatic roll switch 36 autoposition 76 handshake protocol 16 high-capacity delivery tray 8 baud rate 17 bitmap buffer 23 bits combination 18 input buffer 22 inter-character delay 21... - Page 120 26 transmission speed 15 Print origin turnaround delay 20 CalComp 61 Turning off HP-GL 54 printer 12 HP-GL/2 56 turning the copier on Océ 51 printer 12 print settings 46 printer operating panel 9 problems 92 Océ 9300 User Manual...
- Page 121 waste toner bag 38 Index...