Table of Contents
Advertisement
Advertisement
Table of Contents

Summary of Contents for Apollo RoadRunner HD
- Page 3 RoadRunner HD™ | High Definition Mobile Recorder WARNING RISK OF ELECTRIC SHOCK DO NOT OPEN WARNING: TO REDUCE THE RISK OF ELECTRIC SHOCK, DO NOT REMOVE COVER (OR BACK). NO USER-SERVICEABLE PARTS INSIDE. REFER SERVICING TO QUALIFIED SERVICE PERSONNEL. The lightning flash with arrowhead symbol, within an equilateral triangle, is intended to alert the user to the presence of uninsulated "dangerous voltage"...
-
Page 4: Important Safeguards
User Guide and Instruction Manual Important Safeguards 1. Read Instructions 11. Replacement Parts All the safety and operating instructions should be read before the When replacement parts are required, be sure the service technician has appliance is operated. used replacement parts specified by the manufacturer. Unauthorized substitutions may result in fire, electric shock or other hazards. -
Page 5: Table Of Contents
RoadRunner HD™ | High Definition Mobile Recorder Table of Contents Chapter 1 — Introduction ......................1 Chapter 2 — Installation ......................3 Rear Panel Connectors ......................3 Front Panel Controls ......................7 Mounting the Recorder ......................8 Chapter 3 — Operation and Configuration................. 9 Turning on the Power ...................... - Page 6 User Guide and Instruction Manual...
-
Page 7: Chapter 1 - Introduction
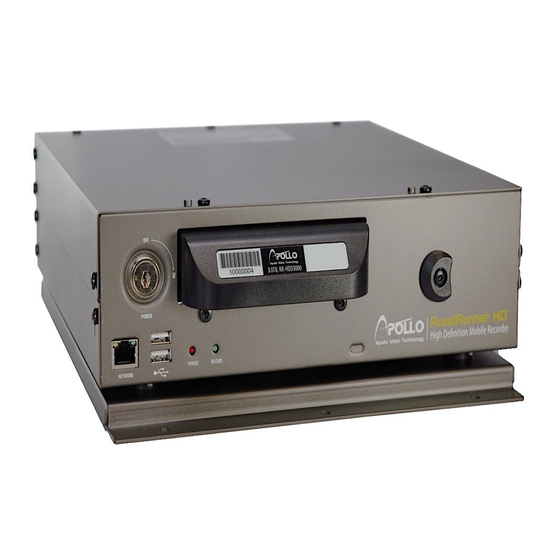
RoadRunner HD™ | High Definition Mobile Recorder Chapter 1 — Introduction The RoadRunner High Definition Mobile Recorder is designed for mobile applications and operates using 9 to 36 volts DC, which makes it compatible with the typical 12 VDC and 24 VDC power systems found on vehicles. The Recorder provides viewing and recording capabilities for up to 16 cameras. - Page 8 User Guide and Instruction Manual...
-
Page 9: Chapter 2 - Installation
RoadRunner HD™ | High Definition Mobile Recorder Chapter 2 — Installation Rear Panel Connectors Power Port UPS Port Video In Ports Network Ports eSATA Port Alarm Ports Event Port RS232 Ports RS485 Port Audio In Port AUX Power Port GPS/Cell/WiFi Ports Factory Reset Switch Once all necessary connections have been made, attach the rear panel cover to the Recorder. - Page 10 User Guide and Instruction Manual CAUTION: When the heater power supply does not meet the requirement (9A@12VDC or 4.5A@24VDC) during operation, the Recorder and heater might be damaged. WARNING: DO NOT TOUCH THE BOTTOM OR TOP OF THE REMOVABLE DRIVE WHEN REMOVING IT AFTER THE HEATER HAS BEEN OPERATING IN LOW TEMPERATURES.
- Page 11 RoadRunner HD™ | High Definition Mobile Recorder Alarm Connection – J5, J6, J7, J10 and J4 AI 1 to 16 (Alarm-In): Use external devices to signal events to the Recorder. Mechanical or electrical switches can be wired to the AI (Alarm-In) and GND (Ground) connectors. The voltage range is from 0V to 50V. When the electrical switch is wired, the threshold voltage for NC (Normally Closed) is below 2.5V and for NO (Normally Open) is above...
- Page 12 User Guide and Instruction Manual RS232 Connection – J6, J7 Two RS232 ports are provided to connect external devices such as GPS. Connection Master Unit Slave Unit Receive Data Transmit Data Chassis Ground VDC Output VDC Output RS485 Connection –...
-
Page 13: Front Panel Controls
RoadRunner HD™ | High Definition Mobile Recorder WiFi/Cell/GPS Connection – J12 Each connector is provided to connect WiFi, Cell and GPS antennas. The GPS antenna will be connected to the Recorder for working with the Recorder internal GPS module NOTE: WiFi and Cell connections will be supported in a future release. -
Page 14: Mounting The Recorder
User Guide and Instruction Manual Front Cover (sold separately) Insert the front cover key into the keyhole and rotate it clockwise. Place the cover over the front of the recorder. Align the slots with the pins on the recorder and slide the front cover to the right. Rotate the key counterclockwise to lock it into place. -
Page 15: Chapter 3 - Operation And Configuration
RoadRunner HD™ | High Definition Mobile Recorder Chapter 3 — Operation and Configuration NOTE: The Recorder should be completely installed before proceeding. Refer to Chapter 2 — Installation. Turning on the Power The Recorder can be turned on by inserting the key in the On/Off switch and rotating it clockwise. The switch can be in the On position and the key removed. -
Page 16: Initial Unit Setup
User Guide and Instruction Manual Initial Unit Setup Before using the Recorder for the first time, establish the initial settings. Install the RsM Software Program (RoadRunner Secure Management Software ) on a PC and connect to the Recorder remotely. The RsM program is provided with the product for remote operation. The Recorder can be accessed, configured and managed by using RsM. - Page 17 RoadRunner HD™ | High Definition Mobile Recorder Select a device group in the Site panel and then select a device (registered Recorder) in the Site List panel. Selecting button at the bottom of the Site List panel, or selecting Remote Setup Device from the device menu displayed by clicking the right mouse button to change the Recorder’s settings remotely.
-
Page 18: System Setup
User Guide and Instruction Manual Throughout the screens notice the Default button located on the left bottom corner. Selecting Default provides the opportunity to reset that screen to its default settings. Select Apply or OK to apply the changes and exit the screen in any setup. - Page 19 RoadRunner HD™ | High Definition Mobile Recorder Select the first box beside Date and the individual sections of the date will highlight. Use the Up and Down arrows to change the number. Select the Format box beside Date and select from the three available date formats to save selected format.
- Page 20 User Guide and Instruction Manual User PATH: System menu > User The User screen displays the authorized groups and users which can be added, deleted and modified. When adding a group, authority levels can be assigned. The +/- column is used to collapse and expand user groups. If there is a + or –...
- Page 21 RoadRunner HD™ | High Definition Mobile Recorder Covert Camera Setup – The user can establish all Covert Camera settings. Record Setup – The user can establish all Record settings. Setup Import – The user can import saved Recorder settings.
- Page 22 User Guide and Instruction Manual Selecting Auto Format toggles between On and Off. When set to On, the internal hard disk drive will be formatted automatically when the system boots if the internal hard disk drive is not formatted or used for another Recorder. Power Management PATH: System menu >...
- Page 23 RoadRunner HD™ | High Definition Mobile Recorder Monitoring PATH: System menu > Monitoring The Recorder can be configured to run self-diagnostics and report the results. Select the Settings box beside the desired event (System, Check Recording, Check Alarm-In, Disk Almost Full, Disk Bad, or Disk Temperature).
-
Page 24: Camera Setup
User Guide and Instruction Manual The Recorder can be set to react to system events. Select the Actions box beside the desired event. System events can be associated with an Alarm-Out and Alarm LED, and/or notify a number of different devices. NOTE: Alarm-Out action cannot be set to System, Boot Up, Restart and Shutdown events. - Page 25 RoadRunner HD™ | High Definition Mobile Recorder Configure the camera’s recording and remote compression method, resolution, picture quality, transfer speed, and ips speed settings. Select the box beside Camera Channel and select the camera number to configure a unique video profile. Selecting the Copy to Camera box applies the video profile settings of the camera selected under Camera Channel to the selected camera.
- Page 26 User Guide and Instruction Manual Advanced Setup PATH: Camera menu > Advanced Setup Configure the camera’s general settings. Select the box under Video changes the video settings such as image sensor, white balance and exposure. NOTE: Refer to the network camera manual for more detailed instructions on setting up the Video. Image Sensor ...
- Page 27 RoadRunner HD™ | High Definition Mobile Recorder Exposure AE Target Gain: Set the target gain for the exposure compensation. Local Exposure: Set the local exposure. Anti-Flicker: Set to the same frequency as the lighting when the AC power is used for the lighting such as a fluorescent lights.
-
Page 28: Record Setup
User Guide and Instruction Manual Upgrade PATH: Camera menu > Upgrade To upgrade the firmware of network cameras, select the box under the Firmware Upgrade and select the desired file. Selecting the Upgrade button will install the selected firmware package. Selecting the Cancel button will close the window without upgrading the firmware. - Page 29 RoadRunner HD™ | High Definition Mobile Recorder Select the slide bar beside Auto Deletion, and adjust the length of time recorded data will be kept from 1 to 999 days. The Recorder automatically deletes video recorded earlier than the user-defined period under three conditions: at midnight, whenever the system reboots or whenever the user changes the Auto Deletion settings.
-
Page 30: Event Setup
User Guide and Instruction Manual Event Setup Alarm-In PATH: Event menu > Alarm-In Turn each input On or Off by selecting the alarm number. Each input can be given a title. Select the desired Title box and enter a title name. Each input can be set as NO (normally open) or NC (normally closed). - Page 31 RoadRunner HD™ | High Definition Mobile Recorder Text-In PATH: Event menu > Text-In The Recorder can be set to react to text input from devices such as accelerometer or other onboard systems. This screen allows configuration of the Recorder for each text-in device.
- Page 32 User Guide and Instruction Manual Select the Case Sensitive box to toggle between On and Off. Refer to the device manufacturer’s documentation to determine if the text strings are Case Sensitive. If the device distinguishes between upper and lower case letters, make certain the Case Sensitive box is turned On.
- Page 33 RoadRunner HD™ | High Definition Mobile Recorder Select the box under Actions. The Recorder can be set to react to motion detection differently for each camera. Each camera can be associated with another camera, trigger an Alarm-Out and Alarm LED, and/or notify a number of different devices.
- Page 34 User Guide and Instruction Manual NOTE: The record action for tripzone events is not affected by the TripZone Ignoring function. Selecting Daytime Setup allows set up the Daytime range. Use the Up and Down arrow buttons to set the Daytime range.
-
Page 35: Devices Setup
RoadRunner HD™ | High Definition Mobile Recorder Audio detection can be turned On or Off for each camera. This feature sends alerts when audio detection is below the set sensitivity level. This notification indicates a possible loss of audio. Selecting the box under the Sensitivity heading allows adjustment of the Recorder’s sensitivity to audio detection. - Page 36 User Guide and Instruction Manual PATH: Devices menu > GPS Select the box beside Port and select from Internal, RS232 (1~2), RS485 and LAN (1 ~ 16). If the RS232 or RS485 ports are in use for another function, they cannot be configured for GPS. If RS232, RS485 and LAN ports are selected, select Setup…...
-
Page 37: Network Setup
RoadRunner HD™ | High Definition Mobile Recorder Network Setup General PATH: Network menu > General The Recorder supports two-way audio communication between a local system and a PC running RsM. Selecting the box beside Remote Audio Channel selects the audio channel that sends audio to the remote site. Selecting Select From Client will send audio of the channel selected from RsM. - Page 38 User Guide and Instruction Manual IP Address PATH: Network menu > IP Address Select the box beside Type, and select the type of network configuration between Manual and DHCP. Selecting Manual from the Type allows set up of LAN parameters manually. Select the number to change and use the Up and Down arrows to increase or decrease.
- Page 39 RoadRunner HD™ | High Definition Mobile Recorder Selecting DHCP from the Type and selecting Apply button reads the current IP address of the Recorder configured by DHCP (Dynamic Host Configuration Protocol) network. Select Auto (Default) to toggle between On and Off. When it is On, the Recorder will obtain the IP address of the DNS server automatically.
-
Page 40: Notification Setup
User Guide and Instruction Manual NOTE: The FEN Name you entered should be checked by selecting Check, otherwise the FEN changes will not be saved. When entering no name or a name already registered on the FEN server, an error message displays. Notification Setup Schedule PATH: Notification menu >... - Page 41 RoadRunner HD™ | High Definition Mobile Recorder Callback PATH: Notification menu > Callback The Recorder can be set up to contact a computer running RsM (RoadRunner Secure Management Software) when an event occurs. Select the box under the No. heading and toggle between On and Off. The IP addresses can be set when the row is enabled.
- Page 42 User Guide and Instruction Manual Select the box under the heading to toggle between On and Off. The Recorder will clip an event detected video segment and attach it to an email when the box is turned On. NOTE: Attaching a video clip to an email is not available for the Text-In event. Select MP4 Clip to toggle between On and Off.
-
Page 43: Appendix
RoadRunner HD™ | High Definition Mobile Recorder Appendix Map of Setup Screens MENU SYSTEM General Date/Time User Storage Power Management Monitoring CAMERA General Stream Audio Advanced Setup Upgrade RECORD General Schedule EVENT Alarm-In Video Loss Text-In Video-Analytics Audio Detection DEVICES... -
Page 44: Troubleshooting
User Guide and Instruction Manual Troubleshooting Problem Possible Solution Check power cable connections. No Power Confirm that there is power at the connection terminals. Check camera video cable and connections. Confirm that the camera has power. No Live Video ... -
Page 45: Error Code Notices
RoadRunner HD™ | High Definition Mobile Recorder Error Code Notices System Upgrade Related Clip Copy Related Description Description Unknown error. Unknown error. File version error. Device error. Operating system version error. Mounting failed. Software version error. No media. Kernel version error.