NETGEAR WNAP320 Reference Manual
Prosafe wireless-n
Hide thumbs
Also See for WNAP320:
- Installation manual (2 pages) ,
- Reference manual (126 pages) ,
- Specifications (3 pages)

Related Manuals for NETGEAR WNAP320


Summary of Contents for NETGEAR WNAP320
- Page 1 ProSafe Wireless-N Access Point WNAP320 Reference Manual FOR CERTIFICATION ONLY 350 East Plumeria Drive San Jose, CA 95134 September 2010 202-10724-01 v1.0...
-
Page 2: Technical Support
NETGEAR, Inc. Technical Support Thank you for choosing NETGEAR. To register your product, get the latest product updates, or get support online, visit us at http://support.netgear.com. -
Page 3: Table Of Contents
Wireless Equipment Placement and Range Guidelines ....15 Understanding WNAP320 Wireless Security Options ....16 Setting Up the Wireless ProSafe Wireless Access Point . - Page 4 Configuring the WNAP320 as a Wireless Repeater ....81 Configuring the WNAP320 for Client Mode ..... . 83 Chapter 5 Troubleshooting and Debugging No lights are lit on the product family.
-
Page 5: Chapter 1 Introduction
Introduction This chapter introduces the NETGEAR ProSafe Wireless-N Access Point WNAP320 and describes some of the key features. This chapter includes the following: minimum prerequisites for installation • package contents (What Is In the Box? on page 8), • description of the front and back panels of the WNAP320 •... -
Page 6: About The Prosafe Wireless Access Point
500 foot radius. Consequently, the NETGEAR ProSafe Wireless-N Access Point WNAP320 can support a small group of users in a range of several hundred feet. Most access points can handle between 10 to 30 users simultaneously. -
Page 7: What Is In The Box
To qualify for product updates and product warranty, NETGEAR encourages you to register on the NETGEAR Web site at http://my.netgear.com/registration/login.aspx. -
Page 8: System Requirements
A Web browser for configuration such as Microsoft Internet Explorer 5.0 or later, or • Mozilla 3.0 or later At least one computer with the TCP/IP protocol installed • 802.11b/g- or 802.11b/g-compliant devices, such as the NETGEAR WG511 Wireless • Adapter Chapter 1. Introduction... -
Page 9: Key Features And Standards
ProSafe Wireless-N Access Point WNAP320 Reference Manual Key Features and Standards The ProSafe Wireless Access Point is easy to use and provides solid wireless and networking support. It also offers a wide range of security options. Supported Standards and Conventions The following standards and conventions are supported: Standards Compliance. -
Page 10: Key Features
ProSafe Wireless-N Access Point WNAP320 Reference Manual Key Features The WNAP320 Access Point provides solid functionality, including the following features: • Multiple operating modes: Wireless Access Point. Operates as a standard 802.11b/g/n access point. Point-to-Point Bridge. In this mode, the access point communicates only with another bridge-mode wireless station or access point. -
Page 11: 802.11B/G/N Standards-Based Wireless Networking
802.11b/g/n Standards–based Wireless Networking The NETGEAR ProSafe Wireless-N Access Point WNAP320 provides a bridge between Ethernet wired LANs and 802.11b/g and 802.11 draft n–compatible wireless LAN networks. It provides connectivity between Ethernet wired networks and radio-equipped wireless notebook systems, desktop systems, print servers, and other devices. -
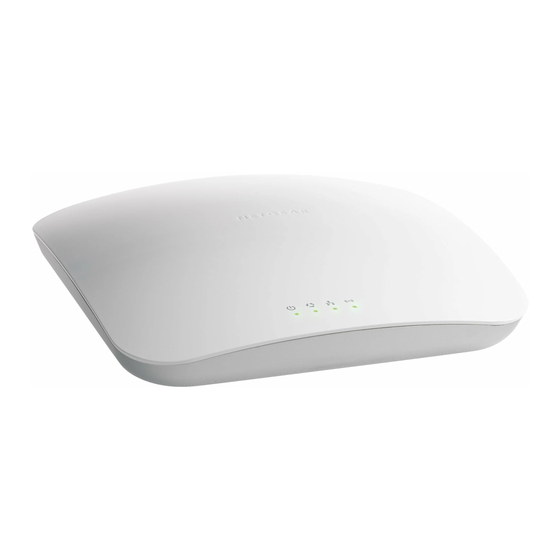
Page 12: Hardware Description
Hardware Description This section describes the front and rear hardware functions of the access point. Front Panel The WNAP320 hardware functions are described in the following figure and table. Figure 1. The following table explains the LED: Table 1. Front Panel LEDs... -
Page 13: Rear Panel
The access pointrear panel functions are described in the following list: Power socket. This socket connects to the WNAP320 12V 1.0A power adapter. RJ-45 Ethernet port. Use the WNAP320 Ethernet RJ-45 port to connect to an Ethernet LAN through a device such as a hub, switch, router, or PoE switch. -
Page 14: Chapter 2 Installation And Configuration
Installation and Configuration This chapter describes how to set up your ProSafe Wireless-N Access Point WNAP320 for wireless connectivity to your LAN. This basic configuration will enable computers with 802.11b/g/n wireless adapters to connect to the Internet, or access printers and files on your LAN. -
Page 15: Wireless Equipment Placement And Range Guidelines
Ethernet cable with RJ-45 connectors. Default Factory Settings When you first receive your WNAP320, the default factory settings will be set. You can restore these defaults with the Factory Default Restore switch on the rear panel .To restore Chapter 2. Installation and Configuration... - Page 16 ProSafe Wireless-N Access Point WNAP320 Reference Manual your default settings, see for a list of default settings Appendix A, Supplemental Information and instructions on the use of the restore switch. 16 | Chapter 2. Installation and Configuration...
-
Page 17: Understanding Wnap320 Wireless Security Options
ProSafe Wireless-N Access Point WNAP320 Reference Manual Understanding WNAP320 Wireless Security Options Anyone wih a compatible wireless adapter can recieve your wireless data transmissions well beyond your walls. For this reason, use the security features of your wireless equipment. The access point provides highly effective security features, which are covered in detail in this chapter. -
Page 18: Setting Up The Wireless Prosafe Wireless Access Point
ProSafe Wireless-N Access Point WNAP320 Reference Manual Installing theWireless Access Point Before installing the ProSafe Wireless-N Access Point WNAP320, you should make sure that your Ethernet network is up and working. You will be connecting the access point to the Ethernet network so that computers with 802.11b/g/n wireless adapters will be able to... - Page 19 From the Country/Region drop-down menu, select the region where the access point will be used (the Country/Region is not Configurable in the United States; but is configurable in the rest of the world). Click Apply. If your country or region is not listed, please check with NETGEAR Note: Support.
- Page 20 ProSafe Wireless-N Access Point WNAP320 Reference Manual Figure 4. Time Zone. From the drop-down list, select the local time zone for your product family • from a list of all available time zones. The default is USA-Pacific. The product family will get the current time from the connecting PC.
- Page 21 ProSafe Wireless-N Access Point WNAP320 Reference Manual Figure 5. Fill in the IP address fields of the access point. (See the online help for more information about how to specify the settings on this screen). DHCP Client. By default, the Dynamic Host Configuration Protocol (DHCP) client is •...
-
Page 22: Configuring Your Wireless Settings
ProSafe Wireless-N Access Point WNAP320 Reference Manual If you change the default subnet of the LAN IP address, you will be Note: disconnected from the access point user interface. To reconnect, reconfigure your computer with a static IP address within the new LAN IP subnet. - Page 23 (shown by lost connections or slow data transfers). Should this happen, you might want to experiment with different channels to see which is the best. See the article “Wireless Networking Basics” available on the NETGEAR website. (A link to this article and other articles of interest can be found in Related Documents Appendix A.
-
Page 24: Deploying The Prosafe Wireless Access Point
If necessary, you can now reconfigure the computer you used in Step1 Installing on page 18. theWireless Access Point Before mounting the WNAP320 in a high location, first set up and test the Tip: WNAP320 to verify wireless network connectivity. To deploy the access point: Disconnect the access point from the PC, and position it where it will be deployed. -
Page 25: Logging In Using The Default Ip Address
ProSafe Wireless-N Access Point WNAP320 Reference Manual If you are unable to connect, see Note: Chapter 5, Troubleshooting and Debugging.” Logging In Using the Default IP Address After you install the access point, log in to the product family to configure the basic settings and the wireless settings. -
Page 26: Mounting The Prosafe Wireless Access Point Using The Wall Mount Kit )
ProSafe Wireless-N Access Point WNAP320 Reference Manual Mounting the ProSafe Wireless Access Point Using the Wall Mount Kit (Optional) Before mounting the access point in a high location, first set up and test Tip: the access point to verify wireless network connectivity. -
Page 27: Logging In To The Prosafe Wireless Access Point
192.168.0.0 to 192.168.0.255 and a subnet mask of 255.255.255.0. If DHCP is enabled, there are two methods you can use to connect to the WNAP320 after the DHCP server on your network assigns it a new IP address. - Page 28 ProSafe Wireless-N Access Point WNAP320 Reference Manual The login screen displays. Enter admin for the user name and password for the password, both in lower case letters. Click Login. Your Web browser should automatically find the access point and display the home screen.
-
Page 29: Setting Basic Ip Options
This unique name is the access point NetBIOS name. The default Access Point Name is located on the bottom label of WNAP320. The default is netgearxxxxxx, where xxxxxxx represents the last 6 digits of the WNAP320 MAC address. You may modify the default name with a unique name up to 15 characters long. - Page 30 ProSafe Wireless Access Points. The default is Enabled. Enable 802.1Q VLAN. Check the radio box to accept 802.1Q VLAN to allow the WNAP320 to process VLAN membership. The default is disabled. From the pull-down men, select the local Time Zone setting for your location.
-
Page 31: Wireless Settings
Figure 10. Enter From the Country/Region menu, select the region where the WNAP320 can be used. It may not be legal to operate the wireless features of the wireless access point in a region other than one of those identified in this field. Unless a country domain is selected, the channel cannot be changed (In the United States, the Country/Region is preset.) - Page 32 ProSafe Wireless-N Access Point WNAP320 Reference Manual adjacent access points is 5 channels (for example, use channels 1 and 6, or 6 and 11). – In “Infrastructure” mode, wireless stations normally scan all channels, looking for an access point. If more than one access point can be used, the one with the strongest signal is used. This can only happen when the various access points are using the same SSID.
-
Page 33: Configuring Qos Settings
ProSafe Wireless-N Access Point WNAP320 Reference Manual Configuring QoS Settings Wireless Multimedia (WMM) is a subset of the 802.11e standard. WMM allows wireless traffic to have a range of priorities, depending on the type of data. Time-dependent information, such as video or audio, has a higher priority than normal traffic. -
Page 34: Setting Up And Testing Basic Wireless Connectivity
Configure and test your PCs for wireless connectivity. Program the wireless adapter of your PCs to have the same SSID that you configured in the WNAP320. Check that they have a wireless link and can obtain an IP address by DHCP from the WNAP320. -
Page 35: Understanding Security Profiles
ProSafe Wireless-N Access Point WNAP320 Reference Manual Understanding Security Profiles Security profiles let you configure unique security settings for each SSID. You can configure up to eight unique 802.11b/g/n wireless security profiles on the WNAP320. The Profile Settings screen is shown in Figure 12,... - Page 36 Consult the product documentation for your wireless adapter and WPA or WPA2 client software for instructions on configuring WPA2 settings. You can configure the WNAP320 to use the types of network authentication shown in the table. Table 1. Network Authentication Types...
- Page 37 ProSafe Wireless-N Access Point WNAP320 Reference Manual Table 1. Network Authentication Types Type Description WPA2-PSK Select this only if all clients support WPA2. If selected, you must use AES and TKIP + AES encryption and enter the WPA passphrase (WPA2 is a later version of WPA ) (Network key).
- Page 38 VLAN ID. If the hubs/switches on your LAN support the VLAN (802.1Q) standard and • this feature has been enabled, the default VLAN ID for WNAP320 will be associated with each profile. The default profile VLAN ID must match the IDs used by other network devices.
-
Page 39: Ssid And Wep/Wpa Settings Setup Form
RADIUS servers: Server Name/IP Address: Primary _________________ Secondary __________________ Port: ___________________________________ Shared Secret: ___________________________________ ___________________________________ Use the procedures described in the following sections to configure the WNAP320. Store this information in a safe place. Chapter 2. Installation and Configuration | 39... -
Page 40: Configuring The Radius Server Settings
To set up or modify the RADIUS server settings: From your Web browser, log in to the WNAP320 using the default LAN address of http://192.168.0.100, user name admin, and password password, or use the LAN address and password that you set up. -
Page 41: Chapter 3 Management
Management This chapter describes how to use the management and monitoring features of your ProSafe Wireless-N Access Point WNAP320. To access these features, connect to the WNAP320 access point as described in on page 25. Then select Logging In Using the Default IP Address the Maintenance or Monitoring in the main menu of the browser interface. -
Page 42: Remote Management
Remote Management Both the SNMP and Remote Console are enabled by default, which allows for remote management of the WNAP320 from a client running SNMP management software, as well as from a secure Telnet console. To set up an SNMP management interface: Select Maintenance >... -
Page 43: Remote Console
ProSafe Wireless-N Access Point WNAP320 Reference Manual Remote Console Remote Console configuration features are located under the Maintenance, Remote Management, Remote Console. Enter the following information in the Remote Console screen, as shown in Figure 2, Secure Shell (SSH). If set to Enable, the wireless access point will allow remote access •... - Page 44 ProSafe Wireless-N Access Point WNAP320 Reference Manual Figure 3. Enter the login name and password (admin and password are the defaults). After successful login, the < > prompt should appear. In this example, Access Point Name the prompt is netgear334408.
-
Page 45: Upgrading The Wireless Access Point Software
NETGEAR releases new software . You can download upgrade files from the Netgear website. If the upgrade file is compressed (.zip file), you must first extract the image (.rmt) file before sending it to the product family. You can send the upgrade file using your browser. - Page 46 ProSafe Wireless-N Access Point WNAP320 Reference Manual To upgrade the WNAP320 firmware: Download the new software file from the NETGEAR website, save it to your hard disk, and unzip it. Select Maintenance > Upgrade > Firmware Upgrade. The Firmware Upgrade screen...
-
Page 47: Saving The Configuration
Click Backup. Your browser will extract the configuration file from the product family and prompt you for a location on your computer to store the file. Give the file a meaningful name, such as WNAP320.cfg and click Save. Restoring the Configuration To restore your settings from a saved configuration file: Select Maintenance >... - Page 48 ProSafe Wireless-N Access Point WNAP320 Reference Manual Figure 6. Chapter 3. Management | 27...
-
Page 49: Restoring The Wnap320 To The Factory Default Settings
Figure 7, Click Apply to reset to the factory default settings. After a restore, the product family password will be password, the WNAP320 DHCP client will be disabled, the default LAN IP address will be 192.168.0.100, and the access point name will reset to the name printed on the label on the bottom of the unit. -
Page 50: Changing The Administrator Password
ProSafe Wireless-N Access Point WNAP320 Reference Manual Changing the Administrator Password The default password is password. You should change this password to a more secure password, since you cannot change the administrator login name. To change the administrator password: Select Maintenance > Password > Change Password. The Change Password screen... -
Page 51: Enabling The Syslog Server
ProSafe Wireless-N Access Point WNAP320 Reference Manual Enabling the Syslog Server The Syslog screen allows you to enable the syslog option if you have a syslog server on your LAN. To enable a syslog server: Select Configuration > System > Advanced > SysLog to display the Syslog screen. -
Page 52: Using Activity Log Information
ProSafe Wireless-N Access Point WNAP320 Reference Manual Using Activity Log Information The Activity Log screen displays the access point system activity. Select Monitoring > Logs. The Logs screen displays as shown in Figure 10, Figure 10. Click Refresh to update the display, click Clear to clear the log content, or click Save As to save the log contents into a file on your PC or to save the file to a disk drive. -
Page 53: Viewing General Summary Information
ProSafe Wireless-N Access Point WNAP320 Reference Manual Viewing General Summary Information The System screen, under the Monitoring tab provides a summary of the current WNAP320 configuration settings, including current IP settings and current wireless settings. This information is read only, so any changes must be made on other screens. - Page 54 ProSafe Wireless-N Access Point WNAP320 Reference Manual Figure 11. Chapter 3. Management | 33...
-
Page 55: Viewing Network Traffic Statistics
Table 2. Statistics Fields Field Description Wired Ethernet Packets The number of packets sent and received since the WNAP320 was restarted. Bytes The number of bytes sent and received since the WNAP320 was restarted. Wireless 11n/g 34 | Chapter 3. Management... - Page 56 ProSafe Wireless-N Access Point WNAP320 Reference Manual Table 2. Statistics Fields Field Description Unicast Packets The unicast packets sent and received since the WNAP320 was restarted. Broadcast Packets The broadcast packets sent and received since the WNAP320 was restarted. Multicast Packets Themulticast packets sent and received since the WNAP320 was restarted.
-
Page 57: Viewing Available Wireless Station Statistics
ProSafe Wireless-N Access Point WNAP320 Reference Manual Viewing Available Wireless Station Statistics The Available Wireless Stations list contains a table of all IP devices associated with this product family in the wireless network defined by the wireless network name (SSID). For... -
Page 58: Enabling Rogue Ap Detection
ProSafe Wireless-N Access Point WNAP320 Reference Manual Enabling Rogue AP Detection The WNAP320 can detect rogue APs and wireless stations and can prevent them from connecting to the WNAP320. The WNAP320 maintains a list of access points and wireless stations that it detects in the area. Initially all detected access points are displayed in the Unknown AP List. -
Page 59: Importing A Rogue Ap List From A File
ProSafe Wireless-N Access Point WNAP320 Reference Manual Importing a Rogue AP List from a File You can import the Known AP List from a file. To replace the existing AP list: Select the Replace radio button to replace the existing list of known APs, or select Merge to add the new MAC addresses to the existing list. -
Page 60: Viewing And Saving Ap Lists
ProSafe Wireless-N Access Point WNAP320 Reference Manual Viewing and Saving AP Lists The WNAP320 detects nearby APs and wireless stations and maintains them in a list. You can use this list to prevent them from connecting to the WNAP320 Wireless Access Point. -
Page 61: Creating Ap Lists Manually
ProSafe Wireless-N Access Point WNAP320 Reference Manual Figure 16. In the Unknown AP List or the Known AP List sections, click Refresh to update the corresponding list. Click SAVE to export the list of unknown or known APs to a file. A window opens so you can browse to the location where you want to save the file. -
Page 62: Chapter 4 Advanced Configuration
Advanced Configuration This chapter describes how to configure the advanced features of your ProSafe Wireless-N Access Point WNAP320. The advanced configuration features are located under various sub-menus under Configuration and provide the following functions: 802.1Q VLAN. Enabling untagged VLAN operation •... -
Page 63: 802.1Q Vlan
ProSafe Wireless-N Access Point WNAP320 Reference Manual 802.1Q VLAN The 802.1Q VLAN protocol on the access point logically separates traffic on the same physical network. See Figure , Untagged VLAN. When this check box is selected, one VLAN can be configured as an •... -
Page 64: Hotspot Settings
ProSafe Wireless-N Access Point WNAP320 Reference Manual Hotspot Settings If you want the product family to capture and redirect all HTTP (TCP, port 80) requests, use this feature to redirect the requests to the specified URL. For example, a hotel might want all wireless connections to go to its server to start a billing transaction. -
Page 65: Configuring Advanced Wireless Settings
ProSafe Wireless-N Access Point WNAP320 Reference Manual Configuring Advanced Wireless Settings The Wireless Settings screen are used to configure and enable various wireless LAN parameters for 11b/g/n mode. The default wireless LAN parameters usually work well. However, you can use these settings to fine-tune the overall performance of your product family for your environment. - Page 66 ProSafe Wireless-N Access Point WNAP320 Reference Manual Fragmentation Length (256 – 2346). This is the maximum packet size. Packets • larger than the size specified in this field will be fragmented. The Fragment length value must be larger than the RTS Threshold value. The default is 2346.
-
Page 67: Configuring Advanced Qos Settings
ProSafe Wireless-N Access Point WNAP320 Reference Manual Configuring Advanced QoS Settings Wireless Multimedia (WMM) is a subset of the 802.11e standard. WMM allows wireless traffic to have a range of priorities, depending on the type of data. Time-dependent information, such as video or audio, has a higher priority than normal traffic. For WMM to function correctly, Wireless clients must also support WMM. - Page 68 ProSafe Wireless-N Access Point WNAP320 Reference Manual The QoS options on the WNAP320 are as follows: AP EDCA parameters. Specify the AP EDCA parameters for different types of data • transmitted from the access point to the wireless client. Station EDCA parameters. Specify the Station EDCA parameters for different types of •...
-
Page 69: Enabling Wireless Bridging And Repeating
Enable column. The other bridge-mode wireless stations must be set to point-to-point bridge mode, using the MAC address of this WNAP320 access point. They then send all traffic to this master, rather than communicate directly with each other. - Page 70 ProSafe Wireless-N Access Point WNAP320 Reference Manual Figure 5. On the screen shown in , when you select the radio button for any option, an Figure 5, Edit button displays. Click this button to edit the security profile of the wireless bridge...
-
Page 71: Configuring A Wnap320 As A Point-To-Point Bridge
To configure a point-to-point bridge as shown in Figure 7, : Select Configuration > Wireless Bridge > Bridging and Repeating. The Bridging and Repeating screen displays. Configure the WNAP320 access point (AP1) on LAN Segment 1 in Point-to-Point Bridge mode. Figure 7. - Page 72 ProSafe Wireless-N Access Point WNAP320 Reference Manual Verify connectivity across the LAN 1 and LAN 2. A computer on either LAN segment should be able to connect to the Internet or share files and printers of any other PCs or servers connected to LAN Segment 1 or LAN Segment Click Apply to save your settings.
-
Page 73: Configuring A Point-To-Multi-Point Wireless Bridge
Configure WNAP320 (AP1) on LAN Segment 1 in point-to-point bridge mode with the • remote MAC address of AP2. Because it is in the central location, configure WNAP320 (AP2) on LAN Segment 2 in • Point-to-Multi-Point Bridge mode. The MAC addresses of the adjacent APs are required in AP2. -
Page 74: Configuring The Wnap320 As A Wireless Repeater
LAN segment. Furthermore, you can extend the range of Configuring the WNAP320 as a Wireless Repeater To configure the WNAP320 as a wireless repeater as shown in Figure 10, : Select Configuration > Wireless Bridge > Bridging and Repeating. The Bridging and Repeating screen displays. - Page 75 ProSafe Wireless-N Access Point WNAP320 Reference Manual Figure 10. Verify the following parameters for all access points: The access points are configured to operate in the same LAN network address range • as the LAN devices. All access points must be on the same LAN. That is, all the LAN IP addresses of the •...
-
Page 76: Configuring The Wnap320 For Client Mode
ProSafe Wireless-N Access Point WNAP320 Reference Manual Configuring the WNAP320 for Client Mode In Client mode the WNAP320 operates as a client bridge only and sends traffic to the selected remote AP or peer device. To configure the WNAP320 for Client mode: Select Configuration >... -
Page 77: Chapter 5 Troubleshooting And Debugging
Troubleshooting and Debugging This chapter provides information about troubleshooting your ProSafe Wireless-N Access Point WNAP320. After each problem description, instructions are given to help you diagnose and solve the problem. For the common problems listed, go to the section indicated. -
Page 78: No Lights Are Lit On The Product Family
If it is plugged directly into the wall, verify that it is not a switched outlet. Make sure that you are using the correct NETGEAR power adapter supplied with your •... -
Page 79: The Ethernet Lan Led Is Not Lit
ProSafe Wireless-N Access Point WNAP320 Reference Manual The Ethernet LAN LED is not lit. There is a hardware connection problem.Check these items: Make sure that the cable connectors are securely plugged in at the access point and the • network device (hub, switch, or router). A switch, hub, or router must be installed between the access point and the Ethernet LAN or broadband modem. -
Page 80: I Cannot Access The Internet Or The Lan With A Wireless-Capable Computer
ProSafe Wireless-N Access Point WNAP320 Reference Manual I cannot access the Internet or the LAN with a wireless-capable computer. There is a configuration problem. Check these items: You might not have restarted the computer with the wireless adapter to have TCP/IP •... -
Page 81: I Cannot Connect To The Wnap320 To Configure It
If you are using the NetBIOS name of the WNAP320 to connect, ensure that your • computer and the WNAP320 are on the same network segment or that there is a WINS server on your network. If your computer is set to “Obtain an IP address automatically” (DHCP client), restart it. -
Page 82: When I Enter A Url Or Ip Address, I Get A Time-Out Error
If using a fixed (static) IP address, check the subnet mask, default gateway, DNS, and IP addresses. If the PCs are configured correctly, but still not working, ensure that the WNAP320 is • connected and turned on. Connect to it, and check its settings. If you cannot connect to it, check the LAN and power connections. -
Page 83: Using The Restore Factory Settings Button To Restore Default Settings
Use something with a small point, such as a pen, to press the restore settings button in and hold it in for at least 5 seconds. Release the restore settings button. The factory default configuration has now been restored, and the WNAP320 is ready for use. Chapter 5. Troubleshooting and Debugging | 51... -
Page 84: Appendix A Supplemental Information
Supplemental Information This appendix provides related documentation, factory default settings, and technical specifications for the ProSafe Wireless-N Access Point WNAP320. • Related Documents • Technical Specifications • Factory Default Settings Appendix A. | 52... -
Page 85: Related Documents
ProSafe Wireless-N Access Point WNAP320 Reference Manual Related Documents This appendix provides links to reference documents you can use to gain a more complete understanding of the technologies used in your NETGEAR product. Table 1. Document Link ITCP/IP Networking Basics http://documentation.netgear.com/reference/enu/tcpip/index.htm... -
Page 86: Technical Specifications
ProSafe Wireless-N Access Point WNAP320 Reference Manual Technical Specifications Table 2. WNAP320 Technical Specifications Parameter ProSafe Wireless-N Access Point WNAP320 802.11g Data Rates 1, 2, 5.5, 6, 9, 11, 12, 18, 24, 36, 48, & 54 Mbps (Auto-rate capable) 802.11ng Data Rates Data Rates for Channel Width=20MHz and Guard Interval=short (400ms): Best, 7.2 Mbps, 14.4 Mbps, 21.7 Mbps, 28.9 Mbps, 43.3 Mbps, 57.8 Mbps, 65 Mbps,... -
Page 87: Factory Default Settings
ProSafe Wireless-N Access Point WNAP320 Reference Manual Factory Default Settings You can use the restore settings button located on the rear of your device to reset all settings to their factory defaults. This is called a hard reset. To perform a hard reset, push and hold the restore settings button for approximately 5 •... - Page 88 ProSafe Wireless-N Access Point WNAP320 Reference Manual Table 3. Access Point Default Configuration Settings (Continued) Feature Description Operating Mode Access Point Access Point Name netgearxxxxxx where xxxxxx are the last 6 digits of the wireless access point MAC address. Wireless Communication...
-
Page 89: Appendix B Compliance Notification
This transmitter must not be co-located or operating in conjunction with any other antenna or transmitter. FCC Declaration of Conformity We, NETGEAR, Inc., 350 East Plumeria Drive, San Jose, CA 95134, declare under our sole responsibility that the ProSafe Wireless-N Access Point WNAP320 complies with Part 15 Subpart B of FCC CFR47 Rules. Operation is... -
Page 90: Industry Canada Statement
Canadian Department of Communications Radio Interference Regulations This digital apparatus, ProSafe Wireless-N Access Point WNAP320, does not exceed the Class B limits for radio-noise emissions from digital apparatus as set out in the Radio Interference Regulations of the Canadian Department of Communications. - Page 91 Directive 1999/5/EC. Español [Spanish] Por medio de la presente NETGEAR Inc. declara que el Radiolan cumple con los requisitos esenciales y cualesquiera otras disposiciones aplicables o exigibles de la Directiva 1999/5/CE.
- Page 92 Svenska [Swedish] överensstämmelse med de väsentliga egenskapskrav och övriga relevanta bestämmelser som framgår av direktiv 1999/5/EG. Hér með lýsir NETGEAR Inc. yfir því að Radiolan er í samræmi við Íslenska [Icelandic] grunnkröfur og aðrar kröfur, sem gerðar eru í tilskipun 1999/5/EC.
- Page 93 ProSafe Wireless-N Access Point WNAP320 Reference Manual Table 2. Interference Reduction Table Household Appliance Recommended Minimum Distance (in feet and meters) Cordless phone - Digital 30 feet / 9 meters Bluetooth devices 20 feet / 6 meters ZigBee 20 feet / 6 meters 76 | Appendix C.