Sign In
Upload
Manuals
Brands
Yamaha Manuals
Motorcycle
XV1700PCRC Road Star Warrior
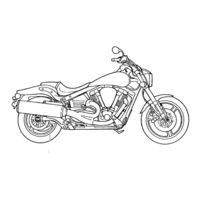
Yamaha XV1700PCRC Road Star Warrior Manuals
Manuals and User Guides for Yamaha XV1700PCRC Road Star Warrior. We have
3
Yamaha XV1700PCRC Road Star Warrior manuals available for free PDF download: Service Manual, Owner's Manual, Supplementary Service Manual
Yamaha XV1700PCRC Road Star Warrior Service Manual (606 pages)
Motorcycle
Brand:
Yamaha
| Category:
Motorcycle
| Size: 26.52 MB
Table of Contents
Important Manual Information
3
How to Use this Manual
4
Symbols
5
Table of Contents
6
Chassis Specifications
7
Engine Specifications
7
General Specifications
7
Electrical Specifications
8
Chassis Tightening Torques
8
Cable Routing
9
Periodic Checks and Adjustments
17
Periodic Maintenance Chart for the Emission Control System
17
Introduction
17
General Maintenance and Lubrication Chart
18
Chassis
20
Adjusting the Rear Shock Absorber Assembly
20
Rebound Damping
21
Front and Rear Brakes
22
Rear Brake Master Cylinder
22
Chassis
22
Rear Shock Absorber and Swingarm
24
Engine
28
Rocker Arms, Push Rods and Valve Lifters
28
Removing the Engine Left Side Cover and Camshaft Sprocket Cover
28
Generator and Starter Clutch
30
Stator Coil Assembly
30
Removing the Stator Coil Assembly
30
Table of Contents
38
General Information
39
Chapter 1 General Information
50
Motorcycle Identification
50
Vehicle Identification Number
50
Model Label
50
Features
51
Outline
51
FI System
52
Fuel Control Block
53
Components
54
ECU (Electronic Control Unit)
54
Fuel Pump
57
Pressure Regulator
58
Fuel Injector
59
Crankshaft Position Sensor
60
Cylinder Identification
61
Cylinder Identification Sensor
61
Throttle Position Sensor
62
Intake Air Pressure Sensor and Atmospheric Pressure Sensor
63
Engine Temperature Sensor
64
Intake Temperature Sensor
64
Lean Angle Cut-Off Switch
65
Detection of Intake Air Volume
66
Determining the Basic Injection Duration
66
Fuel Injection System
66
Operation and Control
66
Fuel Injection Duration During Linear Control Valve Operation
67
Determining the Final Injection Duration
68
List of Fuel Injection Compensations
69
Reactive Injection Duration
69
Fuel Control During Normal Driving
70
Fuel Injection Compensation Control
72
After-Start Enrichment
73
Warm-Up Enrichment
74
Acceleration Enrichment
75
Deceleration Control
76
Over-Revolution Control
76
Basic Operation
77
First Idle Control System
77
Components
78
Linear Control Valve
78
Instrument Panel
79
ECU Transmission Data and Meter Display
79
DIAG Mode Inspection and Adjustment (Multi-Function Meter)
80
Important Information
81
Preparation for Removal and Disassembly
81
Replacement Parts
81
Gaskets, Oil Seals and O-Rings
81
Lock Washers/Plates and Cotter Pins
82
Bearings and Oil Seals
82
Circlips
82
Checking the Connections
83
Special Tools
84
Chapter 2 Specifications
89
General Specifications
89
Engine Specifications
90
Chassis Specifications
101
Electrical Specifications
105
Conversion Table
108
General Tightening Torque Specifications
108
Engine Tightening Torques
109
Chassis Tightening Torques
112
Lubrication Points and Lubricant Types
115
Engine
115
Chassis
116
Engine Oil Lubrication Chart
117
Engine Oil Flow Diagrams
118
Transfer Gear Oil Flow Diagrams
122
Cable Routing
124
Chapter 3 Periodic Checks and Adjustments
139
Introduction
139
Periodic Maintenance Chart for the Emission Control System
139
General Maintenance and Lubrication Chart
140
Seat and Side Covers
142
Headlight and Meter Assemblies
143
Battery
144
Fuel Tank
145
Air Filter Case
146
Silencer Air Filter Case
147
Adjusting the Valve Clearance
149
Engine
149
Synchronizing the Throttle Bodies
153
Adjusting the Engine Idling Speed
155
Adjusting the Throttle Cable Free Play
156
Throttle Body Side
156
Handlebar Side
157
Checking the Spark Plugs
158
Checking the Ignition Timing
160
Engine Idling Speed
160
Measuring the Compression Pressure
161
Checking the Engine Oil Level
164
Changing the Engine Oil
165
Measuring the Engine Oil Pressure
169
Checking the Transfer Gear Oil Level
170
Changing the Transfer Gear Oil
171
Adjusting the Clutch Cable Free Play
173
Cleaning the Air Filter Elements
174
Checking the Fuel Hoses
175
Checking the Throttle Body Joints
175
Checking the Cylinder Head Breather Hose and Oil Tank Breather Hose
176
Checking the Exhaust System
177
Adjusting the Front Brake
178
Chassis
178
Adjusting the Rear Brake
179
Checking the Brake Fluid Level
180
Checking the Front Brake Pads
181
Checking the Rear Brake Pads
181
Adjusting the Rear Brake Light Switch
182
Checking the Front and Rear Brake Hoses
182
Bleeding the Hydraulic Brake System
183
Adjusting the Drive Belt Slack
185
Adjusting the Shift Pedal
185
Checking and Adjusting the Steering Head
188
Checking the Front Fork
190
Adjusting the Front Fork Legs
191
Adjusting the Rear Shock Absorber Assembly
192
Checking the Tires
193
Front Tire
195
Rear Tire
195
Checking and Lubricating the Cables
196
Checking the Wheels
196
Lubricating the Levers and Pedals
197
Lubricating the Rear Suspension
197
Lubricating the Sidestand
197
Electrical System
198
Checking and Charging the Battery
198
Charging Method Using a Variable-Current (Voltage) Charger
201
Charging Method Using a Constant Voltage Charger
202
Checking the Fuses
203
Replacing the Headlight Bulb
206
Adjusting the Headlight Beam
207
Instrument Functions
208
Odometer and Tripmeter
208
Adjusting the Clock
209
Adjusting the Meter Light
209
Chapter 4 Chassis
210
Disassembling the Front Wheel
212
Checking the Front Wheel
213
Removing the Front Wheel
213
Checking the Brake Discs
215
Installing the Front Wheel
216
Adjusting the Front Wheel Static Balance
218
Front Wheel and Brake Discs
210
Rear Wheel, Brake Disc, and Rear Wheel Pulley
220
Removing the Rear Fender
220
Removing the Rear Wheel
221
Removing the Brake Disc and Rear Wheel Pulley
223
Disassembling the Rear Wheel
225
Checking the Rear Wheel
226
Assembling the Rear Wheel
227
Checking and Replacing the Rear Wheel Pulley
227
Checking the Rear Wheel Drive Hub
227
Installing the Rear Wheel
228
Adjusting the Rear Wheel Static Balance
231
Front Brake Pads
232
Removing the Front Brake Pads
232
Front and Rear Brakes
232
Removing the Rear Brake Pads
233
Front Brake Master Cylinder
239
Removing the Front Brake Master Cylinder
239
Rear Brake Master Cylinder
242
Removing the Brake Fluid Reservoir
242
Removing the Rear Brake Master Cylinder
243
Disassembling the Rear Brake Master Cylinder
245
Checking the Front and Rear Brake Master Cylinders
246
Assembling and Installing the Front Brake Master Cylinder
247
Assembling and Installing the Rear Brake Master Cylinder
250
Front Brake Calipers
252
Disassembling the Front Brake Calipers
253
Rear Brake Caliper
254
Removing the Rear Brake Caliper
254
Disassembling the Front Brake Calipers
256
Disassembling the Rear Brake Caliper
257
Checking the Front and Rear Brake Calipers
258
Assembling and Installing the Front Brake Calipers
259
Assembling and Installing the Rear Brake Caliper
261
Front Fork
264
Removing the Front Fork Legs
264
Disassembling the Front Fork Legs
265
Disassembling the Front Fork Legs
267
Removing the Front Fork Legs
267
Checking the Front Fork Legs
269
Assembling the Front Fork Legs
271
Installing the Front Fork Legs
276
Handlebar
278
Removing the Handlebar
278
Checking the Handlebar
280
Installing the Handlebar
280
Steering Head
284
Checking the Steering Head
286
Removing the Lower Bracket
286
Installing the Steering Head
287
Rear Shock Absorber and Swingarm
289
Disposing of a Rear Shock Absorber and Gas Cylinder
293
Handling the Rear Shock Absorber
293
Removing the Rear Shock Absorber and Swingarm
294
Checking the Rear Shock Absorber
295
Checking the Relay Arm and Connecting Arm
295
Checking the Swingarm
295
Installing the Rear Shock Absorber and Swingarm
296
Removing the Drive Belt and Drive Sprocket
298
Checking the Drive Belt
299
Removing the Drive Belt and Drive Sprocket
299
Installing the Drive Belt and Drive Sprocket
300
Chapter 5 Engine
301
Installing the Engine
309
Installing the Muffler and Exhaust Pipes
310
Rocker Arms, Push Rods and Valve Lifters
311
Removing the Rocker Arms, Push Rods and Valve Lifters
316
Checking the Rocker Arms and Rocker Arm Shafts
316
Checking the Rocker Arm Bases
318
Checking the Push Rods
318
Checking the Valve Lifters and Valve Lifter Cases
318
Bleeding a Valve Lifter
319
Checking the Push Rod Cover
321
Installing the Valve Lifters
321
Installing the Rocker Arms and Push Rods
322
Installing the Camshaft Sprocket Cover and Engine Left Side Cover
323
Camshafts
325
Removing the Camshafts
327
Checking the Camshafts
328
Checking the Decompression System
330
Checking the Oil Delivery Pipe
330
Installing the Camshafts
331
Cylinder Heads
334
Removing the Cylinder Heads
336
Checking the Cylinder Heads
336
Installing the Cylinder Head
337
Checking the Oil Delivery Pipe
337
Valves and Valve Springs
339
Removing the Valves
340
Checking the Valves and Valve Guides
341
Checking the Valve Seats
343
Checking the Valve Springs
346
Installing the Valves
347
Cylinders and Pistons
349
Removing the Cylinders and Pistons
350
Checking the Cylinders and Pistons
351
Checking the Piston Rings
352
Checking the Piston Pins
353
Installing the Pistons and Cylinders
354
Clutch Cover
356
Clutch
357
Removing the Clutch
361
Checking the Clutch Plates
362
Checking the Friction Plates
362
Removing the Primary Drive Gear
362
Checking the Clutch Plate Spring
363
Checking the Pressure Plate
364
Checking the Primary Drive
364
Checking the Pull Lever Shaft and Pull Rod
364
Installing the Crankshaft Position Sensor and Pull Lever Shaft
364
Installing the Primary Drive Gear
365
Installing the Clutch
366
Shift Shaft and Stopper Lever
370
Checking the Shift Shaft
371
Checking the Stopper Lever
371
Installing the Stopper Lever and Shift Shaft
371
Generator and Starter Clutch
373
Stator Coil Assembly
373
Checking the Starter Clutch
376
Removing the Generator
376
Installing the Generator
377
Transfer Gear Case
379
Fuel Pump
382
Install the Fuel Pump
383
Removing the Fuel Pump
383
Sub Fuel Tank
384
Removing the Middle Driven Shaft
388
Checking the Oil Pump
389
Checking the Oil Strainer
389
Assembling the Oil Pump
390
Checking the Oil Pipe
390
Installing the Transfer Gear Case
391
Crankcase
393
Disassembling the Crankcase
396
Checking the Crankcase
397
Checking the Bearings and Oil Seals
398
Checking the Engine Oil Pump Drive
398
Checking the Oil Delivery Pipe
398
Assembling the Crankcase
399
Engine Oil Pump
402
Checking the Oil Pump
405
Checking the Relief Valve
405
Assembling the Oil Pump
406
Checking the Oil Strainer
406
Installing the Oil Pump
407
Installing the Oil Strainer
408
Crankshaft and Connecting Rods
409
Checking the Crankshaft and Connecting Rods
410
Removing the Connecting Rods
410
Removing the Crankshaft
410
Installing the Connecting Rods
416
Installing the Crankshaft
418
Transmission
419
Checking the Shift Forks
422
Checking the Shift Drum Assembly
423
Checking the Transmission
423
Installing the Shift Forks and Shift Drum Assembly
424
Installing the Transmission
424
Chapter 6 Fuel Injection System
426
Wiring Diagram
427
Ecu's Self-Diagnostic Function
429
Ecu’s Mode Function
429
Engine Trouble Warning Light Indication and FI System Operating Conditions (Normal Mode)
430
Determining the Area of the Malfunction through the Self-Diagnostic Fault Code Number
431
Fail-Safe Action
433
Substitute Characteristics Operation Control
433
Diagnosis Mode Troubleshooting 1 (Self-Diagnostic Malfunction Detected)
434
Troubleshooting
434
Self-Diagnostic Fault Codes, Symptoms, and Probable Causes
437
Sensor Operation Data Display Verification Table
439
Actuator Operation Verification Table
441
No Normal Signals Are Received from the Crankshaft Position Sensor
443
No Normal Signals Are Received from the Cylinder Identification Sensor
443
Troubleshooting the Self-Diagnostic Fault Code
443
Intake Air Pressure Sensor 1 - Open or Short Circuit Detected
444
Intake Air Pressure Sensor 1 - Pipe System Malfunction
445
Stuck Throttle Position Sensor Detected
445
Throttle Position Sensor - Open or Short Circuit Detected
446
Intake Air Pressure Sensor - Pipe System Malfunction (Clogged or Detached Hose)
447
Open Circuit Is Detected in the Input Line from the Sidestand Switch to the ECU
448
Open or Short Circuit Detected from the Intake Temperature Sensor
448
Intake Air Pressure Sensor 2 - Open or Short Circuit Detected
449
Open or Short Circuit Detected from the Atmospheric Pressure Sensor
449
Intake Air Pressure Sensor 2 - Pipe System Malfunction
450
Sidestand Switch Does Not Function (the Engine Does Not Stop When the Stand Is Extended)
460
Engine Trouble Warning Light Blinks While the Start Switch Is Being Pressed (to Warn that the Engine Is Unable to Start)
461
Throttle Bodies
462
Checking the Injector
466
Checking the Throttle Body
466
Checking the Fuel Pump and Pressure Regulator Operation
467
Air Induction System
468
Air Cut-Off Valve
468
Air Cut-Off Valve Assembly and Air Induction System Hoses
469
Reed Valves
470
Checking the Pressure Regulator
471
Checking the Air Induction System
471
Chapter 7 Electrical System
472
Electrical Components
472
Arrangement of the Electrical Components and Couplers
474
Checking Switch Continuity
479
Checking the Switches
480
Checking the Bulbs and Bulb Sockets
482
Types of Bulbs
482
Checking the Condition of the Bulbs
482
Checking the Condition of the Bulb Sockets
484
Checking the Leds
485
Ignition System Circuit Diagram
486
Ignition System Troubleshooting
487
The Ignition System Fails to Operate
487
Electric Starting System Circuit Diagram
492
Starting Circuit Cut-Off System Operation
493
Electric Starting System Troubleshooting
494
The Starter Motor Fails to Turn
494
Starter Motor
498
Checking the Starter Motor
501
Assembling the Starter Motor
503
Charging System
505
Circuit Diagram
505
Charging System Troubleshooting
506
The Battery Is Not Being Charged
506
Lighting System Circuit Diagram
508
Lighting System Troubleshooting
509
Checking the Lighting System
510
Signaling System Circuit Diagram
514
Signaling System Troubleshooting
516
The Horn Fails to Sound
516
Checking the Signaling System
517
Fuel Injection System Circuit Diagram
524
Fuel Injection System Troubleshooting
526
If the Fuel Injection System Fails to Operate
526
Checking and Adjusting the Throttle Position Sensor
534
Checking the Fuel Pump
534
Chapter 8 Troubleshooting
538
Engine
538
Fuel System
538
Starting Failures
538
Incorrect Engine Idling Speed
539
Electrical Systems
539
Fuel System
539
Poor Medium-And-High-Speed Performance
540
Faulty Gear Shifting
540
Faulty Clutch
540
Engine
540
Fuel System
540
Shifting Is Difficult
540
Shift Pedal Does Not Move
540
Jumps out of Gear
540
Clutch Slips
540
Clutch Drags
540
Overheating
541
Poor Braking Performance
541
Faulty Front Fork Legs
541
Unstable Handling
542
Faulty Lighting or Signaling System
543
Headlight Does Not Come on
543
Headlight Bulb Burnt out
543
Tail/Brake Light Does Not Come on
543
XV1700P/XV1700PC Wiring Diagram
544
Specifications
553
General Specifications
553
Engine Specifications
553
Chassis Specifications
556
Electrical Specifications
556
Tightening Torques
557
Engine Tightening Torques
557
Chassis Tightening Torques
558
Lubrication Points and Lubricant Types
558
Engine
558
Cable Routing
559
Periodic Checks and Adjustments
570
Introduction
570
Periodic Maintenance Chart for the Emission Control
570
System
570
General Maintenance and Lubrication Chart
571
Seat and Side Covers
573
Fuel Tank
574
Installing the Fuel Hose Joint 2
575
Chassis
576
Front Wheel and Brake Discs
576
Front and Rear Brakes
578
Front Brake Pads
578
Front Brake Calipers
579
Assembling and Installing the Front Brake
579
Calipers
580
Front Fork
584
Drive Belt and Drive Pulley
585
Installing the Drive Belt and Drive Pulley
587
Engine
588
Transfer Gear Case
593
Installing the Transfer Gear Case
595
Crankcase
597
Installing the Bearing Retainer
598
Transmission
599
Xv17Pcv(C)/Xv17Pcmv(C) 2006 Wiring Diagram
604
Advertisement
Yamaha XV1700PCRC Road Star Warrior Owner's Manual (122 pages)
Brand:
Yamaha
| Category:
Motorcycle
| Size: 1.19 MB
Table of Contents
Table of Contents
7
Important Manual Information
5
Safety Information
9
Safe Riding
10
Safety Information
11
Protective Apparel
12
Modifications
12
Loading and Accessories
12
Gasoline and Exhaust Gas
14
Location of Important Labels
16
Description
19
Left View
20
Right View
21
Controls and Instruments
22
Instrument and Control Functions
23
Main Switch/Steering Lock
24
Instrument and Control Functions
25
Indicator and Warning Lights
25
Speedometer
26
Tachometer Unit
27
Handlebar Switches
29
Clutch Lever
30
Shift Pedal
30
Brake Lever
31
Brake Pedal
31
Fuel Tank Cap
32
Fuel
32
Seat
34
Helmet Holder
34
Adjusting the Front Fork
35
Adjusting the Shock Absorber Assembly
36
Sidestand
38
Ignition Circuit Cut-Off System
39
Pre-Operation Checks
41
Pre-Operation Check List
42
Operation and Important Riding Points
45
Operation and Important Riding Points
47
Engine Break-In
50
Periodic Maintenance and Minor Repair
51
Periodic Maintenance
52
Owner's Tool Kit
53
Periodic Maintenance Chart for the Emission Control System
54
General Maintenance and Lubrication Chart
55
Checking the Spark Plugs
58
Canister (for California Only)
59
Engine Oil and Oil Filter Cartridge
60
Replacing the Air Filter Elements
64
Transfer Case Oil
64
Adjusting the Throttle Cable Free Play
69
Adjusting the Valve Clearance
70
Tires
70
Cast Wheels
73
Accessories and Replacement Parts
74
Adjusting the Clutch Lever Free Play
74
Adjusting the Brake Lever Free Play
75
Adjusting the Brake Pedal Position
76
Adjusting the Rear Brake Light Switch
76
Checking the Front and Rear Brake Pads
77
Checking the Brake Fluid Level
78
Changing the Brake Fluid
79
Drive Belt Slack
80
Checking and Lubricating the Brake and Shift Pedals
82
Checking and Lubricating the Cables
82
Checking and Lubricating the Throttle Grip and Cable
82
Checking and Lubricating the Brake and Clutch Levers
83
Checking and Lubricating the Sidestand
84
Checking the Front Fork
84
Lubricating the Rear Suspension
84
Checking the Steering
85
Battery
86
Checking the Wheel Bearings
86
Replacing the Fuses
88
Replacing the Headlight Bulb
89
Replacing a Turn Signal Light Bulb
91
Tail/Brake Light
91
Replacing a License Plate Light Bulb
92
Supporting the Motorcycle
93
Troubleshooting
93
Troubleshooting Chart
94
Motorcycle Care and Storage
95
Motorcycle Care and Storage
97
Specifications
101
Consumer Information
107
Identification Numbers
108
Key Identification Number
108
Vehicle Identification Number
108
Model Label
109
Reporting Safety Defects
110
Motorcycle Noise Regulation
111
Maintenance Record
112
Yamaha Motor Corporation, U.s.a. Street and Enduro Motorcycle Limited Warranty
114
Yamaha Extended Service (Y.e.s.)
116
Yamaha XV1700PCRC Road Star Warrior Supplementary Service Manual (34 pages)
Brand:
Yamaha
| Category:
Motorcycle
| Size: 3.56 MB
Table of Contents
Table of Contents
7
Specifications
8
General Specifications
8
Engine Specifications
8
Chassis Specifications
8
Electrical Specifications
9
Tightening Torques
9
Chassis Tightening Torques
9
Cable Routing
10
Periodic Checks and Adjustments
18
Introduction
18
Periodic Maintenance Chart for the Emission Control System
18
General Maintenance and Lubrication Chart
19
Chassis
21
Adjusting the Rear Shock Absorber Assembly
21
Chassis
23
Front and Rear Brakes
23
Rear Brake Master Cylinder
23
Rear Shock Absorber and Swingarm
25
Engine
29
Rocker Arms, Push Rods and Valve Lifters
29
Generator and Starter Clutch
31
Stator Coil Assembly
31
Advertisement
Advertisement
Related Products
Yamaha XV1700PCR Road Star Warrior
Yamaha XV1700PC
Yamaha XV1700P
Yamaha XV1700P 2002
Yamaha XV1700PC 2002
Yamaha XV17AWV(C) Road Star
Yamaha XV17AMV(C) Road Star
Yamaha WARRIOR XV17PCV
Yamaha Star XV17PCX
Yamaha Road Stan XV17AWT
Yamaha Categories
Motorcycle
Musical Instrument
Electronic Keyboard
Receiver
Amplifier
More Yamaha Manuals
Login
Sign In
OR
Sign in with Facebook
Sign in with Google
Upload manual
Upload from disk
Upload from URL