Sign In
Upload
Manuals
Brands
Videotec Manuals
Security Camera
ulisse netcam
Videotec ulisse netcam Manuals
Manuals and User Guides for Videotec ulisse netcam. We have
2
Videotec ulisse netcam manuals available for free PDF download: Instruction Manual
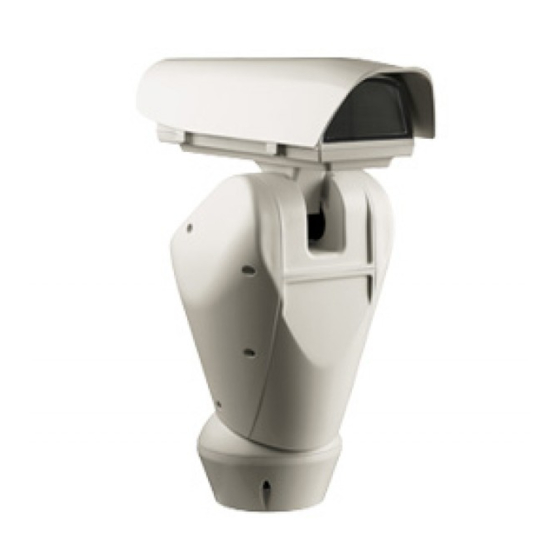
Videotec ulisse netcam Instruction Manual (294 pages)
outdoor full ip ptz unit
Brand:
Videotec
| Category:
Security Camera
| Size: 31 MB
Table of Contents
English
5
Table of Contents
5
1 About this Manual
9
Typographical Conventions
9
2 Notes on Copyright and Information on Trademarks
9
3 Safety Rules
9
4 Identification
12
Product Description and Type Designation
12
Product Markings
12
Checking the Markings
12
5 Versions
13
Integrated Wiper
13
LED Illuminators
13
Version with Germanium Window
13
6 Preparing the Product for Use
14
Safety Precautions before Use
14
Unpacking
14
Safely Disposing of Packaging Material
14
Preparatory Work before Installation
15
Attaching the Bracket
15
Cables Management
15
7 Assembly
16
Assembling the Camera and Motorised Lenses
16
Cameras Features
16
How to Open the Housing
17
How to Install the Camera
17
Housing Board Description
18
Connection of the Camera and Motorised Lens
18
Adjustment of the Supply Voltage of the Lens Motors
19
Connection of the Communication Line
19
8 Installation
20
Connecting the Cables to the Base
20
Fixing the Base to the Support
21
Connector Board Description
21
Connection of the Power Supply Line
22
24Vac Power Line Connection
23
120Vac and 230Vac Power Line Connection
23
Connection of the Alarm Inputs, of the Twilight Switch and of the Relays
24
Connection of the Ethernet Cable
24
Fixing the Upper Body
25
LED Illuminators Installation
26
Fitting the Bracket
26
Fitting the Illuminator on the Bracket
26
Connection of the LED Illuminators
27
Desiccant Bag
28
Setting of the LED Illuminators and Synchronization Mode with the Camera
28
Description of the LED Illuminator
28
Synchronisation with an External Twilight Switch
29
Synchronising the Unit with the LED Illuminators
29
Manually Activate the LED Illuminators
29
LED Illuminator Switching on Threshold Adjustment
30
LED Illuminator Power Adjustment
30
Hardware Configuration
31
Opening the Configuration Door
31
DIP1 Configuration
31
DIP2 Configuration
31
DIP3 Configuration
32
Address Configuration
32
Setting of the Serial Communication Lines
32
DIP4 Configuration
32
9 Switching on
33
10 Configuration
34
Web Interface
34
First Access
34
Home
34
User Controls
35
Device Parameters
36
Device Statistics
36
Network Configuration
36
User Configuration
37
Movement Parameters
37
Autopan
38
Patrol
38
Motions Recall
38
Preset Parameters
38
Preset Parameters (Advanced)
38
Digital I/O
39
Washer
39
Camera Parameters
40
Tools
40
Factory Default
41
Vttunnel
41
11 Accessories
42
Washer
42
Washing System Connection
42
Wall Mount
43
Parapet Bracket
43
Power Supply with Illuminator Control
43
12 Instructions for Exceptional Operation
44
How to Change Communication Mode
44
13 Maintaining
45
Fuses Replacement
45
14 Cleaning
45
Window and Plastic Cover Cleaning
45
Cleaning the Germanium Window
45
15 Disposal of Waste Materials
45
16 Troubleshooting
46
17 Technical Data
47
General
47
Mechanical
47
Electrical
48
Communications
48
Protocols
48
Environment
48
Certifications
48
18 Technical Drawings
49
A Appendix - Address Table
53
Italiano
63
1 Informazioni Sul Presente Manuale
67
Convenzioni Tipografiche
67
2 Note Sul Copyright E Informazioni Sui Marchi Commerciali
67
3 Norme DI Sicurezza
67
4 Identificazione
70
Descrizione E Designazione del Prodotto
70
Marcatura del Prodotto
70
Controllo Della Marcatura
70
5 Versioni
71
Tergicristallo Integrato
71
Illuminatori a LED
71
Versione con Finestra in Germanio
71
6 Preparazione del Prodotto Per L'utilizzo
72
Precauzioni DI Sicurezza Prima Dell'utilizzo
72
Disimballaggio
72
Smaltimento in Sicurezza Dei Materiali DI Imballaggio
72
Lavoro Preparatorio Prima Dell'installazione
73
Fissaggio del Supporto
73
Passaggio Cavi
73
7 Assemblaggio
74
Montaggio Telecamera E Ottiche Motorizzate
74
Caratteristiche Delle Telecamere
74
Apertura Della Custodia
75
Installazione Della Telecamera
75
Descrizione Della Scheda Della Custodia
76
Collegamento Della Telecamera E Dell'ottica Motorizzata
76
Regolazione Della Tensione DI Alimentazione Dei Motori Delle Ottiche
77
Collegamento Della Linea DI Comunicazione
77
8 Installazione
78
Collegamento Dei Cavi Alla Base
78
Fissaggio Della Base al Supporto
79
Descrizione Della Scheda Connettori
79
Collegamento Della Linea DI Alimentazione
80
Collegamento Della Linea DI Alimentazione in 24Vac
81
Collegamento Della Linea DI Alimentazione in 120Vac E 230Vac
81
Collegamento Degli Ingressi DI Allarme, Dell'interruttore Crepuscolare E Dei Relè
82
Collegamento del Cavo DI Rete Ethernet
82
Fissaggio del Corpo Superiore
83
Montaggio Degli Illuminatori a LED
84
Montaggio Della Staffa
84
Montaggio Dell'illuminatore Sulla Staffa
84
Collegamento Degli Illuminatori a LED
85
Sacchetto Disidratante
86
Regolazione Degli Illuminatori a LED E Modalità DI Sincronizzazione con la Telecamera
86
Descrizione Dell'illuminatore a LED
86
Sincronizzazione con un Interruttore Crepuscolare Esterno
87
Sincronizzare L'unità con Gli Illuminatori a LED
87
Attivazione Manuale Degli Illuminatori a LED
87
Regolazione Della Soglia DI Accensione Degli Illuminatori a LED
88
Regolazione Della Potenza Degli Illuminatori a LED
88
Configurazione Hardware
89
Apertura Dello Sportellino DI Configurazione
89
Configurazione del DIP1
89
Configurazione del DIP2
89
Configurazione del DIP3
90
Configurazione Dell'indirizzo
90
Configurazione Delle Linee DI Comunicazione Seriali
90
Configurazione del DIP4
90
9 Accensione
91
10 Configurazione
92
Interfaccia Web
92
Primo Accesso
92
Home
92
Controlli Utente
93
Parametri Dispositivo
94
Statistiche Dispositivo
94
Configurazione Rete
94
Configurazione Utenti
95
Parametri Movimento
95
Autopan
96
Patrol
96
Richiamo Movimenti
96
Parametri Preset
96
Parametri Preset (Avanzato)
96
I/O Digitali
97
Washer
97
Parametri Camera
98
Strumenti
98
Factory Default
99
Vttunnel
99
11 Accessori
100
Impianto DI Lavaggio
100
Collegamento Dell'impianto DI Lavaggio
100
Supporto da Parete
101
Supporto da Parapetto
101
Alimentatore con Controllo Degli Illuminatori
101
12 Istruzioni DI Funzionamento Eccezionale
102
Modifica Della Modalità DI Comunicazione (da Protocollo ONVIF a Telemetria Seriale)
102
Procedura DI Modifica Della Modalità DI Comunicazione
102
13 Manutenzione
103
Sostituzione Dei Fusibili
103
14 Pulizia
103
Pulizia del Vetro E Delle Parti in Plastica
103
Pulizia Della Finestra in Germanio
103
15 Smaltimento Dei Rifiuti
103
16 Risoluzione Dei Problemi
104
17 Dati Tecnici
105
Generale
105
Meccanica
105
Elettrico
106
Comunicazioni
106
Protocolli
106
Ambiente
106
Certificazioni
106
18 Disegni Tecnici
107
A Appendice - Tabella Degli Indirizzi
111
Français
121
1 À Propos de Ce Mode D'emploi
125
Conventions Typographiques
125
2 Notes Sur Le Copyright Et Informations Sur Les Marques de Commerce
125
3 Normes de Securité
125
4 Identification
128
Description Et Désignation du Produit
128
Marquage du Produit
128
Contrôle du Marquage
128
5 Versions
129
Essuie-Glace Intégré
129
Projecteurs À LED
129
Version Avec Fenêtre Au Germanium
129
6 Préparation du Produit en Vue de L'utilisation
130
Précautions de Sécurité Avant L'utilisation
130
Déballage
130
Élimination Sans Danger des Matériaux D'emballage
130
Opérations À Effectuer Avant L'installation
131
Fixation du Support
131
Passage des Câbles
131
7 Assemblage
132
Montage Caméras, Systèmes Optiques Motorisés
132
Caractéristiques des Caméras
132
Ouverture du Caisson
133
Installation de la Caméra
133
Description de la Carte du Caisson
134
Branchement de la Caméra Et de L'optique Motorisée
134
Réglage de la Tension D'alimentation des Moteurs des Optiques
135
Branchement de la Ligne de Communication
135
8 Installation
136
Connexion des Câbles À la Base
136
Fixage de la Base Au Support
137
Description de la Carte de Connexion
137
Connexion de la Ligne D'alimentation
138
Connexion de la Ligne D'alimentation en 24Vac
139
Raccordement de la Ligne D'alimentation en 120Vac Et 230Vac
139
Branchement des Entrées D'alarme, de L'interrupteur Crépusculaire Et des Relais
140
Branchement du Câble de Réseau Ethernet
140
Fixation du Corps Supérieur
141
Montage des Projecteurs À LED
142
Montage de L'étrier
142
Montage du Projecteur Sur L'étrier
142
Branchement des Projecteur À LED
143
Sachet Déshydratant
144
Reglage des Projecteurs À LED Et Modalité de Synchronisation Avec la Caméra
144
Description du Projecteur À LED
144
Synchronisation Avec un Interrupteur Crépusculaire Externe
145
Synchroniser L'unité Avec Les Projecteurs LED
145
Activation Manuelle des Projecteurs À LED
145
Réglage du Seuil D'allumage des Projecteurs À LED
146
Réglage de la Puissance des Projecteurs À LED
146
Configuration du Matériel
147
Ouverture du Volet de Configuration
147
Configuration du DIP1
147
Configuration du DIP2
147
Configuration du DIP3
148
Configuration de L'adresse
148
Configuration du DIP4
148
9 Allumage
149
10 Configuration
150
Interface Web
150
Premier Accès
150
Home
150
Contrôles Utilisateur
151
Paramètres Dispositif
152
Statistiques Dispositif
152
Configuration Réseau
152
Configuration Utilisateurs
153
Paramètres Mouvement
153
Autopan
154
Patrol
154
Rappel Mouvements
154
Paramètres Preset
154
Paramètres Preset (Avancé)
154
I/O Digitaux
155
Washer
155
Paramètres Caméra
156
Instruments
156
Factory Default
157
Vttunnel
157
11 Accessoires
158
Système de Lavage
158
Branchement du Système de Lavage
158
Support Fixation Murale
159
Support Fixation Sol
159
Alimentateur Avec Contrôle des Projecteurs
159
12 Instructions de Fonctionnement Exceptionnel
160
Modification de la Modalité de Communication (Depuis Protocole ONVIF À TéléMétrie Sérielle)
160
Procédure de Modification de la Modalité de Communication
160
13 Entretien
161
Remplacement des Fusibles
161
14 Nettoyage
161
Entretiens de la Vitre Et des Parties en Plastique
161
Nettoyage de la Fenêtre Au Germanium
161
15 Élimination des Déchets
161
16 Dépannage
162
17 Données Techniques
163
Généralités
163
Mécanique
163
Électrique
164
Communications
164
Protocoles
164
Environnement
164
Certifications
164
18 Dessins Techniques
165
Deutsch
179
1 Allgemeines
183
Schreibweisen
183
2 Anmerkungen zum Copyright und Informationen zu den Handelsmarken
183
3 Sicherheitsnormen
183
4 Identifizierung
186
Beschreibung und Bezeichnung des Produktes
186
Kennzeichnung des Produkts
186
Prüfung der Kennzeichnung
186
5 Versionen
187
Vorinstallierter Wischer
187
LED Scheinwerfer
187
Version mit Fensterscheibe aus Germanium
187
6 Vorbereitung des Produktes auf den Gebrauch
188
Sicherheitsvorkehrungen vor dem Gebrauch
188
Entfernen der Verpackung
188
Sichere Entsorgung der Verpackungsmaterialien
188
Auf die Installation Vorbereitende Tätigkeiten
189
Befestigung der Halterung
189
Kabelführung
189
7 Zusammenbau
190
Montage Kamera und Motorisch Bewegte Optiken
190
Eigenschaften der Kameras
190
Öffnung des Schutzgehause
191
Installation der Kamera
191
Beschreibung der Karte Gehäuse
192
Anschluss der Kamera und der Motorisch Bewegten Optik
192
Einstellung der Versorgungsspannung der Motoren der Optiken
193
Anschluss der Kommunikationslinie
193
8 Installation
194
Anschließen der Kabel an die Basis
194
Befestigung der Basis an der Halterung
195
Beschreibung der Karte Anschlüsse
195
Anschluss der Stromversorgung
196
Anschluss der Stromversorgunglinie 24Vac
197
Anschluss der Versorgungsleitung in 120Vac und 230Vac
197
Anschluss der Alarmeingänge, der Dämmerungsschalter und der Relais
198
Anschluss der Ethernet-Netz-Kabel
198
Befestigung des Oberen Körpers
199
Montage der Scheinwerfer mit LED
200
Bügelmontage
200
Montage des Scheinwerfers auf den Bügel
200
Anschluss der LED-Scheinwerfer
201
Trockenmittelbeutel
202
Einstellung der LED-Scheinwerfer und Vorgehensweise zur Gleichschaltung mit der Kamera
202
Beschreibung des LED-Scheinwerfers
202
Synchronisierung mit einem Externen Dämmerungsschalter
203
Die Einheit mit den LED-Scheinwerfern Synchronisieren
203
Manuelle Aktivierung der LED-Scheinwerfer
203
Einstellung der Einschaltschwelle der LED-Scheinwerfer
204
Einstellung der Leistung der LED-Scheinwerfer
204
Hardware Konfiguration
205
Öffnen der Konfigurationsklappe
205
Konfiguration der DIP1
205
Konfiguration von DIP2
205
Konfiguration von DIP3
206
Adressekonfiguration
206
Konfiguration von DIP4
206
9 Einschaltung
207
10 Konfiguration
208
Web-Schnittstelle
208
Erster Zugriff
208
Home
208
Benutzersteuerung
209
Geräteparameter
210
Gerätestatistiken
210
Netzwerk-Konfiguration
210
Benutzer-Konfiguration
211
Bewegungsparameter
211
Autopan
212
Patrol
212
Bewegungsanforderung
212
Preset-Parameter
212
Preset-Parameter (Erweitert)
212
Digitale I/O
213
Washer
213
Kamera-Parameter
214
Werkzeuge
214
Factory Default
215
Vttunnel
215
11 Zubehör
216
Waschanlage
216
Anschluss der Waschanlage
216
Wandhalterung
217
Halterung für Brüstungsmontage
217
Netzteil mit Steuerung der Scheinwerfer
217
12 Anleitung für den Sonderbetrieb
218
Den Datenübertragungsmodus Bearbeiten (von ONVIF-Protokoll auf Serielle Telemetrie)
218
Verfahren zur Bearbeitung des Datenübertragungsmodus
218
13 Wartung
219
Wechsel der Sicherungen
219
14 Reinigung
219
Reinigung des Glases und der Kunststoffteile
219
Putzen des Germaniumfensters
219
15 Müllentsorgungsstellen
219
16 Problemlösung
220
17 Technische Daten
221
Allgemeines
221
Mechanik
221
Elektrik
222
Kommunikation
222
Protokolle
222
Umgebung
222
Zertifizierungen
222
18 Technische Zeichnungen
223
A Anhang - Adressentabelle
227
Advertisement
Videotec ulisse netcam Instruction Manual (204 pages)
UUUnit fot network cameras
Brand:
Videotec
| Category:
Camera Accessories
| Size: 14 MB
Table of Contents
English
5
Table of Contents
5
Safety Rules
9
About this Manual
9
Notes on Copyright and Information on Trademarks
9
Typographical Conventions
9
Identification
12
Checking the Markings
12
Product Description and Type Designation
12
Product Markings
12
Absolute Positioning (Encoder)
13
Integrated Wiper
13
LED Illuminators
13
Germanium Glass
13
Versions
13
Unpacking
14
Safely Disposing of Packaging Material
14
Safety Precautions before Use
14
Preparing the Product for Use
14
Unpacking and Contents
14
Preparatory Work before Installation
15
Attaching the Support
15
Attachment with Bracket (Optional)
15
Attachment with a Pole Support (Optional)
15
Cables Management
15
Assembling and Installing
16
Assembly
16
Camera's Required Features for Installation
16
How to Install the Camera
17
Assembling the Camera and Motorised Lenses
17
How to Open the Housing
17
Motorised Lens PTZ Board
18
Connector for Camera/Motorised Lenses
18
Connection of the Camera and Motorised Lens
18
Adjustment of the Supply Voltage of the Lens Motors
19
Connection of the Communication Line
19
Infrared LED Illuminators Installation
20
Fitting the Bracket
20
Fitting the Illuminator on the Bracket
20
Connection of the LED Infrared Illuminators
21
Description of the Infrared Illuminator
22
Salts Desiccant
22
Setting of the LED Illuminators and Synchronization Mode with the Camera
22
Closing the Housing
22
Synchronisation with an External Twilight Switch
23
Synchronising the Unit with the Infrared Illuminators
23
Manually Activate the Infrared Illuminator
23
Adjusting the Illuminator Trip Threshold
24
Adjusting the Power of the Infrared Illuminators
24
Installation
25
Connecting the Cables to the Base
25
Connection of the Power Supply Line
26
Connection of the Connector Board
26
Fixing the Base to the Support
26
Connection of the 24Vac Power Supply Line
28
Connection of the 120/230Vac Power Supply Line
28
Connection of the Alarm Inputs, of the Twilight Switch and of the Relays
29
Connection of the Ethernet Cable
29
Fixing the Top Unit
30
Configuration
30
Configuration of the Dip-Switches
30
DIP1 Configuration
30
Switching on
31
First Access
32
Configuration
32
Web Interface
32
Home
33
User Controls
33
Device Parameters
34
Device Statistics
34
Network Configuration
34
User Configuration
35
Movement Parameters
35
Preset Parameters (Advanced)
36
Preset Parameters
36
Motions Recall
36
Patrol
36
Autopan
36
Digital I/O
37
Washer
37
Camera Parameters
38
Tools
38
Factory Default
39
Vttunnel
39
Accessories
40
Washer
40
Connecting the Pump
40
How to Change Communication Mode
41
Instructions for Exceptional Operation
41
Maintaining and Cleaning
42
Maintaining
42
Fuses Replacement
42
Cleaning
43
Window and Plastic Cover Cleaning (PC)
43
Cleaning Germanium Glass
43
Disposal of Waste Materials
43
Troubleshooting
44
Technical Data
45
General
45
Mechanical
45
Protocols
46
Certifications
46
Communications
46
Environment
46
Electrical
46
Technical Drawings
47
Italiano
55
Convenzioni Tipografiche
59
Informazioni Sul Presente Manuale
59
Norme DI Sicurezza
59
Note Sul Copyright E Informazioni Sui Marchi Commerciali
59
Controllo Della Marcatura
62
Descrizione E Designazione del Prodotto
62
Identificazione
62
Marcatura del Prodotto
62
Illuminatori a LED
63
Posizionamento Assoluto (Encoder)
63
Tergicristallo Integrato
63
Versioni
63
Vetro al Germanio
63
Precauzioni DI Sicurezza Prima Dell'utilizzo
64
Preparazione del Prodotto Per L'utilizzo
64
Smaltimento in Sicurezza Dei Materiali DI Imballaggio
64
Fissaggio con Staffa (Opzionale)
65
Fissaggio con Supporto a Colonna (Opzionale)
65
Fissaggio del Supporto
65
Lavoro Preparatorio Prima Dell'installazione
65
Passaggio Cavi
65
Assemblaggio
66
Assemblaggio E Installazione
66
Caratteristiche Della Telecamera Necessarie Per L'installazione
66
Apertura Della Custodia
67
Installazione Della Telecamera
67
Montaggio Telecamera E Ottiche Motorizzate
67
Collegamento Della Telecamera E Dell'ottica Motorizzata
68
Connettore Telecamera/Ottiche Motorizzate
68
Scheda Ottiche Motorizzate PTZ
68
Collegamento Della Linea DI Comunicazione
69
Regolazione Della Tensione DI Alimentazione Dei Motori Delle Ottiche
69
Montaggio Degli Illuminatori Infrarossi a LED
70
Montaggio Dell'illuminatore Sulla Staffa
70
Montaggio Della Staffa
70
Collegamento Degli Illuminatori Infrarossi a LED
71
Chiusura Della Custodia
72
Descrizione Dell'illuminatore Infrarosso
72
Impostazione Degli Illuminatori a LED E Modalità DI Sincronizzazione con la Telecamera
72
Sali Esiccanti
72
Attivazione Manuale Dell'illuminatore Ad Infrarosso
73
Sincronizzare L'unità con Gli Illuminatori Infrarosso
73
Sincronizzazione con un Interruttore Crepuscolare Esterno
73
Regolazione Della Potenza Degli Infrarossi
74
Regolazione Della Soglia DI Accensione
74
Collegamento Dei Cavi Alla Base
75
Installazione
75
Collegamento Della Linea DI Alimentazione
76
Collegamento Della Scheda Connettori
76
Fissaggio Della Base al Supporto
76
Collegamento Della Linea DI Alimentazione in 120/230Vac
78
Collegamento Della Linea DI Alimentazione in 24Vac
78
Collegamento Degli Ingressi DI Allarme, Dell'interruttore Crepuscolare E Dei Relè
79
Collegamento del Cavo DI Rete Ethernet
79
Configurazione
80
Configurazione Dei Dip-Switch
80
Configurazione del DIP1
80
Fissaggio Dell'unità Superiore
80
Accensione
81
Configurazione
82
Interfaccia Web
82
Primo Accesso
82
Controlli Utente
83
Home
83
Configurazione Rete
84
Parametri Dispositivo
84
Statistiche Dispositivo
84
Configurazione Utenti
85
Parametri Movimento
85
Autopan
86
Parametri Preset
86
Parametri Preset (Avanzato)
86
Patrol
86
Richiamo Movimenti
86
I/O Digitali
87
Washer
87
Parametri Camera
88
Strumenti
88
Factory Default
89
Vttunnel
89
Accessori
90
Collegamento Della Pompa
90
Impianto DI Lavaggio
90
Istruzioni DI Funzionamento Eccezionale
91
Modifica Della Modalità DI Comunicazione (da Protocollo ONVIF a Telemetria Seriale)
91
Procedura DI Modifica Della Modalità DI Comunicazione
91
Manutenzione
92
Manutenzione E Pulizia
92
Sostituzione Dei Fusibili
92
Pulizia
93
Pulizia del Vetro al Germanio
93
Pulizia del Vetro E Delle Parti in Plastica (PC)
93
Smaltimento Dei Rifiuti
93
Troubleshooting
94
Dati Tecnici
95
Generale
95
Meccanica
95
Ambiente
96
Certificazioni
96
Comunicazioni
96
Elettrico
96
Protocolli
96
Disegni Tecnici
97
Français
105
Conventions Typographiques
109
Normes de Securité
109
Notes Sur Le Copyright Et Informations Sur Les Marques de Commerce
109
À Propos de Ce Mode D'emploi
109
Contrôle du Marquage
112
Description Et Désignation du Produit
112
Identification
112
Marquage du Produit
112
Encodeur Pour la Précision de Positionnement
113
Essuie-Glace Intégré
113
Projecteurs À LED
113
Verre Au Germanium
113
Versions
113
Précautions de Sécurité Avant L'utilisation
114
Préparation du Produit en Vue de L'utilisation
114
Élimination Sans Danger des Matériaux D'emballage
114
Fixation Avec Colonne de Support (en Option)
115
Fixation Avec Support Mural (en Option)
115
Fixation du Support
115
Opérations À Effectuer Avant L'installation
115
Passage des Câbles
115
Assemblage
116
Assemblage Et Installation
116
Caractéristiques des Caméras Necessaires Pour L'installation
116
Installation de la Camera
117
Montage Caméras, Systèmes Optiques Motorisés
117
Ouverture du Caisson
117
Branchement de la Caméra Et de L'optique Motorisée
118
Carte de Connexions Pour L'optique Motorisée PTZ
118
Connecteur Caméra/Optiques Motorisées
118
Branchement de la Ligne de Communication
119
Réglage de la Tension D'alimentation des Moteurs des Optiques
119
Montage de L'étrier
120
Montage des Projecteurs Infrarouges À LED
120
Montage du Projecteur Sur L'étrier
120
Branchement des Projecteur Infrarouges À LED
121
Configuration des Projecteurs À LED Et Modalité de Synchronisation Avec la Caméra
122
Description du Projecteur Infrarouge
122
Fermeture du Caisson
122
Sels Déshydratants
122
Activation Manuelle du Projecteur À Infrarouge
123
Synchronisation Avec un Interrupteur Crépusculaire Externe
123
Synchroniser L'unité Avec Les Projecteurs Infrarouge
123
Réglage de la Puissance des Infrarouges
124
Réglage du Seuil D'allumage du Projecteur
124
Connexion des Câbles À la Base
125
Installation
125
Connexion de la Carte de Connexion
126
Connexion de la Ligne D'alimentation
126
Fixage de la Base Au Support
126
Connexion de la Ligne D'alimentation en 120/230Vac
128
Connexion de la Ligne D'alimentation en 24Vac
128
Branchement des Entrées D'alarme, de L'interrupteur Crépusculaire Et des Relais
129
Branchement du Câble de Réseau Ethernet
129
Configuration
130
Configuration des Dip-Switch
130
Configuration du DIP1
130
Montage de la Partie Supérieure
130
Allumage
131
Configuration
132
Interface Web
132
Premier Accès
132
Contrôles Utilisateur
133
Home
133
Configuration Réseau
134
Paramètres Dispositif
134
Statistiques Dispositif
134
Paramètres Mouvement
135
Autopan
136
Paramètres Preset
136
Paramètres Preset (Avancé)
136
Patrouille
136
Rappel Mouvements
136
I/O Digitaux
137
Washer
137
Instruments
138
Paramètres Caméra
138
Factory Default
139
Vttunnel
139
Accessoires
140
Branchement de la Pompe
140
Système de Lavage
140
Instructions de Fonctionnement Exceptionnel
141
Modification de la Modalité de Communication (Depuis Protocole ONVIF À TéléMétrie Sérielle)
141
Procédure de Modification de la Modalité de Communication
141
Entretien
142
Entretien Et Nettoyage
142
Remplacement des Fusibles
142
Entretiens de la Vitre Et des Parties en Plastique (PC)
143
Nettoyage de la Vitre en Germanium
143
Élimination des Déchets
143
Troubleshooting
144
Données Techniques
145
Mécanique
145
Certifications
146
Communications
146
Environnement
146
Protocoles
146
Électrique
146
Dessins Techniques
147
Deutsch
155
Allgemeines
159
Anmerkungen zum Copyright und Informationen zu den Handelsmarken
159
Sicherheitsnormen
159
Beschreibung und Bezeichnung des Produktes
162
Identifizierung
162
Kennzeichnung des Produkts
162
Prüfung der Kennzeichnung
162
Encoders für Absolute Positionierung
163
Germaniumglas
163
Integrierte LED Scheinwerfer
163
Versionen
163
Vorinstallierter Wischer
163
Sichere Entsorgung der Verpackungsmaterialien
164
Sicherheitsvorkehrungen vor dem Gebrauch
164
Vorbereitung des Produktes auf den Gebrauch
164
Auf die Installation Vorbereitende Tätigkeiten
165
Befestigung der Halterung
165
Befestigung mit Halterung (Optional)
165
Befestigung mit Haltesäule (Optional)
165
Kabelführung
165
Nötige Merkmale der Videokameras für die Installation
166
Zusammenbau
166
Zusammenbau und Installation
166
Installation der Kamera
167
Montage Kamera und Motorisch Bewegte Optiken
167
Öffnung des Schutzgehause
167
Anschluss der Kamera und der Motorisch Bewegten Optik
168
Anschluss Kamera / Motorisch Bewegte Optik
168
Platine Fur Motorisch Bewegte PTZ Optiken
168
Anschluss der Kommunikationslinie
169
Einstellung der Versorgungsspannung der Motoren der Optiken
169
Bügelmontage
170
Montage der Infrarotscheinwerfer mit Leuchtdioden
170
Montage des Scheinwerfers auf den Bügel
170
Anschluss der Led-Infrarot-Scheinwerfer
171
Beschreibung des Infrarot-Scheinwerfers
172
Einstellung der LED-Scheinwerfer und Vorgehensweise zur Gleichschaltung mit der Kamera
172
Entfeuchtungssalz
172
Schließen des Gehäuses
172
Die Einheit mit den Infrarot-Scheinwerfern Synchronisieren
173
Manuelle Aktivierung des Infrarot-Scheinwerfers
173
Synchronisierung mit einem Externen Dämmerungsschalter
173
Einstellung der Leistung der Infrarot-Scheinwerfer
174
Einstellung der Schwelle für das Einschalten des Scheinwerfers
174
Anschließen der Kabel an die Basis
175
Installation
175
Anschluss der Stromversorgung
176
Anschluss der Verbinderplatine
176
Befestigung der Basis an der Halterung
176
Anschluss der Stromversorgunglinie 120/230Vac
178
Anschluss der Stromversorgunglinie 24Vac
178
Anschluss der Alarmeingänge, der Dämmerungsschalter und der Relais
179
Anschluss der Ethernet-Netz-Kabel
179
Konfiguration
180
Konfiguration der Dip-Switches
180
Konfiguration der DIP1
180
Montage der Oberen Einheit
180
Einschaltung
181
Erster Zugriff
182
Konfiguration
182
Web-Schnittstelle
182
Benutzersteuerung
183
Home
183
Geräteparameter
184
Gerätestatistiken
184
Netzwerk-Konfiguration
184
Bewegungsparameter
185
Autopan
186
Bewegungsanforderung
186
Patrol
186
Preset-Parameter
186
Preset-Parameter (Erweitert)
186
Digitale I/O
187
Washer
187
Kamera-Parameter
188
Werkzeuge
188
Factory Default
189
Vttunnel
189
Anschluss der Pumpe
190
Waschanlage
190
Zubehör
190
Anleitung für den Sonderbetrieb
191
Den Datenübertragungsmodus Bearbeiten (von ONVIF-Protokoll auf Serielle Telemetrie)
191
Verfahren zur Bearbeitung des Datenübertragungsmodus
191
Wartung
192
Wartung und Reinigung
192
Wechsel der Sicherungen
192
13 Müllentsorgungsstellen
193
Reinigung der Germanium-Scheibe
193
Reinigung des Glases und der Kunststoffteile (PC)
193
Troubleshooting
194
Mechanik
195
Technische Daten
195
Elektrik
196
Kommunikation
196
Protokolle
196
Umgebung
196
Zertifizierungen
196
Technische Zeichnungen
197
Advertisement
Related Products
Videotec ULISSE RADICAL THERMAL
Videotec ULISSE
Videotec Ulisse Compact HD
Videotec ULISSE MAXI NETCAM
Videotec ULISSE COMPACT
Videotec ULISSE MAXI
Videotec ULISSE COMPACT DELUX
Videotec Ulisse Evo
Videotec Ulisse Evo Thermal
Videotec ULISSE RADICAL PTZ
Videotec Categories
Camera Accessories
Security Camera
Receiver
Racks & Stands
Lighting Equipment
More Videotec Manuals
Login
Sign In
OR
Sign in with Facebook
Sign in with Google
Upload manual
Upload from disk
Upload from URL