Sign In
Upload
Manuals
Brands
Videotec Manuals
Security Camera
ULISSE MAXI
User Manuals: Videotec ULISSE MAXI IP PTZ Camera
Manuals and User Guides for Videotec ULISSE MAXI IP PTZ Camera. We have
1
Videotec ULISSE MAXI IP PTZ Camera manual available for free PDF download: Instruction Manual
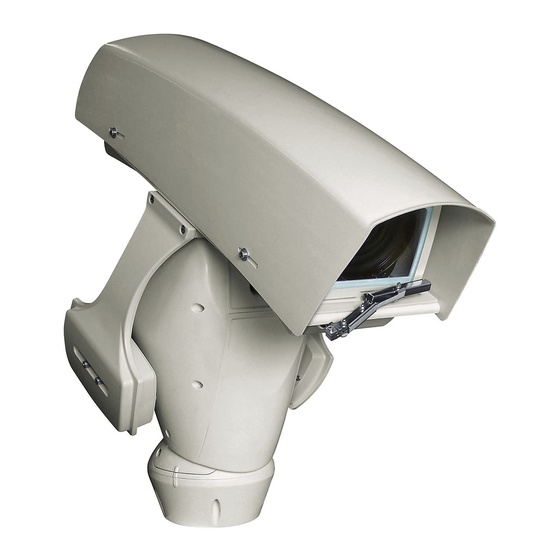
Videotec ULISSE MAXI Instruction Manual (364 pages)
PTZ unit for dynamic monitoring of large outdoor areas
Brand:
Videotec
| Category:
Security Camera
| Size: 37 MB
Table of Contents
English
5
Table of Contents
5
1 About this Manual
9
Typographical Conventions
9
2 Notes on Copyright and Information on Trademarks
9
3 Safety Rules
9
4 Identification
12
Product Description and Type Designation
12
Product Markings
12
Checking the Markings
12
5 Versions
13
LED Illuminators
13
Germanium Window
13
6 Preparing the Product for Use
14
Safety Precautions before Use
14
Unpacking
14
Contents
14
Safely Disposing of Packaging Material
14
Preparatory Work before Installation
15
Attaching the Bracket
15
Cables Management
15
7 Assembly
16
Fixing the Sunshield
16
How to Open the Housing
16
Assembling the Camera and Motorised Lenses
16
Cameras Features
16
Fastening the Lens and the Camera to the Internal Slide
17
Positioning of the H-20 Spacer on the Inner Slide
18
Internal Slide
18
Housing Board Description
19
Connection of the Camera and Motorised Lens
19
Adjustment of the Supply Voltage of the Lens Motors
20
8 Installation
21
Connecting the Cables to the Base
21
Fixing the Base to the Support
22
Connector Board Description
23
Connection of the Power Supply Line
24
24Vac Power Line Connection
25
120Vac and 230Vac Power Line Connection
25
Signal Cable Connection
26
Video Cable Connection
26
Telemetry Lines Connections
27
Connection of the Alarm Inputs, of the Twilight Switch and of the Relays
28
Fixing the Upper Body
29
Counterweights Installation
29
LED Illuminators Installation
30
Counterweight Removal
30
Fitting the Illuminator on the Bracket
30
Connection of the LED Illuminators
31
Connection for Cameras and LED Illuminators Synchronisation
32
Desiccant Bag
32
LED Illuminator Activation and Adjustment Instructions
32
Description of the LED Illuminator
32
Activation of the LED Illuminator Via an External Dusk Switch
33
Activation of the LED Illuminator Via the Integrated Dusk Sensor
33
LED Illuminator Switching on Threshold Adjustment
34
LED Illuminator Power Adjustment
34
Fastening of the Wiper Blade
35
Hardware Configuration
36
Opening the Configuration Door
36
DIP1 Configuration
36
DIP2 Configuration
36
DIP3 Configuration
37
Address Configuration
37
Setting of the Serial Communication Lines
37
DIP4 Configuration
37
Installation Examples
38
RX Line
38
Line (RS-485-1 RX E RS-485-2 TX)
38
Line RS-485-1 Reception, Line RS-485-2 Repetition
38
Two-Way RS-485 TX/RX Line
38
9 Switching on
39
First Start-Up
39
Checks List
39
10 Configuration
40
OSM Interface (on Screen Menu)
40
Using the OSM
40
How to Use the Joystick
40
How to Move Around the Menus
41
How to Modify the Parameters
41
How to Change the Numeric Fields
42
How to Change Text
42
Configuration Via OSM
44
Main Menu
44
Language Selection Menu
44
ZFI Parameter Menu
44
Zone Titling Menu
45
Zone Masking Menu
46
Housing Serial Port Menu
47
Polarity Menu
47
Movement Menu
48
Manual Control Menu
48
Manual Control Menu (Limits)
48
Preset Menu
49
Preset Menu (Edit Preset)
49
Preset Menu (Utility Preset)
50
Patrol Menu
50
Autopan Menu
50
Motion Recall Menu
51
Display Menu
51
Digital I/O-Options Menu
51
Alarms Menu
52
Communication Menu
52
Washer Menu
53
Default Menu
53
Info Menu
53
11 Accessories
54
Washer
54
Washing System Connection
54
Wall Mount Bracket
55
Parapet Bracket
55
Power Supply with Illuminator Control
55
12 Instructions for Normal Operation
56
Visualizing the State of the Pan & Tilt
56
Saving a Preset
56
Restore a Preset Position (Scan)
56
Recalling the Home Position
56
Patrol Enabling
56
Autopan Enabling
57
Enabling the Wiper (Wiper)
57
Enabling the Washer (Washer)
57
Enabling the LED Illuminator
57
Unit Reboot
57
Special Controls
58
Special Configurations
59
13 Maintenance
60
Fuses Replacement
60
14 Cleaning
60
Window and Plastic Cover Cleaning
60
Cleaning the Germanium Window
60
15 Disposal of Waste Materials
60
16 Troubleshooting
61
17 Technical Data
63
General
63
Mechanical
63
Housing's Window
63
Electrical
63
Video
64
18 Technical Drawings
65
A Appendix - Address Table
68
Italiano
77
1 Informazioni Sul Presente Manuale
81
Convenzioni Tipografiche
81
2 Note Sul Copyright E Informazioni Sui Marchi Commerciali
81
3 Norme DI Sicurezza
81
4 Identificazione
84
Descrizione E Designazione del Prodotto
84
Marcatura del Prodotto
84
Controllo Della Marcatura
84
5 Versioni
85
Illuminatori a LED
85
Finestra in Germanio
85
6 Preparazione del Prodotto Per L'utilizzo
86
Precauzioni DI Sicurezza Prima Dell'utilizzo
86
Disimballaggio
86
Smaltimento in Sicurezza Dei Materiali DI Imballaggio
86
Lavoro Preparatorio Prima Dell'installazione
87
Fissaggio del Supporto
87
Passaggio Cavi
87
7 Assemblaggio
88
Fissaggio del Tettuccio
88
Apertura Della Custodia
88
Montaggio Telecamera E Ottiche Motorizzate
88
Caratteristiche Delle Telecamere
88
Fissaggio Dell'ottica E Della Telecamera Alla Slitta Interna
89
Posizionamento Della Slitta Interna
90
Descrizione Della Scheda Della Custodia
91
Collegamento Della Telecamera E Dell'ottica Motorizzata
91
Regolazione Della Tensione DI Alimentazione Dei Motori Delle Ottiche
92
8 Installazione
93
Collegamento Dei Cavi Alla Base
93
Fissaggio Della Base al Supporto
94
Descrizione Della Scheda Connettori
95
Collegamento Della Linea DI Alimentazione
96
Collegamento Della Linea DI Alimentazione in 24Vac
97
Collegamento Della Linea DI Alimentazione in 120Vac E 230Vac
97
Collegamento Dei Cavi DI Segnale
98
Collegamento del Cavo Video
98
Collegamento Delle Linee DI Telemetria
99
Collegamento Degli Ingressi DI Allarme, Dell'interruttore Crepuscolare E Dei Relè
100
Fissaggio del Corpo Superiore
101
Montaggio Dei Contrappesi
101
Rimozione Dei Contrappesi
102
Montaggio Dell'illuminatore Sulla Staffa
102
Collegamento Degli Illuminatori a LED
103
Collegamento Per la Sincronizzazione Della Telecamera con Gli Illuminatori a LED
104
Sacchetto Disidratante
104
Regolazione E Modalità DI Attivazione Degli Illuminatori a LED
104
Descrizione Dell'illuminatore a LED
104
Attivazione Degli Illuminatori a LED Tramite un Interruttore Crepuscolare Esterno
105
Attivazione Degli Illuminatori a LED Tramite Il Sensore Crepuscolare Integrato
105
Regolazione Della Soglia DI Accensione Degli Illuminatori a LED
106
Regolazione Della Potenza Degli Illuminatori a LED
106
Fissaggio Della Spazzola del Tergicristallo
107
Configurazione Hardware
108
Apertura Dello Sportellino DI Configurazione
108
Configurazione del DIP1
108
Configurazione del DIP2
108
Configurazione del DIP3
109
Configurazione Dell'indirizzo
109
Configurazione Delle Linee DI Comunicazione Seriali
109
Configurazione del DIP4
109
Esempi DI Installazione
110
Linea RS-485 RX
110
Linea RS-485 TX/RX Bidirezionale
110
9 Accensione
111
Prima Accensione
111
Lista Dei Controlli
111
10 Configurazione
112
Interfaccia OSM (on Screen Menu)
112
Uso Dell'osm
112
Come Usare Il Joystick
112
Come Muoversi Nei Menù
113
Come Modificare I Parametri
113
Come Modificare I Campi Numerici
114
Come Modificare I Testi
114
Configurazione Tramite OSM
116
Menù Principale
116
Menù Scelta Lingua
116
Menù Parametri ZFI
116
Menù Titolazione Aree
117
Menù Mascheratura Aree
118
Menù Seriale Custodia
119
Menù Polarità
119
Menù Movimento
120
Menù Controllo Manuale
120
Menù Controllo Manuale (Limiti)
121
Menù Preset
121
Menù Preset (Modifica Preset)
121
Menù Preset (Utilità Preset)
122
Menù Patrol
122
Menù Autopan
122
Menù Richiamo Movimenti
123
Menù Visualizzazioni
123
Menù I/O Digitali-Opzioni
123
Menù Allarmi
124
Menù Comunicazioni
124
Menù Impianto DI Lavaggio
125
Menù Default
125
Menù Info
125
Impianto DI Lavaggio
125
Collegamento Dell'impianto DI Lavaggio
126
Supporto da Parete
127
Supporto da Parapetto
127
Alimentatore con Controllo Degli Illuminatori
127
12 Istruzioni DI Funzionamento Ordinario
128
Visualizzazione Dello Stato del Brandeggio
128
Salvataggio DI un Preset
128
Richiamo DI una Posizione DI Preset (Scan)
128
Richiamo Della Posizione DI Home
128
Attivazione del Patrol
128
Attivazione Dell'autopan
129
Attivazione del Tergicristallo (Wiper)
129
Attivazione Dell'impianto DI Lavaggio (Washer)
129
Attivazione Dell'illuminatore a LED
129
Reboot Dell'unità
129
Comandi Speciali
130
Configurazioni Speciali
131
13 Manutenzione
132
Sostituzione Dei Fusibili
132
14 Pulizia
132
Pulizia del Vetro E Delle Parti in Plastica
132
Pulizia Della Finestra in Germanio
132
15 Smaltimento Dei Rifiuti
132
16 Risoluzione Dei Problemi
133
17 Dati Tecnici
135
Generale
135
Meccanica
135
Finestre Per Custodia
135
Elettrico
135
Français
149
1 À Propos de Ce Mode D'emploi
153
Conventions Typographiques
153
2 Notes Sur Le Copyright Et Informations Sur Les Marques de Commerce
153
3 Normes de Securité
153
4 Identification
156
Description Et Désignation du Produit
156
Marquage du Produit
156
Contrôle du Marquage
156
5 Versions
157
Projecteurs À LED
157
Fenêtre Au Germanium
157
6 Préparation du Produit en Vue de L'utilisation
158
Précautions de Sécurité Avant L'utilisation
158
Déballage
158
Élimination Sans Danger des Matériaux D'emballage
158
Opérations À Effectuer Avant L'installation
159
Fixation du Support
159
Passage des Câbles
159
7 Assemblage
160
Fixation du Double Toit
160
Ouverture du Caisson
160
Montage Caméras, Systèmes Optiques Motorisés
160
Caractéristiques des Caméras
160
Fixation de L'optique Et de la Caméra À la Glissière Interne
161
Glissière Interne
162
Description de la Carte du Caisson
163
Branchement de la Caméra Et de L'optique Motorisée
163
Réglage de la Tension D'alimentation des Moteurs des Optiques
164
8 Installation
165
Connexion des Câbles À la Base
165
Fixage de la Base Au Support
166
Description de la Carte de Connexion
167
Connexion de la Ligne D'alimentation
168
Connexion de la Ligne D'alimentation en 24Vac
169
Raccordement de la Ligne D'alimentation en 120Vac Et 230Vac
169
Connexion des Câbles de Signalisation
170
Connexion du Câble VIDéo
170
Connexion des Lignes de TéléMétrie
171
Branchement des Entrées D'alarme, de L'interrupteur Crépusculaire Et des Relais
172
Fixation du Corps Supérieur
173
Montage du Contrepoids
173
Retrait des Contrepoids
174
Montage du Projecteur Sur L'étrier
174
Branchement des Projecteur À LED
175
Connexion Pour la Synchronisation des Caméras Avec Les Projecteurs À LED
176
Sachet Déshydratant
176
Réglage Et Modalité D'activation des Projecteurs À LED
176
Description du Projecteur À LED
176
Activation des Projecteurs À LED À L'aide D'un Interrupteur Crépusculaire Externe
177
Activation des Projecteurs À LED À L'aide du Détecteur Crépusculaire Intégré
177
Réglage du Seuil D'allumage des Projecteurs À LED
178
Réglage de la Puissance des Projecteurs À LED
178
Fixation du Balai Essuie-Glace
179
Configuration du Matériel
180
Ouverture du Volet de Configuration
180
Configuration du DIP1
180
Configuration du DIP2
180
Configuration du DIP3
181
Configuration de L'adresse
181
Configuration des Lignes de Communications Sérielles
181
Configuration du DIP4
181
Exemple D'installation
182
Ligne RS-485 RX
182
Ligne RS-485 TX/RX Bidirectionnelle
182
9 Allumage
183
Premier Allumage
183
Liste des Contrôles
183
10 Configuration
184
Interface OSM (on Screen Menu)
184
Utilisation de L'osm
184
Utilisation du Joystick
184
Comment Se Déplacer Dans Le Menu
185
Comment Modifier Les Paramètres
185
Comment Modifier Les Champs Numériques
186
Comment Modifier Les Textes
186
Configuration Par OSM
188
Menu Principal
188
Menu Choix Langue
188
Menu Paramètres ZFI
188
Menu Titrage des Zones
189
Menu Masquage des Zones
190
Menu Communication Sérielle Caisson
191
Menu Polarité
191
Menu Mouvement
192
Menu Contrôle Manuel
192
Menu Contrôle Manuel (Limites)
193
Menu Preset
193
Menu Preset (Modifier Preset)
193
Menu Preset (Utilités Preset)
194
Menu Patrol
194
Menu Autopan
194
Menu Rappel Mouvements
195
Menu Affichages
195
Menu I/O Numériques-Options
195
Menu Alarmes
196
Menu des Communications
196
Menu Système de Lavage
197
Menu Par Défaut
197
Menu Infos
197
11 Accessoires
198
Système de Lavage
198
Branchement du Système de Lavage
198
Support Fixation Murale
199
Support Fixation Sol
199
Alimentateur Avec Contrôle des Projecteurs
199
12 Instructions de Fonctionnement Courant
200
Affichage de L'état de la Tourelle
200
Enregistrement D'un Preset
200
Rappel D'une Position de Preset (Scan)
200
Rappel de la Position de Home
200
Activation du Patrol
200
Activation de L'autopan
201
Validation de L'essuie-Glace (Wiper)
201
Activation du Système de Lavage (Washer)
201
Activation du Projecteur À LED
201
Reboot du Dispositif
201
Commandes Spéciales
202
Configuration Spéciales
203
13 Entretien
204
Remplacement des Fusibles
204
14 Nettoyage
204
Entretiens de la Vitre Et des Parties en Plastique
204
Nettoyage de la Fenêtre Au Germanium
204
15 Élimination des Déchets
204
16 Dépannage
205
17 Données Techniques
207
Généralités
207
Mécanique
207
Fenêtres Pour Caisson
207
Électrique
207
Deutsch
221
1 Allgemeines
225
Schreibweisen
225
2 Anmerkungen zum Copyright und Informationen zu den Handelsmarken
225
3 Sicherheitsnormen
225
4 Identifizierung
228
Beschreibung und Bezeichnung des Produktes
228
Kennzeichnung des Produkts
228
Prüfung der Kennzeichnung
228
5 Versionen
229
LED Scheinwerfer
229
Fensterscheibe aus Germanium
229
Auf die Installation Vorbereitende Tätigkeiten
231
Befestigung der Halterung
231
Kabelführung
231
7 Zusammenbau
232
Befestigung des Dachs
232
Öffnung des Schutzgehause
232
Montage Kamera und Motorisch Bewegte Optiken
232
Eigenschaften der Kameras
232
Innenschlittens
234
Beschreibung der Karte Gehäuse
235
Anschluss der Kamera und der Motorisch Bewegten Optik
235
Einstellung der Versorgungsspannung der Motoren der Optiken
236
8 Installation
237
Anschließen der Kabel an die Basis
237
Beschreibung der Karte Anschlüsse
239
Anschluss der Stromversorgung
240
Anschluss der Stromversorgunglinie 24Vac
241
Anschluss der Versorgungsleitung in 120Vac und 230Vac
241
Anschluss der Signalkabel
242
Anschluss des Videokabels
242
Anschluss der Alarmeingänge, der Dämmerungsschalter und der Relais
244
Befestigung des Oberen Körpers
245
Aufbau der Gegengewichte
245
Anschluss für die Synchronisierung der Kameras mit den LED-Scheinwerfern
248
Trockenmittelbeutel
248
Einstellung und Aktivierungsarten der LED-Scheinwerfer
248
Beschreibung des LED-Scheinwerfers
248
Aktivierung der LED-Scheinwerfer durch einen Externen Dämmerungsschalter
249
Aktivierung der LED-Scheinwerfer durch den Integrierten Dämmerungssensor
249
Einstellung der Einschaltschwelle der LED-Scheinwerfer
250
Einstellung der Leistung der LED-Scheinwerfer
250
Befestigung des Wischerblattes
251
Hardware Konfiguration
252
Adressekonfiguration
253
Montagebeispiel
254
Leitung RS-485 RX
254
Leitung RS-485 TX/RX Bidirektional
254
9 Einschaltung
255
Erstes Einschalten
255
Liste der Kontrollen
255
10 Konfiguration
256
OSM-Schnittstelle (on Screen Menu)
256
Gebrauch des OSM
256
Verwendung des Steuerknüppels
256
Das Bewegen Innerhalb der Menüs
257
Ändern von Parametern
257
Ändern der Zahlenfelder
258
Ändern von Texten
258
Konfiguration über OSM
260
Hauptmenü
260
Menü Sprachwahl
260
Menü Parameter ZFI
260
Menü Zonenbetitelung
261
Menü Zonenmaskierung
262
Menü Gehäuse Seriell
263
Menü Polarität
263
Menü Bewegung
264
Menü Handsteuerung
264
Menü Handsteuerung (Grenzpunkte)
265
Menü Preset
265
Menü Preset (Preset Ändern)
265
Menü Preset (Utility Preset)
266
Menü Patrol
266
Menü Autopan
266
Menü Bewegungsanforderung
267
Menü Anzeigen
267
Menü I/O Digital-Optionen
267
Menü Alarme
268
Menü Kommunikationen
268
Menü Waschanlage
269
Menü Default
269
Menü Info
269
11 Zubehör
270
Waschanlage
270
Anschluss der Waschanlage
270
Wandhalterung
271
Halterung für Brüstungsmontage
271
Netzteil mit Steuerung der Scheinwerfer
271
12 Anleitung für den Normalen Betrieb
272
Statusanzeige Schwenk-Neige-Kopf
272
Speichern eines Preset
272
Aufruf einer Position Preset (Scan)
272
Aufruf der Homeposition
272
Aktivierung Patrol
272
Aktivierung Autopan
273
Aktivierung der Scheibenwischer (Wiper)
273
Aktivierung der Waschanlage (Washer)
273
Aktivierung des LED- Scheinwerfer
273
Reboot der Einheit
273
Spezialbefehle
274
Sonderkonfigurationen
275
13 Wartung
276
Wechsel der Sicherungen
276
14 Reinigung
276
Reinigung des Glases und der Kunststoffteile
276
Putzen des Germaniumfensters
276
15 Müllentsorgungsstellen
276
16 Problemlösung
277
17 Technische Daten
279
Allgemeines
279
Mechanik
279
Fenster für Gehäuse
279
Elektrik
279
Advertisement
Advertisement
Related Products
Videotec ULISSE MAXI NETCAM
Videotec ulisse2
Videotec ULISSE RADICAL THERMAL
Videotec ulisse netcam
Videotec ULISSE
Videotec Ulisse Compact HD
Videotec ULISSE COMPACT
Videotec ULISSE COMPACT DELUX
Videotec Ulisse Evo
Videotec Ulisse Evo Thermal
Videotec Categories
Camera Accessories
Security Camera
Receiver
Racks & Stands
Switch
More Videotec Manuals
Login
Sign In
OR
Sign in with Facebook
Sign in with Google
Upload manual
Upload from disk
Upload from URL