Sign In
Upload
Manuals
Brands
Onkyo Manuals
Controller
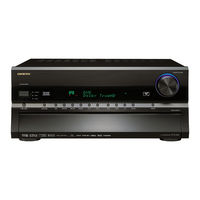
SC886 - PR Preamplifier / Processor
Onkyo SC886 - PR Preamplifier / Processor Manuals
Manuals and User Guides for Onkyo SC886 - PR Preamplifier / Processor. We have
3
Onkyo SC886 - PR Preamplifier / Processor manuals available for free PDF download: Service Manual, Instruction Manual
Onkyo SC886 - PR Preamplifier / Processor Service Manual (260 pages)
Brand:
Onkyo
| Category:
Receiver
| Size: 31 MB
Table of Contents
Service Manual
1
Exploded View
2
Video Section
4
To Naar-
8
Microprocessor Section
9
Dac Section
10
Dsp Section
11
Display Section
14
Power Supply Section
15
Hdmi Section
16
Packing Procedure
25
Front Side
25
Component Side
30
IC Block Diagrams and Terminal Descriptions
46
System Block Diagram
46
Pin Configuration
50
Terminal Name
59
Device Block Diagram
60
System Diagram
72
IC Block Diagrams and Terminal Descriptions
78
Top View
90
IC Block Diagram and Terminal Descriptions
100
Pin Layout
107
Control Circuit
115
Service Procedure
122
Replacing the Fuses
122
Memory Backup
122
Firmware Update
123
Connection and Setup
124
Operation Check
130
Thermal Sensor
130
Debug Mode
132
U01 Amplifier Pc Board (Naasp
144
Advertisement
Onkyo SC886 - PR Preamplifier / Processor Instruction Manual (134 pages)
AV Controller
Brand:
Onkyo
| Category:
Controller
| Size: 7 MB
Table of Contents
Important Safety Instructions
2
Declaration of Conformity
4
Table of Contents
5
Features
6
Supplied Accessories
7
Multiroom Capability
8
Front & Rear Panels
9
Front Panel
9
Display
11
Rear Panel
12
Remote Controller
15
Installing the Batteries
15
Aiming the Remote Controller
15
About the Remote Controller Modes
16
RECEIVER/TAPE Mode
16
DVD Mode
18
CD/MD/CDR Modes
19
DOCK Mode
20
About Home Theater
21
Enjoying Home Theater
21
Connecting the AV Controller
22
Connecting Your Speakers
22
Speaker Configuration
22
Connecting a Powered Subwoofer
23
Connecting a Power Amplifier with RCA Inputs
23
Connecting a Power Amplifier with XLR Inputs
24
Bi-Amping the Front Speakers
25
Connecting Antenna
26
Connecting the Indoor FM Antenna
26
Connecting the am Loop Antenna
26
Connecting an Outdoor am Antenna
27
Connecting an Outdoor FM Antenna
27
Connection
28
About AV Connections
28
Connecting both Audio & Video
29
Which Connections Should I Use
29
Connecting a TV or Projector
31
Step 1: Video Connection
31
Step 2: Audio Connection
31
Connecting a DVD Player
32
Connecting a VCR or DVD Recorder for Playback
34
Connecting a VCR or DVD Recorder for Recording
35
Connecting a Satellite, Cable, Terrestrial Set-Top Box, or Other Video Source
36
Connecting Components with HDMI
37
Making HDMI Connections
38
Connecting a Game Console
39
Connecting a Camcorder or Other Device
40
Connecting a CD Player or Turntable
41
Connecting a Cassette, CDR, Minidisc, or DAT Recorder
42
Connecting a Balanced Audio Source
42
Connecting an RI Dock
43
Connecting the Power Cords of Other Components (North American Model Only)
43
Connecting Onkyo U Components
44
Connecting the Power Cord
44
Turning on the AV Controller
45
Turning on and Standby
45
First Time Setup
46
Monitor Setup
46
Selecting the Language Used for the Onscreen Setup Menus
47
Using the Onscreen Setup Menus
48
Monitor out Setup
49
Video Input Setup
50
HDMI Input Setup
50
Digital Audio Input Setup
53
Analog Audio Input Setup
54
Speaker Settings
55
TV Format Setup (Not North American Models)
56
AM Frequency Step Setup (on some Models)
57
Changing the Input Display
57
Automatic Speaker Setup (Audyssey Multeq® XT)
58
Error Messages
62
Basic Operations
64
Selecting the Input Source
64
Setting the Display Brightness
65
Adjusting Speaker Levels
65
Muting the AV Controller
65
Using the Sleep Timer
66
Using Headphones
66
Adjusting the Bass & Treble
66
Displaying Source Information
66
Listening to the Radio
67
Listening to AM/FM Stations
67
Presetting AM/FM Stations
69
Listening to HD Radio™ Stations (North American Model Only)
70
Displaying HD Radio Information
71
Using RDS
72
Displaying Radio Text (RT)
73
Recording
74
Recording the Input Source
74
Recording from Different AV Sources
74
Using the Listening Modes
75
Selecting the Listening Modes
75
Listening Modes Available for each Source Format
76
About the Listening Modes
82
Advanced Setup
86
Menu Map
86
Monitor out Setup
87
Speaker Setup
89
Speaker Distance
92
Speaker Level Calibration
93
Equalizer Settings
95
THX Audio Setup
97
Audio Adjust
98
Tone Control Settings
99
Dolby Digital
100
Using the Music Optimizer
101
Using the Re-EQ Function
101
Using the Late Night Function
102
Source Setup
102
Picture Adjust
104
Satellite Radio
106
Listening Mode Presets
107
Miscellaneous Setup
108
Volume Setup
108
OSD Setup
109
Hardware Setup
110
Network Settings
112
Lock Setup
113
Selecting Audio Inputs
114
Specifying the Digital Signal Format
114
Zone 2 and Zone 3
115
Connecting Zone 2
115
Connecting Zone 3
116
Zone 2/Zone 3 out Settings
117
Using Zone 2 and Zone 3
117
Using the 12V Triggers
120
Using the Remote Controller in Zone 2/3 and Multiroom Control Kits
121
Others
122
Controlling Other Components
122
Entering Remote Control Codes
122
Remote Control Codes for Onkyo Components Connected Via
123
Resetting the REMOTE MODE Buttons
123
Resetting the Remote Controller
123
Learning Commands
125
Using Macros
126
Troubleshooting
127
Video Resolution Chart
131
Video Section
132
Digital Tuner
132
Video Output
132
Audio Inputs
132
Specifications
132
Onkyo SC886 - PR Preamplifier / Processor Instruction Manual (134 pages)
AV Controller
Brand:
Onkyo
| Category:
Controller
| Size: 7 MB
Table of Contents
Important Safety Instructions
2
Declaration of Conformity
4
Table of Contents
5
Features
6
Supplied Accessories
7
Multiroom Capability
8
Front & Rear Panels
9
Front Panel
9
Display
11
Rear Panel
12
Remote Controller
15
Installing the Batteries
15
Aiming the Remote Controller
15
About the Remote Controller Modes
16
RECEIVER/TAPE Mode
16
DVD Mode
18
CD/MD/CDR Modes
19
DOCK Mode
20
About Home Theater
21
Enjoying Home Theater
21
Connecting the AV Controller
22
Connecting Your Speakers
22
Connecting a Power Amplifier with RCA Inputs
23
Connecting a Power Amplifier with XLR Inputs
24
Bi-Amping the Front Speakers
25
Connecting Antenna
26
Connection
28
About AV Connections
28
Connecting both Audio & Video
29
Which Connections Should I Use
29
Connecting a TV or Projector
31
Connecting a DVD Player
32
Connecting a VCR or DVD Recorder for Playback
34
Connecting a VCR or DVD Recorder for Recording
35
Connecting a Satellite, Cable, Terrestrial Set-Top Box, or Other Video Source
36
Connecting Components with HDMI
37
Audio Signals
38
Connecting a Game Console
39
Connecting a Camcorder or Other Device
40
Connecting a CD Player or Turntable
41
Connecting a Cassette, CDR, Minidisc, or DAT Recorder
42
Connecting a Balanced Audio Source
42
Connecting an RI Dock
43
Connecting the Power Cords of Other Components (North American Model Only)
43
Connecting Onkyo U Components
44
Connecting the Power Cord
44
Turning on the AV Controller
45
Turning on and Standby
45
First Time Setup
46
Monitor Setup
46
Selecting the Language Used for the Onscreen Setup Menus
47
Using the Onscreen Setup Menus
48
Monitor out Setup
49
Video Input Setup
50
Digital Audio Input Setup
53
Analog Audio Input Setup
54
Speaker Settings
55
TV Format Setup (Not North American Models)
56
AM Frequency Step Setup (on some Models)
57
Changing the Input Display
57
Automatic Speaker Setup (Audyssey Multeq® XT)
58
Error Messages
62
Basic Operations
64
Selecting the Input Source
64
Setting the Display Brightness
65
Adjusting Speaker Levels
65
Muting the AV Controller
65
Using the Sleep Timer
66
Using Headphones
66
Adjusting the Bass & Treble
66
Displaying Source Information
66
Listening to the Radio
67
Listening to AM/FM Stations
67
Presetting AM/FM Stations
69
Listening to HD Radio™ Stations (North American Model Only)
70
Using RDS
72
Recording
74
Recording the Input Source
74
Recording from Different AV Sources
74
Using the Listening Modes
75
Selecting the Listening Modes
75
Listening Modes Available for each Source Format
76
About the Listening Modes
82
Advanced Setup
86
Menu Map
86
Monitor out Setup
87
Speaker Setup
89
Speaker Distance
92
Equalizer Settings
95
Audio Adjust
98
Dolby Digital
100
Using the Music Optimizer
101
Using the Re-EQ Function
101
Using the Late Night Function
102
Source Setup
102
Listening Mode Presets
107
Miscellaneous Setup
108
Hardware Setup
110
Lip Sync
111
Network Settings
112
Lock Setup
113
Selecting Audio Inputs
114
Specifying the Digital Signal Format
114
Zone 2 and Zone 3
115
Connecting Zone 2
115
Connecting Zone 3
116
Zone 2/Zone 3 out Settings
117
Using Zone 2 and Zone 3
117
Using the 12V Triggers
120
Using the Remote Controller in Zone 2/3 and Multiroom Control Kits
121
Controlling Other Components
122
Entering Remote Control Codes
122
Others
122
Resetting the Remote Controller
123
Learning Commands
125
Using Macros
126
Troubleshooting
127
Video Resolution Chart
131
Specifications
132
Amplifier Section
132
Video Section
132
Video Output
132
Tuner Section
132
Audio Inputs
132
Audio Outputs
132
Digital Tuner
132
Advertisement
Advertisement
Related Products
Onkyo S680 - HT Home Theater System
Onkyo SR502S - 6.1 Channel Home Theater Receiver
Onkyo SKF-201
Onkyo SKW-750
Onkyo SKF-530F
Onkyo SKM-360S L
Onkyo SKS-HT520B
Onkyo SKC-518C
Onkyo SKC-L30
Onkyo SKW-310
Onkyo Categories
Receiver
Amplifier
CD Player
Stereo Receiver
Home Theater System
More Onkyo Manuals
Login
Sign In
OR
Sign in with Facebook
Sign in with Google
Upload manual
Upload from disk
Upload from URL