Sign In
Upload
Manuals
Brands
Monogram Manuals
Refrigerator
36 Ceramic Cooktop
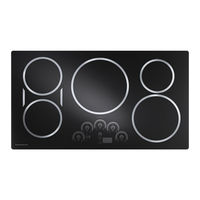
Monogram 36 Ceramic Cooktop Manuals
Manuals and User Guides for Monogram 36 Ceramic Cooktop. We have
11
Monogram 36 Ceramic Cooktop manuals available for free PDF download: Owner's Manual, Installation Instructions Manual
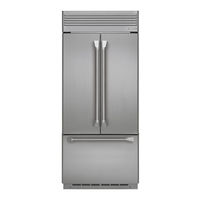
Monogram 36 Ceramic Cooktop Installation Instructions Manual (98 pages)
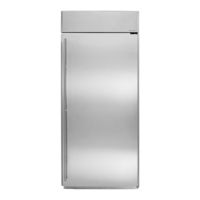
Built-In Bottom-Freezer Refrigerators
Brand:
Monogram
| Category:
Refrigerator
| Size: 1 MB
Table of Contents
English
5
Safety
2
Table of Contents
5
Instructions for Standard Installation
6
The Installation Space
7
Dimensions and Clearances
7
Dual Installation
7
Customization Basics
8
Refrigerator Location
8
Optional Accessory Kits
8
1/4" Framed Panel Dimensions
9
3/4" Overlay Panel Dimensions
9
Side Panels
10
ZKBFN720NII Grille Panel Dimensions
10
130° Door Swing
11
Installation Instructions
12
Tools Required
12
Materials Required
12
Hardware Supplied
12
Grounding the Refrigerator
12
Step 1 Remove Packaging
13
Step 2 Install Water Line
14
Step 4. Anti-Tip Procedures
15
Step 3 Install Side Panels
15
Or Other Household Filtration System
15
Step 6 Secure Unit to Wall
17
Step 7 Alternate Anti-Tip Procedure
18
Step 8 Adjust Door Swing
18
Step 9 Install Grille Panel
19
Step 10. Install 1/4" Framed Panels
19
Step 10A Install Overlay Panels
20
Step 11 Connect Water Supply
21
Step 12 Connect Power
21
Step 13 Start Icemaker
22
Step 14 Install Toekick
22
Instructions for Flush Installation
23
Instructions for Stainless Steel Installation
24
The Installation Space
25
Dimensions and Clearances
25
Optional Accessory Kits
26
Refrigerator Location
26
Side Panels
26
Customization Basics
26
130° Door Swing
27
Installation Instructions
28
Grounding the Refrigerator
28
Step 1 Remove Packaging
29
Step 2 Install Water Line
30
Step 4 Anti-Tip Procedure
31
Step 3 Install Side Panels
31
Osmosis System or Other Household
31
Step 5 Level Refrigerator
33
Step 6 Secure Unit to Wall
33
Step 7 Alternate Anti-Tip Procedure
34
Step 8 Adjust Door Swing
34
Step 9 Connect Water Supply
35
Step 10 Connect Power
35
Step 11 Start Icemaker
36
Step 12 Install Toekick
36
Français
43
Instructions Pour Une Installation Standard
44
Dimensions Et Dégagements
45
Installation Double
45
L'espace D'installation
45
Emplacement du Réfrigérateur
46
Renseignements Essentiels Sur la Personnalisation
46
Trousses D'accessoires en Option
46
Dimensions du Panneau de Recouvrement 3/4 Po
47
Dimensions du Panneau Encadré 1/4 Po
47
Dimensions du Panneau de Grille ZKBFN720NII
48
Panneaux Latéraux
48
Ouverture de Porte À
49
Instructions D'installation
50
Mise À la Terre de L'appareil
50
Étape 1 Retirer L'emballage
50
Système de Filtration Domestique
51
Étape 2 Installer la Conduite D'eau
51
Étape 2A. Installation de la Conduite D'eau Avec
51
Étape 3 Installer Les Panneaux Latéraux
51
Étape 5 Mettre Le Réfrigérateur de Niveau
53
Étape 6 Fixer L'appareil Au Mur
53
Étape 7 Autres Dispositifs Antibasculement
54
Étape 9 Installer Le Panneau de Grille
55
De Recouvrement
56
Étape 10A Installer Les Panneaux
56
Étape 12. Brancher L'alimentation
57
Étape 13 Démarrer la Machine Àglaçons
57
Étape 14 Installer Le Coup-De-Pied
57
Instructions Pour Une Installation Affleurante
58
Instructions Pour Une Installation en Acier Inoxydable
59
Dimensions Et Dégagements
60
L'espace D'installation
60
Emplacement du Réfrigérateur
61
Panneaux Latéraux
61
Renseignements Essentiels Sur la Personnalisation
61
Trousses D'accessoires en Option
61
Ouverture de Porte À
62
Instructions D'installation
63
Mise À la Terre de L'appareil
63
Système de Filtration Domestique
64
Étape 2 Installer la Conduite D'eau
64
Étape 2A. Installation de la Conduite D'eau Avec
64
Étape 3 Installer Les Panneaux Latéraux
64
Étape 5 Mettre Le Réfrigérateur de Niveau
66
Étape 6 Fixer L'appareil Au Mur
66
Étape 7 Autres Dispositifs Antibasculement
67
Étape 10. Brancher L'alimentation
68
Étape 11 Démarrer la Machine Àglaçons
68
Étape 12 Installer Le Coup-De-Pied
68
Español
72
Instrucciones para la Instalación Estándar
73
Dimensiones y Espacios Libres
74
El Espacio de Instalación
74
Para la Instalación Dual
74
Instrucciones Básicas de Personalización
75
Kits de Accesorios Opcionales
75
Ubicación del Refrigerador
75
Dimensiones del Panel con Marco de 1/4
76
Dimensiones del Panel Revestido de 3/4
76
Dimensiones del Panel con Rejilla ZKBFN720NII
77
Paneles Laterales
77
Giro de Puerta de 130
78
Instrucciones de Instalación
79
Inversa U Otro Sistema de Filtración Hogareño
80
Paso 3 Instale Los Paneles Laterales
80
Paso 6 Asegure la Unidad a la Pared
82
Paso 7. Procedimiento Anti Volcaduras Alternativo
83
Paso 8 Ajuste el Giro de la Puerta
83
Paso 10. Instale Los Paneles con Marco de 1/4
84
Paso 9. Instale el Panel con Rejilla
84
Paso 10A Instale Los Paneles Revestidos
85
Paso 12 Conecte la Corriente
86
Paso 14 Instale el Zócalo
86
Instrucciones para una Instalación Nivelada
87
Instrucciones para la Instalación de Acero Inoxidable
88
Dimensiones y Espacios Libres
89
El Espacio de Instalación
89
Instrucciones Básicas de Personalización
90
Kits de Accesorios Opcionales
90
Paneles Laterales
90
Ubicación del Refrigerador
90
Giro de Puerta de
91
Conexión a Tierra del Refrigerador
92
Instrucciones de Instalación
92
Paso 1 Retire el Embalaje
92
Inversa U Otro Sistema de Filtración Hogareño
93
Paso 3 Instale Los Paneles Laterales
93
Paso 4 Procedimiento Anti-Volcaduras
94
Paso 5 Nivele el Refrigerador
95
Paso 6 Asegure la Unidad a la Pared
95
Paso 7. Procedimiento Anti Volcaduras Alternativo
96
Paso 8 Ajuste el Giro de la Puerta
96
Suministro de Agua
96
Paso 10 Conecte la Corriente
97
Paso 12 Instale el Zócalo
97
Advertisement
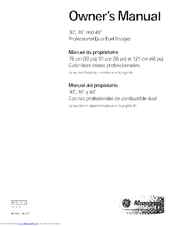
Monogram 36 Ceramic Cooktop Owner's Manual (128 pages)
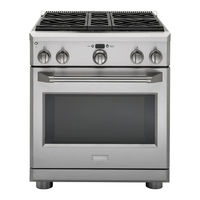
Professional Dual Fuel Ranges
Brand:
Monogram
| Category:
Ranges
| Size: 13 MB
Table of Contents
English
2
Table of Contents
2
Controls
10
Cookware
10
Dual-Flame Stacked Burners
10
Burners
10
Features
15
Oven
16
Aluminum Foil
21
Broiling/Broiling Guide
21
Convection Cooking
22
Proofing
25
Self-Cleaning Instructions
27
Control Panel and Knobs
29
Care and Cleaning
29
Broiler Pan, Grid and Roasting Rack
29
Cutting Board
36
Grease Troughs
36
Griddle
36
Grill
37
Oven Lights
38
Consumer Services
42
Warranty
44
Français
45
Commandes
53
Superposes
53
Fonctions Et Caracteristiques
58
Cuisson Au Grill/Guide
64
Grill
64
Cuisson Par Convection
65
Levee
68
Ei6Ments de Chauffage du Four
72
Entretien Et Nettoyage
72
Grill
72
Grilles de Four Autonettoyantes
73
Lampes du Four
75
Lechefrites
79
Planche _-_ Trancher
79
Plaque Chauffante
79
Guide de Depannage
81
Español
87
Quemadores
90
Controles
91
Recipientes de Coccion
91
De Auto-Limpieza
93
Papel de Aluminio
93
Canaletas para Grasa
94
Plancha
94
Tabla para Cortar
94
Parrilla
107
Elementos Calentadores del Homo
114
Sonda
116
Bandejas del Homo
117
Acero Inoxidable
118
Solucionador de Problemas
123
Garantia
128
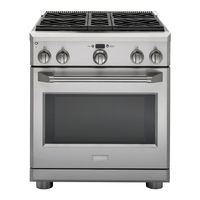
Monogram 36 Ceramic Cooktop Installation Instructions Manual (80 pages)
All Gas Professional Ranges
Brand:
Monogram
| Category:
Ranges
| Size: 3 MB
Table of Contents
English
3
Before You Begin
2
Table of Contents
3
Design Information
3
Models Available
3
Backsplash Accessories
3
Product Dimensions and Clearances
4
Product Dimensions and Clearances
7
Tools and Materials Required
8
Installation Information
8
Power Supply Locations
9
Installation Preparation
9
Step 1 Remove Packaging
10
Step 2, Move Range Indoors
11
Step 3 Install Anti-Tip Device
12
Step 4 Connect Range to Gas
13
Step 5 Connect Electrical
13
Step 6 Roll Range into Position
14
Step 7 Level the Range
15
Step 8, Replace Oven Doors
15
Step 11, Adjusting the Bake Burner at Shutter
16
Step 10 Check Operation of Oven Bake Burners
16
Step 9 Check Burners
16
Step 12 Check Operation of Oven Broil Burner
17
Finalize Installation
17
Installation Checklist
17
Accessories
18
Accessory Installation
19
Gas Conversion
23
Gas Conversion
26
Avant de Commencer
27
Français
28
Accessoires du Dosseret
28
Modèles Disponibles
28
Dimensions du Produit Et Espaces Requis
29
Outils Et Matériel Requis
33
Emplacement des Alimentations
34
Préparation de L'installation
34
Étape 1 Sortez L'appareil de Son Emballage
35
Étape 2 Déplacez la Cuisinière À L'intérieur
36
Étape 3 Installez Le Support Anti-Basculement
37
Étape 5, Branchez la Cuisinière À la Prise Électrique
38
En la Faisant Rouler
39
À L'alimentation en Gaz
39
Étape 7 Ajustez Le Niveau de la Cuisinière
40
Étape 8, Réinstallez Les Portes du Four
40
Depuis Le Volet D'obturation
41
Des Brûleurs de Cuisson du Four
41
Étape 10 Vérifiez Le Fonctionnement
41
Étape 11 Réglez Le Brûleur de Cuisson
41
Étape 9 Vérifiez Les Brûleurs
41
Du Gril du Four
42
Liste de Vérification Pour L'installation
42
Terminez L'installation
42
Étape 12, Vérifiez Le Fonctionnement du Brûleur
42
Accessoires
44
Installation des Accessoires
44
Conversion de la Cuisinière Pour Le Gaz
47
Conversion du Gaz Naturel Au Propane
47
Antes de Comenzar
52
Español
53
Modelos Disponibles
53
Requisitos de Accesorios
53
Dimensiones y Espacios del Producto
54
Herramientas y Materiales Requeridos
58
Preparación para la Instalación
59
Ubicaciones del Suministro de Energía
59
Paso 1 Quite el Empaque
60
Paso 2 Traslade la Cocina al Interior
61
Paso 3 Instale el Dispositivo Anti-Volcaduras
62
Paso 4 Conecte la Cocina al Suministro de Gas
63
Paso 5, Conecte la Electricidad
63
Paso 6, Coloque la Cocina en Su Posición
64
Paso 7 Nivele la Cocina
65
Paso 8 Reemplace las Puertas del Horno
65
De Hornear del Horno
66
Paso 10, Revise la Operación de Los Quemadores
66
Paso 11, Cómo Ajustar el Quemador
66
Paso 9 Controle Los Quemadores
66
Asador del Horno
67
De Hornear en el Obturador
67
Finalice la Instalación
67
Lista de Control de la Instalación
67
Paso 12, Revise la Operación del Quemador
67
Accesorios
68
Instalación de Accesorios
69
Antes de Comenzar
69
Conversión de Gas
72
Advertisement
Monogram 36 Ceramic Cooktop Owner's Manual (72 pages)
Brand:
Monogram
| Category:
Cooktop
| Size: 1 MB
Table of Contents
English
2
Table of Contents
2
Consumer Support
3
Safety Information
4
Features
6
Feature Index
7
Cooking Element(S)
8
Power Level Arc
8
All off
8
Turn Burner(S) off
8
Operating the Cooking Elements
8
Using Your Cooktop
8
Selecting Cooktop Settings
9
How to Synchronize Left Elements
9
Sync Burners
9
Power Sharing
10
Cooktop Lockout
10
Single Kitchen Timer
10
Lock
10
Timer Select
10
Display
10
Pan Detection Removal
11
Hot Light Indicator
11
Multiple Timers
11
Custom Settings
12
How Induction Cooking Works
13
Choosing the Correct Cookware to Use
14
Griddle
16
Care and Cleaning
17
Burned-On Residue
17
Heavy, Burned-On Residue
17
Accessories
18
Glass Surface - Potential for Permanent Damage
18
Metal Marks and Scratches
18
Troubleshooting
19
Limited Warranty
23
Français
26
Soutien Au Consommateur
27
Consignes de Sécurité
28
Caractéristiques
30
Extinction D'un Ou de Plusieurs Brûleurs
32
Fonctionnement des Éléments de Cuisson
32
Utilisation de Votre Table de Cuisson
32
Comment Synchroniser Les Éléments de Gauche
33
Sélection des Réglages de la Table de Cuisson
33
Minuterie de Cuisine Simple
34
Partage de Puissance
34
Verrouillage de la Table de Cuisson
34
Détection de L'enlèvement D'une Casserole
35
Minuteries Multiples
35
Témoin Lumineux de Surface Chaude
35
Réglages Personnalisés
36
Bruit de Cuisson
37
Fonctionnement de la Cuisson À Induction
37
Choix de la Bonne Batterie de Cuisine À Utiliser
38
Plaque Chauffante
40
Nettoyage Et Entretien
41
Résidus Calcinés
41
Résidus Calcinés Difficiles À Enlever
41
Comment Commander des Pièces
42
Surface de Vitrocéramique - Possibilité de Dommages Permanents
42
Traces de Métal Et Rayures
42
Trucs de Dépannage
43
Garantie Limitée de Monogram
47
Español
50
Soporte al Cliente
51
Información Importante de Seguridad
52
Características
54
Apague el Quemador(Es)
56
Cómo Usar Su Estufa
56
Uso de Los Elementos de Cocción
56
Cómo Sincronizar Los Elementos Izquierdos
57
Selección de las Configuraciones de la Placa de Cocción
57
Bloqueo de la Placa de Cocción
58
Distribución de Energía
58
Temporizador Único de la Cocina
58
Detección de Retiro del Recipiente de Cocción
59
Indicador Luminoso de Calor
59
Temporizadores Múltiples
59
Configuraciones Especiales
60
Cómo Funciona la Cocción por Inducción
61
Ruido de la Cocción
61
Cómo Elegir el Mejor Recipiente de Cocción
62
Plancha
64
Cuidado y Limpieza
65
Residuos Pegados
65
Residuos Pegados Rebeldes
65
Marcas de Metal y Rayones
66
Para Solicitar Repuestos
66
Superficie de Vidrio: Posibilidades de Daño Permanente
66
Consejos para la Solución de Problemas
67
Garantía Limitada de Monogram
71
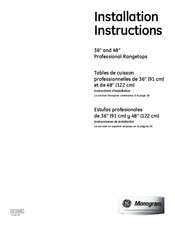
Monogram 36 Ceramic Cooktop Installation Instructions Manual (52 pages)
36" and 48" Professional Rangetops
Brand:
Monogram
| Category:
Cooktop
| Size: 3 MB
Table of Contents
English
3
Installation Instructions
1
Safety Information
2
Table of Contents
3
Design Information
3
Models Available
3
Backsplash Accessories
3
Product Dimensions and Clearances for 48" Wide Models
4
Product Dimensions and Clearances for 36" Wide Models
5
Installation Options
6
Installation Preparation
7
Tools and Materials Required
7
Tools Required
7
Power Supply Locations
7
Remove Packaging
8
Step 1 Cut the Countertop Opening
9
Step 2, Install the Rangetop
10
Step 3 Connect Rangetop to Gas
10
Step 4 Connect Electrical
11
Step 5 Check Burners
11
Finalize Installation
11
Installation Checklist
11
Install the Rangetop Backsplash Accessory
12
Backsplash Accessory
12
Before You Begin
12
Gas Conversion
15
Avant de Commencer
18
Français
19
Accessoires du Dosseret
19
Modèles Disponibles
19
Dimensions du Produit Et Espaces Requis Pour Les Modèles D'une Largeur de 48" (122 CM)
20
Dimensions du Produit Et Espaces Requis Pour Les Modèles D'une Largeur de 36" (91 CM)
21
Options D'installation
22
Emplacement des Alimentations
23
Outils Et Matériel Requis
23
Préparation de L'installation
23
Sortez L'appareil de Son Emballage
24
Consignes D'installation Étape 1, Découpez L'ouverture Sur Le Plan de Travail
25
En Gaz
26
Étape 2 Installez la Table de Cuisson
26
Installez Le Dosseret de la Table de Cuisson
27
Liste de Vérification Pour L'installation
27
Terminez L'installation
27
Étape 4, Branchez À la Prise Électrique
27
Étape 5 Vérifiez Les Brûleurs
27
Installation D'accessoires
28
Conversion de Gaz
32
Español
35
Modelos Disponibles
35
Requisitos de Accesorios
35
Dimensiones y Espacios del Producto para Modelos de 48" de Ancho
36
Dimensiones y Espacios del Producto para Modelos de 36" de Ancho
37
Opciones de Instalación
38
Herramientas y Materiales Requeridos
39
Preparación para la Instalación
39
Ubicaciones del Suministro de Energía
39
Quite el Empaque
40
Paso 1 Corte la Abertura del Mostrador de Encimera
41
Paso 2 Instale la Estufa
42
Paso 3 Conecte la Estufa al Suministro de Gas
42
Finalice la Instalación
43
Lista de Control de la Instalación
43
Paso 4 Conecte la Electricidad
43
Paso 5 Controle Los Quemadores
43
Instale el Salpicadero de 12
44
Antes de Comenzar
44
Instale el Accesorio para Salpicadero de la Estufa
45
Conversión de Gas
47
Monogram 36 Ceramic Cooktop Owner's Manual (48 pages)
Brand:
Monogram
| Category:
Ranges
| Size: 1 MB
Table of Contents
Table of Contents
2
Important Safety Instructions
4
Save These Instructions
8
Burners
10
Controls
10
Cookware
10
Dual-Flame Stacked Burners
10
Surface Cooking
12
Features of Your Oven
15
Features
16
Controls 9
16
Aluminum Foil
17
Oven Racks
18
Broiling or Convection Broiling
20
Broiling/Broiling Guide
21
Aluminum Foil 7
21
Convection Cooking
22
Using the Probe
24
Proofing
25
Self-Cleaning Instructions
26
Special Features
28
Care and Cleaning
29
Broiler Pan, Grid and Roasting Rack
29
Control Panel and Knobs
29
Cutting Board
36
Grease Troughs
36
Grill
37
Oven Lights
38
Consumer Services
42
Model and Serial Number
44
Warranty
48
Monogram 36 Ceramic Cooktop Owner's Manual (32 pages)
Side-by-Side 36",42",48" Built-In Refrigerators
Brand:
Monogram
| Category:
Refrigerator
| Size: 0 MB
Table of Contents
Table of Contents
2
Before Using Your Refrigerator
3
Problem Solver
3
In the USA
3
Consumer Information
3
Read and Save These Instructions
4
Important Safety Instructions
4
Cfc Disposal
4
Se Débarrasser du Cfc
5
Importantes Instructions de Sécurité
5
How to Connect Electricity
6
Raccordement Électrique
7
Conservez Ces Directives
7
Temperature Controls
8
Door Alarm
8
Water Filter Cartridge
9
Ice and Water Dispenser
10
Ice Storage bin
11
Automatic Icemaker
12
Climate Control Drawer
13
Climate Control Drawer 13
14
Control Lock
14
High Humidity
15
Low Humidity
15
Deli Pan
15
Storage Pans
15
Shelves and Bins
17
Light Bulb Replacement
20
Preparing to Move
24
Preparing for Vacation
24
Cleaning the Condenser
24
The Problem Solver
25
Temperature Controls
25
Performance Data Sheet
29
Consumer Services
31
GE Answer Center
31
Service Contracts
31
Parts and Accessories
31
Warranty
32
Monogram 36 Ceramic Cooktop Owner's Manual (32 pages)
Side-by-Side 36”, 42”, 48” Built-In Refrigerators
Brand:
Monogram
| Category:
Refrigerator
| Size: 0 MB
Table of Contents
Table of Contents
2
Operating Instructions
2
Problem Solver
3
Consumer Information
3
Product Registration
3
Important Safety Instructions
4
Use of Extension Cords
6
Proper Disposal of Your Old Refrigerator
6
Conservez Ces Instructions
7
Water Filter Cartridge
9
Automatic Icemaker
12
Climate Control Drawer
13
Control Lock
14
Storage Pans
15
Shelves and Bins
17
Care and Cleaning
19
Temperature Controls
23
Performance Data Sheet
27
Consumer Services
28
Monogram 36 Ceramic Cooktop Owner's Manual (34 pages)
Side-by-Side 36″, 42″, 48″ Built-In Refrigerators
Brand:
Monogram
| Category:
Refrigerator
| Size: 0 MB
Table of Contents
Table of Contents
2
Problem Solver
3
Consumer Information
3
Safety Instructions
4
How to Connect Electricity
6
Automatic Icemaker
12
Climate Control Drawer
13
Climate Control Drawer 13
14
Control Lock
14
Deli Pan
15
High Humidity
15
Low Humidity
15
Shelves and Bins
17
Temperature Controls
25
Consumer Services
31
Water Filter Cartridge
32
Monogram 36 Ceramic Cooktop Owner's Manual (22 pages)
Built-In 36″ Single Door Refrigerators and 36″ Single Door Freezers
Brand:
Monogram
| Category:
Refrigerator
| Size: 0 MB
Table of Contents
Table of Contents
2
Model and Serial Numbers
3
Product Registration
3
Safety Instructions
4
How to Connect Electricity
6
Operating Instructions
8
Temperature Controls
8
Automatic Icemaker
9
Water Filter Accessory
9
Storage Drawers
10
Shelves
11
Wine Rack
11
Shelves
12
Care and Cleaning Cleaning-Outside and Inside
13
Condenser
13
Light Bulb Replacement
14
Vacation
14
Preparation
15
Clearances
15
Leveling
15
Location
15
Problem Solver
16
Consumer Services Important Phone Numbers
19
Monogram 36 Ceramic Cooktop Owner's Manual (20 pages)
36" built-in all-refrigerators and all-freezers
Brand:
Monogram
| Category:
Refrigerator
| Size: 0 MB
Table of Contents
Table of Contents
2
Consumer Information
2
Model and Serial Numbers
3
Product Registration
3
Safety Instructions
4
Proper Disposal of Your Old Refrigerator
6
Use of Extension Cords
6
Conservez Ces Instructions
7
Temperature Controls
8
Operating Instructions
9
Automatic Icemaker
9
Water Filter Accessory
10
Water Filter Cartridge
10
Storage Drawers
11
Shelves
12
Care and Cleaning Cleaning-Outside and Inside
13
Sabbath Mode Product
13
Light Bulb Replacement
14
Vacation
14
Preparation
15
Location
15
Problem Solver
16
Performance Data Sheet
18
Important Phone Numbers
19
Consumer Services
19
Advertisement
Related Products
Monogram 30?
Monogram Side-by-Side 36", 42", 48" Built-In Refrigerators
Monogram Side by Side 36/42/48" Built-In Refrigerators
Monogram 36 inch
Monogram 31-46199-1
Monogram MONOGRAM PETERBILT 359 CONVENTIONAL
Monogram 30 inch
Monogram 388
Monogram '37 Ford Sedan
Monogram '32 Ford Street Rod
Monogram Categories
Refrigerator
Ventilation Hood
Oven
Cooktop
Dishwasher
More Monogram Manuals
Login
Sign In
OR
Sign in with Facebook
Sign in with Google
Upload manual
Upload from disk
Upload from URL