Monogram 30? Owner's Manual
Hide thumbs
Also See for 30?:
- Owner's manual (128 pages) ,
- Installation instructions manual (80 pages) ,
- Owner's manual (72 pages)
Table of Contents
Advertisement
Quick Links
Owner's Manual
30", 36" and 48"
Professional Dual Fuel Ranges
Manuel du propriétaire
76 cm (30 po), 91 cm (36 po) et 121 cm (48 po)
Cuisinières mixtes professionnelles
La section française commence à la page 49
Manual del propietario
30", 36" y 48"
Cocinas profesionales de combustible dual
La sección en español empieza en la página 91
49-85117
04-08 JR
monogram.com
Advertisement
Table of Contents

Related Manuals for Monogram 30?


Summary of Contents for Monogram 30?
- Page 1 Owner’s Manual 30″, 36″ and 48″ Professional Dual Fuel Ranges Manuel du propriétaire 76 cm (30 po), 91 cm (36 po) et 121 cm (48 po) Cuisinières mixtes professionnelles La section française commence à la page 49 Manual del propietario 30″, 36″...
-
Page 2: Table Of Contents
Important Phone Numbers ..42 Model and Serial Number ... . 3 Problem Solver ....38–40 Product Registration . - Page 3 Remove Carefully remove all packaging, foam pads NOTE: The adhesive must be removed from all and tape. parts. It cannot be removed if it is baked on. packaging To assure no damage is done to the finish tape of the product, the safest way to remove the adhesive from packaging tape on new appliances is an application of a household liquid dishwashing detergent.
-
Page 4: Important Safety Instructions
IMPORTANT SAFETY INSTRUCTIONS IMPORTANT SAFETY NOTICE • The California Safe Drinking Water and Toxic • Gas appliances can cause minor exposure Enforcement Act requires the Governor of to four of these substances, namely benzene, California to publish a list of substances known carbon monoxide, formaldehyde and soot, to the state to cause cancer, birth defects or caused primarily by the incomplete... - Page 5 IMPORTANT SAFETY INSTRUCTIONS WARNING: SAFETY PRECAUTIONS • Use this appliance only for its intended use • Never wear loose-fitting or hanging as described in this manual. garments while using the appliance. Be careful when reaching for items stored over • Be sure your appliance is properly installed the range.
- Page 6 IMPORTANT SAFETY INSTRUCTIONS WARNING: SAFETY PRECAUTIONS • Do not use water on grease fires. Never • If by some chance a burner goes out and pick up a flaming pan. Turn the controls gas escapes, open a window or a door to off.
- Page 7 IMPORTANT SAFETY INSTRUCTIONS WARNING: SURFACE COOKING SAFETY PRECAUTIONS • Never leave the surface burners unattended • Use proper pan size—avoid pans that are at high flame settings. Boilovers cause unstable or easily tipped. Select cookware smoking and greasy spillovers that may catch having flat bottoms large enough to properly on fire.
-
Page 8: Save These Instructions
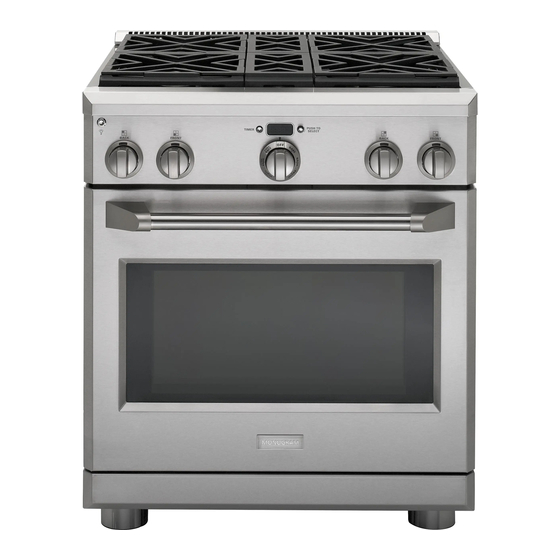
IMPORTANT SAFETY INSTRUCTIONS WARNING: OVEN SAFETY PRECAUTIONS • Place the oven rack in the desired position • When using cooking or roasting bags in the while the oven is cool. If racks must be oven, follow the manufacturer’s directions. handled when hot, do not let pot holder •... - Page 9 Burner Location Indicator —— ZDP366N, ZDP366L LED Bullnose Task Lighting Control 6 gas burners —— Burner Control Knob with Lighted Bezel 11, 30 Oven Display Mini-Knob (to select PROBE, TIMER or Special Features) 16, 30 Oven Mode Selector Oven Temperature Knob...
-
Page 10: Burners
Cooktop Controls Professional Dual Fuel Range Electronic The range is equipped with electronic ignition The griddle and IR (infrared) grill are equipped which eliminates the need for a standing pilot with Glo-Bar igniters. The Glo-Bar remains ignition & light. energized whenever the griddle or IR grill is in automatic use to ensure the burner always stays lit. - Page 11 Surface Cooking Professional Dual Fuel Range How to Watch the flame, not the knob, as you increase or reduce heat. select flame size The flame size on a gas burner should match the cookware you are using. FOR SAFE HANDLING OF COOKWARE, NEVER LET THE FLAME EXTEND UP THE SIDES OF THE COOKWARE.
-
Page 12: Surface Cooking
Surface Cooking Professional Dual Fuel Range WARNING: Grill Cover: Grill safety Do not leave the Remove the cover before lighting the burner. For precautions IR grill unattended at any time. your safety, the cover must be removed when Grease Flare-ups: (on some models) using the grill. - Page 13 Surface Cooking Professional Dual Fuel Range Remove the cover before lighting the IR grill. Grill grates The grill grate is reversible. Place the handle end (on some models) toward the front of the cooktop. The grate will change color when subjected to the heat, and as oils cook onto the surface.
- Page 14 4. Turn the control knob to 350°F for approximately Season must be seasoned. 30 minutes. Turn the heat off when the oil begins the griddle to smoke. Allow the griddle to cool. If the griddle has not been used for a period of time, it should be reseasoned.
-
Page 15: Features Of Your Oven
Full Extension Oven Rack Temperature Probe Roasting Rack Feature Index Page Full Extension Oven Rack(s) 18, 19, 23, 30 — 3 in large oven — 2 in small oven Broiler Pan and Grid Temperature Probe 24, 31 Roasting Rack Automatic Oven Door Latch... -
Page 16: Features
To cancel PROOF, turn the Oven Mode Selector CLEAN – The self-clean temperature is to OFF. automatically set. 3 Mini-Knob – Turn to select and push to enter PROBE or TIMER settings. Also to adjust CLEAN cycle time. 4 Timer Button – Push to select the kitchen timer function. -
Page 17: Aluminum Foil
Baking Tips Professional Dual Fuel Range Do not block An internal cooling fan operates during all oven Rear oven rear vents modes. The warm air from the oven is exhausted vents through vents located at the rear of the cooktop. Do not allow the airflow from the rear vents to be obstructed by cookware or towels. -
Page 18: Oven Racks
Upper Slide the rack all the way in front rail and push down to lock the front rack locks onto the front rack supports 3. Pull the rack all the way out to check that it is properly engaged. - Page 19 The double oven range has a small oven with 4 3. Turn the Oven Mode Selector and the Temperature rack positions. Rack position C is not in the small knob to OFF when baking is finished.
-
Page 20: Broiling Or Convection Broiling
Never leave your probe BROIL is selected. inside the oven during a broil cycle. 3. When broiling is finished, turn the Oven Mode Selector and the Temperature knob to OFF. NOTE: A cooling fan will turn on to cool internal parts. -
Page 21: Broiling/Broiling Guide
Broiling Professional Dual Fuel Range Suggested shelf positions are intended as general guidelines. Experiment with these positions for Broiling specific foods and personal preference. guide The size, weight, thickness, starting temperature and your preference of doneness will affect broiling times. This guide is based on meats at refrigerator temperature. -
Page 22: Convection Cooking
1. Place the oven rack on a low rack position (A). 2. Place the grid on the broiler pan and put the Grid roasting rack over them. 3. Place meat on the roasting rack. Broiler pan... - Page 23 When set on CONV BAKE or CONV ROAST, the rear convection elements and the fan operate when the 3. Turn the Oven Mode Selector and the oven is heating. Temperature knob to OFF when convection cooking is finished.
-
Page 24: Using The Probe
If no temperature is set, the probe will default to 100°F. If the oven 3. Set the oven controls. Turn the Oven Mode was not preheated, the display will show LO. Selector to CONV BAKE, CONV ROAST or BAKE. -
Page 25: Proofing
Proofing Professional Dual Fuel Range The proofing feature maintains a warm How to environment which is useful for rising set the yeast-leavened dough. oven for 1. Turn the Oven Mode Selector to PROOF. The proofing display will show “PrF”. PROOF mode will not operate when oven is above 125°F. -
Page 26: Self-Cleaning Instructions
3. Push the Mini-Knob to start the CLEAN cycle. An interrupted clean cycle cannot be restarted If “CLOSE door” scrolls in the display, the until after the oven is cool enough for the door self-clean cycle has been selected but the to unlock. - Page 27 :00. When the timer reaches :00, may be used.) the control will beep 3 times followed by one beep every 6 seconds until the Mini-Knob is pushed.
-
Page 28: Special Features
30 seconds to 1 minute, before To Cancel the Sabbath Mode: the oven will turn on once it is set to BAKE. Repeat steps 1, 2 and 3. The display will scroll “SAbbAtH OFF”. 1. Push and hold the TIMER button and Mini-Knob... -
Page 29: Care And Cleaning
Care and Cleaning Professional Dual Fuel Range Control Clean up spatters with a damp cloth. Remove heavier soil with warm, soapy water. panel and knobs Do not use abrasives of any kind on the control panel or knobs. The control knobs may be removed for easier cleaning. - Page 30 Newspaper may be placed underneath the rack for easy cleanup. Right side Rack right-side-up 3. If there is debris in the slide tracks, wipe it 6. Open and close the rack several times to away using a paper towel. NOTE: Any graphite distribute the lubricant.
- Page 31 The notch in the hinge arm must be fully seated into the bottom of the slot. Replacement position 3. Fully open the door. If the door will not fully open, the indentation is not seated correctly in the Bottom...
- Page 32 NOTE: If the locking clips fell from the glass lens cover, hold them on the cover, in the correct position, while replacing the cover on the light 3. Remove the glass light cover by pulling its back compartment. edge out and rolling it toward you. Do not Place front remove any screws.
- Page 33 Stainless scratch the surface. appliance cleaner, please call our toll-free steel number, 800.626.2002 or visit monogram.com. To clean the stainless steel surface, use surfaces warm sudsy water or a stainless steel cleaner. Always wipe the surface in the direction of the grain.
- Page 34 DO NOT OPERATE THE heads in a solution of mild liquid detergent and BURNER WITHOUT ALL BURNER PARTS IN PLACE. hot water for 20–30 minutes. For more stubborn stains, use a plastic scouring pad or toothbrush. Surface burners should be cleaned routinely,...
- Page 35 Care and Cleaning Professional Dual Fuel Range Spark igniter The electrode of the electronic ignition system is positioned at the rear of the burner base. When Clean this metal part and electrodes cleaning the cooktop, be careful not to snag the with an emery board.
-
Page 36: Cutting Board
Care and Cleaning Professional Dual Fuel Range Grease from the griddle and the grill will drain Grease troughs Grease into the enameled cast-iron grease troughs at troughs the front of the range. Once the troughs have (on some models) cooled, they may be lifted out for easier cleaning. -
Page 37: Grill
Support Tabs Be careful not to damage the pads during the cleaning process. 3. Radiant Baffle 3. Clean the Radiant baffle: Lift the baffle out of the pan. Clean the baffle Locator with hot soapy water or in the dishwasher. -
Page 38: Oven Lights
The Problem Solver Professional Dual Fuel Range Review the PROBLEM POSSIBLE CAUSE troubleshooting OVEN WILL NOT • A fuse in your home may be blown or the circuit breaker tripped. tips on the WORK • The oven controls are not properly set. following pages first and you •... - Page 39 Temperature knobs to OFF. Allow the oven to cool for one hour. Put the oven back into operation. • Disconnect all power to the oven for 30 seconds and then reconnect power. If the function error code repeats, call for service.
- Page 40 The Problem Solver Professional Dual Fuel Range PROBLEM POSSIBLE CAUSE BURNERS DO NOT • Electrical plug is not plugged into a live power outlet. LIGHT OR SPARK • Gas not turned on. RANDOMLY • Burner parts not replaced correctly. • Holes in the simmer rings or slits in the burner rings are clogged. •...
- Page 41 Notes Professional Dual Fuel Range...
-
Page 42: Consumer Services
GE, we’ll be there. All you have to do is call—toll- free! ® GE Answer Center Whatever your question about any Monogram major appliance, GE Answer Center ® information service is available to help. Your call—and your question—will be answered promptly and courteously. And you In the USA: can call any time. - Page 43 Place 1st Class Letter Stamp Here General Electric Company Warranty Registration Department P.O. Box 32150 Louisville, KY 40232-2150...
-
Page 44: Model And Serial Number
FOLD HERE Consumer Product Ownership Registration Product Model Serial Range Mrs. Miss First Last Name Name Street Address Apt. # City State Code Date Placed In Phone Month Year Number Monogram® ge.com General Electric Company Louisville, KY 40225 TAPE CLOSED... - Page 45 Please place in envelope and mail to: Veuillez mettre dans une enveloppe et envoyez à : OWNERSHIP REGISTRATION P.O. BOX 1780 MISSISSAUGA, ONTARIO L4Y 4G1 (FOR CANADIAN CONSUMERS ONLY)
- Page 47 Notes Professional Dual Fuel Range...
-
Page 48: Warranty
Warranty Professional Dual Fuel Range YOUR MONOGRAM RANGE WARRANTY Staple sales slip or cancelled check here. Proof of original purchase date is needed to obtain service under warranty. Please have serial number and model number available when calling for service.
Need help?
Do you have a question about the 30? and is the answer not in the manual?
Questions and answers