Sign In
Upload
Manuals
Brands
Amx Manuals
Touch Panel
modero NXT-CV17
Amx modero NXT-CV17 Manuals
Manuals and User Guides for Amx modero NXT-CV17. We have
8
Amx modero NXT-CV17 manuals available for free PDF download: Operation/Reference Manual, Instruction Manual, Installer's Manual, Specifications, Dimension Manual
Amx modero NXT-CV17 Operation/Reference Manual (274 pages)
Touch Panel Design Program (v2.10 or higher)
Brand:
Amx
| Category:
Software
| Size: 4.14 MB
Table of Contents
Table of Contents
3
Tpdesign4 Program
21
Overview
21
What's New in Version 2.10
21
Supported Operating Systems
21
Supported Operating System Languages
21
PC Requirements
22
Supported Panel Types
22
Intercom Capabilities for Modero Panels
23
Supported Screen Resolutions
23
Tpdesign4 Work Area
23
Toolbars
25
Show/Hide Toolbars
25
Design View Windows
26
Using the Zoom Controls
27
Workspace Navigator
28
Properties Control Window
29
Properties Control Window - General Tab
29
Properties Control Window - Programming Tab
29
Properties Control Window - States Tab
29
State Manager Window
30
Transfer Status Window
30
Button Preview Window
31
Button Preview Context Menu
31
Magnifier Window
32
Working with Dockable Windows
32
Moving, Docking and Resizing Dockable Windows
32
Toggling the Windows
32
Status Bar
32
Default View
33
Secondary View
33
Print Preview Window
34
Workspace Context Menu
35
Webupdate
35
G4 Panelbuilder
35
G4 Panelpreview
36
Tpdesign4 Project Files
37
Overview
37
Inappropriate File Name Characters
37
Creating a New Project
37
Using the New Project Wizard
38
System-Generated File Names
40
Edit Focus
41
Setting Project Properties
42
Project Properties Dialog - Project Information Tab
42
Applying Password Protection to Your Project File
43
Project Properties Dialog - Panel Setup Information Tab
44
Setting a Power up Page
45
Setting Power up Popup Pages
45
Setting an Inactive Page Flip
46
Project Properties Dialog - Sensors Tab
47
Project Properties Dialog - IR Emitters and Receivers Tab
48
Working with R-4 Remote Controllers
49
Creating a TPD4 Project for R-4 Remote Controllers
49
R-4 Remote Devices - Unsupported Button Types
50
Using Quick Input
50
Undo/Redo Support
51
Using the Workspace Navigator
51
Workspace Navigator - Pages Tab
51
Opening Pages/Popup Pages Via the Workspace Navigator
52
Renaming Pages Via the Workspace Navigator
52
Workspace Navigator - Edit Focus
52
Workspace Navigator - Function Maps Tab
52
Cutting, Copying and Pasting
53
Copying States to the Clipboard
53
Pasting States from the Clipboard
53
Cutting Objects
54
Saving the Active Project as a Different Panel Type
54
Working with Multiple Projects
54
Opening Multiple Projects Simultaneously
54
Copying/Pasting Across Projects
54
Copying/Pasting Pages, Popup Pages and Buttons Across Projects
55
Project Migration (from Previous Versions of Tpdesign4)
55
Converting TPD3 Files to TPD4
55
Using the TPD Conversion Wizard
55
Errors and Warnings Report Dialog
56
Working with Pages
57
Overview
57
Creating a Page
57
Page General Properties
58
Creating a Page Flip
58
Drag & Drop to Set Page Flips
58
Page Flip Actions
59
Page Programming Properties
59
Page State Properties
60
Adding a Fill Color to a Page
61
Adding Text to a Page
61
Adding a Bitmap to a Page
61
Adding an Icon to a Page
62
Working with Transparent Backgrounds
62
Supported Image File Types
63
Displaying a Video Source on a Page
63
Copying Pages
64
Pasting Pages
64
Copying / Pasting a State from a Page
64
Opening Pages/Popup Pages Via the Workspace Navigator
64
Renaming a Page
64
Renaming Pages Via the Workspace Navigator
64
Deleting Pages from a Project
65
Exporting Pages as Image Files
65
Printing Pages
66
Working with Popup Pages
67
Overview
67
Creating a Popup Page
67
Using the Popup Draw Tool
68
Drawing Assist Support for Popup Pages
69
Popup Page General Properties
70
Popup Page Programming Properties
71
Popup Page State Properties
71
Adding a Fill Color to a Popup Page
73
Adding a Bitmap to a Popup Page
73
Adding an Icon to a Popup Page
73
Adding Text to a Popup Page
74
Displaying a Video Source on a Popup Page
74
Copying Popup Pages
74
Pasting Popup Pages
74
Copying / Pasting a State from a Popup Page
75
Popup Page Groups
75
Show/Hide Popup Pages
75
Deleting Popup Pages from a Project
76
Printing Popup Pages
76
Working with Buttons
77
Overview
77
Selection Tool
77
Setting Default Parameters for New Buttons
78
Drawing Tools Toolbar
78
Creating New Buttons
79
Drawing a Button
79
Using the Drawing Assist Features
80
Alignment & Sizing Tool
82
Generated Button Names
84
Setting General Button Properties
85
Setting Button Programming Properties
86
Level Control Types
86
Setting State Properties
87
Editing Button Properties
88
Editing Multiple Selections
88
Apply to All
88
General Buttons
89
Multi-State General Buttons
89
Bargraph Buttons
89
Multi-State Bargraph Buttons
89
Custom Sliders on Multi-State Bargraph Buttons
89
Formatting Codes (Bargraph and Multi-Bargraph Buttons Only)
90
Using Touch Maps for Multi-State Bargraphs Buttons
90
Joystick Buttons
91
Text Input Buttons
91
Input Mask Characters (Text Input Button Only)
91
Input Mask Ranges (Text Input Button Only)
91
Input Mask Operators (Text Input Button Only)
91
Input Mask Next Field Characters (Text Input Button Only)
92
List Box Buttons
92
Adding Text to a Button
92
Additional Foreign Language Support
93
Pre-Rendered Graphics
93
True Type Font Support
93
Computer Control Buttons
92
Takenote Buttons
92
Changing Button Text Color
93
Adding a Bitmap to a Button
94
Adding an Icon to a Button
94
Changing the Button Fill Color
94
Border Styles
95
Creating a Time Button
95
Creating a Date Button
95
Working with Touch Styles and Active Touch
96
Displaying a Video Source on a Button
96
Copying/Pasting Buttons
96
Paste Controls Dialog
97
Searching and Replacing Button Properties
97
Using Quick Input
98
Button Preview Window
99
External Controls (Pushbuttons/Leds)
100
Setting Global General Properties for External Pushbuttons And/Or Leds
101
Setting Global Programming Properties for External Pushbuttons And/Or Leds
101
Setting Page-Specific General Properties for External Pushbuttons And/Or Leds
102
Setting Page-Specific Programming Properties for External Pushbuttons And/Or Leds
102
Copy/Convert External Controls between Panels
102
List Box Buttons
103
Overview
103
G4 Devices that Support List Box Buttons
104
List Box Buttons: Managed Mode
105
List Box Buttons - Container
105
List Box Toolbar
105
Creating List Box Buttons (Managed Mode)
106
Using the Drawing Tools Toolbar with List Box Buttons
107
Setting List Box Container Button Properties
107
List Box Container Properties Vs. Column Properties (Managed Mode)
107
Setting General Properties: List Box Container Buttons
108
Setting Programming Properties: List Box Container Buttons
109
Setting State Properties: List Box Container Buttons
109
List Box Buttons - Columns
110
List Box Buttons - Subordinate Buttons
110
Setting List Box Button Column Properties
111
Setting General Properties: List Box Button Columns
111
Setting State Properties: List Box Button Columns
112
Adding Rows and Columns to a List Box (Managed Mode)
112
Adding Rows
112
Adding Columns
113
Deleting Rows and Columns from a List Box (Managed Mode)
113
Deleting Columns
113
Deleting Rows
113
Cutting, Copying and Pasting a List Box (Managed Mode)
113
Subordinate Button Placement
114
Subordinate Buttons - Drag and Drop Capability
114
List Box Buttons - Resizing Capability
114
List Box Buttons - Navigation Buttons
115
Creating Navigation Buttons
115
Navigation Buttons - Channel Code Values
116
List Box Buttons: Unmanaged Mode
116
Rules for Unmanaged List Box Buttons
117
List Box Buttons - Z-Order
117
Creating List Box Buttons (Unmanaged Mode)
117
Editable Button Properties of an Unmanaged List Box Container Button
118
Editable Button Properties of an Unmanaged List Box Subordinate Button
118
List Data Table
119
Edit List Tables Dialog
119
Creating a Static List Data Table
120
List Data Table Column Types
121
Attaching a Static List Data Table to a List Box Button
121
Editing Cell Data
121
Changing the Port and Address Assignments for a Data List Table
122
Deleting a List Data Table
122
Working with Dynamic List Box Data
123
Dynamic List Box Data
123
Creating a Dynamic List Data Table
123
List Box Commands
123
Data List Commands
123
Ldn
123
Lda
124
Ldr
124
Ldc
124
Ldd
124
Data List Commands - Rules
125
Ldt
125
Ldl
125
Command Structure List View Commands
126
Lvo
126
Lvl
126
Lvp
126
Lvs
127
Lvc
127
Lvf
127
Attaching a Dynamic List Data Table to a List Box Button
128
Example Netlinx Code with List Data
128
Working with Properties
131
Properties Control Window
131
Using the Apply to All Option
132
Using the Prev and Next Buttons
132
General Properties
133
Above Popups
133
Animate Time down
133
Animate Time up
133
Auto-Repeat
133
Border Style
133
Color Depth
133
Column Display Order
133
Column Sort Order
134
Compression
134
Cursor Color
134
Cursor Name
134
Description
134
Disabled
134
Display Type
134
Group
134
Height
134
Hidden
134
Hide Effect
135
Input Mask
135
Left
135
List Column
135
List Column Padding
135
List Display
136
List Table Port
136
List Table Address
136
List Table Wrap
136
List Filter Column
136
List Managed
136
List Offset Enabled
137
List Preferred Row
137
List Preferred Row Height
137
List Row
137
List Row Height
137
List Row Padding
137
List Selectable
137
Lock Button Name
138
Max Text Length
138
Modal
138
Name
138
Page Flip
138
Password
138
Password Character
138
Password Protection
138
Remote Host
138
Remote Port
138
Scale to Fit
139
Show Effect
139
Slider Color
139
Slider Name
139
State Count
139
Takenote Enabled
139
Takenote Host
139
Takenote Port
139
Top
139
Touch Map
139
Touch Style
140
Type
140
Value Direction
140
Width/Height
140
Address Code
141
Address Port
141
Channel Code
141
Channel Port
141
Command Output
141
Command Port
141
Feedback
141
Level Aux
141
Level Code
141
Level Control Repeat
141
Level Control Parameters
142
Level Code
142
Level Control Repeat
142
Level Control Value
142
Level Port
142
Range High
142
Range Low
142
Range Time down
142
Range Time up
142
Range Inverted
142
Level Functions
143
Display Only
143
Active
143
Active Centering
143
Drag
143
Drag Centering
143
Address Codes
143
Basic Address Codes: Date Display
143
Basic Address Codes: Time Display
144
Channel Codes
144
Navigation Buttons - Channel Code Values
144
Basic Channel Codes: Page Flip
145
NXP-PLV Reserved Channel Codes (1-7)
145
Level Codes
145
NXP-PLV Reserved Level Codes (1-11)
145
State Properties
146
Bitmap
146
Bitmap Justification
146
Bitmap X and y Offsets
146
Border Color
146
Border Name
146
Chameleon Image
147
Draw Order
147
Fill Color
147
Font
147
Icon Justification
147
Icon Slot
147
Icon X and y Offsets
147
Marquee Direction
148
Marquee Repeat
148
Overall Opacity
148
Scale Bitmap to Fit
148
Sound
148
Streaming Source
148
Text
148
Text Color
148
Text Effect
149
Text Effect Color
149
Text Justification
149
Text X and y Offsets
149
Video Cropping
149
Video Fill
149
Video Pass-Thru
149
Word Wrap
149
Working with the Property Painter
150
Property Painter Dialog
151
Saving a Properties Set
152
All States Option
150
Workspace Navigator Context Menu
150
Advertisement
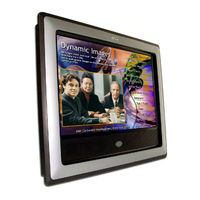
AMX modero NXT-CV17 Operation/Reference Manual (168 pages)
17" Modero Touch Panel
Brand:
AMX
| Category:
Touch Panel
| Size: 3.74 MB
Table of Contents
Table of Contents
3
Introduction
11
Product Overview
11
CV17 Panel Specifications
12
CV17 Panels - Connector Layout
14
CV17 Touch Panel Accessories
15
Overview
15
NXA-AVB Audio/Video Breakout Box (FG2254-01)
15
Product Specifications
15
Installing the NXA-AVB Breakout Box
16
Wiring the NXA-AVB Connectors and Cables
17
Wiring the NXA-AVB for Unbalanced Audio
18
Wiring the NXA-AVB for Balanced Audio
18
Modero Table Top Cable (CA2250-50)
19
Product Specifications
19
Wiring Information for the Modero Table Top Cable
20
Installing CAT5 Suppression Ferrites
22
NXA-Wc80211B Wireless Interface Card (FG2255-02)
23
Installing the Wireless Card
24
Nxa-Cftp (Fg2116-22)
24
Installation of the Compact Flash Card (Table Top Panel)
25
Step1: Removing the Existing NXT Outer Housing
25
Step 2: Installing the Upgrade Compact Flash Card
27
Step 3: Replacing the NXT Outer Housing
27
Installation of the Compact Flash Card (Wallmount Panel)
28
Step 1: Removing the Existing NXD Outer Housing
28
Step 2: Installing the Upgrade Compact Flash Card (NXD)
30
Step 3: Replacing the NXD Outer Housing
30
NXT-BP Power Pack (FG2255-10)
30
Product Specifications
30
NXA-BASE/B Battery Base Kit (FG2255K)
31
Product Specifications
31
Checking the NXT-BP Battery Charge
32
Installing the NXA-BASE/B to an NXT Modero Panel
32
Installing an NXT-BP into the NXA-BASE/B
33
Charging the NXT-BP Batteries with the NXA-BASE/B
34
NXT-CHG Battery Charger Kit (FG2255-50K)
34
Product Specifications
35
Powering the NXT-CHG
35
Reading NXT-CHG LED Indicator
35
Charging the NXT-BP Batteries Using the NXT-CHG
36
Recalibrating the Batteries
36
Installation
37
Overview
37
Unpacking the Panel
37
Installing the Internal Components
37
Upgrading the Back Box with the MB-TP17 VESA Housing
37
Removing the Original Modero Back Box
37
Installing the MP-TP17 Back Box
38
Cable Installation for the MP-TP17 Back Box
39
Finalizing the Installation
39
Pre-Wall Installation of the CB-TP17 Conduit Box
41
Installation of an NXD-CV17
43
Installing the NXD-CV17 Within a CB-TP17 Conduit Box
43
Installing the NXD-CV17 into Drywall Using Expansion Clips
44
Installing the NXD-CV17 into a Flat Surface Using #6 Screws
48
Installing an NXD into an (Optional) Rack Mount Kit (NXA-RK17)
51
Wiring Guidelines for the 17" Panels
53
Preparing Captive Wires
53
Using the PSN Netlinx Connector for Power
53
Icsnet RJ-45 Connections/Wiring
53
Audio/Video RJ-45 Connections/Wiring
54
Ethernet 10/100 Base-T RJ-45 Connections/Wiring
55
Panel Calibration
57
Overview
57
Calibrating the Modero Panel
57
Testing Your Calibration
58
Configuring Communication
59
Overview
59
Modero Setup and System Connection
59
Master Connection - Using Icsnet
61
Secondary Connection Page - Wireless Access Overview
62
IP Routing
62
Hot Swapping
62
Configuring a Wireless Access Connection
63
Step 1: Configuring the Panel's IP Settings
63
Wireless Communication Using a DHCP Address
63
Wireless Communication Using a Static IP Address
64
Step 2: Configuring the Card's Wireless Settings
65
Configuring the Panel for Unsecured Access to the WAP
65
Configuring the Panel for Secured Access to a WAP
66
Configuring Multiple Wireless Moderos to Communicate with a Target WAP
68
Configuring a Wired Ethernet Connection
68
Step 1: Configuring the Panel's IP Settings
68
IP Settings Section - Configuring a DHCP Address over Ethernet
68
IP Settings Section - Configuring a Static IP Address over Ethernet
69
Step 2: Choosing a Master Connection Mode Setting
70
Step 3: Configuring the Ethernet Connection Type
70
Master Connection - Virtual Master Communication over Ethernet
71
Master Connection Section - Netlinx Master Ethernet IP Address - URL Mode
73
Master Connection Section - Netlinx Master Ethernet IP Address - Listen Mode
73
Master Connection Section - Netlinx Master Ethernet IP Address - Auto Mode
74
Using G4 Web Control® to Interact with a G4 Panel
75
Using Your Netlinx Master to Control the G4 Panel
76
Upgrading Modero Firmware
79
Upgrading the Modero Firmware Via an IP Address
79
Preparing the Master for Communication Via an IP
79
Preparing the Panel for Communication Via an IP
81
Verifying and Upgrading the Panel Firmware Via an IP
81
Upgrading the NXA-BASE/B Firmware Via an IP Address
83
Preparing the NXA-BASE/B for Firmware Transfer
83
Upgrading the NXA-BASE/B Firmware Via an IP
84
Firmware Pages and Descriptions
87
Overview
87
Setup Navigation Buttons
87
Setup Page
88
Project Information Page
90
Panel Information Page
91
Time & Date Setup Page
92
Volume Page
93
Supported Sampling Rates for WAV
94
Video Setup
94
Protected Setup Page
95
Battery Base Page
95
Protected Setup Navigation Buttons
97
Protected Setup Page
98
G4 Web Control Page
100
Sensor Setup
101
Using the Automated Brightness Control Feature (DIM Mode)
103
Password Setup Page
104
Calibration Page
105
Secondary Connection Page
105
System Connection Page
109
Programming
111
Overview
111
Button Assignments
111
Page Commands
111
Apg
111
Cpg
111
Dpg
112
Pdr
112
Phe
112
Php
112
Pht
112
Ppa
113
Ppf
113
Ppg
113
Ppk
113
Ppm
114
Ppn
114
Ppt
114
Ppx
114
Pse
115
Psp
115
Pst
115
Ppof
115
Programming Numbers
116
RGB Triplets and Names for Basic 88 Colors
116
Ppog
116
Ppon
116
Font Styles and ID Numbers
119
Border Styles
119
Button Commands
121
Ani
121
Apf
121
Bat
122
Bau
122
Bcb
122
Bcf
123
Bct
123
Bdo
123
Bfb
124
Bim
124
Bln
124
Bmc
125
Bmf
126
Bmi
128
Bml
128
Bmp
128
Bnc
128
Bnn
129
Bnt
129
Bop
129
Bor
129
Bos
130
Bpp
130
Brd
130
Bsf
130
Bsm
130
Bso
131
Bvl
131
Bvn
131
Bvp
131
Bvt
131
Bww
132
Cpf
132
Dpf
132
Ena
132
Gdi
133
Giv
133
Fon
133
Glh
134
Gll
134
Grd
134
Gru
134
Gsc
134
Gsn
135
Ico
135
Jsb
135
Jsi
136
Jst
136
Mbt
136
MDC
137
Sho
137
Tec
137
Tef
137
Txt
137
Amx modero NXT-CV17 Instruction Manual (152 pages)
Design XPress-Professional version 1.1
Brand:
Amx
| Category:
Software
| Size: 1.86 MB
Table of Contents
Instruction Manual
1
Table of Contents
3
Introduction
11
New Features Available Within Version 1.1
11
Supported Operating Systems
14
Minimum System Hardware Requirements
14
Minimum System Software Requirements
14
Downloading the Application
14
Supported Touch Panels
15
G4 Touch Panels
15
G3 Touch Panels
15
G3 Touch Panel Considerations
15
Supported Subsystems and Equipment
16
Audio/Video Switchers
16
Audio Conferencing Devices
17
AMX Netlinx Integrated Controllers
17
Cameras
17
CD (Compact Disc) Players
17
DVD (Digital Video Disc) Players
17
Lighting
18
MAX - Integrated Content Servers by AMX
18
MP3 Players
19
Plasma Displays
19
Serial-Interface Devices
19
User Interfaces
19
Video Cassette Recorder (VCR)
19
Video Conferencing Devices
20
Video Projection Devices
20
User Information Splash-Screen
21
DXP-PRO Main Screen
21
Project Selection List
22
Project Selection List Context Menu
23
Main Screen Command Buttons
23
Copy Project Dialog
24
Version Information
24
DXP-PRO Menu Bar
24
File Menu
24
Edit Menu
25
View Menu
25
Help Menu
25
Before You Begin
26
Configuring Your Program Preferences
26
Getting Started with the Sample Project
27
Using the DXP-PRO Wizard
29
Required Information for Building a System
29
Common Mistakes
29
Launching the DXP-PRO Project Wizard
30
Project Wizard Navigation Controls
31
System Information Dialog
32
Adding a Device to the Project
34
Adding IR-Controlled Devices to the Project
34
Adding Serial-Controlled Devices to the Project
35
Adding Ethernet-Controlled Devices to the Project
37
Adding a MAX-IMS or MMS Server to the Project
38
Working with MAX Servers
38
Duplicating a Device
39
Device Configuration Dialog
39
Device Configuration Dialog - Device Data Tab
40
How to Setup External Cameras (Using Camera and Video Conference Source Types)
43
How to Configure G4 Computer Control (G4CC)
44
How to Configure I!-Weather
45
Device Configuration Dialog - IR Mapping Tab
46
Mapping a Function
46
Removing a Mapped Function
47
Device Configuration Dialog - Control Configuration Tab
47
Device Configuration Dialog - Power Control Tab
49
Device Considerations When Using New Features
50
Which Screens? Dialog
51
Integrated Applications Dialog
52
Lighting Presets Dialog
54
Note for ALD-D48 Lighting Systems
55
Note for Radia Lighting Systems
56
Touch Panel Interfaces Dialog
56
Choose Touch Panel Theme Dialog
59
Choose Touch Panel Background Dialog
60
Choose Touch Panel Buttons Dialog
60
Choose Touch Panel Text Colors Dialog
61
Input Names Dialog
61
Switcher Inputs/Outputs Dialog
62
Switcher Inputs Tab
62
Switcher Outputs Tab
64
Channel Preset Categories Dialog
65
Channel Presets for
66
CD Titles for CD Dialog
67
Adding a New CD Title
67
Editing CD Information
68
Retrieving CD Information (from Freedb.org)
68
Removing a CD Title
68
Using the CD Titles Maintenance Dialog
68
Adding a New Disc Title (CD Titles Maintenance Dialog)
68
Editing Disc Information (CD Titles Maintenance Dialog)
68
Retrieving CD Information from Freedb.org (CD Titles Maintenance Dialog)
68
Removing a CD Title (CD Titles Maintenance Dialog)
69
DVD Titles for DVD Dialog
69
Relay Control Dialog
69
Adding a Relay Control Definition to the List
71
Editing the Display Name for an Existing Relay Control Definition
71
Deleting a Relay Control Definition from the List
71
Navigation and Routing Macros Dialog
71
Editing an Existing Macro Within the Project
72
Using the Macro Steps for
73
System Macros Dialog
75
Adding a New System Macro to the Project
76
Using the Macro Steps for
76
Editing Your Project
76
Creating an Existing Design Xpress - Professional Project
76
Opening an Existing Design Xpress - Professional Project
77
Copying a Design Xpress - Professional Project
77
Importing a DXP-PRO Project
77
Exporting a DXP-PRO Project
78
Deleting a DXP-PRO Project
78
Before You're Finished
78
Finishing a Project
79
Understanding the Report File
80
Uploading a Completed Touch Panel File to a Target Panel
81
Working with Your Project
83
The Netlinx Studio Project
84
Transferring CD/DVD Title Information to the Master Via FTP
84
Advertisement
Amx modero NXT-CV17 Instruction Manual (68 pages)
Design XPress version 1.5 for NetLinx Studio
Brand:
Amx
| Category:
Software
| Size: 3.02 MB
Table of Contents
Instruction Manual
1
Table of Contents
3
Introduction
7
Minimum System Requirements for DXP V1.5
7
Required Applications
8
Version Information
8
DXP V1.5 System Capabilities
8
DXP V1.5 Configuration Capabilities
8
Supported Subsystems and Equipment
9
AMX Netlinx Integrated Controllers
9
AMX Touch Panels
9
MAX Content Servers by AMX
10
Lighting
10
Hvac/Environment
10
Whole House A/V Selection and Distribution
10
MP3 Players
10
User Interfaces
11
Doorphones
11
Supported Integration!Solutions Applications
11
Related Documents
11
Downloading the Application
12
Web Update
12
Design Xpress Main Screen
12
Project Selection List
13
Project Selection List Context Menu
13
Project Sorting
14
Menu Bar
14
File Menu
14
Edit Menu
15
Edit DSS Channels Sub-Menu
15
View Menu
15
Help Menu
16
Main Screen Command Buttons
16
Setting Program Preferences
16
Custom Modifications
17
Adding and Modifying Software
17
Common Mistakes
18
Using the Design Xpress Project Wizard
21
Overview
21
Required Information
21
Launching the Design Xpress Project Wizard
22
Project Wizard Navigation Controls
22
Using the Design Xpress Project Wizard
23
User Information Dialog
23
System Information Dialog
24
To Add a New Room/Location Name
25
To Rename an Existing Room/Location Name
25
System Configuration Dialog
26
Which Screens? Dialog
27
Audio Zones Dialog
28
Setting up Audio/Video Zones
29
Audio Sources Dialog
31
Selecting Audio Sources
32
Format of IR Files for Audio Sources
33
Video Inputs Dialog
34
HVAC Zones Dialog
35
Naming HVAC Zones
36
DMS Keypads Dialog
36
Specifying a Location for each Keypad
37
Configuring Audio, HVAC and Intercom Zone Control for each Keypad
38
Configuring Lighting Zone Control for each Keypad
38
Copying a Lighting Scene Layout from Another DMS Keypad in the System
38
SB2 Keypads Dialog
39
Configuring SB2 Keypads
40
Edit Rooms/Locations Dialog
40
Door Phones Dialog
40
Configuring Door Phones
41
Touch Panel Declarations Dialog
42
Creating Touch Panel Declarations
43
Adding a New Touch Panel Interface
43
Choose Background Images Dialog
44
Choose Button Colors Dialog
45
Choose Button Text Colors Dialog
46
Choose Bargraph Color Dialog
47
Touch Panel Control Dialogs
48
Address Formats for Supported Lighting Systems
49
Note for ALD-D48 Lighting Systems
49
Note for Radia Lighting Systems
50
House Lighting Scenes Dialog
50
Control Button Labels Dialog
51
CD Titles Dialog
52
CD Titles Maintenance Dialog
53
Adding a New CD Title
53
Editing CD Information
54
Retrieving CD Information (from Freedb.org)
54
Removing a CD Title
54
DSS TV Favorites Dialog
54
Adding a New DSS TV Channel
55
Removing a DSS TV Channel
55
Changing the Name And/Or Channel Number on an Existing TV Channel
55
DSS Music Favorites Dialog
56
Adding a New DSS Music Channel
57
Removing a DSS Music Channel
57
Tuner Presets Dialog
57
Finishing a Project
58
Understanding the Report File
59
Installation Instructions
59
Device Addressing
59
Wiring/Connections
60
General Information
60
AMX Recommended Equipment List
60
Transferring Preset Button Text to the Master Via FTP
60
Opening an Existing Design Xpress Project
61
Copying a Design Xpress Project
61
Copy Project Dialog
61
Importing a Design Xpress Project
62
Exporting a Design Xpress Project
62
Deleting a Design Xpress Project
62
Using Netlinx Studio
63
Working with Your Project
63
Setting up the Master
63
Addressing the System
64
Addressing the Devices
64
Downloading Software and Transferring Files
65
Amx modero NXT-CV17 Installer's Manual (42 pages)
version 1.5
Brand:
Amx
| Category:
Software
| Size: 0.33 MB
Table of Contents
Table of Contents
3
Introduction
5
Overview
5
Scope of this Document
5
DXP V1.5 System Capabilities
5
DXP V1.5 Configuration Capabilities
6
Supported Subsystems and Equipment
6
AMX Netlinx Integrated Controllers
6
AMX Touch Panels
6
MAX Content Servers by AMX
7
Lighting
7
Hvac/Environment
7
Whole House A/V Selection and Distribution
8
MP3 Players
8
Receivers
8
User Interfaces
8
Doorphones
8
Supported Integration!Solutions Applications
8
Related Documents
9
One Step at a Time
9
Label Every Wire Termination Point
9
Don't Get Ahead of Yourself
9
Use the Auto-Generated Report File as Your Installation Check List
9
The Design Xpress Application
10
Custom Modifications
10
Adding and Modifying Software
10
Common Mistakes
10
Understanding the Report File
13
Device Addressing
13
Wiring/Connections
13
General Information
13
AMX Recommended Equipment List
14
Installation Instructions
14
Using Netlinx Studio
15
Setting up the Master
15
Addressing the System
16
Addressing the Devices
16
Downloading Software and Transferring Files
17
Using Tpdesign3 to Download Panel Pages
17
Transferring Preset Button Text to the Master Via FTP
17
Startup
18
Appendix
19
Address Formats for Supported Lighting Systems
19
Note for ALD-D48 Lighting Systems
19
Note for Radia Lighting Systems
19
Format of IR Files for Audio Sources
20
Channel Map - Function Codes
22
Amx modero NXT-CV17 Instruction Manual (32 pages)
Design XPress - Professional
Brand:
Amx
| Category:
Software
| Size: 0.4 MB
Table of Contents
Instruction Manual
1
Table of Contents
3
On-Site Installer Overview
5
Introduction
5
Installation Overview
5
Scope
6
Related Documents
6
One Step at a Time
6
Label Every Wire Termination Point
6
Don't Get Ahead of Yourself
7
Use the Auto-Generated Report File as Your Installation Check List
7
Supported Operating Systems
7
Minimum System Hardware Requirements
7
Minimum System Software Requirements
7
The Design Xpress - Professional Application
8
Supported Touch Panels
8
G4 Touch Panels
8
G3 Touch Panels
9
G3 Touch Panel Considerations
9
Supported Subsystems and Equipment
10
Audio/Video Switchers
10
Audio Conferencing Devices
10
AMX Netlinx Integrated Controllers
11
Cameras
11
CD (Compact Disc) Players
11
DVD (Digital Video Disc) Players
11
Lighting
12
MAX - Integrated Content Servers by AMX
12
MP3 Players
13
Plasma Displays
13
Serial-Interface Devices
13
User Interfaces
13
Video Cassette Recorder (VCR)
13
Video Conferencing Devices
13
Video Projection Devices
14
Adding and Modifying Software
15
Common Mistakes
15
Understanding the Report File
17
Installation Instructions
17
Device Addressing
18
Wiring/Connections
18
General Information
18
Macros
19
AMX Recommended Equipment List
19
Using Netlinx Studio
21
Setting up the Master
22
Setting the System Value
23
Changing the Device Address on a Netlinx Device
24
Recommended Netlinx Device Numbers
26
Obtaining the Master's IP Address (Using DHCP)
26
Assigning a Static IP to the Netlinx Master
27
Communicating with the Master Via an IP
28
Downloading Software and Transferring Files
30
Running the First Time
30
Startup
30
Amx modero NXT-CV17 Specifications (2 pages)
17" modero widescreen touch panel
Brand:
Amx
| Category:
Touch Panel
| Size: 0.2 MB
Amx modero NXT-CV17 Dimension Manual (1 page)
17" TILT, VIDEO TOUCH PANEL
Brand:
Amx
| Category:
Touch Panel
| Size: 0.11 MB
Advertisement
Related Products
AMX Modero NXT-1200V
AMX Modero NXT-CV7
Amx MODERO NXT-CA12
Amx modero NXT-CA15
Amx MODERO NXT-CV12
Amx modero NXT-CV15
Amx Modero NXT-CV10
AMX NXT-CA7
Amx Modero NXD-CA12
AMX NXD-435P
Amx Categories
Touch Panel
Matrix Switcher
Controller
Switch
Keypad
More Amx Manuals
Login
Sign In
OR
Sign in with Facebook
Sign in with Google
Upload manual
Upload from disk
Upload from URL