Table of Contents
Advertisement
Advertisement
Table of Contents

Subscribe to Our Youtube Channel
Related Manuals for AEG CS FMP 550IR


Summary of Contents for AEG CS FMP 550IR
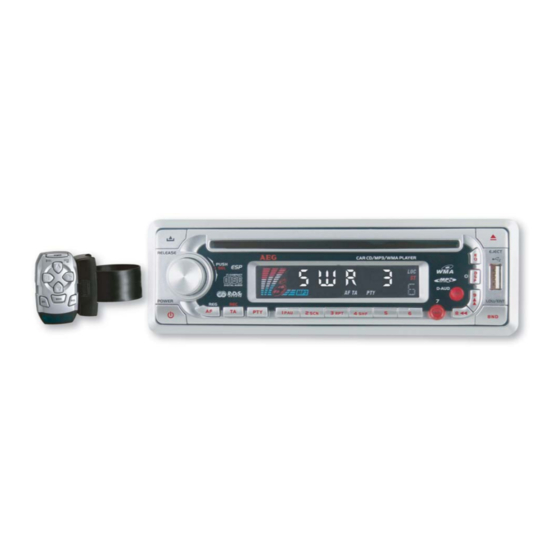
- Page 1 CS FMP 550IR OWNER’S MANUAL PLL Synthesizer Stereo Radio RDS (Radio Data System) operation CD Player / MP3 Player / WMA Player Automatically Memory Storing Full Detachable Panel Preset Equalization USB Interface Steering Wheel Remote Control...
-
Page 2: Table Of Contents
Table of Contents Installation .................. 4 DIN FRONT/REAR-MOUNT ............... 4 DIN FRONT-MOUNT (Method A) ............... 5 DIN REAR-MOUNT (Method B) ..............7 USING THE DETACHABLE FRONT PANEL ......8 Removing the front panel ................8 Installing the front panel ................9 WIRING CONNECTION............. - Page 3 PREVIEWING THE SAME TRACK ............22 PLAYING ALL TRACK IN RANDOM ............22 Searching Directory or file Name ............22 Searching From Root Directory .............. 23 Searching From Current Directory ............23 DISPLAY INFORMATION ................. 23 WMA operation ................. 24 USB PLAY OPERATION............
-
Page 4: Installation
Installation Notes: - Choose the mounting location where the unit will not interfere with the normal driving function of the driver. - Before finally installing the unit, connect the wiring temporarily and make sure it is all connected up properly and the unit and the system work proberly. -
Page 5: Din Front-Mount (Method A)
DIN FRONT-MOUNT (Method A) Installation OpeningThis unit can be installed in any dashboard having an opening as show below: Installing the unit Be sure you test all connections first, and then follow these steps to install the unit. 1.Make sure the ignition is turned off, and then disconnect the cable from the vehicle battery's negative (-) terminal. - Page 6 7.Reconnect the wire harness and the antenna and be careful not to pinchany wires or cables. 8.Slide the unit into the sleeve until it Locks into place. 9.To further secure the unit, use the supplied metal strap to secure the back of the unit in place.
-
Page 7: Din Rear-Mount (Method B)
Removing the unit 1.Make sure the ignition is turned off, then disconnect the cable from the vehicle battery's negative (-) terminal. 2.Remove the metal strap attached the back of the unit (if attached). 3.Press the release button to remove the front panel. 4.Lift the top of the outer trim ring then pull it out to remove it. -
Page 8: Using The Detachable Front Panel
To fasten the unit to the factory radio mounting brackets. 1.Align the screw holes on the bracket with the screw holes on the unit, and then tighten the screws (5x5mm)on each side. the outer trim ring, sleeve and the metal strap are not used for method B installation. -
Page 9: Installing The Front Panel
Installing the front panel To install the front panel, insert the panel into the housing and make sure the panel is properly installed. Otherwise, abnormality occurs on the display or some keys will not function properly. Precautions when handling 1.Do not drop the front panel. 2.Do not put pressure on the display or control buttons when removing or installing the front panel. -
Page 10: Wiring Connection
WIRING CONNECTION... -
Page 11: Operations
OPERATIONS LOCATION OF KEYS SWITCHING ON/OFF THE UNIT Switch on the unit by pressing any button (except RELEASE button (7) and EJECT button (4) When system is on, press POWER button (9) to turn off the unit. FACEPLATE RELEASE Press RELEASE button (7) to detach the removable faceplate. -
Page 12: Sound Adjustment
SOUND ADJUSTMENT Press SEL button (10) to select the desired adjustment mode. The adjustment mode will change in thefollowing order: By rotating the knob (10) clockwise or counter-clockwise, it is possible to adjust the desired sound quality. Press SEL button (10) for several seconds, it is activated as cyclical mode of following functions for user's selection. - Page 13 phenomenon can be occurred, because the different PI code can be received from 100 MHz with "XXX"PI. The car radio has special procedure to reduce even this kind of unavoidable situation however there is a limit to be escaped from this serious case perfectly.
-
Page 14: Loudness
But, these phenomenons are rare and the user will hardly hear the wrong sound in whole Europe. - MASK DPI mode: Masked only the AF which has different PI. - MASK ALL mode: Masked the AF which has different PI and NO RDS signal with high field strength. -
Page 15: Equalization
- In case of no receiving CT or PTY information, the display shows as "NO CLOCK" or "NO PTY". - In case of receiving a non RDS station In radio mode: ->"NO CLOCK" ->FREQ -> "NO PTY" -> In CD mode: ->... -
Page 16: Radio Operation
The RESET button is to be activated for the following reasons: - Initial installation of the unit when all wiring is completed. - All the function buttons do not operate. - Error symbol on the display. if press RESET button (25), the unit can't work yet, please use a cotton swab soaked in isopropyl alcohol to clean the socket on the front panel. -
Page 17: Automatic Memory Storing &Program Scanning
AUTOMATIC MEMORY STORING &PROGRAM SCANNING - Automatic memory storing Press AMS button (18) for several seconds, the radio searches from the current frequency and checks the signal strength until one cycle search is finished. And then 6 strongest stations are stored into the corresponding preset number button. - Page 18 While selecting PTY engagement, its selection is implemented by preset buttons as described in notes.When PTY is selected, the radio starts to search corresponding PTY information, and stops if the corresponding PTY information is detected. If corresponding PTY information isnot existed any more, PTY engagingis automatically exit to normal mode.
-
Page 19: Cd Operation
EON TA LOCAL mode When the filed strength level of EON linked is less than threshold level, the radio does not switch that station, and a customer can hardly listen to any disturbances. When EON TA LOCAL mode is selected, „EON TA Lo“ on numeric display is indicated for a few seconds. -
Page 20: Selecting Tracks
SELECTING TRACKS Press o button (16) or n button (17) to move to the previous track or the following track. Track numbershows on display. Hold n button (17) or o button (16) to fast reverse of fast forward, CDplay starts from when you releasethe button. -
Page 21: Mp3 Operation
MP3 OPERATION SWITCHING TO CD (MP3) MODE If there is no MP3 disc inserted in the driver: Gently insert the MP3 disc with the printed side uppermost into the disc slot (5) until you feel some resistance. The MP3 disc is drawn into the driver automatically. -
Page 22: Previewing The Same Track
PREVIEWING THE SAME TRACK Press PRT button (22) to continuouslyrepeat the same track. Press it again tostop repeat. PLAYING ALL TRACK IN RANDOM Press SHF button (23) to play all tracks on MP3 disc in random o rder.Press again to cancel the function.SELECTING TRACK BY AS/PS/ MP3BUTTONAMS button is assigned as Digital Audio Mode selection button in MP3operation, When pressed, it is activated as selecting each mode of Digital Audio. -
Page 23: Searching From Root Directory
Searching From Root Directory Press AMS (D-AUD) button for threetimes. The unit searches fire or directory from root by TUNE/TRACK UP/DOWN buttons (D-DIR icon turns on if the name is directory). Display will list all available directories and songs. Select thedesired directory/songs by using TUNE/TRACK UP/ DOWN button and BND/LOU (ENTER) button to confirm. -
Page 24: Wma Operation
KEY Assigned IN Searching mode (Table 1) VOLUME KNOB (ENCODER) & MANU/SKIP UP/DOWN buttons:Searching file and directory duringNavigation. WMA operation For the unit that can play the Wma disc,the operation is the same with Mp3operation described above. USB PLAY OPERATION ln the front panel of the unit, there is an USB interface(24). -
Page 25: Record Operation
When you connect a player through theinterface, the unit will search the Mp3 files of WMA files in the player and start to play Mp3 files or WMA files automatically.When playing the Mp3 files or WMA files in the device, the operation is the same withthe Mp3 operation described above. -
Page 26: Sd/Mmc Operation
The USB solution can support: 1.Folder: 1024 max. 2.File: 4096 max. 3.Depth of folder: 8 layers 4.Size: 1 GB CAUTION: When there are important files in the USBdevice, do not connect it to the main unit to play. And don not play the CD-R/RW disc that has important files in it. -
Page 27: Remote Control
If USB is full, it will record to SD/MMC. The corresponding operation and cautions please refer to the record operation to USB. When there is no USB driver in the USB interface, you cannot record to SD/ MMC directly. When there are important files in the SD/MMC card, do not connect it to the mainunit to play. - Page 28 2. On the mounting base, there are four fasteners. On the binding, there are two rows of holes. Let the binding surround the pole of the steering wheel, then select four holes to fasten the fasteners according to the size of the steering wheel.
-
Page 29: Inserting The Battery
If the main unit is placed on the left side of the steering wheel, to operate the unit conveniently, you can install the remote control on the left pole of the steering wheel (see Method B). 6. To release the remote control from the mounting bracket, press the hook on the mounting bracket to remove the remote control easily. -
Page 30: Disc Notes
DISC NOTES A. Notes on discs: 1. Attempting to use non-standard hape discs (e.g. square, start, heart) may damage the unit. Be sure to use round shape CD discs only for this unit. 2. Do not stick paper or tape, etc, onto the label side or the recording side of any discs, as it may cause a malfunction. -
Page 31: Specification
SPECIFICATION GENERAL Power Supply Requirements: DC 12 Volts, Negative Ground Chassis Dimensions: 178 (W) x 160 (D) x 50 (H) Tone Controls - Bass (at 100 Hz): +/- 10 dB - Treble (at 10 kHz): +/- 10 dB Maximum Output Power: 4x50 watts Current Drain: 5 Ampere (max.) -
Page 32: Trouble Shootng
TROUBLE SHOOTNG Before going through the checklist, check wiring connection. If any of the problemspersist after checklist has been made, consult your nearest service dealer. -
Page 33: Notice
Warranty This device is covered by a 24-month warranty. The warranty starts with the date of purchase. In order to proof the date of purchase, we advise to keep the receipt. If articles are returned without receipt, repairs can only be executed on payment of additional costs. -
Page 34: Hotline
Hotline *Hotline number: 01805 880606 (0,12 € / Minute) *Valid for Germany only Business hours: Monday to Thursday from 08:00 am to 05:00pm Friday from 08:00 am to 04:00pm We offer you qualified advice, should you encounter problems during the installation or the operation of your unit. -
Page 35: Index
Index display 9, 14, 15, 16, 17, 19, 20, 21, 22, 23 EON 18, 19 front panel 2, 6, 7, 8, 9, 16, 24 metal strap 6, 7, 8 MMC 3, 26, 27 MP3 1, 2, 3, 18, 21, 22, 23, 25, 30 Mp3 24, 25, 26 PTY 14, 15, 17, 18, 19 RDS 1, 2, 12, 13, 14, 15, 17, 19...
Need help?
Do you have a question about the CS FMP 550IR and is the answer not in the manual?
Questions and answers