
Related Manuals for AEG CS FMP200


Summary of Contents for AEG CS FMP200
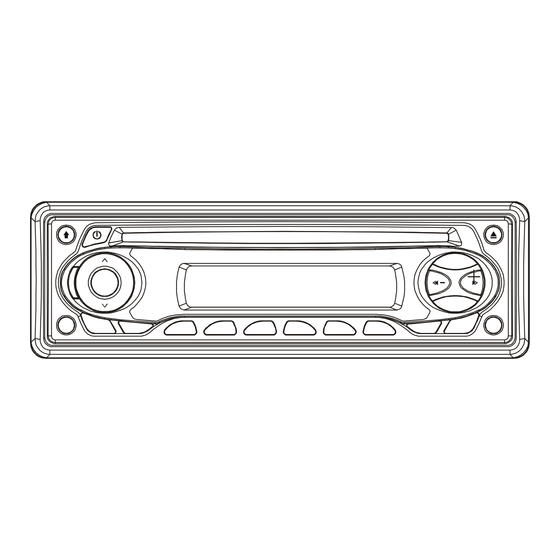
- Page 1 CS FMP200 OWNER'S MANUAL Mobile Audio System PLL Synthesizer Stereo Radio RDS (Radio Data System) Operation Digital Compact Disc Player Automatically Memory Storing Mechanical Detachable Panel Preset Equalization 022475...
-
Page 2: Table Of Contents
Contens Installation------------------------------------ Pausing playing------------------------------ Take out screw before installation--- Previewing all track------------------------- DIN Front-Mount (Method A)----------- Repeating the same track----------------- Installing the unit--------------------------- Playing all track in random ---------------- Removing the unit-------------------------- Ejecting a disc-------------------------------- DIN Rear-Mount (Method B)------------ MP3 operation-------------------------------- Using the detachable Front panel---- Switch to CD (MP3) mode----------------- Wiring Conection---------------------------... -
Page 3: Installation
INSTALLATION Notes: TAKE OUT SCREW BEFORE Choose the mounting location where INSTALLATION the unit will not interfere with the Before install the unit, please remove normal driving function of the driver. the two screws . Before finally installing the unit, Take out screw connect the wiring temporarily and before installation... -
Page 4: Removing The Unit
INSTALLATION middle left and right sides of the unit. (Tapping Screw (5x25mm) and Plain Then slide the sleeve off the back of Washer) to attach the other end of the unit. metal strap to a solid metal part of the vehicle under the dashboard. -
Page 5: Din Rear-Mount (Method B)
INSTALLATION 2. Align the screw holes on the bracket with the screw holes on the unit, and then tighten the screws (5x5mm)on each side. Note: the outer trim ring, sleeve and the metal strap are not used for method B installation. DIN REAR-MOUNT (Method B) If your vehicle is a Nissan, Toyota, follow these mounting instructions. -
Page 6: Using The Detachable Front Panel
USING THE DETACHABLE FRONT PANEL REMOVING THE FRONT PANEL 1. Press the release button (open) on the front panel and pull of the front panel. Release Button Precautions when handling 1. Do not drop the front panel. 2. Do not put pressure on the display Front Panel or control buttons when removing or installing the front panel. -
Page 7: Wiring Connection
WIRING CONNECTION MAIN UNIT ANTENNA CONNECTOR FUSE IGNITION SWITCH (ACC+) FUSE YELLOW MEMORY BACK-UP (B+) (GREY) Rch RED RCA CABLE BLACK GROUND (B–) Lch WHITE BLUE POWER ANTENNA GREY WHITE FRONT Lch FRONT Rch SPEAKER SPEAKER GREY/BLACK WHITE/BLACK GREEN VIOLET REAR Lch REAR Rch SPEAKER... -
Page 8: Operation
OPERATION... -
Page 9: Switching On / Of The Unit
OPERATION SWITCHING ON/OFF THE UNIT have TP information for several Switch on the unit by pressing any seconds, beeps come out. When TP information gets lost at the button [except OPEN button (7) and current station for retune time, the button (4)]. -
Page 10: Loudnes
OPERATION When AMS button (18) is pressed. - RETUNE L mode: - BEEP ALL mode: Selected as 90 seconds. The beep is generated when - RETUNE S mode: every key is pressed. Selected as 30 seconds. - BEEP OFF mode: d) MASK DPI or MASK ALL mode The beep is disabled. -
Page 11: Reset Function
OPERATION search is finished, And then 6 RESET FUNCTION strongest stations are stored into RESET button (24) must be activated the corresponding preset number with either a ballpoint pen or thin metal button. object. - Program scanning The RESET button is to be activated for Press AMS button (18) shortly to the following reasons: scan preset station, When the... - Page 12 OPERATION broadcasting for a certain time When the unit was in CD (MP3), it period. When region is on, the will switch temporarily to radio current listening program remains mode. unchanged. When region is off, it Temporary switch over to an EON allows the reception moves to the linked station when EON detects a regional station.
-
Page 13: Cd Operation
OPERATION SELECTING TRACKS When EON TA DISTANCE mode is Press button (16) or button selected, “EON TA DX” on numeric (17) to move to the previous track or display is indicated for a few seconds. the following track. Track number The RDS data used are the PI, PS, shows on display. -
Page 14: Ejecting A Disc
OPERATION EJECTING A DISC selected by following direct numeric Press button (4) to stop MP3 buttons: playing and eject the disc from the M1-M6, MOD (7), MANU/SKIP disc slot (5) DOWN(8), MANU/SKIP UP (9), DSP(0). EJECTING TRACKS IN SINGLE If selected three digits, the unit STEP searches the track at once. -
Page 15: Selecting Tracks By Ams / Mp3 Button 14 Display Information
OPERATION turns on if the name is directory). KEY Assigned IN Searching mode (Table 1) Display will list all available Mode Select directories and songs. Select the desired directory/songs by using BND/LOU ENTER MANU/SKIP UP/ DOWN button A, B, C, 1 and BND/LOU (ENTER) button to D, E, F, 2 confirm. - Page 16 OPERATION B. Notes on CD-Rs (recordable CDs)/CD-RWs (rewritable CDs): 1. Be sure to use discs with following marks only for the unit to play: Recordable Rewritable 2. The unit cannot play a CD-R and CD-RW that is not finalized. (Please refer to the manual of your CD-R/CD-RW recorder or CD-R/CD-RW software for more...
-
Page 17: Specification
SPECIFICATION GENERAL Power Supply Requirements : DC 12 Volts, Negative Ground Chassis Dimensions : 178 (W) x 160 (D) x 50 (H) Tone Controls - Bass (at 100 Hz) 10 dB - Treble (at 10 kHz) 10 dB Maximum Output Power : 4x50 watts Current Drain : 5 ampere (max.) -
Page 18: Trouble Shooting
TROUBLE SHOOTING Before going through the checklist, check wiring connection. If any of the problems persist after checklist has been made, consult your nearest service dealer. Symptom Cause Solution No power. The car ignition switch is If the power supply is properly not on. -
Page 19: Warranty
Warranty This device is covered by a 24-month warranty. The warranty starts with the date of purchase. In order to proof the date of purchase, we advise to keep the receipt. If articles are returned without receipt, repairs can only be executed on payment of additional costs. -
Page 20: Hotline
Hotline *Hotline number: 01805 880606 (0,12€ / Minute) *Valid for Germany only Business hours: Monday to Thursday from 08:00 am to 05:00 pm Friday from 08:00 am to 04:00 pm We offer you qualified advice, should you encounter problems during the installation or the operation of your unit.
Need help?
Do you have a question about the CS FMP200 and is the answer not in the manual?
Questions and answers