
Related Manuals for Mass Portal Pharaoh ED

Summary of Contents for Mass Portal Pharaoh ED
- Page 1 Mass Portal Pharaoh ED Desktop 3D Printer User Manual MP Delta Manual ENG +.indd 1 15/04/15 17:03...
- Page 2 © 2014 MASS PORTAL SIA — ALL RIGHTS RESERVED MASS PORTAL IS A REGISTERED TRADE MARK OF MASS PORTAL SIA PHARAOH AND ED ARE TRADE MARKS OF MASS PORTAL SIA ALL OTHER TRADE MARKS ARE USED FOR INFORMATIONAL PURPOSES ONLY AND ARE PROPERTY OF THEIR RESPECTIVE OWNERS MP Delta Manual ENG +.indd 2...
-
Page 3: Table Of Contents
Contents Contents......3 Getting started Welcome ......4 Printer overview . -
Page 4: Getting Started
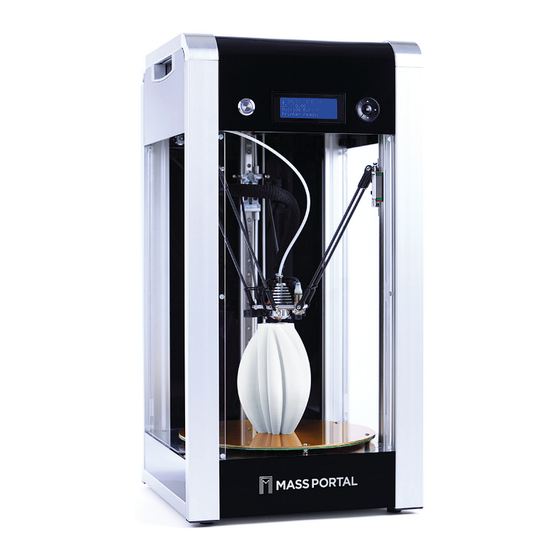
Getting started Welcome Thank you for your purchase of the Mass Portal Pharaoh ED 3D printer. We hope that it will serve you well and help you create many beautiful and useful things. Getting started Please take your time and read through at least the Getting started chapter of this manual –... - Page 5 3D printing meetups. Printing Material — 1,75mm filament Mass Portal 3D printers are designed to work with print material from any vendor — 1,75 mm thermoplastic filament — as long as it’s a good quality product, with uniform diameter. We try to find and recommend the best materials on the market, since the materials play the most important role for quality printouts.
-
Page 6: Printer Overview
Printer overview Front Aluminum frame Grab handles and ventilation Pause button 5-way navigation LCD display button Not shown: Bowden tube axis endstops Linear guide carriage Not shown: Linear guide rails LED lights for print chamber illumination Drive belts Printing head Heat indicator LEDs Heated print bed below the heated... - Page 7 PRINTER OVERVIEW — CONTINUED Back Ventilation — do not cover SD card slot Filament load / Filament feed hole release lever Filament feed hole Removable magnetic side panels Filament spool holder On / Off switch, Power cord socket, Fuse panel USB cord socket Filament Extrduder Bowden tube...
-
Page 8: Safety
The printer is intended to be used only indoors — ambient metal plate below temperature must be between 15°C and 30°C. The Mass Portal the printhead are 3D printer under no circumstances must be subjected to high... - Page 9 SAFETY — CONTINUED WARM PARTS The printer frame and outer parts can be warm during operation, reaching temperatures up to 60°C after extended use. CLEANING DO NOT USE FLAMMABLE LIQUIDS TO CLEAN HOT PARTS. Use dry paper towel to clean print bed and print head. If more thorough cleaning is needed, the printer must be turned off and cooled down to room temperature.
-
Page 10: Printer Setup
Printer Setup 1. Unbox the printer INFO The filament spool holder is Be careful, the printer is not very light — 16,5kg. designed to be Open the box — there’s a side door. compatible with Pull the printer out of the box carefully, grabbing at the sides. different form It’s easier ir somebody can help holding the box. -
Page 11: My First Print
My First Print The printer comes with a SD card already inserted, so you can INFO Instert filament into this hole on the print a test print without connecting computer. back side of the printer. You need to 1. Turn on the printer firmly press and hold The power switch is on the back of the printer. -
Page 12: Printing Process Overview
3D scanned models by software programs called slicers. The process of generating the G-codes is usually aslo called slicing. Mass Portal uses the Simplify3D program for slicing and printer control. Although G-code is used to control many 3D printers, it generally must be created for each particular printer. - Page 13 PRINTING PROCESS OVERVIEW — CONTINUED STL or OBJ files TIP Test and sample files for the bundled G-code is usually generated from 3D models, that are saved in material are provided the STL or OBJ format. Most 3D software today can export to on the SD card these formats, and printable files on the Internet are also usually included with the...
-
Page 14: Printer Operation & Software
Printer operation & software Print Bed Coating and Heating WARNING The Mass Portal printers are equipped with a heated glass print correct bed coating bed. Although you can print directly to the glass surface, some must be selected materials work better on a different coating. Work better means on the printer, so they adhere firmly or “stick”... -
Page 15: Print Bed Leveling / Calibration
Print Bed Leveling / Calibration The print bed on Mass Portal printers is held in place with three TIP The printbed can be leveled manually thumbscrews. The slope and height of the print bed can be by adjusting the adjusted by turning the thumbscrews. As a general rule, the three thumbscrews printbed should not be slanted —... -
Page 16: Standalone Printing
Standalone Printing INFO Printer control panel consists of a dediated pause button, built in display and five-way navigation button. TIP Pause button allows pausing print for inspection or filament change. Press it shortly to pause, and again to resume. When paused, the light You can use the control panel on the printer to see current is off. -
Page 17: Using The Printer Control Panel
Using the Printer Control Panel Home screen (Status display) This is the main status display of the printer. This is what you see when the printer is turned on. It is the top level for the menus. It shows the most important parameters at a glance and status messages. - Page 18 Bed Coating -> Calibration -> About -> About command Displays information about the printer: serial number, harware version, firmware version. Pharaoh ED by MASS PORTAL HW: v1.4 ID: 12345 FW ver.: 123-4567890 MP Delta Manual ENG +.indd 18 15/04/15 17:03...
- Page 19 USING THE PRINTER CONTROL PANEL — CONTINUED Control menu TIP Fan speed percentage is Lists commands for to adjusting the printing parameters while estimated, and fans printing. will not work all the way down to 0 >Speedrate : 100% The > at the percent.
- Page 20 USING THE PRINTER CONTROL PANEL — CONTINUED Utilities menu Lists commands for various maintenance tasks. >Home All Change Filament Release Printhead Extrude -> Cooldown Turn Fan Off Bed LED: Home All — Moves the printhead to it’s default position at the top of the printing chamber.
- Page 21 USING THE PRINTER CONTROL PANEL — CONTINUED SD Card menu To print g-code files from an SD card after the card is inserted into the printer’s card reader slot, the card must be “mounted”. Use this command to do this. Unmount the SD card before removing it from the printer with the Unmount command that becomes available after mounting.
- Page 22 USING THE PRINTER CONTROL PANEL — CONTINUED Fan Speed menu TIP Fan speed percentage is Use to set the speed of the three part cooling fans. estimated, and fans Remember to turn off fans for the first couple of layers, so the will not work all bounced airflow form the printbed does not cool the nozzle.
- Page 23 USING THE PRINTER CONTROL PANEL — CONTINUED Calibration menu Use the calibration command if the first layer is not printing correctly. Rememeber to check the Bed Coating settings. While performing the calibration, status message will be displayed, and a success confirmation when the calibration process is finished.See more in the Automati Calibration chapter.
-
Page 24: Printing Software Owerview
Recommended solution for Mass Portal printers, and our recommended solution for Mac users. Very fast slicing engine. Allows manual control over support placement and fine tuning of slicing settings. A full licence is included with Mass Portal printer. Repetier Host Alternative printing software. Allows control and management of printer and print jobs, and has a choice of integrated slicing software: Slic3r, CuraEngine and Skeinforge. -
Page 25: Software: Simplify3D
Software: Simplify3D Setup After the installation of Simplify 3D, please choose the “Other” from the printer models popup menu and enter the following data exactly as on the picture: MP Delta Manual ENG +.indd 25 15/04/15 17:03... -
Page 26: Software: Simplify3D
Software: Simplify3D Interface Layout Move Model: Ctrl-left-click and drag Scale Model: Ctrl-right-click and drag up or down Rotate Model: Alt-left-click and drag right or left 1. Build Table: This is the interactive 3D environment where you will be viewing and working with your 3D content before printing. This is the “main stage”... - Page 27 SIMPLIFY3D — CONTINUED Import and Manipulate Your 3D Model Click Show Advanced at the The first step in the 3D printing process is to import the model bottom of the FFF you want to build. You can obtain 3D models from http://www. Settings window to thingiverse.com* or you can make a model yourself using a CAD view additional...
- Page 28 SIMPLIFY3D — CONTINUED The FFF Settings Use continuous helical/corkscrew extrusion option for vase or single-outline prints. This window contains all the Processes that specify how your model will be constructed: 1. Select Profile – Allows you to choose a pre-configured printer profile.
- Page 29 SIMPLIFY3D — CONTINUED Build Statistics If you want more information about any particular setting, hover the mouse cursor over that element to display a tooltip describing the functionality. Buld Statistics are located in the top left corner of the Preview window and include three estimates: 1.
-
Page 30: Software: Repetier Host
Software: Repetier Host Good all in-one solution 1. Create a 3D model or get it from the internet. 2. Arrange one or more models on a virtual print plate. Control: Holding the 3. Slice the the models into thin slices and compute a path for control button, you printer head. - Page 31 REPETIER-HOST — CONTINUED Manual control When you hover We offer you to see how the basic commands works in Repetier- over the arrow, you Host software. If you want to advance then visit http://www. will see a distance repetier.com/documentation/repetier-host for more detailed appear in mm.
- Page 32 REPETIER-HOST — CONTINUED The extruder and print bed Fit Printer (Strg+A): Zooms to fit the complete printer area into the window with maximum size. Fit Objects (F5): This blocks allow it to change the temperature. The temperature Zooms to fit all can be set either on the right in the text field as well as by objects into the window with...
- Page 33 REPETIER-HOST — CONTINUED Object parametrs You can select one object by right clicking on it. If you press the ctrl-key while right clicking the selected object is added. ctrl-clicking a selected object In this block you can export all displayed objects at once, add removes it from the objects in .stl, .obj, .amf and .3ds format, duplicate the marked selection.
-
Page 34: Printing Materials Overview
Printing Materials Overview If you’re new to 3D Each material has different properties that make it useful printing, PLA Filament for different tasks. For example, nylon is both strong and is a good material to non-reactive to many substances. Other plastics can have start with because excellent optical clarity or can be easy easy to work with. - Page 35 Flexible materials Flexible materials can be abit challenging to print with a bowden based system like the Mass Portal printer uses — but the Mass Portal Pharaoh is known to print even pretty flexible materials like thermoplastic elastomers, thermoplastic polyurethane and various kinds of flexibility-modified PLA.
-
Page 36: Pla
PLA is probably the easiest material to work with when you first For vertical start printing. PLA is a biodegradable thermoplastic that has been objects retraction recommended short derived from renewable resources such as corn starch and sugar and fast, such as 1 canes. -
Page 37: Abs And Hips
ABS and HIPS NB. When printing ABS and HIPS plastic Acrylonitrile Butadiene Styrene is a commonly used thermoplastic light fumes and as it is lightweight and can both be injection molded and extruded. smell will be emited It has better mechanical properties than HDPE and less brittle than —... -
Page 38: Pet / Copolymer Materials
PET / Copolymer materials Polyethylene terephthalate commonly abbreviated PET, PETE, or the obsolete PETP or PET-P is a thermoplastic polymer resin of the polyester family and is used in synthetic fibers; beverage, food and other liquid containers; thermoforming applications; and engineering resins often in combination with glass fiber. -
Page 39: Nylon
Nylon Nylon is extremely robust and will not crack or break the way ABS or PLA might after some wear and tear. It also will hold up against heat much better, as anyone who has ever left a PLA print in a hot car can appreciate. -
Page 40: Post Processing Of Prints
Post Processing of Prints This articles describes how to clean up and otherwise post- process 3D prints made with a 3D printer that prints polymers like ABS or PLA. Prints always have imperfections, e.g. small parts that stick out and that you will have to remove. You can do this mechanically or by using fire, heat or a solvent. - Page 41 MP Delta Manual ENG +.indd 41 15/04/15 17:03...
-
Page 42: Maintenance
Maintenance Printer maintenance To ensure long service life and correct operation of the printer, simple maintenance must be done when appropriate: • after long periods of printing; • after long periods of inactive use or storage; • once every three months. Cleaning the print bed Brass printbed is commonly coated with Kapton tape or Blue painter’s tape when printing. - Page 43 Cleaning the extruder drive gear Extruder is located inside the printer chamber, upper right corner. The design of the extruder allows cleaning of the drive gear without disassembling it. Use hard brush or plastic tip to remove any stuck plastic from the drive gear. The drive gear teeth can sometimes become filled with plastic parts from filament, when the print head has been clogged and the drive gear has “dug”...
-
Page 44: Troubleshooting
Troubleshooting Troubleshooting In this section we introduce you with possible technical support if its not working please contact our support team support@ massportal.com and we will be glad to help you Feedrate and Extrusion problems. Flowrate – these No or not enough plastic is released from the nozzle. settings can be The nozzle or another hot end part could be (partially) blocked by changed during... - Page 45 Filament breaks and goes after filament drive gear. There is sometimes a case when filament breaks near feed hole and if the printer is still printing filament end goes after drive gear in bowden tube then it is impossible to push it out. To remove filament from bowden tube heat up printhead and push with two fingers bowden tube’s mount button, then remove tube firstly pushing it in then out.
Need help?
Do you have a question about the Pharaoh ED and is the answer not in the manual?
Questions and answers