
Subscribe to Our Youtube Channel
Related Manuals for Yeastar Technology TA Series


Summary of Contents for Yeastar Technology TA Series
-
Page 1: Installation Guide
TA Series Analog VoIP Gateway Installation Guide Version 1.3 Date: July 10, 2015 Yeastar Information Technology Co. Ltd. -
Page 2: Table Of Contents
TA Series Installation Guide Contents About TA Series Analog VoIP Gateway ..............3 1. Preparation before Installation ................4 2. Hardware Specifications ..................5 2.1 Overview ......................5 2.2 LED Indicators and Ports ................6 2.3 Specifications and Operating Environment ............8 3. -
Page 3: About Ta Series Analog Voip Gateway
TA Series Installation Guide About TA Series Analog VoIP Gateway Yeastar TA Analog VoIP Gateways are cutting-edge products that connect legacy telephones, fax machines and PBX systems with IP telephony networks and IP-based PBX systems. Featuring rich functionalities and easy configuration, Yeastar TA is ideal for small and medium enterprises that wish to integrate a traditional phone system into IP-based system. -
Page 4: Preparation Before Installation
TA Series Installation Guide 1. Preparation before Installation Please make sure the following devices are available before installation Contents of the box Upon receiving Yeastar TA gift box, please open the package and check if all the items are supplied as TA400/410/800/810 Packing List (See Sheet 1) and TA1600/1610/2400/3200 Packing List (See Sheet 2). -
Page 5: Hardware Specifications
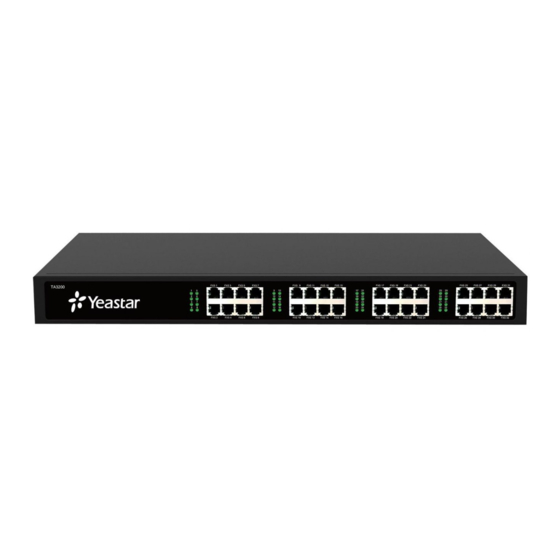
TA Series Installation Guide 2. Hardware Specifications 2.1 Overview Figure 2-1 TA Series Analog VoIP Gateways Table 2-1 Yeastar TA Telephony Interfaces Telephony Interfaces Models RJ11 FXS Ports RJ11 FXO Ports RJ21 FXS Ports – – TA400 – – TA410 –... -
Page 6: Led Indicators And Ports
TA Series Installation Guide 2.2 LED Indicators and Ports The LED indicators and ports of TA400, TA410, TA800, and TA810 are similar; the difference is the number for ports and the type of ports. Take the front panel and rear panel of TA800 and TA3200 as examples. -
Page 7: Rear Panels
TA Series Installation Guide Rear Panels LAN Port FXO Ports for TA410/810 Power Inlet FXS Ports RESET WAN Port (reserved) Figure 2-4 TA800 Rear Panel LAN Port Power Inlet POWER RESET RJ21 FXS Ports Protective Earth CONSOLE Power Switch... -
Page 8: Specifications And Operating Environment
TA Series Installation Guide Table 2-2 LED Indications Indication Status Description The power is switched on. POWER Power status The power is switched off. Blinking is running properly. status goes wrong. Blinking/Off Ports 1-32 Solid green: the port is idle. - Page 9 TA Series Installation Guide Table 2-5 TA1600/1610/2400/3200 Specifications and Operating Environment TA1600/1610/2400/3200 Description Size (L×W×H) 440 mm × 250 mm × 44 mm Power Supply AC 100-240V 50/60Hz Operating Temperature 0 to 40° C, 32 to 104° F Storage Temperature -20 to 65°...
-
Page 10: Yeastar Ta Series Installation
TA Series Installation Guide 3. Yeastar TA Series Installation To avoid unexpected accident, personal injury or device damage, please read the following instructions before installing the Gateway. 3.1 Placement Instructions Ambient Temperature: to avoid overheating, please do not run Yeastar TA in the place where the ambient temperature is above 104°... -
Page 11: Connection Of Ethernet Ports
TA Series Installation Guide Push the TA device into the stand. Fix two screws on the wall and then you could mount the stand to the wall. 3.2.2 Connection of Ethernet Ports Yeastar TA provides one 10/100M adaptive RJ45 Ethernet LAN port. -
Page 12: Connection Of Fxo Ports
TA Series Installation Guide RJ21 Connection Applicable to TA1600/2400/3200. Connect one end of a RJ21 cable to the connector. Connect the other ends to your analog telephones. 3.2.4 Connection of FXO Ports TA FXO Gateways include TA410, TA810, and TA1610, supporting 4, 8, and 16 FXO ports respectively. - Page 13 TA Series Installation Guide Figure 3-3 TA3200 Connection Diagram 13/17...
-
Page 14: Ta Series Basic Configurations
TA Series Installation Guide 4. TA Series Basic Configurations 4.1 Getting an IP Address Yeastar TA provides web-based configuration interface for administrator and account user. The user can manage the device by logging in the Web interface. Access path: http://[IP address] ... -
Page 15: Logging In The Web Configuration Panel
TA Series Installation Guide 4.2 Logging in the Web Configuration Panel Start the browser on PC. In the address bar, enter the IP address, click “Enter” button and then you can see Web Configuration Panel login page. Enter the Admin User Name and Password to log in. -
Page 16: Make And Receive Calls
TA Series Installation Guide Note: please note that after changing the IP address of LAN port, TA device should be rebooted to make the new changes to take effect. 4.4 Make and Receive Calls TA FXS Gateway 1. Internal calls between FXS ports Two analog phones connected to TA could make calls between them by dialing *99+FXS port number. -
Page 17: Conclusion
TA Series Installation Guide 5. Conclusion This Installation Guide only explains the installation and basic settings of TA Series Analog VoIP Gateways. For more functionality and advanced settings, please refer to the relative documents as below: “TA Series Analog VoIP Gateways Datasheet”...
Need help?
Do you have a question about the TA Series and is the answer not in the manual?
Questions and answers