Table of Contents
Advertisement
Advertisement
Table of Contents

Related Manuals for Eaglemaster E4


Summary of Contents for Eaglemaster E4
-
Page 2: About Your System
About Your System Congratulations on your purchase of this state-of-the-art vehicle security system. With proper installation this system will provide superior protection and performance for many years to come. What is included: A control module 2-way pager transceiver antenna One 5-button 2-way LCD remote transmitter One 3-button or 4-button random code remote transmitter Dual stage shock sensor High output 6-tone siren (optional) -
Page 3: Way Lcd Remote Transmitter Description
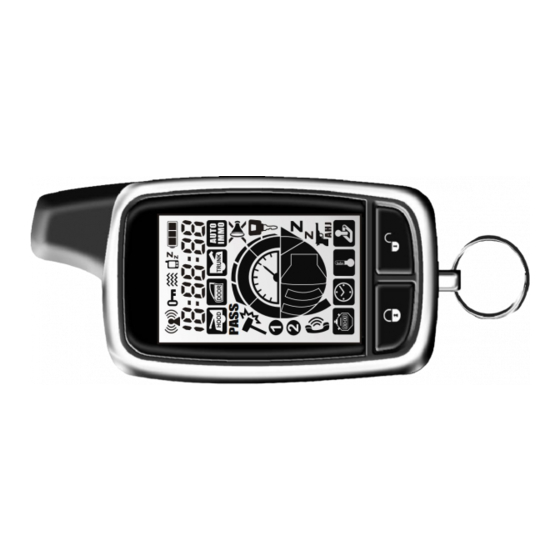
2-way LCD Remote Transmitter Description PASS #TX-4R NO.TR-57 Functions of remotetransmitter buttons Button to arm the system (ARM) Button to disarm the system (DISARM) Button to control TRUNK Programmed channel Button to check car status , to turn on LCD back light Button to Silent arm the system (SILENT) System maintenance This system needs no specific maintenance beyond 2-wayremote control battery... - Page 4 Remote Function Table: Functions Step Condition Arm and door lock Press once Disarmed & ACC off Arm without siren chirp Press once then within 3sec. press once Disarmed & ACC off Disarm and door unlock Press once Armed Disarm without siren chirp Press once then within 3sec.
-
Page 5: Standard Lcd 2-Way Icon Instructions
Standard LCD 2-way icon instructions LCD Display CAUTION: Use of this system is for car start and alarm PASS purpose only. Since this system is a precise instrument that is fragile and susceptible to damage from external shock, do not drop the unit, and keep it away from children. - Page 6 LCD Icon LCD Function 1st sensor trigger 2nd sensor trigger PASS sensor bypass immobilizer mode Ignition switch Silent mode Valet mode Anti car-jack mode Auto re-arming Call mode Colock Remote button lock...
- Page 7 LCD Icon LCD Function Vibration mode Battery Meter Battery conserve mode (disable receiving) Engine running / Turbo mode Colock time start (optional) Fix time start (optional) Temperature start (optional) Safety mode (optional)
-
Page 8: Programming 2-Way Remote
Programming 2-way remote Disable remote receiving You may turn off the 2-Way remote receiving signal from the main unit. Press button simultaneously for 2sec. until one long beep is heard. Remote receiving is now disabled. To turn on receiving again, Press button simultaneously until two long beep is heard, remote receiving is now enable. -
Page 9: Time Adjust Mode
Time adjust mode Besides operating for alarm functions, LCD remote control additionally provides 12-hour clock, alarm clock. Instructions: 1. Press and hold Button for 3sec. to enter time-setup mode, 1 beep will be heard. 2. Press button to select Hour & Min adjust setting. Icon flashing to indicate. 24-hour display Minutes display 3. -
Page 10: Way Signal Paging Features
2-way signal paging features A page is the signal the control module sends to the remote controls confirmation of receipt of a command or alarm system status. When the remote control receives a page it will generate a page notification to the user (notifications are audible beeps) and the LCD Icons will display the current system status. - Page 11 Check-in range notification (on/off ) Arming the system within 8-seconds, press button once on the 2way remote , the system will enable this Check- in range function. Icon will on for 2sec. and give 1 beep The 2way remote sound to indicate the function has been will respond: turned ON.
-
Page 12: Standard Features
Standard features: To ARM the system: To arm your system within proper operation range, simply press button once (while system in disarmed or Acc off position) . The system will respond one siren chirp, one lights flash, doors lock, disable engine starter, LED will begin flashing quickly until all sensor inputs are active - LED will start blinking slowly (flash once per second) to indicate the system is in full armed. -
Page 13: To Disarm The System
- To DISARM the system : To disarm your system within proper operating range, simply press button once (while system in arm position). The system will respond two siren chirp, two light flash, doors unlock, Enable your engine starter, LED off. 2-way LCD display : + Two beep sound - Intrusion Alert:... -
Page 14: Disarm Without Siren Chirp
- Disarm without siren chirp : To disarm your system without siren chirp , simply press button once then within 3sec. press button once. Note: this features is only activated under the system is in armed position,. - Silent arm mode : The system provide a feature to turn OFF the siren, simply press 2-way button of press (while system in disarmed or Acc off position) . -
Page 15: Panic Mode
- Panic mode: If you are threatened in or near your vehicle, you can attract attention by press button for 2sec. system will triggering for 30sec. To stop Panic mode at any time, simply press any button once. Note: To stop panic mode, simply press any button on the remote and the system will be armed. -
Page 16: Passive Immobilizer (Programmable)
- Car search mode: The system provide a feature to easy find your car position, simply press button once when in armed after 8sec. The system will respond by 5 chirps and 5 lights flash. - Valet mode: To enter valet mode: Disarm the system and turn Ignition switch to ON position then press button for over 2 seconds, or press Valet/over-ride switch for over 5 seconds, until siren give 1 long with 1 short chirp and LED light ON to confirm the system is in valet mode. -
Page 17: Remote Trunk Open
- Arming without Remote control: This function gives you a possibility to Arm and Disarm the system use original key and Valet switch, After driving and ignition keep ON , open the door, then turn off the ignition Key and press the Valet switch once, then closed the door, the system will armed immediately. -
Page 18: Siren Chirps On/Off (Programmable)
- Siren chirps ON/OFF (programmable): This programme feature controls the chirps that confirm the arming , disarming and intrusion alert of the system. Note: Set siren chirp off, if door, hood or trunk not closed, siren will activated. - Power disconnecting memory : Alarm is built in memory on main unit. - Page 19 Control Channel (-) features: - Comfort /window close : If programmed with the feature, this channel will constant output for 30sec. When arming the system. - 2nd stage door unlock: If programmed with the feature , to operate it by press button at 2nd time , 2nd stage door unlock will be output for passenger side .
-
Page 20: Turbo Mode
- Turbo mode: If programmed with the feature , this channel will constant output when ignition turn on for over 1 minutes. It will keeps the engine running after arriving at your destination by ignition off for a programmable of 1, 3, 5, or 10 minutes. This allows the system's timer to conveniently cool down the turbo after you have left the vehicle. -
Page 21: Emergency Disarm (Valet Sw & Pin Code)
Emergency disarm (Valet SW & PIN code): If the remote control has been lost or damaged, you can manually disarm your system by programmed " Valet SW or PIN code": Emergency disarm by Valet Switch : (1) Turning the Ignition switch from OFF to ON position. (2) Simply pressing and holding the Valet switch for over 3 seconds, the system will disarmed immediately. - Page 22 - Door switch activates: If programmed with the feature , to operate it when driving the car, if a door is forced been open and close, the system will activate Anti-car jack mode immediately. The parking lights will flash once and the LED will fast flash to show the system is enter anti car-jack mode. Activate with door switch, LCD will 2-way LCD display : display Anti car-jack icon for identify.
-
Page 23: Antenna Call Switch
R.F Antenna CALL SWITCH : The R.F antenna module provide a switch which can be send a signal to the 2-way remote. In disarmed or ACC on position, if press Call switch for 2 seconds, lights will flashing 5 times and the 2-way remote will give pre-warn beep sound . -
Page 24: Transmitter Programming
Transmitter programming: This programming features is provide the owner to learn the new transmitter into the system memory. This system can expand 4 different transmitters, and comes from factory with two transmitters already programmed into the system memory (1-way & 2-way ) . Whenever you want to add or delete transmitter code , the procedures are as following: 1. - Page 25 PROGRAMME FEATURES TABLE Press button Press button Press button Press button Item FEATURES 2-chirp 3-chirp 1-chirp 4-chirp flash Ignition controlled doors lock *W/I Ignition controlled doors unlock *W/I Automatic re-arm *W/I Siren & Horn pulse output Horn *Siren Arm / Disarm siren chirp on/off Passive arming &...
- Page 26 PROGRAMME FEATURES TABLE Press button Press button Press button Press button Item FEATURES 2-chirp 3-chirp 1-chirp 4-chirp flash Door switch arming delay *8sec. 15sec. 60sec. 1-way remote reminder arm/disarm *W/I status to 2-way remote Arming Remote Pager w/engine CH-2 (gray wire) feature *Window latched running...
-
Page 27: System Installation
System Installation: 1. Thoroughly read and become familiar with the installation instructions before beginning the installation. 2. Review system contents: (1). A control module. (2).2-way pager transceiver antenna (3). One 5-button 2-way LED remote transmitter. (4).One 3-button or 4-button random code remote transmitter (5).Dual stage shock sensor (6).High output 6-tone siren (optional ) (7).Status LED indicator (8).Valet over-ride switch... -
Page 28: Wiring Diagram
WIRING DIAGRAM Main control unit H1 12-PIN CONNECTOR Valet switch H2 12-PIN CONNECTOR Plug-in dual stage shock sensor Dual-stage Dual color LED Shock Sensor External Ultra sonic & Plug-in dual color micro-wave sensor port LED indicator Green 2 nd stage (-) trigger Blue 1 st stage(-) trigger Black... - Page 29 H1 12-PIN CONNECTOR WIRING: Central door lock wiring Right parking light + 12V DC of direction indicator White (+/-) Green/red Blue/red Lock Green Unlock Blue Lights(+)or (-) White/red (+) Green/black input ,for the parking lights power sources Blue/black (-) Ground Left parking light of direction indicator Connect to Chassis...
- Page 30 H2 12-PIN CONNECTOR WIRING: (+) positive Programme (-) Orange/black input Immobilizer-2 (-) negative pulsed when (+) Red/black disarmed output DOOR(+) Killer-1 (-) Orange Connect to (-) Negative pulsed Existing (+) when Armed output Positive Door Switch CH-3 (+) Purple (-) White/black (-) Negative pulsed Programme output Connect to (-)
-
Page 31: Central Door Lock Wiring
Central door lock wiring: 1.) For Factory installed central door lock system MOTOR CONTROL MOTOR CONTROL ORIGINAL DOWN BUILT-IN DOOR MOTOR LOCK CONTROLLER (Inside of the front door) MAIN LINE Central door lock wiring Green/black Green Green/red Blue/black Blue Blue/red 2.) Directly connect to 2 wire Actuator + 12V 2 WIRE ACTUATOR...
Need help?
Do you have a question about the E4 and is the answer not in the manual?
Questions and answers