Table of Contents
Advertisement
Advertisement
Table of Contents

Related Manuals for Nokia Mediamaster 260T


Summary of Contents for Nokia Mediamaster 260T
- Page 1 User Guide...
- Page 2 DTMF (Dual Tone ling. Multiple Frequency). Nokia declara que el receptor digital Mediamaster 260 T Hierbij verklaart Nokia dat deze digitale ontvanger, de cumple con los requisitos básicos de conformidad y con Mediamaster 260 T, in overeenstemming is met el resto de provisiones correspondientes de la Directiva essentiële vereisten en andere relevante bepalingen...
-
Page 3: Table Of Contents
Nokia operates a policy of continuous development. Therefore we reserve the right to make changes and improvements to any of the products described in this manual without any prior notice. -
Page 4: General Information
• Do not allow the unit to be exposed to hot, cold or humid conditions. • Service should be carried out only at a Nokia Authorised Service Centre. • Please note that the only way to isolate the Mediamaster completely from the... -
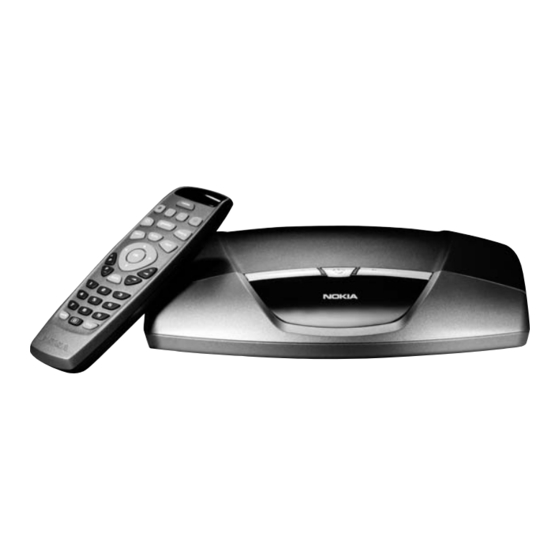
Page 5: Remote Control
Remote control This section describes how to operate the Mediamaster using the buttons on the remote control. Some of the functions can also be carried out using the buttons on the front panel. Press and hold for a few seconds to switch the Mediamaster in and out of standby mode. -
Page 6: Front And Rear Panels
TV aerial input of the TV or a VCR Mains cable TV aerial power 110-240 V AC only for connection of a Nokia indoor TV aerial with signal amplifier; 5 V 30 mA. AUDIO L R AUX SCART SERIAL PORT... -
Page 7: The Smart Card And Ca Module
Service Provider. NOTE: CA modules and smart cards are only distributed by Service Providers and special distributors, not by Nokia. After inserting a card, leave it in the slot permanently. Do not re- move it again, unless you are asked to do so. This is important if your Service Provider were to want to download new information to the smart card, as the card has to be in the slot. -
Page 8: Connecting The Mediamaster
Connecting the Mediamaster The Mediamaster receiver should have the following items: • the Mediamaster • a remote control with 2 AAA batteries • a SCART cable (fully connected, 1.0 meter) • a mains cable Mains Remote User • an RF cable cable control Guide... -
Page 9: Connecting To The Tv Aerial
Connecting the Mediamaster Connecting to the TV aerial You can connect the Mediamaster to the following type of aerials: Standard outdoor aerial Where possible, use an outdoor roof aerial intended for receiving UHF channels between 21 and 69. Please note the following: •... -
Page 10: Connecting To The Tv
Connecting the Mediamaster Connecting to the TV • Connect the SCART cable between the main SCART socket on the TV and the TV SCART socket on the Mediamaster. • Connect the TV aerial to the TV aerial input socket on the Media- master •... -
Page 11: Installation
Installation First-time installation Once you have correctly connected the Mediamaster, you will also have to perform a "First-time installation." During this procedure, helpful information is displayed at the bottom of the menus. The ok button always confirms a selection within the menus, and pressing it will take you to the next step in the installation proce- dure. -
Page 12: Time Adjustment
Installation Please note that the search procedure may take a few minutes. You can cancel the search at any time by pressing ok. When the search procedure has ended, a message will tell you how many TV and radio channels have been found. Press ok to continue. -
Page 13: Watching Tv & Listening To The Radio
Watching TV & listening to the radio General You can watch digital TV or listen to digital radio with the Media- master receiver. • If no TV channel is automatically shown after you finish the in- stallation procedure, press the P+ or P- button to select a chan- nel. -
Page 14: Temporary Settings
Watching TV & listening to the radio Temporary settings By pressing opt, a menu appears that allows you to configure tem- porary settings for the channel that you are currently watching. If you leave the channel and return to it later, the temporary set- tings will be deleted. -
Page 15: Navi Bars
Navi Bars Navigating with Navi Bars Bookmark Navi Bars are used for selecting TV/Radio channels and changing name Bookmark settings. 1. Display Navi Bars by pressing the navi button. Hide it by pressing the navi or back button. 2. When Navi Bars are displayed, you can move around with the 4-way cursor key. -
Page 16: Control Folder - User Preferences
Navi Bars Control folder User preferences — Banner time-out When you switch channels, a programme information banner will be shown for a few seconds. You can select the duration that the banner will be shown. Volume bar Select whether or not you want the volume bar to appear on the screen when you change the volume. - Page 17 Navi Bars Important information about editing channels Before you start, you must select the list, TV or radio, that you want to edit. If you are watching TV and press ok and choose Edit chan- nels, you can only edit TV channels. If you are listening to radio channels, you can only edit radio channels.
- Page 18 Navi Bars Delete list If you want to delete a Favourite list, select the list using the cursor left/right button and press ok. Rename list You can give an existing list a new name by following the instruc- tions in the How to enter a specific name section on page 17. Rearrange lists If you have created several Favourite lists, you can determine the sequence in which the lists will appear.
- Page 19 Navi Bars Lock channels To open this menu, you will be asked to enter your access code. The access code is set to 1234 at the factory. You can lock (and later unlock) channels on any of the lists in order to prevent your children from watching them, etc.
-
Page 20: Viewing Images Received From An External Device
Navi Bars Viewing images received from an external device General The 260 T is equipped with a built-in Bluetooth module that makes it possible to receive, watch and save digital images transmitted from an external device. The device must be equipped with Blue- tooth Standard Version 1.5 and "Object Push Profile". -
Page 21: The Images Folder In Navi Bars
Navi Bars Paired devices Will show how many external devices have access to the receiver. You can prevent all external devices from having access to the re- ceiver by pressing info. To regain access to the 260 T, you have to enter the passkey again. - Page 22 Navi Bars 2. When the downloading is ready and you press ok: • Select “open” to watch an image. • Use the “Mark”, “Mark all” and “Unmark all” when you are using the “slide view” function. • Press back to close an image shown on the TV screen and return to the temporary folder.
-
Page 23: Control Folder - Timer
Navi Bars Control folder Timer — General You can programme the Mediamaster to switch on and off at pre- defined times. The timer function is very useful when you want to record a pro- gramme and you are unable to start/stop the recording event your- self, or when you just want to be reminded of the start of a programme that you do not want to miss. -
Page 24: Control Folder - System Info
Navi Bars Control folder System info — If you need to contact your Service Provider or a Service Centre, they may ask for information available from this menu. This gives general information about the hardware and software version on which your Mediamaster is running. Control folder CA Menu —... -
Page 25: Settings Folder - Tv
Navi Bars Advanced manual search The information that must be entered in this menu is available in TV magazines or on the Internet. You can use this menu if you are looking for some "special" chan- nels (i.e., non-DVB standard channels) that can only be found when you have entered the necessary settings here. -
Page 26: Settings Folder - Access
Navi Bars Picture format If you have a TV set with a 4:3 picture format and the transmission is 16:9, you can select "Fullscreen" or "Letterbox". Fullscreen will fill the screen but some information on the left and right sides will be cut off. Letterbox will give a complete picture, but black areas will be visi- ble at the top and bottom of the screen. -
Page 27: Settings Folder - Time
In order to keep the Mediamaster up-to-date, it is occasionally pos- sible to download new versions of the system software. New soft- ware may include new or improved features for existing menus. Please check the latest updates for your receiver at Nokia’s website www.nokia.com. IMPORTANT. Updating may take a while. -
Page 28: Settings Folder - Reinstall
Navi Bars Settings folder Reinstall — To open this menu, you will be asked to enter your access code. The access code is set to 1234 at the factory. Use this option only if you have to start the complete installation procedure from scratch. -
Page 29: Pvr (Personal Video Recording)
PVR (Personal Video Recording) About hard disk recording As you probably already know, this box is equipped with a built-in hard disk, similar to those in ordinary Personal Computers (PCs). This hard disk, thus, can be used to record TV and radio pro- grammes. -
Page 30: Pause Recording
PVR (Personal Video Recording) Pause recording Indicates an ongoing To describe this, let us say that the phone starts to ring while you pause recording are watching TV. You do not want to miss anything of the pro- gramme, so you decide to do a pause recording while you answer the phone. -
Page 31: Normal Recording
PVR (Personal Video Recording) Normal recording When you want to perform what we call a normal recording. • Start a recording by pressing the button with the red It will be possible, thus, to select the following recording possibili- ties from a menu that appears on the screen: 1. -
Page 32: Storing Of The Recordings
PVR (Personal Video Recording) Storing of the recordings There are 3 different ways the recordings can be stored to the hard disk. The "Recordings" folder in the Navi Bars will contain the fol- lowing Bookmarks: 1. Erasable: This Bookmark is used for temporary storage. Recordings stored here will automatically be overwritten by new recordings. -
Page 33: Delete All Recordings
PVR (Personal Video Recording) Recording Information Within the recording bookmarks, you can get information about the different recordings by selecting a recording and pressing info. Delete all recordings From the "Settings" bookmark in the "Recordings" folder, you can delete all of the recordings you have made. GB 33... -
Page 34: Technical Specifications
Technical specifications Front panel TV SCART 2 LEDs, Buttons: (standby, programme number up and down.) Video output (1 dB)/75 Ohm Conditional Access system Audio output 0.5 V >10 Ohm One PCMCIA Interface for a Common Interface CA-module. RGB output Internal RGB DVB standard. -
Page 35: Nokia Mediamaster Software End-User License
This Software Agreement (“Agreement”) is between You (either an individual or an entity), the End User, and Nokia Corporation, Nokia Home Communications (“Nokia”). The Agreement authorizes You to use the Software specified in Clause 1 below and which is included in this Nokia digital TV receiver. This is an agreement on end-user rights and not an agreement concerning sale. - Page 36 Nokia is a registered trademark of Nokia Corporation www.nokia.com 00003357.00...
Need help?
Do you have a question about the Mediamaster 260T and is the answer not in the manual?
Questions and answers