
Related Manuals for Nokia Mediamaster 210


Summary of Contents for Nokia Mediamaster 210
- Page 1 Nokia Mediamaster Owner’s Manual Gebruiksaanwijzing Bedienungsanleitung Bruksanvisning Mode d’emploi Betjeningsvejledning Instrucciones de uso Brukerveiledning Istruzioni per l’uso Käyttöohje...
-
Page 3: Quick Guide
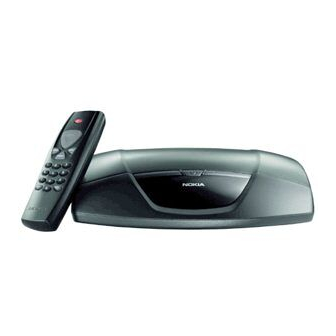
Quick Guide Preparing the Remote Connecting a TV and a video recorder Control video SCART Switching on for the first time • Plug in your Mediamaster. • The “First time installation”menu is shown • Press the select button on the remote control to start the installation procedure. -
Page 4: Time Adjustment
Quick Guide Time adjustment The time is adjusted ± 1/2 hour at a time by using cursor up/ down. You can also adjust the minutes by using cursor left/right. • Press select to finish the First time installation and to open the Navigator. -
Page 5: Table Of Contents
Nokia operates a policy of continuous development. Therefore we reserve the right to make changes and improvements to any of the products described in this manual without any prior notice. -
Page 6: End User License
Nokia Corporation, Nokia Home Communications (“Nokia”). The Agreement authorizes You to use the Software specified in Clause 1 below and which is included in this Nokia digital TV receiver. This is an agreement on end-user rights and not an agreement concerning sale. -
Page 7: End User License
NOKIA MEDIAMASTER SOFTWARE END-USER LICENSE without notice from Nokia if You fail to comply with units (as defined in part 772 of the EAR) which are any provision of this Agreement. In such an event, engaged in the manufacture or distribution of items... -
Page 8: Security Information
• Do not allow the unit to be exposed to hot, cold or humid conditions. • Service should be carried out only at a Nokia Authorised Service Centre. • Please note that the only way to isolate the Mediamaster completely from... -
Page 9: Remote Control
REMOTE CONTROL This section describes how to operate the Mediamaster using the buttons on the remote control. Some of the functions can also be performed by using the buttons on the front panel. Press once to turn the sound off/on (mute). Press and hold for a few seconds to switch the Mediamaster in and out of standby mode. -
Page 10: Front And Rear Panel
RF-cable to the aerial input of the TV or Mains cable 110-240 V AC Power supply only for connection of a NOKIA indoor TV aerial with signal amplifier. 5V 30 mA. Aerials from other AUDIO L R AUX SCART... -
Page 11: About The Smart Card And Ca Module
Service Provider. Note: CA modules and smart cards are only distributed by Serv- ice Providers and special distributors, not by Nokia. After inserting a card, leave it in the slot permanently. Do not re- move it again, unless you will be asked to do so. This is impor-... -
Page 12: Connecting The Mediamaster
CONNECTING THE MEDIAMASTER The box for your Mediamaster should contain the following items: • the Mediamaster • remote control with 2 AAA batteries • SCART cable (fully connected; 1,0 metre) SCART cable RF cable Mains cable • mains cable • RF cable •... -
Page 13: General
CONNECTING THE MEDIAMASTER Please note the following: • In some block of flats, the roof-mounted aerial system includes a filter and channel selector. If so, the aerial will probably not work with the Mediamaster. Please consult the landlord. • Many older roof-mounted aerials may only receive a limited number of channels. -
Page 14: Connection Of A Video Recorder
CONNECTING THE MEDIAMASTER Connection of a video recorder • Connect a SCART cable between the main SCART socket on the TV and the TV SCART socket on the Mediamaster. • Connect an RF cable from the TV/VCR output on the Media- video master to the RF input socket on the video. -
Page 15: Procedure When Rf Connections Are Used
CONNECTING THE MEDIAMASTER Procedure when RF connections are used This procedure is necessary only when your Mediamaster is connected to the TV with an RF lead and no SCART leads are used. To tune your TV to the RF signal you might also need your TV manual in addition to this manual. -
Page 16: First Time Installation
FIRST TIME INSTALLATION General information Once you have correctly connected the Mediamaster, you also have to perform a “First time installation.” During this procedure, helpful information is displayed at the bot- tom of the menus. Please note! The select button always confirms a selection within these menus, and pressing it will take you to the next step in the instal- lation process. -
Page 17: Time Adjustment
FIRST TIME INSTALLATION Channel search in progress This menu will be shown as long as the Mediamaster is search- ing for TV and radio channels. All channels found will be listed on the screen. Please note that the search procedure may take a few minutes. You can cancel the search at any time by pressing select. -
Page 18: The Navi™ Bars Navigator
NAVI™ BARS NAVIGATOR General information Bookmark Bookmark name • Press select to open the Navi™ Bars Navigator. In order to select TV or radio channels and to change system set- tings you will use the Navi™ Bars Navigator. In this manual the name is shortened to Navigator. -
Page 19: The "Control" And "Settings" Folders
NAVI™ BARS NAVIGATOR The “Control” and “Settings” folders Both of these system folders contains a few bookmarks. Each of these bookmarks contains menus from where you can make different settings. The system folders can not be deleted. The manual will now explain the different settings you can per- form from the Control and Settings folders, starting with the bookmarks from the Control folder. -
Page 20: Control Folder Edit Channels
NAVI™ BARS NAVIGATOR Control folder Edit channels From these menus you can create and edit favourite channel lists. You can add, delete, rename and arrange the order of the chan- nels within the favourite lists. The “All TV” list might contain lots of channels. By creating your own favourite lists you can make channel handling more convenient. - Page 21 NAVI™ BARS NAVIGATOR • Enter the name as follows: Press the numerical button corresponding to the character you want: once for the first character, twice for the second and so The available characters are listed below. * # & % $ , ! ; - + ) / \ @ ^ 1 m n o 6 Ö...
- Page 22 NAVI™ BARS NAVIGATOR Add/Delete channels From this menu you add and remove the channels in your favour- ite lists. You use the “All TV” or “All radio” list as basis to select the channels from. A channel is added or removed from the list by pressing info. The square to the right on a line will be empty for removed channels, and will contain an “x”...
-
Page 23: Control Folder Timer
NAVI™ BARS NAVIGATOR Control folder Timer General You can make the Mediamaster to start and stop at a predefined time. The timer function is very useful when you want to record a pro- gramme and you are unable to start/stop the recording event yourself, or when you just want to be reminded of the start of a programme you do not want to miss. -
Page 24: Settings Folder Channel
NAVI™ BARS NAVIGATOR Settings folder Channel When you want to search for channels at a later time. To open this menu you will be asked to enter your access code. From the factory the access code is set to 1234. A channel search procedure can be performed in different ways: Automatic, Manual or Advanced manual search. -
Page 25: Settings Folder Tv
NAVI™ BARS NAVIGATOR Settings folder To open this menu you will be asked to enter your access code. From the factory the access code is set to 1234. From here you can adjust the audio/video settings for your Media- master. TV screen format Select your TV screen format. -
Page 26: Settings Folder Modem
NAVI™ BARS NAVIGATOR Settings folder Modem General Some Service Providers make it possible for you to order e. g. movies via an external phone modem. Normally you do not need to change any of the following settings. They are there to make it possible to use any external modem that accepts AT commands. -
Page 27: Settings Folder Access Ctrl
1234. DO NOT FORGET IT! Without it you do not have ac- cess to any of the functions where the code is required! If you forget it, you have to contact an Authorised Nokia Service Centre to get help. -
Page 28: Settings Folder Sw Update
NAVI™ BARS NAVIGATOR Settings folder SW update In order to keep the Mediamaster up-to-date, it will be possible to download new versions of the system software (SW). New software may include new or improved features for existing menus. Enter this menu to check for new software. If new software is available you will get information in the menu on how to proceed. -
Page 29: Viewing Mode
VIEWING MODE General Information The following describes the basic functions of your Mediamaster while watching terrestrial digital TV . Some of the functions described here are dependent on the Service Provider and can only be used if they are included in the transmitted programme information. -
Page 30: Extended Programme Information
VIEWING MODE Extended programme information The Mediamaster can display information about programmes cur- rently being broadcasted as well as those that will be broadcasted next. This procedure is the same for both TV and radio mode. By pressing info while watching TV you will get the “Programme information”... -
Page 31: Tv Release (0)
VIEWING MODE TV Release (0) With the 0 button you can toggle between external connected equipment, such as e. g. a digital terrestrial TV or a Video recorder (the video must be switched on.) (This is only valid when the units are connected via SCART cables, and not by RF connection.) Teletext Pressing txt will open a teletext page (if teletext is transmitted.) -
Page 32: Glossary
GLOSSARY OF TERMS AC-3 Multichannel digital audio encoding system. Program Clock Reference. Access Authorisation to use the coding system to purchase / or- Packet Identifier. der TV programmes. PIN code Access code Personal Identification Number. A four-digit code stored A four-digit code stored in the Mediamaster. Used to in the smart card. -
Page 33: Problem Solving
PROBLEM SOLVING Problem Possible causes What to do The LED on the front panel does Mains cable is not connected. Check that the mains cable is not light up/is not lit. plugged into the power socket. The left LED is shining red The Mediamaster is in standby Press the standby button to bring the mode. -
Page 34: Technical Specifications
TECHNICAL SPECIFICATIONS Transmission Standards DVB, MPEG 2, OFDM Conditional Access system: For 210 T and 212 T: One slot on the left side for a Common Interface CA module (DVB and PCMCIA Standards). RF input Modulator output For 212 T only: The right card slot is intended for a Viaccess In-/output connector IEC female / IEC male smart card. - Page 36 Nokia is a registered trademark of Nokia Corporation www.nokia.com 66 76993-20 © 0222...
Need help?
Do you have a question about the Mediamaster 210 and is the answer not in the manual?
Questions and answers