Table of Contents
Advertisement
Advertisement
Table of Contents

Related Manuals for Nokia Mediamaster 9602 S


Summary of Contents for Nokia Mediamaster 9602 S
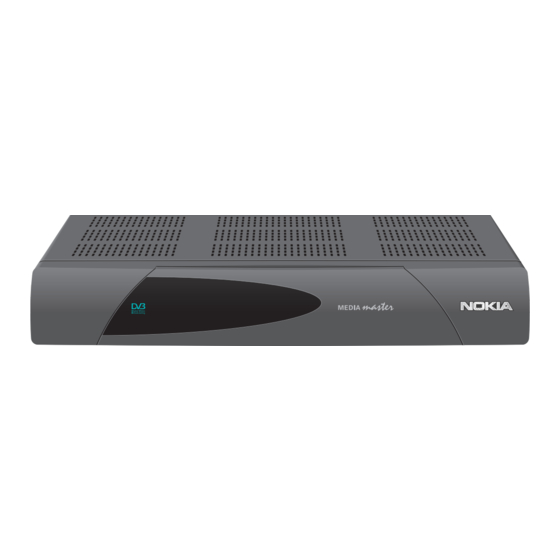
- Page 1 Owner’s Manual Mediamaster 9602 S 9610 S GB 1...
- Page 2 GB 2...
-
Page 3: Table Of Contents
230 V mains supply is Subtitling and Teletext. The TEXT button to unplug the mains lead! Settings from the Main Menu • Nokia is proud to offer a high Radio Guide, TV Guide quality product. To keep this level of quality, service should... -
Page 4: Installation Of The Mediamaster
Installation of the Mediamaster The box for your Mediamaster should contain the following items: • the Mediamaster • a remote control handset with batteries GUIDE MENU EXIT • a fully featured SCART cable which can be used to connect your Mediamaster to the TV or video recorder TEXT •... -
Page 5: Overview Of Connections
Overview of connections Mains lead 0/12 VOLT TV SCART TELEPHONE LINE LNB * 230 V AC +/- for an external for the audio / for modem Satellite dish 15%,50 Hz LNB switch video input of connection to the input (F- the TV set telephone jack connector) -
Page 6: Connecting To Different Units
Connecting to the TV set • Do not remove the cable from the TV to the TV aerial. • Connect one end of the SCART cable to the TV SCART socket on the back of the Mediamaster and the other end to the SCART input socket on your TV. -
Page 7: Connecting To A Hi Fi System
In order to switch the signal from the dish between the ana- Mediamaster logue and digital receivers, you need a Nokia Smart priority switch (see diagram). • Connect a coaxial cable between output A on the NOKIA Smart priority switch (accessory) to the LNB socket on the analogue receiver. Analogue receiver •... -
Page 8: Ca Module And Smart Card
Preparing the remote control handset • Remove the cover on the battery compartment on the bottom of the remote control handset. • Insert the 2 x AAA (1,5 V) batteries, as shown in the diagram, taking care to observe the + and - markings indicated inside. •... -
Page 9: Remote Control
Remote control This section describes how to operate the Mediamaster using the buttons on the remote control. You can also change programmes by pressing buttons on the Mediamaster‘s front panel. To turn the Mediamaster on/off (standby). Press once to switch to audio language/audio track Press twice to switch to radio mode. -
Page 10: Before You Go On
Before you go on... please read this concerning menus and buttons Menu Information Before you do anything else, please read the following explana- tion of how to operate the menus which will appear on the TV screen. A menu is a field of text shown on the TV screen. These menus contain different kinds of information and give the possibility to select between alternatives. -
Page 11: About Smart Card And The Ca Module
About Smart Card and the CA Module To be able to receive pay-TV channels you will need an CA Mo- dule and a Smart Card from the Service Provider of your choice. The Service Provider is the distributor of the programmes. If you are subscribing to services from more than one Service Provider, you might have to change between two Smart Cards, or even between two CA Modules. -
Page 12: Basic Settings
Basic Settings The Welcome Menu To install the Mediamaster properly you have to perform a few settings. You will always be guided by the information in the menus. When you have finished the setup procedure you can start watch- ing TV channels and listen to Radio channels. Push the button on the remote control to start the Media- master from stand-by position. -
Page 13: Dish Adjustment
If you have a single satellite dish equipped with 2 LNBs; or two dishes with one LNB on each: The Mediamaster is preprogrammed for the LNB combination ASTRA/HOTBIRD. It is also preprogrammed for the connection of an external switch. This external switch should be either; DiSEqC 1 A so called DiSEqC swich (Level 1 or 2 type), or;... - Page 14 Channel Search From the Channel Search menu the Mediamaster will automati- cally search for TV and Radio channels digitally transmitted from the satellite which your dish is aimed at. The search will be performed in a predetermined way, and all channels found will be listed in two columns on the screen.
- Page 15 DiSEqC input selection: There are in principle two kinds of ex- ternal DiSEqC switches on the market at present. One for con- nection of two LNBs. The other one for connection of up to 4 LNBs. If you connect a two input switch that it is of a so called “Tone Burst”...
-
Page 16: Viewing Tv
Viewing TV Start/stop watching TV To start the Mediamaster from standby mode, press the but- ton, TV button or one of the number buttons on the remote con- trol. It is also possible to start by pressing the button behind the lid on the front of the Mediamaster. -
Page 17: The Radio Button
The Radio button Pressing the button once gives you a menu where you can change the spoken language in the present TV programme. (This provides that more than one language is transmitted). Some TV channels also transmits radio channels selectable from this menu. -
Page 18: Video Recorder
Video recorder If a Video Cassette Recorder (VCR) is connected you can watch/ record video tapes. When you press the Start button on the VCR the playback will start and interrupt the TV programme from the Mediamaster. To watch TV programmes again, press the TV button or stop the VCR. -
Page 19: Settings From The Main Menu
Settings from the Main Menu How to show the Main Menu Press the MENU button and you will get the Main Menu on the TV screen. Press the TV button to leave the menu. Submenus from the Main Menu If you select one of the highlighted titles and press the OK but- ton, a submenu will be shown on the TV screen. -
Page 20: Radio Channels
TV Channels TV Channels will show a list with the names of the different TV channels. To move faster within the list, use the DOUBLE ARROW buttons. Press OK to enter a marked channel. Radio Channels Radio Channels will show a list with the names of the different Radio channels. -
Page 21: Common Interface
Installation The Installation Menu lets you add settings or change settings already done. More about this Menu in the chapter “Installation Submenus”. Common interface From here you will get access to information and menus con- nected to the Common Interface (CA) Module. This information may vary a lot depending on the Service Provider. -
Page 22: Installation Submenus
Installation Submenus Installation Select this Menu from the line “Installation” in the Main Menu. The submenu will give you the opportunity to change the prefer- ences performed during first time installation. You can also add features that were not included from the first time installation. Please note that helpful information for every line is given at the end of the menu. -
Page 23: Channel Search
Channel Search The information to enter in this menu is available in magazines concerning satellite TV reception, or from your Service Provider. Antenna Configuration Name: Step between the names you have entered in the “Antenna Configuration Set-Up” menu. (Practically, this means that you select between the connected LNBs). -
Page 24: Edit Channels
Edit Channels Select “TV Channels” or “Radio Channels”. From these menus you can change the order of the TV and radio channels to your needs by simply selecting and moving a chan- nel to a new position. You may also delete unwanted channels. Follow the instructions in the menu. -
Page 25: Telephone Modem Settings
Time Adjustment: Adjust the clock in steps of ± 1/2 hour. Display volume indicator: Possibility to turn on/off the Volume Indicator on screen. LNB Adjustment: If the cable up to the LNB is very long it might be necessary to increase the Voltage by 0,5 V. Telephone Modem Settings If you are connected to the Telephone net via the built in Modem, make the necessary settings from this menu. -
Page 26: Future Services
Future Services Phone Modem The Mediamaster has a built-in Phone Modem. The connection of the modem to the ordinary telephone plug is required for ac- cess to future on-line services such as Near Video on Demand and Pay per View. For the full functionality of your subscription we recommend that you do not disconnect the phone plug. -
Page 27: Glossary Of Terms
Glossary of terms Access Authorisation to use the coding system to MPEG Moving Picture Experts Group. A system for purshase/order TV programmes. compression of digital data. Audio system With digital satellite reception, the NVOD Near Video On Demand. System for ordering pro- sound is transmitted in packages and is selected either grammes. -
Page 28: Technical Specifications
Technical Specifications Transmission Standards Control output, 0/12 VOLT DVB, MPEG-2 Connector 1 x RCA/Cinch Connections Voltage 0/12 V 50 mA LNB / Tuner input Conditional access system: Connector 1x F-type (LNB) Interface for the Common Interface RF input frequency 950-2150 MHz CA-module (DVB Standard) RF input power level -20 to -70 dBm Front panel, display 8 character alphanumeric matrix... - Page 29 9602 S 9610 S 66 76915-12 © 9901 Nokia is a registered trademark of Nokia Corporation GB 29...
Need help?
Do you have a question about the Mediamaster 9602 S and is the answer not in the manual?
Questions and answers