Table of Contents
Advertisement
Quick Links
Advertisement
Table of Contents

Related Manuals for Malaguti Madison3 250ie


Summary of Contents for Malaguti Madison3 250ie
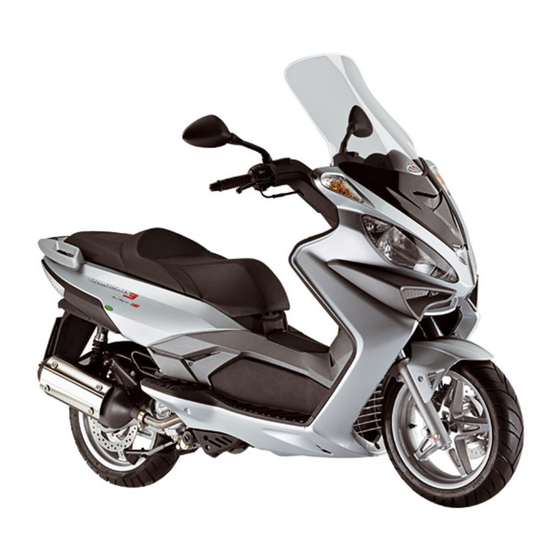
- Page 1 FRAME AND RUNNING GEAR WORKSHOP MANUAL...
-
Page 2: Table Of Contents
FRAME AND RUNNING GEAR MADISON 3 INTRODUCTION INDEX 250 ie 1 - INTRODUCTION FRONT WHEEL ............. 23 FRONT BRAKE DISC ..........25 INTRODUCTION............. FRONT MUDGUARD..........25 Manual updates ..............FRONT FAIRING ............ 26 NOTES FOR EASY CONSULTATION..... Modified pages .............. - Page 3 FRAME AND RUNNING GEAR MADISON 3 INDEX 250 ie RADIATOR.............. 62 RADIATOR (assembly) ......... 64 HORN ..............65 BRAKE CALIPERS OVERHAUL......65 Overhaul of rear caliper ............ Overhaul of front caliper ........... BRAKE MASTER CYLINDERS ......69 BLEEDING THE BRAKE SYSTEM.
-
Page 4: Introduction
Some information has been given to us by the engine manufacturers. We therefore decline all respon- sibility for any error, omission or misrepresentation. MALAGUTI reserves the right to make any changes and modifications hereto it deems necessary without prior notice. -
Page 5: Symbols
FRAME AND RUNNING GEAR MADISON 3 INTRODUCTION 250 ie SYMBOLS • Symbols are provided for quick and easy reference (see the relevant heading), identifying situations requiring utmost attention or providing practical suggestions or simple information. • These symbols may appear next to a text (in which case they refer solely to the text itself), next to a figure (in which case they refer to the topic illustrated in the figure and to the relative text), or at the top of the page (in which case they refer to all the topics dealt with in the page). -
Page 6: Recommendations
FRAME AND RUNNING GEAR MADISON 3 INTRODUCTION 250 ie GENERAL WORK PROCEDURES • The advice, recommendations and warnings given hereafter are aimed at ensuring maximum work safety as well as at considerably reducing the risk of accidents, personal injury, equipment damage and idle times. We therefore recommend observing such advice, recommendations and warnings scrupulously. - Page 7 FRAME AND RUNNING GEAR MADISON 3 INTRODUCTION 250 ie Never use open flames for any reason. Never leave open containers or containers not suitable for holding fuel in passageways, close to heat sources. etc. Never use petrol to clean the vehicle or the workshop floor. Always use low flash point solvents to clean the vehicle components.
-
Page 8: Operating Symbols
FRAME AND RUNNING GEAR MADISON 3 INTRODUCTION 250 ie OPERATING SYMBOLS IMPORTANT! CAUTION! - Descriptions concerning operations that are potentially hazardous for the maintenance mechanic or repairman, other workshop personnel or extraneous persons, for the environment, for the vehicle, and for the tools and equipment. DISCONNECT POWER - Before performing the work described, disconnect the battery negative cable. -
Page 9: Getting To Know Your Scooter
GETTING TO KNOW MADISON 3 YOUR SCOOTER 250 ie TECHNICAL DATA MALAGUTI SpA reserves the right to modify technical data at any time without prior notice. 06039483 DIMENSIONS FUEL SYSTEM wheel base (A), m ..........1.410 Electronic injection with electric fuel pump. -
Page 10: Dimensional Check Of Frame
FRAME AND RUNNING GEAR GETTING TO KNOW MADISON 3 YOUR SCOOTER 250 ie DIMENSIONAL CHECK OF FRAME If the scooter has been involved in an accident and you suspect even slight distortion of the frame it is essential to perform the dimensional checking procedure before any further “repair or set-up” work. Control dimension (A) must be 1220 mm with a tolerance of ±... -
Page 11: Maintenance
The maintenance schedule is based on average riding conditions. Machines subject to severe use or ridden in unu- sually wet or dusty conditions or off the road require more frequent servicing. Certain simple checks, i. e. those marked with an asterisk, MAY be performed under the direct re- sponsibility of technicians not specifically authorised by MALAGUTI. 05/06... -
Page 12: Disassembly
FRAME AND RUNNING GEAR MADISON 3 DISASSEMBLY 250 ie REAR-VIEW MIRRORS 06039057_1 • Lift rubber boot then undo nut (D) and mirror (A). RIGHT-HAND MIRROR is fitted by screwing it COUNTER-CLOCKWISE. LEFT-HAND MIRROR is fitted by screwing it CLOCKWISE. CENTRAL FAIRING 06039029_1 •... -
Page 13: Changing The Front Turn Indicator Bulb
FRAME AND RUNNING GEAR MADISON 3 DISASSEMBLY 250 ie • Disengage central fairing (B) and remove it from sco- 06039041_1 oter, rotating it forwards. CHANGING THE FRONT TURN INDICATOR 06039029_1 BULB • Remove panels (A) by prising with a screwdriver. •... -
Page 14: Windshield
FRAME AND RUNNING GEAR MADISON 3 DISASSEMBLY 250 ie WINDSHIELD 06039045_1 • (Remove central fairing). • Undo screws (V6). • Remove windshield (A). • Recover the rubber grommets under the screws. 05/06... -
Page 15: Upper Handlebar Cover
FRAME AND RUNNING GEAR MADISON 3 DISASSEMBLY 250 ie UPPER HANDLEBAR COVER 06039048_1 • (Remove rear-view mirrors). • Undo screws (V2a) and (V2b). • Remove upper handlebar cover (A). ACCESSIBILITY 06039059_1 Removing the front handlebar cover provides access to the following components: •... -
Page 16: Right-Hand Control
FRAME AND RUNNING GEAR MADISON 3 DISASSEMBLY 250 ie RIGHT-HAND CONTROL 06039385 • (Remove rear-view mirrors). • (Remove upper handlebar cover). • Unscrew union (B). • Undo screw (V) and remove counterweight. • Disconnect wiring connectors. • Undo screws (V2) and remove throttle control. •... -
Page 17: Ambient Temperature Sensor
FRAME AND RUNNING GEAR MADISON 3 DISASSEMBLY 250 ie AMBIENT TEMPERATURE SENSOR 06039060_1 • (Remove rear-view mirrors). • (Remove upper handlebar cover). • Detach the connector (A). • Remove sensor (B) from lower handlebar cover (C). 06039021_1 The sensor must be mounted EXTERNAL- LY to the lower handlebar cover, as shown in the figure. -
Page 18: Handlebar Lower Cover
FRAME AND RUNNING GEAR MADISON 3 DISASSEMBLY 250 ie HANDLEBAR LOWER COVER 06039062_1 • (Remove rear-view mirrors). • (Remove upper handlebar cover). • (Remove right-hand control). • (Remove ambient temperature sensor). • Undo screws (V2). • Undo screw (V). 06039061_1 •... -
Page 19: Sub Panel
FRAME AND RUNNING GEAR MADISON 3 DISASSEMBLY 250 ie SUB PANEL 06039082_1 • Remove footboards (A). • Undo screw (V). 06039085_1 • Undo screws (V4a) and (V4b). 06039086_1 • Remove sub-panel (B). Screws (V4a) are longer than screws (V4b). 05/06... -
Page 20: Accessibility
FRAME AND RUNNING GEAR MADISON 3 DISASSEMBLY 250 ie ACCESSIBILITY 06039088_1 Removing the sub panel provides access to the following components: • Ignition coil (A). • Bank angle sensor (B). • Radiator drain plug (C). 06039090_1 • Side stand switch (D). 06039227_1 05/06... -
Page 21: Speedometer Sensor
FRAME AND RUNNING GEAR MADISON 3 DISASSEMBLY 250 ie SPEEDOMETER SENSOR 06039095_2 • Undo screw (V) ensuring the spacer does not fall. • Disconnect the electronic transmission connector. When refitting, use a feeler gauge, to check that the sensor - disc gap is 1÷2 mm. •... -
Page 22: Front Wheel
FRAME AND RUNNING GEAR MADISON 3 DISASSEMBLY 250 ie FRONT WHEEL 06039093_1 Before disassembly, support the frame at the centre to prevent the scooter from falling. For this purpose, remove sub-panel and pla- ce a stand under frame cradles as shown. •... - Page 23 FRAME AND RUNNING GEAR MADISON 3 DISASSEMBLY 250 ie The figure shows sequence of components for fitting 06039098_1 wheel. • Pin (A). • Washer (B). • Right-hand spacer (C). • Left-hand spacer (D). • Washer (E). • Nut (F). Do not operate the brake lever after remo- ving the wheel, since the pads would come into contact with each other.
-
Page 24: Front Brake Disc
FRAME AND RUNNING GEAR MADISON 3 DISASSEMBLY 250 ie FRONT BRAKE DISC 06039360_1 • (Remove speedometer sensor). • (Remove front brake caliper). • (Remove front wheel) • Undo screws (V5). When reassembling, use new screws and apply a high strength thread locker. 11 ±... -
Page 25: Front Fairing
FRAME AND RUNNING GEAR MADISON 3 DISASSEMBLY 250 ie FRONT FAIRING 06039107_1 • (Remove central fairing). • (Remove windshield). • (Remove front wheel). • (Remove front mudguard). • Undo screws (V2a), (V2b) and (V2c). Recover the bushes located under the screws (V2a). - Page 26 FRAME AND RUNNING GEAR MADISON 3 DISASSEMBLY 250 ie • Undo screws (V5f) and (V2g). 06039122_1 Pay attention to screws (V4) located UNDER 06039125_1 ticket compartment cover, UNDER cover of radiator expansion vessel access compart- ment and UNDER glove compartment door. 06039506_1 05/06...
-
Page 27: Accessibility
FRAME AND RUNNING GEAR MADISON 3 DISASSEMBLY 250 ie • Rotate front fairing (A) forwards then disconnect hea- 06039499 dlight connectors (B). • Remove front fairing (A). During subsequent reassembly, engage 06039133_1 front fairing with metal tab (C). ACCESSIBILITY 06039500 Removing the front fairing provides access to the following components: •... -
Page 28: Main Switch
FRAME AND RUNNING GEAR MADISON 3 DISASSEMBLY 250 ie MAIN SWITCH 06039256_1 • (Remove central fairing). • (Remove windshield). • Disengage front fairing from lower fairing and rest it on front mudguard, taking care not to damage paintwork. • Remove keyswitch ringnut (A), rotating it counter- clockwise through 1/4 of a turn. -
Page 29: Replacing The Headlight Bulbs
FRAME AND RUNNING GEAR MADISON 3 DISASSEMBLY 250 ie REPLACING THE HEADLIGHT BULBS 06039137_1 • Disengage front fairing and rest it on front mudguard, protecting paintwork from scratches. (See “Removing front fairing”). LOW BEAM / HIGH BEAM BULBS (A) • Remove the wiring connector, rubber cap and spring; •... -
Page 30: Rider Seat
FRAME AND RUNNING GEAR MADISON 3 DISASSEMBLY 250 ie RIDER SEAT 06039168_1 • Release the seat lock with the key and tip it to its open position. • Unscrew nuts (D2) and remove the seat, resting it on a supporting surface with the upholstery upwards. PILLION SEAT 06039179_1 •... -
Page 31: Accessibility
FRAME AND RUNNING GEAR MADISON 3 DISASSEMBLY 250 ie ACCESSIBILITY 06039180_1 Removing seat provides access to the following compo- nents: • main charge circuit fuse (30 A) (A); • Battery (B). BATTERY 06039180_1 (See “Installing the battery”.) Note that: - the RED leads must be connected to the battery PO- SITIVE “+”... -
Page 32: Seat Lock
FRAME AND RUNNING GEAR MADISON 3 DISASSEMBLY 250 ie SEAT LOCK 06039185_1 • Remove nut covers and unscrew nuts (D2). • Extract seat lock (A) by pulling downwards and then 06039188_1 disengage it from transmission cable (B) and remove. 05/06... -
Page 33: Helmet Compartment
FRAME AND RUNNING GEAR MADISON 3 DISASSEMBLY 250 ie HELMET COMPARTMENT 06039180_1 • (remove rider seat). • (remove pillion seat). • (Remove battery). • (Remove seat lock). • Undo screws (V2a). • Loosen the screws (V2b). 06039180_1 • Slightly lift helmet compartment (A) and then extract 06039192_1 battery cables (B) and disconnect fuseholder (C). -
Page 34: Accessibility
FRAME AND RUNNING GEAR MADISON 3 DISASSEMBLY 250 ie • Disengage electrical cable (E) for helmet compartment light from cable guide (F), then disconnect connector (G). When reassembling, electrical cable (E) must be reattached to cable guide (F). 06039196_1 ACCESSIBILITY Removing the helmet compartment provides access to the following components: •... -
Page 35: Replacing The Taillight Bulbs
FRAME AND RUNNING GEAR MADISON 3 DISASSEMBLY 250 ie REPLACING THE TAILLIGHT BULBS • (Remove rider seat). • (Remove pillion seat). • (Remove battery). • (Remove helmet compartment). TURN INDICATOR BULB • Turn bulb-holder ringnut (A) counter-clockwise and remove. • Extract bulb by pulling it. -
Page 36: Rear Fairing
FRAME AND RUNNING GEAR MADISON 3 DISASSEMBLY 250 ie REAR FAIRING 06039229_1 • (Remove rider seat). • (Remove pillion seat). • (Remove seat lock). • (Remove battery). • (Remove helmet compartment). • (Remove pillion grab handle). • Undo screws (V4). •... -
Page 37: Accessibility
FRAME AND RUNNING GEAR MADISON 3 DISASSEMBLY 250 ie In the event of breakage of rubber protec- 06039229_1 tion (D), it can be removed after having di- sengaged it from supports (E). ACCESSIBILITY Removing rear fairing provides access to the following components: •... -
Page 38: Instrument Panel
FRAME AND RUNNING GEAR MADISON 3 DISASSEMBLY 250 ie INSTRUMENT PANEL 06039245_1 • (Remove central fairing). • (Remove windshield). • Disengage upper part of front fairing (see “Removing 06039247_1 front fairing”. • Undo screws (V4). • Disconnect connector (A), open clamp (B); then re- 06039254_1 move dashboard. -
Page 39: Lower Fairing And Footboard
FRAME AND RUNNING GEAR MADISON 3 DISASSEMBLY 250 ie LOWER FAIRING AND FOOTBOARD 06039256_1 • (Remove rider seat). • (Remove pillion seat). • (Remove seat lock). • (Remove battery). • (Remove helmet compartment). • (Remove pillion grab handle). • (Remove rear fairing). •... - Page 40 FRAME AND RUNNING GEAR MADISON 3 DISASSEMBLY 250 ie • Remove foam (A) from 12V power socket and detach 06039152_1 connectors (B). When reassembling note that foam (A) must be refitted to protect connectors and soc- ket. • Open hatch (C). 06039260_1 •...
- Page 41 FRAME AND RUNNING GEAR MADISON 3 DISASSEMBLY 250 ie • Temporarily remove flasher unit (G) from vehicle. 06039264_1 • Remove lower fairing and footboard unit (H) from vehi- 06039267_1 cle, turning front part upwards, then slide out towards rear of vehicle. •...
-
Page 42: Accessibility
FRAME AND RUNNING GEAR MADISON 3 DISASSEMBLY 250 ie ACCESSIBILITY 06039286_1 Removing lower fairing and footboard provides access to the following components: • Fuel tank (A). • Side stand switch connector (B). MUFFLER 06039327_1 Before working on the silencer and the exhaust manifold wait until all the compo- nent shave cooled down and always wear suitable protective gloves. -
Page 43: Exhaust Manifold
FRAME AND RUNNING GEAR MADISON 3 DISASSEMBLY 250 ie EXHAUST MANIFOLD 06039326_1 • (Remove silencer). • (Remove helmet compartment). Before working on the silencer and the exhaust manifold wait until all the compo- nent shave cooled down and always wear suitable protective gloves. -
Page 44: Rear Shock Absorbers
FRAME AND RUNNING GEAR MADISON 3 DISASSEMBLY 250 ie REAR SHOCK ABSORBERS Before disassembly, support the frame at the centre to prevent the scooter from falling. • First undo lower screw (Vi); then upper screw (Vs). 45 ± 15% • Remove shock-absorber (A). -
Page 45: Check The Disc And Pads Of The Rear Brake For Wear
FRAME AND RUNNING GEAR MADISON 3 DISASSEMBLY 250 ie CHECK THE DISC AND PADS OF THE REAR BRAKE FOR WEAR 2 mm • Take the opportunity to check also wear of the brake disc. If the disc is badly damaged or the thickness less than 05053576 3.5 mm, it must be renewed. - Page 46 FRAME AND RUNNING GEAR MADISON 3 DISASSEMBLY 250 ie • Undo screws (V2b) and the screw (Va). Watch out for the bush under the screw (Va). • Slightly lift rear mudguard (F). • Remove swing arm (G). There is a spacer behind the swing arm si- milar to the spacer IN FRONT of the arm;...
-
Page 47: Rear Disc
FRAME AND RUNNING GEAR MADISON 3 DISASSEMBLY 250 ie Before reassembling, grease shaft (N) abundan- tly, especially on the splines. 06039362_1 REAR DISC • (Remove silencer). • (Remove rear brake caliper). • (Remove right-hand shock absorber). • (Remove rear wheel). The thickness of the rear brake disc must NEVER be less than 3.5 mm;... -
Page 48: Filter Box
FRAME AND RUNNING GEAR MADISON 3 DISASSEMBLY 250 ie FILTER BOX • (Remove rider seat). • (Remove pillion seat). • (Remove pillion grab handle). • (Remove helmet compartment). • (Remove rear fairing). • (Remove rear wheel). • Undo screws (V3a), screw (Vb) and screws (V9c); now remove cover (A) from airbox. -
Page 49: Engine
FRAME AND RUNNING GEAR MADISON 3 DISASSEMBLY 250 ie The sequence for disassembling the filter box compo- nents is shown in the figure. 06039495 ENGINE • (Remove helmet compartment). • (Remove fairing). • (Remove silencer). • (Remove exhaust manifold). • (Remove shock absorbers). - Page 50 FRAME AND RUNNING GEAR MADISON 3 DISASSEMBLY 250 ie • Disconnect wires (C) from starter motor. 06039382_1 • Undo screw (Vb), disengage hose (D) and underlying wiring. • Disconnect injection control unit connector (E). • Disconnect hoses (D) and (F), injector connector (G), engine temperature thermistor connector (H).
- Page 51 FRAME AND RUNNING GEAR MADISON 3 DISASSEMBLY 250 ie • Disconnect throttle cable (L). • Undo screw (Vb) and disengage clamp from engine. 06039374_1 • Detach hose (M) from water pump. Before disconnecting hose (M), empty the cooling system (see “Removing the radia- tor”).
- Page 52 FRAME AND RUNNING GEAR MADISON 3 DISASSEMBLY 250 ie • Temporarily fit rear wheel on its spindle and lock tem- porarily with its nut. This operation will facilitate removal of en- gine from scooter. • Undo the nut (D). 68 ± 10% •...
-
Page 53: Side Stand
FRAME AND RUNNING GEAR MADISON 3 DISASSEMBLY 250 ie SIDE STAND • Detach springs (A) and undo screw (V). 20 ± 15% SIDE STAND SWITCH • Undo screws (V2). 5 ± 20% • Disconnect connector (A) under the footboard on the right-hand side of the scooter. -
Page 54: Fuel Tank
FRAME AND RUNNING GEAR MADISON 3 DISASSEMBLY 250 ie FUEL TANK • (Remove upper fairing). • (Remove rider seat). • (Remove pillion seat). • (Remove pillion grab handle). • (Remove helmet compartment). • (Remove fairing). • (Remove lower fairing and footboard). •... -
Page 55: Fuel Level Sensor
FRAME AND RUNNING GEAR MADISON 3 DISASSEMBLY 250 ie FUEL LEVEL SENSOR 06039400_1 • (Remove rider seat). • (Remove pillion seat). • (Remove helmet compartment). • Detach connector (A) and undo screws (V4). During this procedure do not use heat and keep sparks and naked flames well clear of the scooter. -
Page 56: Sub-Fairing
FRAME AND RUNNING GEAR MADISON 3 DISASSEMBLY 250 ie SUB-FAIRING • Loosen all screws (V4) and remove one for each brac- ket (A); then turn latter until to align them with ope- ning in sub-fairing (B). 06039402_1 • Undo screw (V) and remove sub-fairing (B) passing slider stanchion tubes through relative opening. -
Page 57: Front Fork
FRAME AND RUNNING GEAR MADISON 3 DISASSEMBLY 250 ie FRONT FORK 06039315_1 • (Remove front fairing). • (Remove windshield). • (Remove upper fairing). • (Remove upper handlebar cover). • (Remove handlebar). • (Remove mudguard). • (Remove front brake caliper). • (Remove speedometer sensor). -
Page 58: Front Damper
FRAME AND RUNNING GEAR MADISON 3 DISASSEMBLY 250 ie FRONT DAMPER RIGHT • (Remove mudguard). • (Remove upper fairing). • (Remove wheel). • (Remove sub-fairing). LEFT • (Remove mudguard). • (Remove upper fairing). • (Remove wheel). • (Remove brake caliper). •... -
Page 59: Checking The Oil Level In The Damper
FRAME AND RUNNING GEAR MADISON 3 DISASSEMBLY 250 ie CHECKING THE OIL LEVEL IN THE DAMPER If the front suspension bottoms out or makes anomalous noises, check the oil level in the dampers as follows: • Remove upper cover (A); •... -
Page 60: Changing The Fork Oil
FRAME AND RUNNING GEAR MADISON 3 DISASSEMBLY 250 ie CHANGING THE FORK OIL • Place a container under the damper and remove screw (V). • Allow as much oil as possible to drain out. • Disassemble the dampers as described above. •... -
Page 61: Radiator
FRAME AND RUNNING GEAR MADISON 3 DISASSEMBLY 250 ie RADIATOR • (Remove upper fairing). • (Remove lower fairing and footboard). DANGER OF BURNS! Before proceeding, make sure that the coo- lant temperature is lower than 50 °C. • Open expansion vessel cap (A). 06039410_1 •... - Page 62 FRAME AND RUNNING GEAR MADISON 3 DISASSEMBLY 250 ie • Use a felt-tip pen to mark position of screw (V) with respect to its hole. • Remove rubber protection then undo screw (V) and allow coolant to continue to flow from radiator cap. Marking position of screw (V) eliminates risk of overtightening it at time of reassembly.
- Page 63 FRAME AND RUNNING GEAR MADISON 3 DISASSEMBLY 250 ie When reassembling remember to insert 06039090_1 ground cable (D) under right-hand screw (V2b). 06039410_1 RADIATOR After having refitted the radiator and filled the cooling system by pouring coolant into filler point (A), bleed air from the system as follows: loosen screw (V) and allow ALL THE AIR to escape;...
-
Page 64: Horn
FRAME AND RUNNING GEAR MADISON 3 DISASSEMBLY 250 ie HORN 06039412_1 • (Remove upper fairing). • (Remove sub-fairing). • Undo screw (V) and disconnect the cables. For subsequent reassembly, connect BLUE wire to the horn INTERNAL terminal and ORANGE wire to the EXTERNAL terminal. BRAKE CALIPERS OVERHAUL OVERHAUL OF REAR CALIPER •... - Page 65 FRAME AND RUNNING GEAR MADISON 3 DISASSEMBLY 250 ie • Apply a low pressure jet of compressed air to the oi- lway (E) in which the brake fluid union was fitted in order to cause the two plungers to be ejected from their seats in the two halves of the caliper;...
-
Page 66: Overhaul Of Front Caliper
FRAME AND RUNNING GEAR MADISON 3 DISASSEMBLY 250 ie OVERHAUL OF FRONT CALIPER • Unscrew pins (V2) from their seats (C) and remove pads (D). 20 ± 20% NOTE The brake pads can be removed and chan- ged without having to disassemble the brake calipers from the scooter. - Page 67 FRAME AND RUNNING GEAR MADISON 3 DISASSEMBLY 250 ie • Remove wiper seal ring (B) and oil seal ring (C) rela- tive to both plunger cylinders. During this procedure take care not to da- mage the wiper seal and oil seal grooves. •...
-
Page 68: Brake Master Cylinders
FRAME AND RUNNING GEAR MADISON 3 DISASSEMBLY 250 ie BRAKE MASTER CYLINDERS Empty the hydraulic circuit and drain the fluid into a con- tainer so that it may be disposed of in compliance with statutory environmental and waste disposal legislation. Beware of possible spills and splashes of brake fluid. -
Page 69: Bleeding The Brake System
FRAME AND RUNNING GEAR MADISON 3 DISASSEMBLY 250 ie BLEEDING THE BRAKE SYSTEM REAR BRAKE CALIPER NOTE Position the scooter so that it is stable and perfectly level. • Remove master cylinder reservoir cover (A) (left-hand side), unscrewing the relative two screws, so that you can replenish the brake fluid. -
Page 70: Securing Clamps
FRAME AND RUNNING GEAR MADISON 3 DISASSEMBLY 250 ie SECURING CLAMPS 06039315_1 The following description contains a list of the main se- curing clamps on the vehicle, together with an indication of the component they fasten (in some cable harnesses the position of the clamp is shown by means of coloured adhesive tape). - Page 71 FRAME AND RUNNING GEAR MADISON 3 DISASSEMBLY 250 ie 1. Main wiring harness 06039286_1 2. Rear brake hydraulic fluid line 3. Fuel pump delivery and return tubes 4. Rubber boot protecting voltage regulator connector 06039288_1 5. Frame right-hand side wiring fixing 06039285_1 05/06...
- Page 72 FRAME AND RUNNING GEAR MADISON 3 DISASSEMBLY 250 ie 1. Lambda sensor wiring 06039339_1 2. Coil cable Sidestand switch wiring 3. Bank angle sensor wiring 06039320_1 05/06...
Need help?
Do you have a question about the Madison3 250ie and is the answer not in the manual?
Questions and answers