Zycoo CooVox-U20 User Manual
Hide thumbs
Also See for CooVox-U20:
- User manual (92 pages) ,
- Quick installation manual (8 pages) ,
- Quick installation manual (8 pages)
Table of Contents
Advertisement
Quick Links
Advertisement
Table of Contents

Related Manuals for Zycoo CooVox-U20


Summary of Contents for Zycoo CooVox-U20
-
Page 2: Table Of Contents
2.6.1 Follow Me Settings ......................36 2.6.2 Call Recording ....................... 36 2.6.3 Call Forward ........................37 2.6.4 Voicemail ........................37 2.7 C ) ........................39 ENTER UEUES 2.8 C ..........................42 ONFERENCE RIDGE Copyright © ZYCOO All rights reserved. V1.0... - Page 3 SYSTEM ........................76 7.1 H U100 ) ......................... 76 TANDBY ONLY 7.2 T ............................77 ETTINGS 7.3 M U50/U100) .................... 78 ODULE ETTINGS UPPORT FOR 7.4 D ............................79 TORAGE 7.5 M ............................80 ANAGEMENT Copyright © ZYCOO All rights reserved. V1.0...
- Page 4 OW TO RESOLVE THE PROBLEM AUDIO PROBLEMS 8.5 H -U50 ......................90 OW TO USE KYPE ON 8.5.1 Visit the Top-up Page ....................90 8.5.2 Manage Skype Account ....................90 8.5.3 Create a SIP File ......................90 Copyright © ZYCOO All rights reserved. V1.0...
- Page 5 15. Before you work on any equipment, be aware of any hazards involved with electrical circuitry and be familiar with standard practices for preventing accidents. If you are in a situation that could cause bodily injury. Copyright © ZYCOO All rights reserved. V1.0...
-
Page 6: Chapter 1 Brief Introduction
CooVox Series IP PBXs come in four sizes: U20 / U50 / U60 / U100. Each model will be introduced in detail below: CooVox-U20 is configured with 2 analog ports: CooVox-U20 CooVox-U50 consists of two main parts:U50 Host and Modules. There are 2 slots in the... -
Page 7: Main Features
Call Forward Call Transfer Call Waiting Call Center Queues Black List Phonebook Flexible Dial Plan Virtual Fax (fax to email, and email to fax) Dial by Name Speed Dial Do Not Disturb Callback Copyright © ZYCOO All rights reserved. V1.0... -
Page 8: Modules
VPN Server (L2TP / PPTP / OpenVPN, up to 10 connections for VPN clients) VPN Client (L2TP / PPTP / OpenVPN / N2N) SNMPv2 IPv4 / IPv6 DDNS(Dyndns.org /No-ip.com /zoneedit.com) 1.3 Modules 4FXS Module 4FXO Module 2FXOS Module 2GSM Module Copyright © ZYCOO All rights reserved. V1.0... -
Page 9: Hardware Interfaces
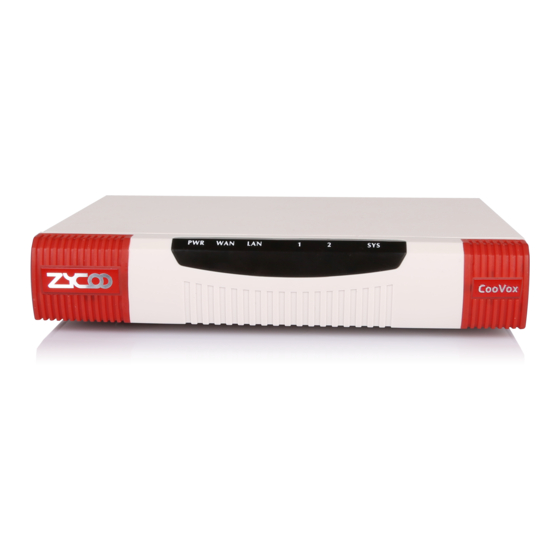
4GSM Module 4BRI Module 1E1/T1 Module 32 EC Module 1.4 Hardware Interfaces 1.4.1 CooVox-U20 CooVox-U20 Front Panel CooVox-U20 Rear Panel 1 * Reset Button 1 * Power Interface ( DC 12V 2A Copyright © ZYCOO All rights reserved. V1.0... -
Page 10: Coovox-U50
Channel Loading Failure Green Channel Loading Success Blink Channel Ringing Channel Loading Failure 1 * Ethernet Interface (10/100Mbps) 2 * Analog Ports(FXO/FXS) 1 * UMTS Port U20 LEDs Indication 1.4.2 CooVox-U50 CooVox-U50 Front Panel Copyright © ZYCOO All rights reserved. V1.0... - Page 11 Channel Loading Success 1-4(SLOT1/2) SLOT 1/2 Status Blink Channel Ringing Channel Loading Failure E1/T1 Module Loading Success (PRI/ Module Loading Failure CPE signal (Only Green NET signal No signal Slot 1) SS7 signal Copyright © ZYCOO All rights reserved. V1.0...
-
Page 12: Coovox-U60
2 * Ethernet Interfaces (10/100/1000Mbps) 1 * VGA Interface 2 * Audio Interfaces 2 * USB Interfaces 1 * Hardware Echo Cancellation Interfaces (onboard) 1 * UMTS Interface for 3G Data (onboard) 24 * Analog Ports (FXO/FXS) Copyright © ZYCOO All rights reserved. V1.0... -
Page 13: Coovox-U100
2 * USB Interfaces 2 * Audio Interfaces SLOT 1 for any Module Cards (4FXO/ 4FXS/ 2FXOS/ 4GSM/ 2GSM/ 1PRI) SLOT 2 for any Module Cards (4FXO/ 4FXS/ 2FXOS/ 4GSM/ 2GSM/ 1PRI/ 4BRI) Copyright © ZYCOO All rights reserved. V1.0... -
Page 14: Model Comparison Table
21,000 mins 200,000 mins 2,500,000 mins (.gsm) (.gsm) (.gsm) (.gsm) Recording 3000 mins 3000 mins 20,000 mins 270,000 mins (.wav) (.wav) (.wav) (.wav) Hardware SDRAM 128MB DDR2 256MB DDR2 1GB DDR3 2GB DDR3 Copyright © ZYCOO All rights reserved. V1.0... -
Page 15: Environmental Requirements
Warranty Card 1 piece Notice: 1) ZYCOO Module cards will only function in CooVox IP PBX from ZYCOO; 2) Module cards for CooVox-U50/U100 will be packed separately but contained in the same package. Copyright © ZYCOO All rights reserved. V1.0... -
Page 16: Chapter 2 Getting Started
(Take CooVox-U50 as example for the guide) 2.1 Before Configuration What kind of IP Phones can be used with this device? SIP Extension: CooFone Series and ZP Series IP Phones provided by ZYCOO (D30/ D30P/ D60) Any standard SIP Phone based on SIP/ IAX2 protocol (eg: CISCO, Grandstream, Yealink, Polycom, Siemens, Snom,etc.) - Page 17 With the default setting, if there is no activity on the page for more than one minute, the system will timeout and automatically log out. To continue making configuration changes, you will need to login again. Network WAN IP and MAC will be displayed Copyright © ZYCOO All rights reserved. V1.0...
-
Page 18: Basic Configuration
Time Settings, Management, Back Up and Upgrade, etc. 2.2.2 Basic Configuration Extension Configuration CooVox Supports SIP/ IAX2 and analog extensions as well as the ability to ”Batch Add Users” by uploading extensions file. Click【Basic】->【Extensions】to configure: Copyright © ZYCOO All rights reserved. V1.0... - Page 19 Click【New User】to see the extension configuration interface as below: Copyright © ZYCOO All rights reserved. V1.0...
-
Page 20: Extension Settings
Audio Codecs Select what audio codecs you need to use. Notice: There are 30 default extensions which number started with “8”*; you can add or delete extension by your requirement. Maximum extensions: 100 Copyright © ZYCOO All rights reserved. V1.0... -
Page 21: Time Based Rules
“if time matches” destination will be used for the call. If the current time of the PBX is outside these parameters, then the “if time does not match” destination will be used for the call. Please set from this page:【Time Based Rule】---【New Time Rule】: Copyright © ZYCOO All rights reserved. V1.0... -
Page 22: Outbound Call
If you want to set up outbound route connected to PSTN (Public Switch Telephone Network) or VoIP provider, please configure on this page:【Basic】->【Trunks】 CooVox supports two kinds of trunks for your choice: VoIP or SIP Trunk and FXO/GSM/PRI/BRI Trunk. Copyright © ZYCOO All rights reserved. V1.0... - Page 23 Password provided by VoIP Provider. Advanced Options Advanced options for this trunk, e.g.: codecs, dialplan, etc. The outbound trunk will be in the list of VoIP Trunk when the trunk is added successfully. Copyright © ZYCOO All rights reserved. V1.0...
- Page 24 Note: each channel can only be included in one trunk group. If no channels appear then all available channels are already defined. BRI / PRI Trunk Please set up BRI/PRI trunk similarly to the FXO/GSM trunk settings above. Copyright © ZYCOO All rights reserved. V1.0...
-
Page 25: Outbound Routes
For example, create “InternalDialPlan” to include all Internal Calling Rules but do not select any outbound dial rules. Select “InternalDialPlan” for all extension users that do not need the ability to make external calls. Click【DialPlans】->【New DialPlan】: Copyright © ZYCOO All rights reserved. V1.0... - Page 26 You can create one or more DialRules for DialPlans from this page: Copyright © ZYCOO All rights reserved. V1.0...
-
Page 27: Inbound Call
For example, user dialed 94166445775 and you selected to delete 1 digit, then 4166445775 is sent out the trunk. If add digit “9”, when dial 12345, 912345 will be sent. Auto-add digit[ ] 2.4 Inbound Call 2.4.1 Inbound Routes Click【Inbound Control】->【Inbound Routes】 Copyright © ZYCOO All rights reserved. V1.0... - Page 28 If you want to select the destination of inbound calls on PRI/BRI or VoIP Trunks based on the incoming DNIS (dialed number or DID). You can specify the DID and destination (user extension, queue, conference bridge, or IVR: Click【 Number DID】->【New Number DID】: Copyright © ZYCOO All rights reserved. V1.0...
-
Page 29: Ivr
(user extension, queue, conference bridge, or IVR) 2.4.2 IVR IVR (Interactive Voice Response) or Automated Attendant will allow callers to select from a specific set of options by pressing the selected digit on their telephone dial pad. Click【Inbound Control】->【IVR】: Copyright © ZYCOO All rights reserved. V1.0... -
Page 30: Ivr Prompts
Select the available options beside the designated digit 2.4.3 IVR Prompts IVR prompts can be recorded by using any extension registered to the PBX or they can be uploaded from the “Upload IVR Prompt” section below. Copyright © ZYCOO All rights reserved. V1.0... - Page 31 Extension used for recording: Select the extension which is used for recording the IVR prompt. Click【Record】, the extension will ring, and the prompt can be recorded after picking up the phone. To hear the existing recording, please click【Play】: Copyright © ZYCOO All rights reserved. V1.0...
-
Page 32: Ring Groups
Once the timeout (number of seconds) is reached, the call will then be directed to the “if not answered” or failover destination. To configure a Ring Group Click 【Inbound Control】 -> 【Ring Groups】 -> 【New Ring Group】 : Copyright © ZYCOO All rights reserved. V1.0... -
Page 33: Blacklist
Input the caller ID in the space provided. Once configured, future calls from this caller ID will be blocked. To maintain this list of blocked numbers, see the instructions in the following diagram: Copyright © ZYCOO All rights reserved. V1.0... -
Page 34: Do Not Disturb
2.4.7 Call Pickup This feature allows users to answer a call that is ringing on another users extension by pressing the selected feature code on their own phone as shown in the diagram below. Copyright © ZYCOO All rights reserved. V1.0... -
Page 35: During A Call
Parking Calls: What Parking space or Default Number : 701 - 720. Define in【Feature Codes】 Extension to park calls on Default is 45 seconds. Define in 【Feature Codes】. How many seconds a call Copyright © ZYCOO All rights reserved. V1.0... -
Page 36: Call Transfer
Default is *2. Define in【Feature Codes】 Default is *, it can be used when you use *2. Define in 【Feature Code】 Complete Attended Transfer Timeout for answer on Default is 15 seconds. Define in【Feature Codes】 attended transfer Copyright © ZYCOO All rights reserved. V1.0... -
Page 37: User Extension Settings
Click【Basic】->【Extension】->【Edit】the extension you want to configure. Check【Web Manager】 and【Save】 Then login the Extension Web Panel: 2.6.2 Call Recording This feature allows users to access calls they have recorded. To configure this setting, please see the diagram below. Copyright © ZYCOO All rights reserved. V1.0... -
Page 38: Call Forward
Calls that are not answered have the option to be sent to a voicemail account so the caller can leave a recorded message. Optionally, these recorded messages may be sent to a user’s email account. Click【Basic】->【Extension】->【Edit】the extension you want to configure. Copyright © ZYCOO All rights reserved. V1.0... - Page 39 If incoming calls are not answered, when the default ring time is over, the system will play: “please leave your message and press the “#”key ”. Then voicemail will be sent to the specified mailbox by email. To Leave a Message Copyright © ZYCOO All rights reserved. V1.0...
-
Page 40: Call Center (Call Queues)
Create Agent To allow a user to be considered an agent in a Call Center queue, please check the “Agent” option for that specific user extension. Click【Basic】->【Extension】->【Edit】the extension you want to configure: Step1: Check【Agent】and【Save】 Copyright © ZYCOO All rights reserved. V1.0... - Page 41 Step2: Click【Inbound Control】->【Call Queues】 Copyright © ZYCOO All rights reserved. V1.0...
- Page 42 . Agent Check each agent that is to be a member of this specific Call Center Queue. Copyright © ZYCOO All rights reserved. V1.0...
-
Page 43: Conference Bridge
The conference bridge can be protected with a password so only callers with the password can access the conference. The software supports up to three conference rooms. To configure a conference bridge, go to 【Advanced】->【Conference】: Copyright © ZYCOO All rights reserved. V1.0... - Page 44 If check this option, all the participants in the conference can hear only, but it is not allowed to speak. Leader Wait Wait until the conference leader(administrator) entering the conference before starting the conference. Copyright © ZYCOO All rights reserved. V1.0...
- Page 45 While in a conference, the administrator can invite new guest (extension user or external number) into the conference. (Default password for admin is 2345) As an administrator, to invite a new guest to the conference, refer to the diagram as below: Copyright © ZYCOO All rights reserved. V1.0...
-
Page 46: Chapter 3 Advanced
Check to enable Music On Ringback. Record Format Set the format for recording files. (GSM/WAV only) Defaut Setting for New User Check to enable the default settings. Extension Preferences Set the rule for extensions. Copyright © ZYCOO All rights reserved. V1.0... - Page 47 Count the Busy Detection. It will be active when enable Busy Detection. Global SIP Settings 【Global SIP Settings】is appropriate for advanced administrators. Please contact our technical support department before modifying anything in this section. Copyright © ZYCOO All rights reserved. V1.0...
-
Page 48: Voicemail
Play the message duration before playing the voice message. Play Envelope Play the date, time and caller ID for the voicemail message. Allow Users to Review Check this option to allow users to review the voice message. Copyright © ZYCOO All rights reserved. V1.0... -
Page 49: Smtp Settings
Message Input the Email template. 3.3 SMTP Settings To allow email messages to be sent to users with attached voicemail and faxmail messages, the SMTP settings need to be configured. Settings】 : Click【Advance】->【SMTP Copyright © ZYCOO All rights reserved. V1.0... -
Page 50: Email To Fax
Specify the email address and click【Send】-to send the test email. Verify that email was successfully sent or not. If no email was received, please modify the SMTP settings and retry. 3.4 Email to Fax Users can send fax by Email. Please configure as below. Copyright © ZYCOO All rights reserved. V1.0... -
Page 51: Music Settings
If you need dial the extension when sending fax, e.g.: fax number: 85337096 ext.800, you need use the 【Access Code】: 985337096-800 as subject. 3.5 Music Settings Management of Music on Hold, Music on Ringback, Music on Queue. 【Music Settings】: Select the different music file for different Music. Copyright © ZYCOO All rights reserved. V1.0... -
Page 52: Disa
PBX. By calling the DISA number, after PIN authentication, the caller hears dial tone and can dial the call. Please configure as below. Click【Advance】->【DISA】--【New DISA】 Copyright © ZYCOO All rights reserved. V1.0... -
Page 53: Follow Me
This feature allows callers to automatically be forwarded to one or more internal extensions and/or one or more external phone numbers when the call is not answered at the primary extension. Please configure as below: Click【Advanced】->【Follow Me】->【New Follow Me】: Copyright © ZYCOO All rights reserved. V1.0... -
Page 54: Call Forward
List Format: Extension Number, Ring Duration E.g.: 806,30 808,20 806 rings, after 30 seconds, the call is going to 808 【Follow Me Options】 3.8 Call Forward The administrator can config the Call Forward on this page: Click【Advanced】->【Call Forward】: Copyright © ZYCOO All rights reserved. V1.0... -
Page 55: Paging And Intercom
Paging group must use phones that support this feature. If the Duplex option is selected, and the listed extensions use phones that support Duplex, then all the phones in the paging group will be able to have two-way conversations. Click【Advanced】->【Paging and Intercom】->【New Paging Group】: Copyright © ZYCOO All rights reserved. V1.0... -
Page 56: Pin Sets
Route can be specified that a valid PIN code from a selected PIN Set must be used in order to have access to a give Outbound route (e.g. for long distance or international calling). Please configure as below. Click【Advanced】->【PIN Sets】->【New PIN Set】: Copyright © ZYCOO All rights reserved. V1.0... -
Page 57: Call Recording
Define PIN codes in this list. 3.11 Call Recording This feature allows an administrator to enable Call Recording to record incoming and/or outgoing calls related to the specified extension. Please configure as below: Click【Advanced】->【Call Recording】->【New Call Recording】: Copyright © ZYCOO All rights reserved. V1.0... -
Page 58: Speed Dial
Smart DID: After extension user makes an outbound call, the call is ringing back to CooVox IP PBX, and directed to the extension who made the last call. Please configure as below. Click【Advanced】->【Smart DID】: Copyright © ZYCOO All rights reserved. V1.0... -
Page 59: Callback
Please configure as below. Click【Advanced】->【Callback】: Enable this function; select DialPlan, and define the callback rule (strip digits or prepend prefix). Copyright © ZYCOO All rights reserved. V1.0... -
Page 60: Phone Book
Search contacts, by name, phone number or speed dial Create Contact Create a contact Delete Contact Delete a selected contact Call Click to call the number directly Click【Create Contact】to see the following diagram: Copyright © ZYCOO All rights reserved. V1.0... -
Page 61: Feature Codes
Define the time for parking calls. CooVox IP PBX will return the call to the extension after this time limit has expired. Pickup Extension This feature code will pick up a call given that the callers extension and the Copyright © ZYCOO All rights reserved. V1.0... - Page 62 “0”. After pressing “0”, you will get dialtone, and you can dial to invite people. After the call is connected, please press ** to direct the people into the conference, or *# to hang up the current call and return to the conference. Copyright © ZYCOO All rights reserved. V1.0...
-
Page 63: Ip Phone Provisioning
There are two operation methods to fulfill this function, please see details as below. Enable DHCP service Click【System】->【Network Advanced】->【Enable】DHCP Server in the following diagram: Then Click【Advanced】->【Phone Provisioning】->【New Phone】: Copyright © ZYCOO All rights reserved. V1.0... - Page 64 Enable Phone Provisioning in【Basic】, select the IP Phone manufacture, input MAC of the phone, and select the extension for provisioning. Notice CooVox IP PBX supports IP Phones from ZYCOO / Yealink / Grandstream now. Copyright © ZYCOO All rights reserved. V1.0...
-
Page 65: Chapter 4 Network Settings
You can configure the WAN Port, and define the Virtual Interface. Click【Network Settings】->【Network】->【IPv4 Settings】: Reference Item Explanation IP Assign Static/ DHCP/PPPoE supported. Virtual Interface Define the virtual interface for WAN Port. Click【Network Settings】->【Network】->【IPv6 Settings】 Copyright © ZYCOO All rights reserved. V1.0... -
Page 66: Static Routing
Enable Enable IPv6, define the IPv6 address, gateway, and DNS. Click【Network Settings】->【Network】->【VLAN Settings】: VLAN Reference: Item Explanation Enable Enable VLAN, define the VLAN address and VLAN ID. 4.2 Static Routing Click【Network Settings】->【Static Routing】: Copyright © ZYCOO All rights reserved. V1.0... -
Page 67: Vpn Server
Click 【Network Settings】 -> 【Static Routing】 -> 【Routing Table】 , the current routing information will be displayed as below: 4.3 VPN Server CooVox IP PBX supports three kinds of VPN servers: L2TP/PPTP/OpenVPN. Click【Network Settings】->【VPN Server】 : Copyright © ZYCOO All rights reserved. V1.0... - Page 68 When the mode is L2TP or PPTP VPN server, click【Network Settings】->【VPN Server】-> 【VPN Users Management】 : This page is used for management of VPN username and password. When the mode is OpenVPN server, click【Network Settings】->【VPN Server】->【OpenVPN Certificate Download】 : Copyright © ZYCOO All rights reserved. V1.0...
-
Page 69: Vpn Client
Click【Network Settings】->【VPN Client】 : Reference: Item Explanation VPN Client Four kinds of VPN Clients supported: L2TP/PPTP/OpenVPN/N2N(Only one mode can be enabled simultaneously) Enable Enable/Disable VPN Client 4.5 DHCP Server Click【Network Settings】->【DHCP Server】 : Copyright © ZYCOO All rights reserved. V1.0... -
Page 70: Ddns Settings
Click【Network Settings】->【DHCP Server】->【Static MAC】->【New Static MAC】: 4.6 DDNS Settings After setting DDNS (Dynamic Domain Network Server), CooVox IP PBX settings will be visited remotely. Click【Network Settings】->【DDNS Settings】 : CooVox supports DDNS provided by Dyndns.org / No-ip.com / zoneedit.com. Copyright © ZYCOO All rights reserved. V1.0... -
Page 71: Snmpv2 Settings
Define the name of RO Community of SNMP RO Network Define network of RO 4.8 Trouble Shooting You can ping other network device through CooVox IP PBX and track network routing by command "Traceroute" . Click【Network Settings】->【TroubleShooting】: Copyright © ZYCOO All rights reserved. V1.0... -
Page 72: Chapter 5 Security
Deny IP(192.168.0.3)to access 80 port iptables -A INPUT -s 192.168.0.3 -p tcp --dport 80-j DROP 5.2 Service 【Service】: settings of SSH/FTP and HTTP Port. Click【Security】->【Service】: Enable SSH to login background management system through SSH. Copyright © ZYCOO All rights reserved. V1.0... -
Page 73: Sip Allowed Address
Enable FTP to allow uploading files to system through FTP. 5.3 SIP Allowed Address Define an allowed address, from which every SIP request will never be filtered or refused. Click【Security】->【SIP Allowed Address】: Copyright © ZYCOO All rights reserved. V1.0... -
Page 74: Chapter 6 Report
6.1 Register Status Check status of all kinds of users & trunks. 6.2 Record List Check recordings of specified extension or conference here, or delete the recording file. 【Record List】: 【Conference】: 【One Touch Recording】 Copyright © ZYCOO All rights reserved. V1.0... -
Page 75: Call Logs
CooVox IP PBX. The number in the call logs can be added in the phone book directly: 6.4 System Logs Click【Report】->【System Logs】, you can download/ delete the system logs. Copyright © ZYCOO All rights reserved. V1.0... - Page 76 Copyright © ZYCOO All rights reserved. V1.0...
-
Page 77: Chapter 7 System
Set the virtual IP address. The primary server and slave Virtual IP server must use same virtual IP address SYNC Network Rate Select the server network rate. Status Fresh Time Set the status fresh time(sec) Copyright © ZYCOO All rights reserved. V1.0... -
Page 78: Time Settings
Select your time zone so that the system will set time based on the time zone. 【Manual Time Set】: After entering Year/ Month/ Day/ Hour/ Minute, then save and activate. Or, you can click【Sync】to synchronize with current PC time. Copyright © ZYCOO All rights reserved. V1.0... -
Page 79: Module Settings (Support For U50/U100)
One of 'd4' or 'esf' for T1; 'cas' or 'ccs' for E1. Coding One of 'ami' or 'b8zs' for T1; 'ami' or 'hdb3' for E1. CRC4 Enable CRC4 Verification. ISDN BRI module Copyright © ZYCOO All rights reserved. V1.0... -
Page 80: Data Storage
Directory Define a directory used for storage on FTP server. Automatically upload frequency Define frequency by days to upload the data. (day) Time of automatically upload Define the time to upload the data. Copyright © ZYCOO All rights reserved. V1.0... -
Page 81: Management
Check from【Data Storage Log】: Click【Refresh】to refresh data storage log. Click【clear】to clear data storage log. 7.5 Management 【Management】is used for modify password of CooVox system, and the settings of system voice. Click 【System】->【Management】: 7.6 Backup Click【System】->【Backup】 Copyright © ZYCOO All rights reserved. V1.0... -
Page 82: Reset & Reboot
Click【browse】to select the local backup file, and click【Upload】to upload the backup file to system. 7.7 Reset & Reboot If you need reset the system to factory defaults or reset, please click【System】->【Reset & Reboot】: Restoring factory settings will make configuration data in the system lost. Copyright © ZYCOO All rights reserved. V1.0... -
Page 83: Upgrade
Click【Browse】to select the firmware file, then click【Upload】to upload the selected firmware to system and finish the upgrading automatically. If check【Restore Default Set】, the system will clear all the configuration and reset to factory default. 7.8.2 TFTP Upgrade Click【System】->【Upgrade】->【TFTP Upgrade】: Copyright © ZYCOO All rights reserved. V1.0... - Page 84 Restore Default Set System will restore to factory defaults after checking this option. Enter The Package Name Enter the package name for upgrading. TFTP Server IP address Enter your TFTP server IP address. Copyright © ZYCOO All rights reserved. V1.0...
-
Page 85: Chapter 8 Operating Instructions
8.2 How to combine two sets CooVox IP PBX in the same network We start to combine two IP PBXs in the same network and then try to expand to different network. Combine two IP PBXs in the same LAN from the structure as below: Copyright © ZYCOO All rights reserved. V1.0... - Page 86 All extensions on U50-A can call extensions on U50-B by 8XX format. All extensions on U50-B can call extensions on U50-A by 6XX format. Step1: Register U50-B IP to a trunk of U50-A CooVox-U50-A: Click【Basic】->【Trunks】->【New VoIP Trunk】: Copyright © ZYCOO All rights reserved. V1.0...
- Page 87 Step 3: Create DialRule on U50-A, and add the DailRule to the DialPlan Click【Outbound Routes】->【DialRules】->【New Dial Rule】: Select the created line 192.168.1.200 to 【Selected Trunks】 , custom pattern is XXX, save and activate. Click【DialPlans】->【New Dial Plan】: Copyright © ZYCOO All rights reserved. V1.0...
-
Page 88: How To Connect Two Sets Coovox Ip Pbxs In Different Network
IP Phone registers on U50-A as extension 601. Another IP Phone registers on U50-B as extension 801. U50-A IP:192.168.1.100. U50-B IP:192.168.1.200. Extension format of U50-A: 6XX. Extension format of U50-B: 8XX Create an extension 888 with password 123456 on U50-B. Copyright © ZYCOO All rights reserved. V1.0... - Page 89 IAX2 port(4569) on the router. Then, all data received from WAN port of router(192.168.1.100:4569) will be sent to U50-A Now, take the web management panel of Linksys router as example. Copyright © ZYCOO All rights reserved. V1.0...
-
Page 90: How To Resolve The Problem "One-Way" Audio Problems
DDNS. 8.4 How to resolve the problem “one-way” audio problems If U50 is behind router, to resolve the problem, please set up IP address as below: Click【Advanced】->【Option】->【Global SIP Settings】: Copyright © ZYCOO All rights reserved. V1.0... -
Page 91: How To Use Skype On Coovox-U50
Notice First top up for business account must be more than €50. 8.5.2 Manage Skype Account After login, you will find Skype Manager, and click it. 8.5.3 Create a SIP File Click Features: Copyright © ZYCOO All rights reserved. V1.0... - Page 92 Create a SIP account, and each account has a channel, you need pay €5 for each channel as monthly rent. Then input the registration profile in the VoIP trunk of U50 and distribute the money to Outgoing calls. Copyright © ZYCOO All rights reserved. V1.0...
- Page 93 Select the created line 192.168.1.200 to 【Selected Trunks】 , custom pattern is XXX, save and activate. For any questions or problems during installation and use, please feel free to contact our technical support via email: support@zycoo.com or phone : 0086 28 85337096. Copyright © ZYCOO All rights reserved. V1.0...
Need help?
Do you have a question about the CooVox-U20 and is the answer not in the manual?
Questions and answers