
Related Manuals for Zycoo CooVox U80


Summary of Contents for Zycoo CooVox U80
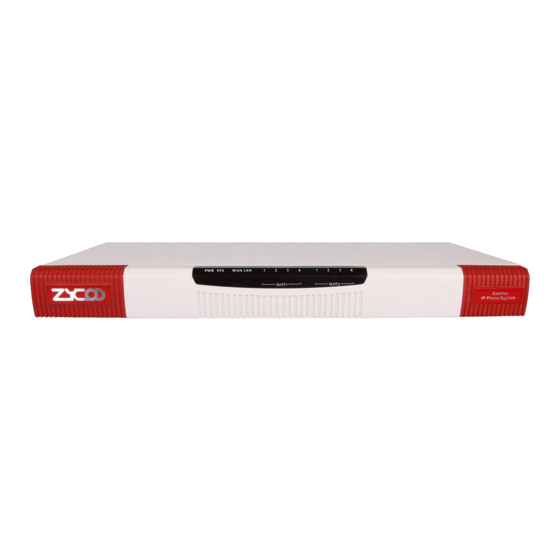
- Page 1 IP PHONE SYSTEM CooVox Series-U80 For Medium and Large Business Quick Installation Guide Quick Installation Guide PWR SYS SLOT2 SLOT1 CooVo x IP Phone System www.zycoo.com...
-
Page 2: Table Of Contents
Table of Contents 1 Package Contents 2 Hardware Installation 2.1 Safety Precautions 2.2 Installation Tools 2.3 Product Installation 2.4 Physical Connection 2.5 LED Definitions 3 Basic System Configuration 3.1 Web Login 3.2 Network Configuration 3.3 Module Settings 4 Further Configuration... -
Page 3: Package Contents
1 Package Contents Thank you for purchasing ZYCOO IP Phone System. These are the items included with your IP Phone System purchase: Power Cord IP PBX Antenna(only for Quick Installation GSM/WCDMA Module) Guide Two mounting brackets Warranty Card and fittings... -
Page 4: Hardware Installation
2 Hardware Installations The followings are instructions for setting up ZYCOO CooVox-U80 IP PBX. Please refer to the illustration and follow the simple steps below to quickly install your IP phone system. 2.1 Safety Precautions Notes: To avoid any device damage and bodily injury caused by improper use, please obey the following rules. - Page 5 To ensure normal operation and long service life of the device, please install it in an environment that meets the requirements described in the following subsection. Please keep a proper temperature and humidity in the equipment room. Too high/low humidity may lead to bad insulation, electricity leakage, m e c h a n i c a l p ro p e r t y c h a n g e s a n d c o r ro s i o n s .
- Page 6 Electromagnetic Interference SLOT1 SLOT2 CooVox IP Phone System Electronic components including capacitance and inductance on the device can be affected by external interferences, such as conducted emission by capacitance coupling, inductance coupling, and impedance coupling. To decrease the interferences, please make sure to take the following measures: Use the power supply that can effectively filter interference from the power grid.
-
Page 7: Installation Tools
Ensure the rack and devices are well earthed. Make sure the power socket has a good contact with the ground. Keep a reasonable cabling system and avoid induced lightning. Use the signal SPD (Surge Protective Device) when wiring outdoor. Note: the device is specially designed for the usage of communication operators’... - Page 8 4BRI Module FXO/FXS Module GSM/WCDMA Module Below are the rules must follow to install ZYCOO module cards. 1.Please refer to module combination table to install the module/modules to the module slots, you must follow the feasible combinations or there will be problems.
- Page 9 Notes: Do not touch any device on the module, just to prevent the module from being damaged by static electricity. This operation must be done with power cut off. The module does not support hot-plugging. Rack Installation To install the device in an EIA standard-sized, 19-inch rack, follow the instructions described below: 1.Check the grounding and stability of the rack.
- Page 10 PW R SY S W A N LA N SL O T1 SL O T2 C o o V o IP P h o n e S y s te m 4.After the brackets are attached to the device, use suitable screws (not provided) to secure the brackets to the rack, as illustrated in the following figure.
- Page 11 If CooVox-U80 IP PBX is installed in the computer room, and the room has dedicated Grounding bar, then the using of ground wire to connect the device with the Grounding bar is put to the first consideration as shown in the following figure. HDMI IP PBX(Rear panel) [2] Grounding Terminal...
-
Page 12: Physical Connection
2.4 Physical Connection Computer SLO T2 SLO T1 HDM I WA N Router PSTN Power 2.5 LED Definitions Indication Function Status Explaination Green Power On Power Status Power Off Wink System is Running System Status System Booting or Failed Wink Data Transmitting WAN/LAN WAN/LAN Interface Status... -
Page 13: Basic System Configuration
3 Basic System Configuration 3.1 Web Login Step 1. Connect a PC directly to CooVox IPPBX WAN port. Change your PC IP address to 192.168.1.xx. Step 2. Start a web browser. To use the user interface, you need a PC with Internet Explorer (version 7.0 or higher), Firefox, Google Chrome. -
Page 14: Network Configuration
Default WAN IP address: 192.168.1.100 Default LAN IP address: 192.168.10.100 Default Username: admin Default Password: admin 3.2 Network Configuration Step 1. Go to Network Settings Network... -
Page 15: Module Settings
Step 2. Configure the network information There are three types of network connection. They are Static, DHCP, PPPoE(Point-to-Point Protocol over Ethernet). You can find detail settings in the user manual. 3.3 Module Settings If you have FXS/FXO/GSM/WCDMA modules installed on CooVox- U80 IPPBX system then you don’t have to configure the module settings, because that’s default module settings for the CooVox- U80 IPPBX system. - Page 16 If BRI module: Save the configurations and confirm to reboot the IPPBX system.
-
Page 17: Further Configuration
You can also browse our online FAQ resource at the ZYCOO Web site first to check if it could solve your issue. If you need more support, please contact ZYCOO support team.
Need help?
Do you have a question about the CooVox U80 and is the answer not in the manual?
Questions and answers