Table of Contents
Advertisement
Quick Links
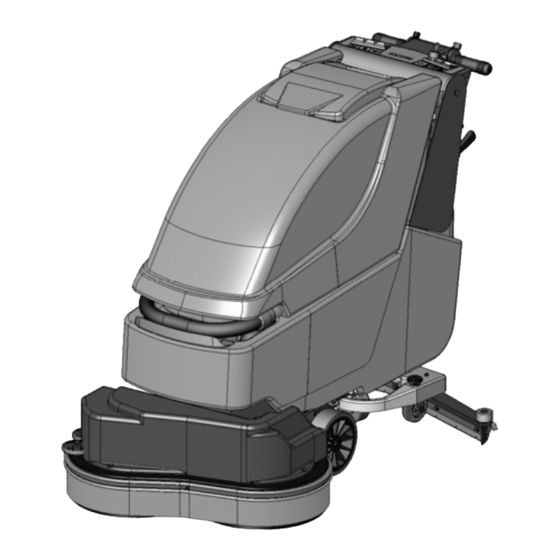
Proteus 26 & 26BA
Operating & Maintenance
This operator's manual has important
information for the use and safe operation
of this machine. Read this manual
carefully before starting the machine.
Keep this manual and tell all operators to
read this manual. If you do not follow the
instructions, you can cause an injury or
damage equipment. Carefully inspect all
components to ensure that there is no
concealed freight damage. If damage is
discovered,
file
DAMAGE REPORT" immediately with the
delivering carrier.
The content of this
manual are based on the latest product
information available at the time of
publication. Pacific Steamex reserves the
right to make changes or improvements to
its machines without notice.
Instructions
READ THIS MANUAL
a
"CONCEALED
For new manuals write to:
2259 S. Sheridan
Muskegon, MI 49442-6252
or download the most recent version of
the manuals from our website:
www.pacificfloorcare.com
FOR YOUR CONVENIENCE, RECORD THE
FOLLOWING IMPORTANT INFORMATION:
SERIAL NUMBER
DATE PURCHASED
Page 1 of 17
Pacific
Advertisement
Table of Contents

Related Manuals for Pacific Proteus 26


Summary of Contents for Pacific Proteus 26
- Page 1 Proteus 26 & 26BA Operating & Maintenance Instructions READ THIS MANUAL This operator's manual has important For new manuals write to: information for the use and safe operation of this machine. Read this manual Pacific carefully before starting the machine.
-
Page 2: Safety Instructions
SAFETY INSTRUCTIONS You must have training in the operation of the machine before using it. READ THE INSTRUCTION BOOK. If you do not understand any instruction, ask your supervisor. Make sure all labels, decals, warnings, cautions and instructions are fastened to the machine. - Page 3 SYMBOLS USED ON THE AUTOMATIC SCRUBBER Water Valve Indicator Brush Drive Motor Control Switch Brush Base Lifting Lever Vacuum Motor Control Switch Squeegee Lift Lever Indicator Battery Charge Indicator Parking Brake Indicator Handle Bar Height Adjustment Lever OFF / ON Key Switch Indicator Maximum temperature of fluid added to Solution Tank is 50°...
-
Page 4: Machine Preparation
MACHINE PREPARATION 1) UNPACKING THE MACHINE a) Take off the outer packaging. b) The machine is fastened to the pallet with wooden wedges that block the wheels. Remove wedge and tie down straps. c) Using a ramp, pull the machine off the pallet. 2) BATTERY INSTALLATION a) Lift the recovery tank forward. -
Page 5: Charging The Batteries
MACHINE PREPARATION 3) BATTERY INSTALLATION (Cont.) The battery charger’s connector fits into the battery connector (1). 4) CHARGING THE BATTERIES NEVER ALLOW THE BATTERIES TO COMPLETELY DISCHARGE. Recharge them within a few minutes after the battery indicator starts flashing. Never leave the batteries completely discharged, even if the machine is not being used. -
Page 6: Battery Charge Level Indicator
MACHINE PREPARATION 5) BATTERY CHARGE LEVEL INDICATOR The batteries’ indicator is digital with 4 display levels and a flashing one. The numbers, which appear on the display, show the approximate charge level. 4 represents a full charge and 0 represents discharged and the batteries must be recharged. -
Page 7: Recovery Tank
MACHINE PREPARATION 8) ADJUSTING SQUEEGEE HEIGHT The height from floor to squeegee should be adjusted based on blade wear. Rotate the knobs (2) counter-clockwise to lift squeegee and clockwise to lower it. NOTE: Rotate the right and left adjusting knobs until the squeegee is positioned parallel to the floor. -
Page 8: Solution Tank
MACHINE PREPARATION 11) SOLUTION TANK Remove water inlet cover plug and confirm the solution filter, which is located on the bottom left side, is properly assembled. 12) SOLUTION WATER Fill the solution tank with clean water at a temperature not higher than 50°C / 122°F. Add the proper concentration of liquid detergent by following the manufacturer instructions. -
Page 9: Machine Operation
MACHINE OPERATION 1) Connect machine connector (2) to the battery connector (1). 2) Turn key (1) clockwise to ON. Signal light (3) will illuminate indicating that the batteries are charged. If the indicator is flashing the batteries need to be charged. 3) Turn on the water solenoid valve switch (3). -
Page 10: Machine Movement
MACHINE OPERATION 10) MACHINE MOVEMENT These machines are equipped with driven traction wheels or brush assist propulsion. The machines with driven wheels have two speeds forward and one speed backwards. To move either style machine forward, turn the key ON, wait for 3 seconds and then rotate forward lever (1) on the handle bar. - Page 11 UPON COMPLETION OF MACHINE USE After finishing your work and before any type of maintenance is done, it is necessary to do the following: 1) Close the water valve with lever (1). 2) Raise the brush base with lever (2). 3) Lift the squeegee with lever (3).
-
Page 12: Cleaning The Recovery Tank
DAILY MACHINE MAINTENANCE CLEANING THE RECOVERY TANK 1) Empty the recovery tank by removing the plug from the drain hose. WARNING: Use gloves for protection from contact with dangerous solution. 2) Lift the cover of the recovery tank. 3) Take off the vacuum cover by rotating it counter clockwise. -
Page 13: Cleaning The Squeegee
DAILY MACHINE MAINTENANCE CLEANING THE SQUEEGEE To obtain the best drying results, keep the squeegee clean. To clean the squeegee it is necessary to: 13) Remove the vacuum hose from the squeegee. 14) Press release latch (1) toward the center of the machine. - Page 14 DAILY MACHINE MAINTENANCE BRUSH / PAD DRIVER REMOVAL (Cont.) 27) Rotate each brush until they come off the brush plate. The figure shows the direction to rotate each of the brushes to release them from the machine. BATTERY COMPARTMENT CLEANING 28) Use the hose under the solution tank, which is accessible from the rear of the machine to empty any liquids from the battery...
-
Page 15: Cleaning The Squeegee Hose
WEEKLY MACHINE MAINTENANCE CLEANING THE SQUEEGEE HOSE To obtain the best drying results, keep the squeegee hose clean. To clean the squeegee hose it is necessary to: 1) Take off the vacuum hose from its vacuum port on the squeegee. 2) Remove the other end of the vacuum hose from the recovery tank. -
Page 16: Troubleshooting Guide
TROUBLE SHOOTING GUIDE 1) INSUFFICIENT WATER TO THE BRUSHES a) Make sure the water valve is open (lever 1). b) Confirm that there is water in the solution tank. 2) THE MACHINE DOES NOT CLEAN SATISFACTORILY a) Check the condition of the brushes or pads and replace them if necessary. - Page 17 If unable to locate the Dealer, you may contact Pacific at the address listed herein for the location of the nearest Pacific repair center or agent or for other instructions pertaining to your warranty difficulty.
Need help?
Do you have a question about the Proteus 26 and is the answer not in the manual?
Questions and answers