Table of Contents
Advertisement
Operating & Maintenance
This operator's manual has important
information for the use and safe operation
of this machine. Read this manual
carefully before starting the machine.
Keep this manual and tell all operators to
read this manual. If you do not follow the
instructions, you can cause an injury or
damage equipment. Carefully inspect all
components to ensure that there is no
concealed freight damage. If damage is
discovered,
file
DAMAGE REPORT" immediately with the
delivering carrier.
The content of this
manual are based on the latest product
information available at the time of
publication. Pacific Steamex reserves the
right to make changes or improvements to
its machines without notice.
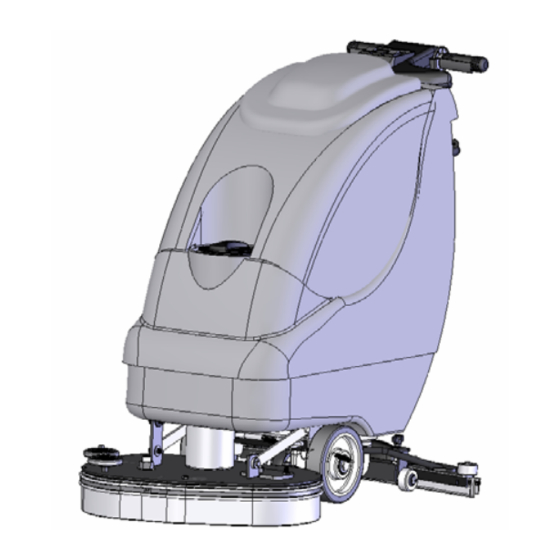
Proteus 210E
Instructions
READ THIS MANUAL
a
"CONCEALED
For new manuals write to:
2259 S. Sheridan
Muskegon, MI 49442-6252
or download the most recent version of
the manuals from our website:
www.pacificfloorcare.com
FOR YOUR CONVENIENCE, RECORD THE
FOLLOWING IMPORTANT INFORMATION:
SERIAL NUMBER
DATE PURCHASED
Page 1 of 14
Pacific
Advertisement
Table of Contents

Related Manuals for Pacific Proteus 210E


Summary of Contents for Pacific Proteus 210E
- Page 1 FOLLOWING IMPORTANT INFORMATION: manual are based on the latest product information available at the time of SERIAL NUMBER publication. Pacific Steamex reserves the right to make changes or improvements to DATE PURCHASED its machines without notice. Page 1 of 14...
-
Page 2: Safety Instructions
SAFETY INSTRUCTIONS You must read the instruction manual carefully before using the machine. Make sure all labels are fastened to the machine. Do not use the machine near flammable materials and vapors. Do not use acid solutions that could damage the machine. Do not stop and leave the machine on ramp. - Page 3 SYMBOLS USED ON THE AUTOMATIC SCRUBBER Water Valve Indicator Water Flow Rate Indicator Brush Drive Motor Control Switch Vacuum Motor Control Switch Squeegee Lift Lever Indicator Waste Fluid Drain Indicator Maximum temperature of fluid added to Solution Tank is 50° Celsius (120° Fahrenheit) Tie Down Location Indicator Page 3 of 14...
-
Page 4: Machine Preparation
MACHINE PREPARATION 1) UNPACKING THE MACHINE a) Take off the outer packaging. b) The machine is fastened to the pallet with wooden wedges that block the wheels. Remove wedge and tie down straps. c) Pull the machine off the pallet. 2) SQUEEGEE ASSEMBLY a) Assemble the squeegee as shown in the figure to the... - Page 5 MACHINE PREPARATION 3) ADJUSTING SQUEEGEE HEIGHT The height from floor to squeegee should be adjusted based on blade wear. Rotate the knobs counter-clockwise to lift squeegee and clockwise to lower it. NOTE: Rotate the right and left adjusting knobs until the squeegee is positioned parallel to the floor.
-
Page 6: Brush Installation
MACHINE PREPARATION 6) BRUSH INSTALLATION a) Lift the brush base by pressing on the foot pedal. b) Place the brushes under the base. Align the brush lugs with the holes in the brush plate. Insert the brushes into the plate and turn each brush so the lugs are pushed toward their retaining springs, until locked. -
Page 7: Hose Connections
MACHINE PREPARATION 8) HOSE CONNECTIONS Open the lid and confirm the following connections are secure: a) The vacuum cover (2) is securely attached, turn clockwise to tighten. b) The vacuum hose (1) is attached. c) The hose cuff on the vacuum hose (on the back of the machine) is inserted. -
Page 8: Machine Operation
MACHINE OPERATION 1) Turn on the brush motor switch (1). 2) Turn on the vacuum motor switch (2). 3) Item (6) is the solution flow indicator. When the indicator is illuminated, cleaning solution is flowing. To stop the solution flow raise lever (3) to the off position. - Page 9 DAILY MACHINE MAINTENANCE After finishing work and before any type of maintenance is done, it is necessary to do the following: 1) Close the water valve with lever (1). 2) Raise the brush base with the foot pedal. 3) Lift the squeegee with lever (2). Note: The squeegee blades can be damaged if the squeegee is not raised during storage or transport.
-
Page 10: Cleaning The Recovery Tank
DAILY MACHINE MAINTENANCE CLEANING THE RECOVERY TANK 10) Empty the recovery tank by removing the plug from the drain hose. WARNING: Use gloves for protection from contact with dangerous solution. 11) Lift the cover of the recovery tank. 12) Take off the vacuum cap (1) by rotating it counter clockwise. -
Page 11: Cleaning The Squeegee
DAILY MACHINE MAINTENANCE CLEANING THE SQUEEGEE To obtain the best drying results, keep the squeegee clean. To clean the squeegee it is necessary to: 22) Remove the vacuum hose from the squeegee. 23) Loosen the knobs (1). 24) Clean the inside of the squeegee thoroughly. 25) Clean the squeegee blade thoroughly. -
Page 12: Cleaning The Squeegee Hose
WEEKLY MACHINE MAINTENANCE CLEANING THE SQUEEGEE HOSE To obtain the best drying results, keep the squeegee hose clean. To clean the squeegee hose it is necessary to: 36) Take off the vacuum hose from its vacuum port on the squeegee. 37) Remove the other end of the vacuum hose from the recovery tank. -
Page 13: Troubleshooting Guide
TROUBLE SHOOTING GUIDE 1) INSUFFICIENT WATER TO THE BRUSHES a) Make sure the water valve is open (lever 1). b) Confirm that there is water in the solution tank. 2) THE MACHINE DOES NOT CLEAN SATISFACTORILY a) Check the condition of the brushes or pads and replace them if necessary. - Page 14 If unable to locate the Dealer, you may contact Pacific at the address listed herein for the location of the nearest Pacific repair center or agent or for other instructions pertaining to your warranty difficulty.
Need help?
Do you have a question about the Proteus 210E and is the answer not in the manual?
Questions and answers