Table of Contents
Advertisement
Advertisement
Chapters
Table of Contents
Troubleshooting

Related Manuals for Kohler Command PRO CS


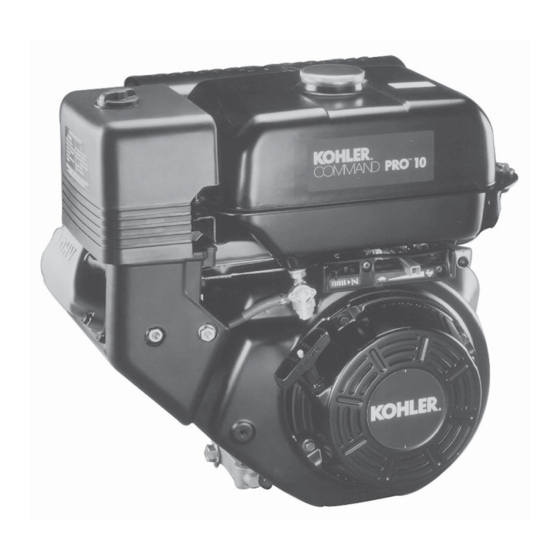
Summary of Contents for Kohler Command PRO CS
-
Page 3: Table Of Contents
Contents Section 1. Safety and General Information ................Section 2. Tools & Aids ......................Section 3. Troubleshooting ..................... Section 4. Air Cleaner and Air Intake System ................. Section 5. Fuel System and Governor ..................Section 6. Lubrication System ....................Section 7. Retractable Starter ....................Section 8. - Page 23 By using tools designed for the job, you can properly service engines easier, faster, and safer! In addition, you’ll increase your service capabilities and customer satisfaction by decreasing engine downtime. Here is the list of tools and their source. Separate Tool Suppliers: Kohler Tools Design Technology Inc. SE Tools Contact your source 415 Howard St.
- Page 24 Section 2 Tools & Aids ) . t t f i l l a c i l f i l . s r i t i & . s t l i o i f i i f i i f i .
- Page 25 Section 2 Tools & Aids - l e ) t f i l i e t i ® . r e l i o s i s , s t s i l e t i ® s i r c i t ®...
- Page 26 4. Use a flat washer with the correct I.D. to slip on tooth segment of the ring gear as shown. the capscrew and approximately 1” O.D. (Kohler Part No. 12 468 05-S). Assemble the capscrew 2. Grind off any burrs or sharp edges.
-
Page 27: Section 3. Troubleshooting
Section 3 Troubleshooting Section 3 Troubleshooting Troubleshooting Guide Engine Will Not Crank 1. PTO drive is engaged. When troubles occur, be sure to check the simple 2. Battery (if equipped) is discharged. causes which, at first, may seem too obvious to be 3. - Page 28 Section 3 Troubleshooting Engine Loses Power • Check the oil level. Note if the oil level is within 1. Low crankcase oil level. the operating range on the dipstick, or if it is low 2. High crankcase oil level. or overfilled. 3.
- Page 29 Section 3 Troubleshooting 1. The engine should have a minimum of 4 in. of 2. Refer to the following chart for possible causes and solutions. vacuum. A vacuum less than 4 in. is usually due to internal wear or a bad gasket or seal allowing air to leak into the crankcase.
- Page 30 Section 3 Troubleshooting b. If the flywheel end of the engine is more 5. Connect an adequate air source (70-100 psi) to the accessible, you can use a breaker bar and tester. socket on the flywheel nut/screw or a flywheel holding tool to hold it in position. 6.
-
Page 31: Section 4. Air Cleaner And Air Intake System
Section 4 Air Intake and Air Cleaner System Section 4 Air Cleaner and Air Intake System Air Cleaners General These engines are equipped with one of three air cleaner configurations; the standard dual-element air cleaner assembly, an optional heavy-duty cyclonic air cleaner assembly, or a third design which uses an oiled, solid foam element. - Page 32 Section 4 Air Cleaner and Air Intake System To service the precleaner perform the following steps: 1. Remove the air cleaner cover knob (standard air cleaner) or unsnap the latches (heavy-duty air cleaner), and remove the cover/housing. See Figures 4-3 and 4-4. 2.
- Page 33 2. Do not wash the paper element or use pressurized air, as this will damage the element. Replace a dirty, bent, or damaged element with a genuine Kohler element. Handle new elements carefully; do not use if the sealing surfaces are bent or damaged.
- Page 34 Section 4 Air Cleaner and Air Intake System 3. When servicing the air cleaner, check the air Heavy-Duty Cyclonic Air Cleaner cleaner base, and cover/housing assembly. Make Make sure the main housing, lower swirl/dirt sure it is secure and not bent or damaged. On a chamber, mounting hardware and latches are not heavy-duty air cleaner, unsnap the latches and damaged, bent or broken;...
- Page 35 Every 50 hours of operation, wash and reoil the foam remove any excess. air cleaner element (more often under extremely dusty, or dirty conditions). Replace the foam element with a new genuine Kohler element if deteriorated or damaged in any way.
- Page 36 Section 4 Air Cleaner and Air Intake System 5. When servicing the foam air cleaner element, Air Intake/Cooling System clean and check the air cleaner case and outer To ensure proper cooling, make sure the grass screen, cover for damage, distortion, or an improper seal. cooling fins and other external surfaces of the engine Replace any components which are bent or are kept clean at all times.
- Page 47 10W-30...
-
Page 51: Section 7. Retractable Starter
Section 7 Retractable Starter Section 7 Retractable Starter WARNING: Spring Under Tension! Retractable starters contain a powerful, recoil spring that is under tension. Always wear safety goggles when servicing retractable starters and carefully follow instructions in this section for relieving spring tension. Pawl Repair Starter Drive Cup... - Page 52 Section 7 Retractable Starter 2. Pull the starter handle out until the pawls engage 5. When all spring tension on the starter pulley is the drive cup. Hold the handle in this position released, remove the rope from the pulley. and torque the screws to 5.5 N·m (48 in.
- Page 53 4. Carefully inspect the components for wear, Center Screw cracks, and/or damage. Replace all worn or Clip damaged components. Use only genuine Kohler Starter Pawl (Dog) replacement parts as specified in the parts manuals. All components shown in Figure 7-1 are CS8.5-12 Pawl Repair Kit Contains...
- Page 54 Section 7 Retractable Starter 1. Release spring tension and remove the handle Clip and starter rope. (Refer to ‘‘Rope Replacement’’.) Drive Plate 2. Unscrew the center screw and lift off the drive plate. The screw will be captured within plate by the clip on backside.
- Page 55 Section 7 Retractable Starter 3. Carefully install pulley into recoil housing, engaging the spring hook with starter housing tab. See Figure 7-10. NOTE: Rotating pulley counterclockwise slightly will assist engagement. 4. Install the pawl springs (CS8.5-12 only) and pawls onto pawl studs of pulley. Figure 7-11.
- Page 56 Section 7 Retractable Starter...
-
Page 57: Section 8. Electrical System And Components
NGK spark plug is RN14YC The service replacement is Wire Gauge ® Champion RC14YC (Kohler Part No. 66 132 01-S). Equivalent alternate Spark Plug brand spark plugs can also be used. Gap: 0.76 mm (0.030 in.) Thread Size:... - Page 58 Section 8 Electrical System and Components Inspection Inspect the spark plug as soon as it is removed from the cylinder head. The deposits on the tip are an indication of the general condition of the piston rings, valves, and carburetor. Normal and fouled plugs are shown in the following photos.
- Page 59 Section 8 Electrical System and Components Operation As the flywheel rotates and the magnet assembly moves past the ignition module, a low voltage is induced in the primary windings of the module. When the primary voltage is precisely at its peak, the module induces a high voltage in its secondary windings.
-
Page 60: Troubleshooting Guide
Install a new spark plug and try to start attach it to the terminal end of spark tester Kohler Part No. 25 455 01-S. Attach tester engine. If it still will not start, check other possible causes (fuel, compression, etc.). If spring clip to a good ground, not to the spark plug. - Page 61 Section 8 Electrical System and Components Problem Test Conclusion 6. Resistance of the ignition module should be 6. Set an ohmmeter to the Rx1K or Rx10K scale and zero. Connect one ohmmeter lead to the 13.5-18.0 K ohms. kill lead (black/white) terminal and connect the other lead into the spark plug cap.
- Page 62 Section 8 Electrical System and Components Battery Charging Systems General CS engines may be equipped with a 7 amp, 10 amp, or 18 amp regulated battery charging system. Refer to the selection tables below and the appropriate wiring diagram, based upon the specific Model and Spec. No. Wiring Diagram Selection Tables The following selection tables and individual wiring diagrams (Figures 8-4 through 8-22) provide a reference for troubleshooting and servicing.
- Page 63 Section 8 Electrical System and Components Model No. Spec. No. Figure No. Page No. Model No. Spec. No. Figure No. Page No. CS12STG 941515 8-10 8.11 CS10T 931501 CS12STG 941516 8-10 8.11 CS10T 931502 CS12STG 941517 8-11 8.11 CS10TG 931503 CS12STG 941518 8-15...
- Page 64 Section 8 Electrical System and Components Wiring Color Codes Ignition Module Black Blue Spark Plug Yellow Ground White Brown Green Gray Black w/White Stripe Red w/White Stripe White w/Blue Stripe Green w/Red Stripe Stop Green w/Yellow Stripe Switch Blue w/White Stripe Blue w/Red Stripe Green w/Black Stripe Oil Sentry™...
- Page 65 Section 8 Electrical System and Components Warning Unit R or BR R or BR Stop Switch Ground Oil Sentry™ Light Sentry™ Wire Lead Gauge Ignition Module Ground Spark Ground Electronic Ignition System, 7 Amp Plug Stator Unregulated Charging System, with Ground Ground Oil Sentry™...
- Page 66 Section 8 Electrical System and Components Main Switch Wire Color Warning Start Unit Ground Oil Sentry™ Fuse (15 A) Light Wire Lead Engine Ground Ignition Module Oil Sentry™ Gauge Ground Stator Starter Spark Ground Ground Solenoid Plug Battery Ground Electronic Ignition System, 10 Amp Rectifier-Regulator Charging System, with Rectifier- Starter...
- Page 67 Section 8 Electrical System and Components Main Switch Wire Color Warning Start Unit R RW Ground Ground Rectifier Oil Sentry™ Light Wire Lead Ignition Module Fuse Sentry™ Starter Gauge Solenoid Spark Ground Ground Ground Plug Ground Ground Battery Electronic Ignition System, 0.4 or 2 Amp Starter Motor Charging System, Rectified Only.
- Page 68 Section 8 Electrical System and Components Warning Unit Stop Switch Engine Ground Ground Ground Oil Sentry™ Light Sentry™ Gauge Ignition Module Ground Not on All Spark Models Plug Electronic Ignition System Oil Stator Sentry™ System, with Indicator Light Ground Ground (Some Models), Recoil Start.
- Page 69 Section 8 Electrical System and Components Warning Stop Unit Switch Engine Ground Ground Ground Oil Sentry™ Gauge Ignition Module Sentry™ Gauge Stator Spark Plug Ground Ground Ground Rectifier Electronic Ignition System 18 Amp Charging System, Rectified Only. Oil Sentry™ System. Recoil Start. Figure 8-14.
- Page 70 Section 8 Electrical System and Components 10 Amp Charging System with Rectifier-Regulator and Oil Sentry™ System. Solenoid Shift Electric Starter. Figure 8-16. 18 Amp Charging System with Rectifier-Regulator and Oil Sentry™ System. Solenoid Shift Electric Starter and Provisions for Charge Lamp. Figure 8-17.
- Page 71 Section 8 Electrical System and Components 0.4 or 2 Amp Charging System-Rectified Only and Oil Sentry™ System. Solenoid Shift Electric Starter. Optional Solenoid Valve (Some Models). Figure 8-18. 18 Amp Charging System with Rectifier-Regulator and Oil Sentry™ System. Solenoid Shift Electric Starter and Provisions for Charge Lamp.
- Page 72 Section 8 Electrical System and Components No Charging System, Operational Off Battery. Oil Sentry™ System. Solenoid Shift Electric Starter. Figure 8-20. Ignition Module Spark Ground Plug Ground Wire Lead Stop Switch Recoil Start No Oil Sentry™ System. Ground Stop Switch Only. Figure 8-21.
- Page 73 Section 8 Electrical System and Components Warning Unit Stop Switch Ground Ground Oil Sentry™ LIght Ignition Module Sentry™ Gauge Stator Spark Ground Plug Ground Ground Rectifier- Regulator 10 Amp Charging System Recoil Start Only Oil Sentry™ System. Figure 8-22. 8.17...
- Page 74 Section 8 Electrical System and Components NOTE: Observe the following guidelines to avoid 18 Amp Rectifier-Regulator damage to the electrical system and The 18 amp rectifier-regulators contain a 6-terminal components. plug-in configuration, illustrated in Figure 8-23. The upper center terminal is the control or monitor •...
- Page 75 Section 8 Electrical System and Components Rectified Only (Non-Regulated) Systems Some engines are equipped with a rectified only, non-regulated charging system, with output ranging from 0.2 amp to 18 amps. The rectifier is normally connected to the engine with a matching wiring harness and secured to the equipment with a single mounting screw.
- Page 76 Section 8 Electrical System and Components Troubleshooting Guide Battery Charging System NOTE: Zero ohmmeters on each scale to ensure accurate readings. Voltage tests should be made with engine running at 3600 RPM - no load. Battery must be fully charged. Check the specific gravity of battery. If low, recharge or replace battery as necessary.
- Page 77 Section 8 Electrical System and Components Battery 2. Keep the cables, terminals, and external surfaces of the battery clean. A build-up of corrosive acid or grime on the external surfaces can cause the General battery to self-discharge. Self-discharge occurs A 12 volt battery (not furnished) with a minimum rapidly when moisture is present.
- Page 78 Section 8 Electrical System and Components Electric Starting Motors NOTE: If the engine develops sufficient speed to disengage the starter but does not keep Electric start engines in this series will use either an running (a false start), the engine rotation inertia drive, or a solenoid shift starter.
- Page 79 Section 8 Electrical System and Components Troubleshooting Guide – Electric Starting System Problem Test Conclusion 1. Test battery on unit. 1. a. Battery voltage should be at least 12 volts If low charge battery. a. Connect a DC voltmeter across the battery terminals and read battery voltage (key b.
- Page 80 Section 8 Electrical System and Components Solenoid Test Procedure 12 volt Test Leads Momentary Solenoid Shift Style Starters Connection Only Disconnect all leads from the solenoid including the positive brush lead attached to the lower stud VOM Leads terminal. Remove the mounting hardware and separate the solenoid from the starter for testing.
- Page 81 1. Remove the starter from the engine. 2. Push back the spring holder (collar) to expose the retaining ring on the armature shaft, which secures the drive components. Remove the retaining ring using either of the Kohler retaining ring removal tools. Figure 8-33. Solenoid Details. 8.25...
- Page 82 Section 8 Electrical System and Components Figure 8-37. Installing Drive Components. Figure 8-35. Removing Retaining Ring. 8. Install a new retaining ring into the groove of the 3. Remove the spring holder (collar), spring and armature shaft. Squeeze it with a pliers to drive pinion assembly from the armature shaft.
- Page 83 Section 8 Electrical System and Components Figure 8-39. Removing Solenoid Lead. Figure 8-42. Removing End Cap with Brush Plate. 3. Scribe or mark a small line from the starter frame 6. Pull the armature out of the starter frame. to each end cap to serve as match marks for reassembly later.
- Page 84 Section 8 Electrical System and Components 2. Inspect both the springs and brushes for wear, fatigue, or damage. Measure the length of each brush. The minimum length for each brush must be 9 mm (0.350 in.). See Figure 8-44. Replace the brush plate assembly if the condition of parts is Depth: out of specification or questionable.
- Page 85 Section 8 Electrical System and Components Starter Reassembly 1. Position the thrust washer in the recess inside the drive end cap. Install cover gasket on housing flange if removed previously. Figure 8-50. Installing Frame. 4. With the brushes and brush springs in place on brush plate, align the tabs and install the brush plate in commutator end cap.
- Page 86 Section 8 Electrical System and Components 5. Assemble the end cap assembly to the starter, inserting the commutator below the brushes and gently guiding the end of the armature shaft into the bushing within the end cap, against the brush spring tension.
- Page 87 Section 8 Electrical System and Components Solenoid Shift Electric Starter The following subsection covers the solenoid shift electric starter. Much of the information in the proceeding subsection relates to this type starter also, so it is not repeated here. A Nippendenso solenoid shift starter is used. Operation (Solenoid Shift Starter) When power is applied to the starter, the electric solenoid moves the drive pinion out onto the drive shaft and into mesh with the flywheel ring gear.
- Page 88 Section 8 Electrical System and Components Starter Disassembly 8. Pull outward on the pivot portion of the drive 1. Remove flange nut and disconnect the braided lever, and remove the drive lever and armature wire from lower main solenoid terminal. from the drive end cap.
- Page 89 Electrical System and Components Brush Replacement The brushes in the starter are part of the starter frame. The brush kit, Kohler Part No. 52 221 01-S, contains four replacement brushes and springs. If replacement is necessary, all four brushes should be replaced.
- Page 90 Section 8 Electrical System and Components 7. Mount the brush holder to rear of starter frame. Install the four brushes into the corresponding slots. Then carefully work (set) each of the four brush springs into position behind the brushes. Slide the rubber insulating grommet onto the small corresponding plastic tab on frame.
- Page 91 Section 8 Electrical System and Components 14. Connect the braided (brush) lead to lower main solenoid terminal and secure with the loose hex flange nut. See Figure 8-70. Figure 8-68. Installing End Cap. 12. Install and tighten the two thru bolts. Figure 8-70.
- Page 92 Section 8 Electrical System and Components 8.36...
-
Page 93: Section 9. Disassembly
Section 9 Disassembly Section 9 Disassembly WARNING: Accidental Starts! Disabling engine. Accidental starting can cause severe injury or death. Before working on the engine or equipment, disable the engine as follows: 1) Disconnect the spark plug lead(s). 2) Disconnect negative (-) battery cable from battery. General 15. - Page 94 Section 9 Disassembly Turn Fuel Shut-Off Valve to Off Position Figure 9-4. Removing Muffler. Figure 9-2. Fuel Shut-Off Valve. 3. Remove the exhaust gasket from the outlet. Drain Oil From Crankcase Remove Air Cleaner Assembly 1. Remove one of the oil drain plugs and one of the Remove the air cleaner components from the air oil fill caps.
- Page 95 Section 9 Disassembly Remove Fuel Tank 1. Make sure the fuel tank is empty. If the fuel shut- off valve is mounted directly to tank, close the valve. See Figure 9-2. 2. Loosen the clamp and disconnect the fuel line from the outlet of shut-off valve (fuel tank mounted valves) on CS4, CS6, CS8.5 (spec.
- Page 96 Section 9 Disassembly 4. On CS8.5 (spec. 95xxxx) remove the five screws and washers securing the fuel tank support to the crankcase, and the single screw into the throttle control bracket. Lift off the fuel tank support. See Figure 9-11. Figure 9-13.
- Page 97 Section 9 Disassembly Remove Carburetor WARNING: Gasoline may be present in the carburetor and fuel system. Gasoline is extremely flammable, and its vapors can explode if ignited. Keep sparks, open flames and other sources of ignition away from the engine. 1.
- Page 98 Section 9 Disassembly Remove Blower Housing 1. Remove the hex flange screws securing the blower housing. The screw in the upper right- hand position may also secure a ground lead on some models. See Figures 9-20 and 9-21. NOTE: On models with electric starters, loosening or removing the starter cover panel mounting screws will allow easier access to the screw in the upper right-...
- Page 99 Section 9 Disassembly Remove Right Fuel Tank Bracket (if so equipped), Switch Bracket, Electric Starter, and Housing/Cover Panel Assembly 1. Disconnect the wiring harness bullet connectors for the oil sentry and ignition module. Remove the mounting screw securing the ground lead. See Figures 9-24 and 9-25.
- Page 100 Section 9 Disassembly 4. Remove the two electric starter mounting bolts. See Figures 9-29 and 9-30. Figure 9-31. Inertia Drive Starter and Control Panel Removed. Figure 9-29. Removing Inertia Drive Starter Mounting Bolts. Starter Mounting Bolts Figure 9-32. Solenoid Shift Starter and Control Panel Removed.
- Page 101 Section 9 Disassembly Remove Left Fuel Tank Bracket 1. Remove the left fuel tank mounting bracket by removing the two screws. Figure 9-34 and 9-35. Washers are used on the CS4 and CS6 only. Figure 9-36. Removing Valve Cover Screws on Models with Attached Support Bracket.
- Page 102 Section 9 Disassembly 3. Lift off the air shroud from the cylinder head. CS4 and CS6 air shrouds have one mounting screw which must be removed. See Figure 9-39. Figure 9-41. Cylinder Head and Gasket Removed. Disassemble Cylinder Head Mounting Screw 1.
- Page 103 Section 9 Disassembly Remove Flywheel NOTE: Whenever possible, an impact wrench should be used to loosen the flywheel retaining nut. A flywheel strap wrench, or an approved holding tool (see Section 2) may also be used to hold the flywheel when loosening or tightening the flywheel retaining nut.
- Page 104 Section 9 Disassembly Remove Ignition Module 1. Remove the two hex flange screws securing the ignition module to the crankcase. See Figure 9-51. Figure 9-48. Removing Flywheel Nut Using Holding Tool. 2. Remove the flywheel from the crankshaft using a Figure 9-51.
- Page 105 Section 9 Disassembly 2. Remove the four hex flange shoulder screws securing the stator to the crankcase. Remove the stator and pull the wires through the opening in the casting. See Figure 9-53. Figure 9-55. Removing Reduction Housing Screws on CS8.5-CS12. 3.
- Page 106 Section 9 Disassembly 4. Remove the screw and washer securing the crankshaft sprocket/gear. Figure 9-60. Removing Sprockets and Chain on CS4, CS6. Figure 9-58. Removing Screw from Crankshaft on CS4, CS6. Figure 9-61. Thrust Washer Behind Crank Sprocket on CS4, CS6. Figure 9-59.
- Page 107 Section 9 Disassembly 6. Check the reduction system bearings for wear or excessive play. See Figure 9-63. If bearing removal is required, use an internal bearing puller to remove the housing bearings. An arbor press should be used for removal of the others. Figure 9-65.
- Page 108 Section 9 Disassembly 6. Remove the gasket(s) and clean the respective sealing surfaces with a cleaning solvent or aerosol type gasket remover. Do not nick or scrape the sealing surfaces. Figure 9-70. Removing Housing Cover Screws. 3. Remove the cover from the reduction assembly. Place a flat drain pan or shop towel under the housing to catch any remaining oil.
- Page 109 Section 9 Disassembly 5. Remove the counter gear from the closure plate. Remove the screw and washer securing the crank gear and slide the gear off of the crankshaft splines. See Figure 9-73. Pry/Tap Pry/Tap Pads Pads Figure 9-75. CS4, CS6 Closure Plate Mounting Screws.
- Page 110 Section 9 Disassembly Figure 9-77. Separating Closure Plate From Figure 9-79. Removing Governor Gear. Crankcase. 6. Remove the crankshaft seal. See Figure 9-80. Steps 3-7 should be performed only if further disassembly or servicing in the respective areas is necessary. 3.
- Page 111 Section 9 Disassembly Remove Balance Shaft (If So Equipped) 1. Pull the balance shaft out of the crankcase. Figure 9-84. Removing Connecting Rod Bolts. NOTE: If a carbon ridge is present at the top of the Figure 9-82. Removing Balance Shaft. cylinder bore, use a ridge reamer to remove it, before attempting to remove the piston.
- Page 112 Section 9 Disassembly Remove Crankshaft Remove Flywheel End Main Bearing and 1. Carefully remove the crankshaft from the Oil Seal crankcase. 1. Remove the front oil seal from the crankcase. See Figure 9-89. Figure 9-86. Removing Crankshaft. Figure 9-89. Oil Seal Removed. Remove Governor Cross Shaft 1.
-
Page 113: Section 10. Internal Components
Section 10 Internal Components Section 10 Internal Components This section covers the operation, inspection, and repair/reconditioning of major internal engine components. The following components are not covered in this section, they are covered in their own sections: Air Cleaner, Section 4 Carburetor &... - Page 114 Section 10 Internal Components Benefits As a result of the reduced compression at cranking speeds, several important benefits are obtained: 1. Manual (retractable) starting is much easier. Without ACR, manual starting would be virtually Inspect impossible. 2. Electric start models can use a smaller starter and battery that are more practical for the application.
- Page 115 Section 10 Internal Components Crankshaft Inspection and Service Inspect the gear teeth of the crankshaft. If the teeth are badly worn, chipped, or some are missing, replacement of the crankshaft will be necessary. Inspect the crankshaft bearing surfaces for scoring, grooving, etc.
- Page 116 Section 10 Internal Components 3. When the bore is within 0.064 mm (0.0025 in.) of desired size, remove the coarse stones and replace with burnishing stones. Continue with the burnishing stones until within 0.013 mm (0.0005 in.) of desired size and then use finish stones (220-280 grit) and polish to final size.
- Page 117 Replace the flywheel, the crankshaft, and the key if flywheel key is sheared or the keyway damaged. Inspect the ring gear for wear, cracks, or damage. Kohler does not provide ring gears as a serviceable part. Replace the flywheel if the ring gear is damaged. 10.5...
- Page 118 Section 10 Internal Components Cylinder Head and Valves Inspection and Service Carefully inspect the valve mechanism parts. Inspect the valve springs and related hardware for excessive wear or distortion. Check the valves and valve seat area for evidence of deep pitting, cracks, or distortion. Check clearance of the valve stems in guides.
- Page 119 Section 10 Internal Components CS8.5, CS10, CS12 Valve Specifications Dimension Intake Exhaust Head Diameter 32.0 mm (1.26 in.) 27.0 mm (1.06 in.) Stem Diameter 5.948/5.963 mm 5.940/5.955 mm (0.2342/0.2348 in.) (0.2339/0.2344 in.) Length 88.1 mm (3.47 in.) 87.9 mm (3.46 in.) Face/Seat Width 0.7/0.9 mm (0.0276/0.0354 in.) 0.7/0.9 mm (0.0276/0.0354 in.)
- Page 120 Section 10 Internal Components Leakage: A poor grind on face or seat of valve will Gum: Gum deposits usually result from using stale allow leakage resulting in a burned valve on one side gasoline. Gum is a prevalent cause of valve sticking. only.
- Page 121 Section 10 Internal Components Valve Seat Cover (Typical) Pilot Overheating: An exhaust valve subject to Figure 10-11. Standard Valve Seat Cutter. overheating will have a dark dicoloration in the area above the valve guide. Worn guides and faulty valve Lapping Valves springs may cause this condition.
- Page 122 Section 10 Internal Components Pistons and Rings Inspection Scuffing and scoring of pistons and cylinder walls occurs when internal temperatures approach the melting point of the piston. Temperatures high enough to do this are created by friction, which is usually attributed to improper lubrication, and/or overheating of the engine.
- Page 123 Section 10 Internal Components Replacement pistons are available in STD bore size, 4. After installing the new rings on the piston, check and in 0.25 mm (0.010 in.) and 0.50 mm (0.20 in.) piston-to-ring side clearance. Maximum oversizes. Replacement pistons include new piston recommended side clearance is: ring sets and new piston pins.
- Page 124 Section 10 Internal Components Install Piston Rings 2. Middle Compression Ring: Locate and identify the compression ring with the R marking. Using To install piston rings, proceed as follows: a piston ring expander, install this ring in the middle groove with the R up towards the top of NOTE: Rings must be installed correctly.
- Page 125 Section 10 Internal Components Governor Shaft Position (In Closure Plate) Governor Gear The governor shaft is pressed into the closure plate to a specified height and normally should not require Inspection and Service Inspect the governor gear teeth, look for any evidence removal or servicing.
- Page 126 Section 10 Internal Components Governor Reassembly 1. Install one thrust washer onto the governor shaft, followed by the governor gear/flyweight assembly. 2. Start the retaining clip over the end of the shaft. 3. Raise the gear up on the shaft sufficiently to install the other thrust washer and governor Excessive regulating pin under the outer fingers of the...
- Page 127 Section 10 Internal Components Figure 10-25. Inspect for Binding. Figure 10-27. CS8.5-12 Oil Passage. 5. Check to see that the closure plate/oil passages to the reduction assembly are open and not restricted. See Figures 10-26 and 10-27. Figure 10-26. CS4, CS6 Oil Passage. 10.15...
- Page 128 Section 10 Internal Components 10.16...
-
Page 129: Section 11. Reassembly
Section 11 Reassembly Section 11 Reassembly General 21. Install air cleaner base and element. 22. Adjust/Set governor. NOTE: Make sure the engine is assembled using all 23. Install fuel tank and fuel tank support. specified torque values, tightening sequences, 24. Install outer air cleaner cover. and clearances. -
Page 130: Install Governor Cross Shaft
Section 11 Reassembly Figure 11-2. Installing Bearing in Closure Plate. Figure 11-4. Installing Governor Shaft. 3. Use a seal driver and install the crankshaft oil seals (manufacturer’s numbers visible) into crankcase and closure plate. Seals should be installed to a depth of 2 mm (0.080 in.) below outer surface. - Page 131 Section 11 Reassembly Install Connecting Rod with Piston and Rings 1. If the piston and/or connecting rod has been changed or removed, make sure the following is correct before installing. Figure 11-6. CS4, CS6. Installing Hitch Pin. Figure 11-9. a. The locating mark on piston is down. See Figure 11-10.
- Page 132 Section 11 Reassembly b. The connecting rod offset is down and oil hole is in the 3 o’clock position. Match marks should align as shown with dipper down. See Figure 11-11. Oil Hole Match Marks Figure 11-13. Installing Piston Using a Ring Dipper Compressor.
- Page 133 Section 11 Reassembly 3. Rotate the crankshaft to TDC so the timing mark 2. Install the balance shaft, aligning the timing mark (dimple) on crankgear (smaller gear) is in the 4 (hole) with the timing mark (dimple) on the o’clock position. Install the camshaft into the larger crankgear.
-
Page 134: Install Closure Plate Assembly
Section 11 Reassembly 2. Install shield for lead and secure with the M6x1.0 hex flange screw. Torque all three screws to 10 N·m (88.5 in. lb.). See Figure 11-19. Dowel Dowel Figure 11-21. CS8.5-12. Internal Details. 3. Install the closure plate to the crankcase. Carefully seat the ends of the camshaft and balance shaft Figure 11-19. - Page 135 Section 11 Reassembly Torque Screws to 30 N·m (265 in. lb.) Figure 11-23. CS8.5-12. Closure Plate Torque Figure 11-25. CS8.5-12. Installing Bearing. Sequence. 2. Install a new oil seal into the cover to a depth of Install Reduction System (If So Equipped) 2 mm (0.08 in.).
- Page 136 Section 11 Reassembly Figure 11-27. CS4, CS6. Installing Thrust Washer. Figure 11-30. Installing Mounting Bolt and Washer. Figure 11-28. CS4, CS6. Installing Sprockets and Figure 11-31. Torquing Mounting Bolt. Chain. CS8.5-12: Install the key into the keyway of the crankshaft. Install the crankshaft gear onto the engine crankshaft.
- Page 137 Section 11 Reassembly Install the counter gear into the pre-oiled bearing boss in the closure plate, engaging teeth with gear on crankshaft. Install the output shaft/gear assembly into the corresponding pre-oiled bearing boss in the closure plate. See Figure 11-33. Figure 11-35.
- Page 138 Section 11 Reassembly Description C Oil seal installation depth Bolt Chain Case Cover Gasket 2 mm (0.08 in.) Dowel Pin Oil Seal Bearing Washer Bolt/Washer Shaft 2 Idle Sprocket Chain Washer Straight Key D Tightening sequence A 22 N·m (195 in. lb.) B 10 N·m (88 in.
- Page 139 Section 11 Reassembly 6:1 Reduction Assemblies 5. Install the reduction housing to the closure plate CS4 and CS6 as shown and secure with the four hex flange 1. If any bearings were removed, press the new screws. Torque the screws to 20-24 N·m bearing(s) into the housing or cover, so the (177-212 in.
- Page 140 Section 11 Reassembly 7. Install a new gasket (dry) onto the housing and attach the cover with the four mounting screws, so the Oil Fill and Oil Level port locations are positioned exactly as shown. Torque the screws to 20-24 N·m (177-212 in. lb.). Figure 11-46.
- Page 141 Section 11 Reassembly 3. Slide the crankshaft gear onto the splines of the crankshaft. Secure with the flat washer and hex flange screw. Torque the screw to 20-24 N·m (177-212 in. lb.). Figure 11-50. Installing Output Shaft Assembly. 6. Reinstall the two dowel pins into their respective locations in the closure plate.
- Page 142 Section 11 Reassembly Figure 11-53. Torquing Mounting Screws. Figure 11-55. Stator Screws Torque Sequence. 2. Route the stator leads along the formed channel Install Stator and Wire Shield (If So and out through the hole in the crankcase casting. Equipped) 1.
-
Page 143: Install Flywheel
Section 11 Reassembly Install Flywheel WARNING: Damaging Crankshaft and Flywheel Can Cause Personal Injury! Using improper procedures to install the flywheel can crack or damage the crankshaft and/or flywheel. This not only causes extensive engine damage, but can also cause personal injury, since broken fragments could be thrown from the engine. -
Page 144: Install Ignition Module
Section 11 Reassembly Figure 11-61. CS4, CS6. Setting Air Gap. Figure 11-60. Tightening Flywheel Nut. Install Ignition Module 1. Turn the flywheel so the magnet is away from the location where the ignition module will be installed. 2. Install the ignition module loosely to the bosses with the two hex flange screws. - Page 145 Section 11 Reassembly NOTE: The engine utilizes a valve stem seal on the intake valve. Always use a new seal when valves are installed in the cylinder head. Replace the seal if it is deteriorated or damaged in any way. Never reuse an old seal. 2.
- Page 146 Section 11 Reassembly Install Push Rods, Rocker Arms, Studs, and Rocker Shaft NOTE: Push rods should always be installed in the original location. 1. Identify the proper position of each push rod. Dip the ends of the push rods in engine oil and install them in their respective locations, seating each into the tappet socket.
- Page 147 0.1 mm (0.004 in.). 5. Use a new Champion RN14YC, Champion RC14YC (Kohler Part No. 66 132 01-S), or equivalent spark plug. 6. Set gap to 0.76 mm (0.030 in.). Install the spark plug in the cylinder head and torque to 20 N·m (177 in.
-
Page 148: Install Valve Cover
Section 11 Reassembly Install Valve Cover 1. Install a new valve cover gasket onto the cylinder head. 2. Install the valve cover assembly. CS4, CS6, CS8.5 (spec. 95xxxx): Install the four hex flange screws and torque to 10-12 N·m (88-106 in. lb.). Figure 11-76. - Page 149 Section 11 Reassembly Figure 11-80. CS8.5-12. Torquing Screws. Figure 11-82. CS8.5 (spec. 92xxxx), CS10, CS12. Mounting Left Fuel Tank Support. Install Fuel Tank Supports (If So 2. Assemble the right fuel tank support and Equipped), Throttle Lever, Wiring attached electrical components* to the crankcase Harness, Ignition Switch, and Oil Sentry™...
- Page 150 Section 11 Reassembly Figure 11-84. CS8.5 (Spec 92xxxx) 10, CS-12 Figure 11-85. CS8.5-12. Ground Lead Location. Mounting Right Fuel Tank Support. Install Governor Lever, Throttle Link, CS8.5 (spec. 95xxxx): Align and mount the Throttle and Governor Springs throttle control bracket to the top of the crankcase 1.
- Page 151 Section 11 Reassembly Figure 11-89. CS4, CS6. Spring Hole Position. Figure 11-87. CS8.5 (spec. 92xxxx), CS10, CS12. Governor Lever Installation. 3. Connect the throttle link and the shorter end of dampening spring, from the top down, into the hole(s) in long end of governor lever as shown in Figures 11-86, 11-87, and 11-88.
- Page 152 Section 11 Reassembly Figure Hole Spec. Figure Hole Spec. Model Number Position Model Number Position (CS12) CS12T 11-90 941633 CS12T 11-90 CS12ST 941501 11-90 941634 CS12T 11-90 CS12T 941502 11-90 941635 CS12TG CS12TR 11-90 11-90 941503 941636 CS12TP 11-90 CS12ST 941504 11-90 941637...
- Page 153 Section 11 Reassembly Connect Electrical Leads and Install Electric Starter (If So Equipped) CS8.5 (spec. 92xxxx), CS10, CS12 with Inertia Drive Starters 1. Mount the electric starter, with the control panel and solenoid attached, onto the crankcase. Install and torque the two hex flange screws to 30 N·m (265 in.
- Page 154 Section 11 Reassembly Install Blower Housing and Electric Starter Cover Panel (If So Equipped) 1. Install the blower housing behind the throttle link and dampening spring. Start all the hex flange screws. On CS4 and CS6 engines, secure the ground lead with the silver screw in the upper right hand location.
-
Page 155: Install Carburetor
Section 11 Reassembly Install Carburetor 1. Install a new carburetor spacer gasket onto the carburetor studs, followed by the carburetor spacer and another spacer gasket. See Figure 11-100. Figure 11-102. CS8.5-12. Assembling Linkage. 3. CS8.5-12: Connect Z end of choke link and dampening spring to choke lever on blower housing or control bracket. -
Page 156: Install Air Cleaner Base And Element
Section 11 Reassembly Install Air Cleaner Base and Element 1. Install the air cleaner base gasket onto the mounting studs. Attach the breather hose onto Rubber Seal the air cleaner base connection port. Then install the air cleaner base onto the studs. Connect the opposite end of the breather hose to the valve cover. - Page 157 Section 11 Reassembly Figure 11-108. CS4, CS6. Adjusting Governor. Figure 11-110. CS4, CS6, CS8.5 (spec. 92xxxx), CS10, CS12. Shut-Off Valve Orientation. 2. Install the fuel tank assembly onto the mounting brackets. Secure with the four M6 hex flange screws and a flat washer [CS8.5 (spec. 92xxxx), CS10, CS12 only] under each screw head.
-
Page 158: Install Outer Air Cleaner Cover
Section 11 Reassembly Figure 11-112. CS8.5 (spec. 95xxxx) Installing Fuel Figure 11-114. CS8.5 (spec. 95xxxx). Mounting Tank Support. Shut-Off Valve. 2. Install the fuel tank assembly, with the fuel line 5. Connect the fuel line to the outlet of the shut-off connected to the outlet fitting, into the fuel tank valve and the carburetor inlet. -
Page 159: Install Muffler
Section 11 Reassembly Prepare the Engine for Operation The engine is now reassembled. Before starting or operating the engine be sure to do the following: 1. Make sure all hardware is properly torqued. 2. Make sure the oil drain plugs and oil sentry control unit are tightened securely. - Page 160 Section 11 Reassembly Figure 11-118. CS4, CS6. High Speed Stop Screw. Figure 11-120. CS8.5 (spec. 95xxxx). High Speed Stop Screw. Figure 11-119. CS8.5 (spec. 92xxxx), CS10, CS12. High Speed Stop Screw. 11.32...
Need help?
Do you have a question about the Command PRO CS and is the answer not in the manual?
Questions and answers