Table of Contents
Advertisement
Quick Links
Clean Water Made Easy
www.cleanwaterstore.com
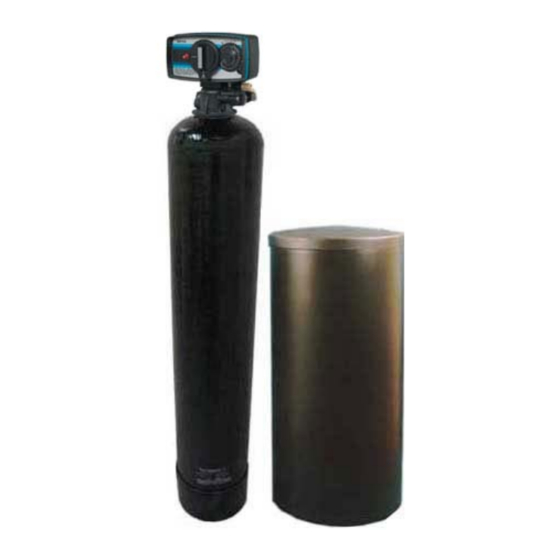
Fleck 5600 Softener
Installation & Start‐Up Guide
Thank you for purchasing a Clean Water System! With
proper installation and a little routine maintenance your
system will be providing filtered water for many years.
Your new system comes with a printed Fleck Service manual,
which along with this start‐up guide will help guide you in the
installation and start‐up of your new system. The Fleck
service manual covers other types of systems as well such as
water softeners and filters, so there may be information in
your Fleck service manual that does not pertain to your
system. Please review this start‐up guide entirely before
beginning to install your system and follow the steps outlined
for best results.
Questions?
Call us toll‐free: 1‐888‐600‐5426 or 1‐831‐462‐8500
Email us: support@cleanwaterstore.com
See more information on our website: www.cleanwaterstore.com/resources
Advertisement
Table of Contents
Troubleshooting

Subscribe to Our Youtube Channel
Related Manuals for Clean Water Systems Fleck 5600 Softener


Summary of Contents for Clean Water Systems Fleck 5600 Softener
- Page 1 Clean Water Made Easy www.cleanwaterstore.com Fleck 5600 Softener Installation & Start‐Up Guide Thank you for purchasing a Clean Water System! With proper installation and a little routine maintenance your system will be providing filtered water for many years. Your new system comes with a printed Fleck Service manual, which along with this start‐up guide will help guide you in the installation and start‐up of your new system. The Fleck service manual covers other types of systems as well such as water softeners and filters, so there may be information in your Fleck service manual that does not pertain to your system. Please review this start‐up guide entirely before beginning to install your system and follow the steps outlined for best results. Questions? Call us toll‐free: 1‐888‐600‐5426 or 1‐831‐462‐8500 Email us: support@cleanwaterstore.com See more information on our website: www.cleanwaterstore.com/resources ...
-
Page 2: Table Of Contents
Clean Water Made Easy www.cleanwaterstore.com Table of Contents Packing List ................................ 2 Pre‐Installation .............................. 3 Best Practices for Piping & Drain Installation ...................... 3 How Your Softener Works ............................. 4 Installation Instructions ............................ 7 Attaching the Brine Line Tubing to the Brine Tank & the Fleck 5600 Brine Valve ........ 9 CWS Time Clock Diagram ........................ 11 Maintaining Your Softener 5600 System ...................... 12 Troubleshooting the Fleck 5600 Softener ...................... 13 More Troubleshooting Tips .......................... 15 Brine Solution Not Being Sucked In During Regeneration .............. 15 System Not Backwashing Adequately .................... 15 System Not Programmed Correctly – PROGRAM SETTINGS .............. 16 Brine Tank Not Filling With Enough Water .................... 16 Filter Tank Does Not Sit Level on the Floor .................... 16 ... -
Page 3: Packing List
Fleck 5600 Softener Installation & Startup Guide Packing List All models will come with: Quantity Description 1 Fleck 5600‐SXT backwash control valve & bypass valve 1 Pipe connector kit (either 1”or ¾”) 1 Black brine tank 1 Media funnel You will also receive one of the following groups of items depending on the size of your system. Model Size: 24K Grain Softener: Quantity Description 1 8” x 44” filter tank with distributor tube 1 3/4 cubic foot box of softening media (resin) Model Size: 32K Grain Softener: Quantity Description 1 9” x 48” filter tank with distributor tube 1 ... -
Page 4: Pre-Installation
Fleck 5600 Softener Installation & Startup Guide Pre‐Installation 1. Review your packing list and make sure you have received all the parts before beginning installation. Please ensure that all parts are included before scheduling a plumber or installer to come to the site. 2. If you are going to be turning off the water to the house and you have an electric water heater, shut off the power to the water heater before beginning installation in case water heater is accidentially drained. 3. Pick a suitable location for your filter system on a dry level spot where it won’t be exposed to freezing temperatures. A minimum of 20 PSI is required. Maximum pressure is 90 PSI. 4. Get all of your plumbing parts together before beginning installation. Installation typically takes 3 to 5 hours. However after installation the Softener must be allowed to run through a complete backwash and rinse cycle (also called ‘regeneration’). You don’t have to be present for this first backwash necessarily, but it does take 90 minutes. 5. After the system is installed and running, your water may be discolored, or full of sediment or rust, particularly if this is older piping that has been exposed to iron or manganese for some time. Typically this clears up over a day or two, but can persist for weeks if the pipe is old galvanized iron pipe that is corroded. Best Practices for Piping & Drain Installation 1. See typical installation (see Fig 1). The softener is installed after the pressure tank. 2. Make sure to connect the inlet pipe to the Fleck 5600 inlet and the outlet to the outlet (see Fig 2). As you face the Fleck 5600 control from the front, the water enters on the right and exits on the left. From the back (see Fig 2) the water enters on the left. The inlet and outlet are attached to the bypass valve which is marked with arrows as well. 3. Make sure there is a working gate or ball valve before the Fleck 5600 Softener and also one after as shown in the diagram. The pressure gauges are optional and not necessary but a hose bib (which is a faucet that you can attach a garden hose to) is strongly recommended after the softener before the second ball valve. This makes it easy to rinse your new softener on start‐up and gives you a place to test the water before it enters your household plumbing. 4. If you will be using copper piping, do not sweat the copper pipe directly on to the Fleck 5600 control valve. Avoid heating up the Fleck 5600 control valve plastic with the torch. ... -
Page 5: How Your Softener Works
Fleck 5600 Softener Installation & Startup Guide 5. You do not need unions to install your Fleck 5600 control. If you need to remove it, the Fleck 5600 has quick‐release couplings that make it easy to put the softener on by‐pass and remove the filter system from the piping. 6. The drain line tubing (not supplied) is connected to a drain from the drain outlet using flexible ½” ID tubing. Note that the drain can run up above the Fleck 5600 control and into a drain, it does not have to drain down, as the filter backwashes under line pressure from your well pump. Most plumbing codes require an air‐gap connection, so that if your sewer or septic tank backs up, it cannot cross connect with the drain tubing. How Your Softener Works See Fig 1. In the softener, the water enters the top of the tank and flows down through the media and up the distributor tube. Hardness minerals are drawn to the resin beads in the softener. During backwash, the water flow is reversed and water flows down the distributor tube and up through the media, lifting and expanding the softening media, and removing any trapped particles in the media. After the backwash stage, salt brine automatically drawn in from the brine tank and slowly rinses through the softening resin for 1 hour, which allows the hardness minerals to be swapped out with harmless sodium or potassium ions. This entire automatic process, called ‘regeneration’ takes about 90 minutes. Typically the softener filter is set to regenerate every 14‐21 days, during the middle of the night when no water is being used. Fig 1 Page 4 www.cleanwaterstore.com Rev 031714 ... - Page 6 Fleck 5600 Softener Installation & Startup Guide Fig 2 ‐ Typical Softener Fleck 5600 piping installation with ball valve and hose bib after the filter along with pre‐ and post‐filtration if necessary: Page 5 www.cleanwaterstore.com Rev 031714 ...
- Page 7 Fleck 5600 Softener Installation & Startup Guide Fig 3: Fleck 5600 from the rear showing the inlet and outlet end‐connector fittings 1” or 1‐1/4” NPT in Noryl plastic. Brass end‐connectors are also available for connecting to copper tubing. To Brine Tank To Drain Inlet Outlet Fig 4 Fleck 5600 side view Bypass Knobs – shown in Bypass position To Drain Inlet Outlet Page 6 www.cleanwaterstore.com Rev 031714 ...
-
Page 8: Installation Instructions
Fleck 5600 Softener Installation & Startup Guide Installation Instructions 1. Unscrew by hand the entire Fleck 5600 control valve from top of tank if it was shipped screwed on. Place distributor tube in tank if not already inside tank. If not already done, make sure blue cap is on top of distributor tube, or wrap the top of distributor tube with electrical or duct tape. The idea is we do not want any media to go down the distributor tube. Plug or tape top of distributor tube when adding media to prevent media from entering. Remove when finished. 2. Next add the softening resin using the media funnel provided. Tank will be approximately 2/3to the 3/4 full. 3. Remove cap or tape from top of distributor tube. Be careful not to pull up distributor tube when removing cap or tape. 4. Attach plastic top screen to the under‐side of the Fleck 5600 control valve. It is a funnel‐shaped plastic screen that snaps on to the control valve and prevents resin from being backwashed out to drain during the regeneration cycles. Page 7 www.cleanwaterstore.com Rev 031714 ... - Page 9 Fleck 5600 Softener Installation & Startup Guide 5. NOTE Regarding Teflon tape and pipe sealants: It is OK to use Teflon tape and pipe sealant on the water pipe connector threads, where you attach your pipes or plumbing to the Fleck 5600. DO NOT USE any Teflon tape or pipe joint compound on the tank itself or on the threads where the Fleck 5600 threads into the tank. 6. Install the Fleck 5600 backwash control‐timer valve on to the top of the filter tank by hand, do not over‐tighten. Tighten with hands, there is no need for a pipe wrench or other wrench. 7. See the bypass image below. Note that Items 2 are the pipe connectors and the other end is what gets attached to the control valve. Items 3 are the red clips that hold the pipe connectors to the by‐ pass valve. To put system on or off bypass do NOT remove the red clips. Just turn knobs (1). Fleck 5600 is usually shipped in by‐pass position. Leave in bypass position for now. 8. Fleck 5600 Bypass & Pipe Connectors Page 8 www.cleanwaterstore.com Rev 031714 ...
-
Page 10: 14. Attaching The Brine Line Tubing To The Brine Tank & The Fleck 5600 Brine Valve
Fleck 5600 Softener Installation & Startup Guide 9. Lubricate the by‐pass valve o‐rings only on the pipe connectors with some vegetable oil or silicone grease and connect the bypass assembly to the Fleck 5600 control by sliding the bypass valve firmly into the body of the Fleck 5600. Once bypass is in far enough, you will be able to easily insert the red connector clips. DO NOT USE OIL OR PETROLEUM GREASE ON ANY PART OF THE FLECK 5600 CONTROL VALVE. O‐rings are OK to lubricate but not the main tank threads. 10. Make sure the by‐pass valve is in the bypass position when starting the installation. Follow the IN and OUT arrows on the bypass valve and control valve for proper connection of in and out water piping. Leave in the BY‐PASS position for now. 11. Now install your water pipes to the Fleck 5600‐SXT bypass end connectors. Our preferred method is to wrap the pipe threads with 2 or 3 wraps of Teflon tape, then apply a thin coating of white non‐ hardening Teflon joint compound paste (available at all hardware stores) before attaching the pipe fittings. Make sure inlet is installed to the 'In" pipe connector on the bypass valve and outlet is on the “Out” connector. Note: Arrows on bypass valve should be visible from the top of the bypass valve. 12. Connect some flexible tubing from the drain connection on the Fleck 5600‐SXT control valve to a suitable drain such as a septic tank or drain to a sewer. It is OK to run the drain line up and over the Fleck 5600‐SXT Softener up to 4 feet above the top of the tank. If the drain line will be more than 20 feet, and especially if your system is a 2.0 or 2.5 cubic foot size, use larger diameter tubing such as ¾” or 1”. Note that it is desirable to be able to run the drain line into a bucket in order to test the backwash flow rate in the future. This is why hard piping the drain line is discouraged, however, if you do use hard PVC piping for the drain line, and you are able to remove the hard PVC drain piping and attach flexible tubing should you ever desire for testing purposes, it is OK to use rigid PVC pipe for the drain. Make sure the drain tubing is firmly clamped to the barbed fitting with a hose clamp to prevent leaks. 13. Next, connect the solution tank to the Fleck 5600 control valve with the black tubing, provided with the brine tank. 14. Attaching the brine line tubing to the brine tank & the Fleck 5600 brine valve Page 9 www.cleanwaterstore.com Rev 031714 ... - Page 11 Fleck 5600 Softener Installation & Startup Guide 15. Begin by sliding the plastic brine injector nut on to the brine tubing by putting the tubing through the non‐threaded side of the nut. Next, slide the black (or clear) compression ring on to the tubing with the narrower diameter going on first. Then slide the taller, white compression ring on to the tubing with the wider diameter going on first. The two compression rings should lay flush against each other on the tubing. Slide them in to the brine injector nut and place the brine tubing into the brine valve. Finally, push the brine injector nut, which now has the compression rings inside of it, on to the threading of the brine valve and rotate the nut clockwise, screwing it on to the brine valve. Tighten it down to finger tightness. The tubing should be firmly attached and not slide out if pulled on. 16. Repeat step 14 to attach the tubing to the perm solution tank. This uses the same process, but on the brine tank valve. 17. Add approximately 5 gallons of water to the brine tank, then fill it about 2/3 full of salt. It is OK to use any kind of water softening salt, however we find that extra coarse salt works better than pellets. You do not have to add water to the brine tank again after this first time during the start‐up. 18. See the over‐flow barbed fitting on the side of the brine tank. You do not have to connect this to a drain. If the safety float were to malfunction, there is a small chance that the brine solution will drip out of this fitting. If this would cause a big mess where you have installed the softener, hook some tubing to this and run to a bucket, floor pan or floor drain. Normally no brine will leak out of this fitting. 19. Now you are ready to turn on the water to the system. Turn on the water and leave on bypass and check for leaks. Leave the ball valve after the softener closed, so water is still off to the house, but connect a garden hose and open up the hose bib after the softener and allow the water to run. This will help to clear out any foreign material that may be in the pipes from the piping installation. If you do not have a valve installed after the softener and you do not have a hose bib, you will need to turn the water on inside the house to let the water run. Use a bathtub or laundry sink or other fixture that does not have an aerator screen. 20. Leave the water running out of the garden hose at a slow rate. Now you can turn the bypass valve to the service position. You do NOT remove the red clips on the bypass knobs in order to turn the bypass valves from the bypass to the service position. First open the Inlet Side of the bypass valve. ...
-
Page 12: Cws Time Clock Diagram
Fleck 5600 Softener Installation & Startup Guide knobs. Make sure you are turning the bypass valve knobs in the correct direction which is counter‐ clockwise as you face the bypass valve knobs. 21. Now turn on the garden hose to full force and let the water until it turns relatively clear. The water may have some color at first. CWS Time Clock Diagram 22. Plug your CWS Time Clock control valve into an outlet. Your sediment filter comes preset to backwash at 2:00 am if the timer is set to real time of day. 23. Set timer so it reads the real time of day 24. Slide two pins outward on the skipper wheel (above) to set the system to backwash once every six days (two pins sticking out). 25. Start a manual backwash by turning the Manual Regeneration knob clockwise to backwash. Very slowly turn the inlet knob on the bypass valve towards the service position, but DO NOT open the valve all the way. We want to allow all of the air in the tank to escape before allowing the water to flow freely. The bypass valve knobs may be a little stiff at first. 26. Once water begins to flow from the drain line open the inlet valve all the way. Continue to let the water run from the drain line for about five minutes or until any resin fines in the water are no longer present. 27. If possible verify that the backwash flow is 5 gallons per minute, which is the recommended backwash flow rate for 1.0 and 1.5 cubic foot models. If you have a 2.5 cubic foot Filter it should be backwashing at 10 gallons per minute. You can easily run the drain hose to a bucket and using a watch verify the flow rate in gallons per minute. An adequate backwash is critical to properly clean the Softener resin and prevent it from cementing together. Page 11 www.cleanwaterstore.com Rev 031714 ... -
Page 13: Maintaining Your Softener 5600 System
Fleck 5600 Softener Installation & Startup Guide 28. Allow to go through full cycle automatically. Wait 2 hours and initiate another backwash, or set the skipper wheel so it backwashes the same night as the installation. The filter resin should be backwashed twice for best results when the resin is new. This eliminates any potential for milky colored water in the household water, and allows the resin to be rinsed thoroughly. 29. After backwashing is completed, open up hose bib, bath tub faucet or other faucet such as a laundry sink without an aerator screen in house and allow water to run for 5 to 10 minutes. If piping inside house is corroded, turning on and off the water may dislodge some loose mineral or material. Aerators on faucets may need to be cleaned later if some of the fixtures inside house start to run more slowly. 30. Pull out two pins so it backwashes every six days; the numbers on the skipper wheel represent a 12 day cycle, so sliding pins 1 and 7 out would be every 6 days. If your water has a lot of sediment or iron in it, set to backwash every 3 ‐ 4 days. If your water is very clean, clear water, and there are only 1 or 2 people in the house, you can set it backwash every 12 days. 31. Check to make sure at the end of the cycles that the brine tank is filled with enough water to cover salt. You can change the level of the brine by adjusting the level of the float assembly. For most users though it is not necessary to adjust the float, it comes set to the correct level. 32. After the regeneration process is complete, turn on the water to the house and run the water in the house for a few minutes. 33. Refer to your Fleck 5600 service manual for more information about how your control valve is programmed if desired. Maintaining Your Softener 5600 System Adding Salt to the Brine Tank: Be sure to check the level of salt every few months (typically 3‐4 months). You will see that the salt level will drop after a certain period of time based on your usage, at which point you will want to add more salt as you did the first time. Clean the Injector Once a year, clean the brine tank and the brine injector. 1. Shut off water to filter or put filter on bypass. 2. Release water pressure by pressing the Extra Cycle button, or shut off the water to the house by closing the ball valve after softener, and release the pressure by opening up the hose bib after the softener. ... -
Page 14: Troubleshooting The Fleck 5600 Softener
Fleck 5600 Softener Installation & Startup Guide 4. Pry out #8 Cap Injector to reveal #15 injector screen, and #7 injector assembly using small screw driver. Clean in vinegar or muriatic acid. 5. Re‐install these items and test to make sure the injector is drawing a vacuum by removing the 3/8” black tubing from the pot perm tank to the control valve, at the opening #9. 6. Turn the water on and return to service position. 7. Push the Extra Cycle button. Wait 10 to 12 minutes until the Softener 5600 control valve is in in the brine draw position (Cycle 2). At this point, it should be sucking a vacuum, which you can determine by placing your thumb over the hole. 8. Note that if you do NOT want the Fleck 5600 control to go through all the cycles (which takes 90 minutes) you can press the Extra Cycle to advance to the next cycle. Wait until the 5600 control goes to the next cycle and press the Extra Cycle button again and continue until the control valve is back in the service position and displaying the current time. 9. Next clean the potassium perm tank by removing the felt pad and cleaning in muriatic acid, citric acid or vinegar, or better yet just replacing the felt pad if you want. Clean the float and rinse the pot perm tank out. It’s better to use rubber gloves when you are doing this to avoid the possibility of staining your hands with potassium permanganate. If your hands do become stained you can clean them with vinegar or lemon juice. Troubleshooting the Fleck 5600 Softener PROBLEM / SYMPTOM POSSIBLE CAUSE SOLUTION Water softener fails to regenerate Electrical service to unit Assure permanent electrical service (check fuse, plug, pull chain, or switch) has been interrupted Timer is defective Replace timer Power failure Reset time of day Hard water By‐pass valve is open Close by‐pass valve. No salt is in brine tank Add salt to brine tank and maintain salt level ... - Page 15 Fleck 5600 Softener Installation & Startup Guide Internal valve leak Replace seals and spacers and/or piston. Unit used too much salt Improper salt setting. Check salt usage and salt setting Excessive water in brine See problem 7. tank. Loss of water pressure Iron buildup in line to Clean line to water conditioner. water conditioner Iron buildup in water Clean control and add mineral cleaner to conditioner. mineral bed. Increase frequency of regeneration. Inlet of control plugged Remove piston and clean control due to foreign material broken loose from pipes by recent work done on plumbing system. Loss of softening resin through drain line Air in water system Assure that well system has proper air eliminator control. Check for dry well condition. Improperly sized drain Check for proper drain rate. line flow control. Iron in conditioned water Fouled mineral bed. Check backwash, brine draw, and brine tank fill. Increase frequency of regeneration. ...
-
Page 16: More Troubleshooting Tips
Fleck 5600 Softener Installation & Startup Guide Control cycles continuously Misadjusted, broken, or Determine if switch or timer is faulty and shorted switch replace it, or replace complete power head. Drain flows continuously Valve is not Check timer program and positioning of programming correctly. control. Replace power head assembly if not positioning properly. Foreign material in Remove power head assembly and inspect bore. Remove foreign material control. and check control in various regeneration positions Internal control leak. Replace seals and piston assembly. More Troubleshooting Tips Brine Solution Not Being Sucked In During Regeneration Most problems occur when the Fleck 5600 is not drawing in the brine. Make sure the injector is drawing in the brine: 1. Remove the brine tank tubing where it enters the Fleck 5600 control valve. 2. Press the Extra Cycle button and hold for several seconds until a backwash is started. After the display stops blinking and it is in a backwash cycle, press the Extra Cycle button again, and it will advance to the next cycle, which is the Brine Cycle, where it is supposed to suck in the brine solution. 3. If it is sucking strongly, check the brine tank float inside the brine well and make sure there are no rubber bands around it, and that is free of obstructions. In some cases it may need to be replaced or cleaned, if there is suction at the control valve, but no brine is being drawn in. 4. If there is NO suction at the control valve port where you removed the brine line tubing, then the injector should be cleaned. 5. If the injector has been cleaned and there is still no suction check to make sure there is obstruction in the backwash line; that the backwash line does not go up and over the softener more than several feet ... -
Page 17: System Not Programmed Correctly - Program Settings
Fleck 5600 Softener Installation & Startup Guide System Not Programmed Correctly – PROGRAM SETTINGS In some cases, the Fleck 5600 may not be programmed correctly. Verify the correct programming by following the steps 21‐33 earlier in the start‐up guide. Brine Tank Not Filling With Enough Water Sometimes if the brine tank is not filling adequately, it is possible that the float assembly in the tank is set too low. You would want the float to be several inches above the air check valve inside the tank. This will allow for enough water to be added to the tank before shutting the brine fill cycle. If necessary, pull the float assembly rod up to the appropriate height, and cut the rod at that height, leaving while keeping the rubber washers the adequate space to hold the float in place. Filter Tank Does Not Sit Level on the Floor Your black filter tank base is not glued to the bottom of your tank. Occasionally tank bases will become crooked during shipment. If you find that that your tank does not sit level on the floor, you can easily adjust it by holding the empty tank and rapping it on a concrete or solid floor once or twice in order to level it. Page 16 www.cleanwaterstore.com Rev 031714 ...
Need help?
Do you have a question about the Fleck 5600 Softener and is the answer not in the manual?
Questions and answers