Fisher & Paykel OR90SDBGFX User Manual
Freestanding
Hide thumbs
Also See for OR90SDBGFX:
- Installation instructions and user manual (60 pages) ,
- Installation instructions and user manual (52 pages)

Related Manuals for Fisher & Paykel OR90SDBGFX


Summary of Contents for Fisher & Paykel OR90SDBGFX
-
Page 1: Installation Instructions
Freestanding cooker Installation instructions User guide OR90SDBGFX models GB IE... -
Page 3: Table Of Contents
Contents Safety and warnings Installation instructions First use Using your oven Cooking functions Cooking guide Using the rotisserie Using the electronic timer Automatic cooking Using your gas cooktop Care and cleaning Troubleshooting Warranty and service Important! SAVE THESE INSTRUCTIONS The models shown in this User Guide may not be available in all markets and are subject to change at any time. -
Page 4: Safety And Warnings
Safety and warnings Installation WARNING! Electrical Shock Hazard Always disconnect the cooker from the mains electricity supply before carrying out any maintenance operations or repairs. Failure to do so may result in death or electrical shock. WARNING! Cut Hazard Take care - panel edges are sharp. Failure to use caution could result in injury or cuts. - Page 5 Safety and warnings Some appliances have a protective film. Remove this film before using the cooker. After unpacking the appliance, check to to ensure it is not damaged and the door closes correctly. If in doubt, do not use it and consult your Authorised Dealer or a professionally qualified technician.
- Page 6 Safety and warnings Electrical The switch must always be accessible. The power supply cable must not touch any hot parts and must be positioned so that it does not exceed 75 C at any point and cannot become entrapped in the oven door. To connect the cooker to the mains, do not use adapters, reducers or branching devices as they can cause overheating and burning.
- Page 7 Safety and warnings General Do not leave packing elements (plastic bags, polystyrene foam, nails, packing straps etc) around within easy access of children, as these may cause serious injuries. Read the instructions carefully before installing and using the appliance. The manufacturer declines all liability for injury to persons or damage to property caused by the incorrect use or improper use of the appliance.
- Page 8 Safety and warnings Operation Your freestanding cooker has been carefully designed to operate safely during normal cooking procedures. Please keep the following guidelines in mind when you are using it: WARNING! Explosion Hazard Do not store flammable materials such as gasoline near the cooktop. Do not store flammable material in the ovens or in the storage compartment.
- Page 9 Safety and warnings WARNING! Hot Surface Hazard Accessible parts will become hot when this cooker is in use. To avoid burns and scalds keep children away. Do not touch hot surfaces inside the ovens. Use oven mitts or other protection when handling hot surfaces such as oven shelves or dishes.
- Page 10 Safety and warnings Important safety precautions Never leave the appliance unattended when in use. Boilover causes smoking and greasy spillovers that may ignite. NEVER try to extinguish a fire with water. Switch the appliance off at the wall and then cover the flame with a lid or fire blanket.
- Page 11 Safety and warnings Take particular care during warmer weather. Do not place aluminium foil, dishes, trays, water or ice on the oven floor during cooking as this will irreversibly damage the enamel. Do not line the oven walls with aluminium foil. Do not stand on the door, or place heavy objects on it.
- Page 12 Safety and warnings Do not hang towels, dishcloths or other items on the cooker or oven door handle as this is a potential a fire hazard. If the electrical supply cord is damaged, it must only be replaced by an authorised person. Do not touch the cooker with wet hands or feet.
- Page 13 Safety and warnings The manufacturer declines all liability for damage to property cause by the incorrect or improper use of the appliance. Important! This appliance is designed and manufactured solely for the cooking of domestic (household) food and it not suitable for any non domestic application and therefore should not be used in a commercial environment.
-
Page 14: Installation Instructions
Installation instructions Installation instructions Cooker overall dimensions [mm] • height: 897 - • product width: • depth: • cavity width Fig. 1 Dimensions and distances from cooker The cooker must be installed by a qualified technician and in compliance with local safety standards. - Page 15 Installation instructions Levelling the cooker Important! Using the supplied adjustable feet is MANDATORY. For safety reasons and to ensure adequate ventilation, the cooker chassis MUST NOT sit directly on the floor, a plinth, or other support surface. For ease of installation, first remove the kickstrip.
- Page 16 Installation instructions Installation instructions Fitting the anti-tilt bracket Important! To restrain the appliance and prevent it tipping accidentally, the anti-tilt bracket supplied must be fitted according to the instructions below. Drill four 8mm diameter holes for the fixing screws (two in the wall and two in the floor-see Fig.3) and insert the plastic plugs supplied.
- Page 17 Installation instructions Moving the cooker Important! To prevent damaging the adjustable feet or lower trim, ensure the cooker is always lifted by two people. Do not lift the cooker by the door handles. DO NOT DRAG the cooker. Lift the feet clear of the floor.
-
Page 18: Ventilation Requirements
Installation instructions Installation instructions Ventilation requirements The appliance should be installed into a room or space with an air supply in accordance with BS 5440-2:2008. For rooms with a volume of less than 5 m - permanent ventilation of 100 mm free area will be required. - Page 19 Installation instructions Attaching a restraining chain It is a requirement that a restraining chain (not supplied with the appliance) is used to prevent stress being applied to the gas hose or pipework. The chain should be attached securely to the product and on the wall (Fig.
- Page 20 Installation instructions Installation instructions Installation to Natural gas The installation must conform to the relevant British Standards. Installation to Natural Gas must conform to the Code of Practice, etc. The supply pressure for Natural Gas is 20 mbar. Installation to Liquid Petroleum gas This appliance must only be connected to LPG after an LPG conversion kit has been fitted.
- Page 21 Installation instructions To connect the gas supply: Fit the 1/2” BSP (female) connector (supplied with the cooker in a separate kit) to the gas inlet at the rear of the cooker interposing the gasket. Check the correct positioning of the connector as shown and always use two suitable spanners (Fig 8c).
- Page 22 Installation instructions Rear wall Suggested area for gas mains connection Fig. 8d Gas mains connection area. Converting to a different gas type This appliance is suitable for use with Natural gas or LPG (check the “gas type” sticker attached to the appliance).
- Page 23 Installation instructions Injector Injector Fig. 9 Semi-rapid burner Fig. 10 Triple-ring wok burner Injectors for Injector for Injectors for Injector for outer crown inner crown outer crown nner crown Fig. 11 Dual burner...
- Page 24 Installation instructions Adjusting the minimum burner setting Check whether the flame spreads to all burner ports when the burner is lit with the gas valve set to the minimum position. If some ports do not light, increase the minimum gas rate setting. Check whether the burner remains lit even when the gas valve is turned quickly from the maximum to the minimum position.
- Page 25 Installation instructions Table for the choice of the injectors Cat: II 2H3+ Natural gas G30 - 28-30 mbar G20 - 20 mbar Nominal Reduced G31 - 37 mbar BURNERS power [kW] power [kW] Injector Dia. Injector Dia. [1/100 mm] [1/100 mm] 1,75 0,45 Semi-rapid...
- Page 26 Installation instructions Connecting the power supply cable Important! This cooker must be connected to the electricity supply only by an authorised person. Feeder cable section This cooker must be connected to electrical supply using H05RR-F insulated cable 220-240V~ 3 x 1,5 mm cable.
-
Page 28: First Use
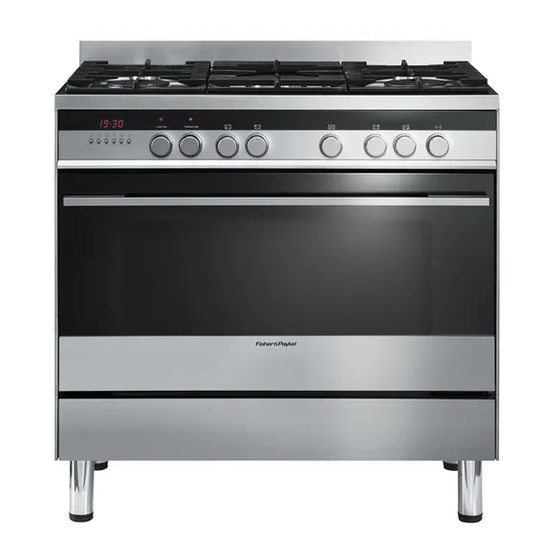
First use Fig. 16 Control panel Rear right (semi-rapid) burner dial Control buttons Front right (triple-ring) burner dial Clock display Function indicator light Temperature dial Temperature indicator light Function dial Front left (triple-ring wok) burner dial Rear left (semi-rapid) burner dial Central (dual) burner dial... - Page 29 First use Buttons 12:00 sets the timer sets the cooking time sets the stop time for automatic cooking set the oven temperature / select Celsius or Fahrenheit decreases the time and temperature increases the time and temperature Fig. 17 Clock display and control buttons Illuminated symbols If the display shows It means that...
- Page 30 First use Remove the side racks to fit the Catalytic panels (if not already fitted) Remove all shelves and trays. For easier access to the fixing screws, you may remove the oven door first. See ‘Removing and refitting the oven door’ in Care and Cleaning. Remove the side racks on both sides: Using a small coin or a flat-head screwdriver, loosen and remove both fixing screws.
-
Page 31: Using Your Oven
Using your oven Before using your new oven, please: Read this user guide, taking special note of the ‘Safety and warnings’ section. Remove all accessories and packaging. Peel the protective film off all surfaces and accessories. Set the clock. The oven will not work until the clock has been set. See ‘Setting the clock’ . Fit the Catalytic panels and side racks. - Page 32 Using your oven Temperature Function indicator light indicator light Fig. 20 Function and temperature dials FUNCTION TEMPERATURE 210 C 225C Select a function Adjust the temperature Rotate the function dial to select a function There are two ways to set the The function indicator light will come on.
- Page 33 Using your oven When the oven is preheating and during To check the set temperature cooking Press the button. indicator will show in the display. The display will flash showing the set indicator will go out when the oven temperature has reached the set temperature.
-
Page 34: Cooking Functions
Cooking functions OVEN LAMP Only the oven light comes on. It remains on in all the cooking functions. BAKE The upper and lower heating elements come on. BAKE is the traditional method of cooking. It is best to cook on only one shelf at a time in this function. Ideal for large cakes and dishes that bake for several hours. - Page 35 Cooking functions WARM this is not a cooking function Always reheat food until piping hot and then select the warm function to keep food hot. FAN BAKE The upper and lower heating elements and the fan come on. Ideal for dishes like lasagne that need to brown on top and also single trays of small cakes or biscuits that bake in less than an hour.
- Page 36 Cooking guide Using the fat filter Use the fat filter when roasting meat and poultry on Fan Bake, Fan Grill or Fan Forced. It helps to keep your oven clean and reduces splatter and smoking. Remove the fat filter before baking. Clean the fat filter after every use.
-
Page 37: Cooking Guide
Cooking guide SAVOURY Recommended Shelf Food Shelves Temp (°C) Time (mins) Function positions 15-20 Roast Chicken Rotisserie Rotisserie 180-210 min/450g Lasagne Single Fan Bake 175-180 45-50 Quiche Single Pastry Bake 180-200 30-40 Pizza Single Pastry Bake 225-250 10-15 Casserole Single Fan Forced 170-190 55-70... -
Page 38: Using The Rotisserie
Using the rotisserie Important! If fitted, remove the sliding shelf supports from shelf position 1 before using the rotisserie. Remove all oven shelves and trays. Prepare the rotisserie supports. Place the grill tray on the benchtop. Insert the supports into the lock studs. Push the supports all the way down to lock them in firmly. - Page 39 Using the rotisserie Position the skewer on the supports. Place the skewer on the supports, and check that the meat does not touch the grill tray. Twist the handle off. It must not be left in the oven. Place the rotisserie in the oven. Check the fat filter is in place.
-
Page 40: Using The Electronic Timer
Using the electronic timer 12:00 You can use the timer at any time, even when the oven is not in use. Important! The timer does NOT turn the oven off. To set the timer Press the timer button. 0:00 The time will show Press buttons to set the time you want (up to 3 hours in one minute steps). -
Page 41: Automatic Cooking
Automatic cooking 12:00 To set the oven for automatic cooking Set the oven Check the clock shows the correct time (eg 12:07). Select the function and set the temperature. The oven will turn on. Set the cooking time Decide how long the food will take to cook, allowing time for preheating if necessary (eg 40 minutes). - Page 42 Using your gas cooktop Fig 23 Cooktop layout Triple-ring wok burner Semi-rapid burner Dual burner Gas burners The dial controls the flow of gas through the safety valve. Semi-rapid and triple-ring wok burners = closed valve (OFF) = maximum flow of semi-rapid and triple-ring burner burners = minimum flow of semi-rapid and triple-ring burner burners You can choose to cook at any heat between , but never...
- Page 43 Using your gas cooktop Before using your cooktop Before using your new cooktop, please: Read this user guide, taking special note of the ‘Safety and warnings’ section. Make sure all burner control dials are turned off. Turn the power to the cooker on at the wall. Using the gas burners Choose the control dial for the burner you want to use.
- Page 44 Using your gas cooktop If a burner does not light Check that: The cooker is plugged in and the electricity is switched on. The gas is turned on. The gas bottle is not empty (if you are using bottled gas). You have held down the dial for at least 10 seconds.
-
Page 45: Using Your Gas Cooktop
Using your gas cooktop Matching cookware to burner Use flat-bottomed pans, and make sure they match the size of the burner, as shown in the following table. A small pot on a large burner is not efficient. Diameters of pans which may be used on the cooktop Burners Minimum Maximum... -
Page 46: General Advice
Care and cleaning Important! Before you start cleaning your cooker, please: Read these cleaning instructions and the ‘Safety and warnings’ section at the start of this user guide. Turn the cooker off at the wall. Make sure the cooker is a safe temperature to touch. Do not use a steam cleaner. - Page 47 Care and cleaning Burner parts and pan supports You can remove and clean these parts with hot soapy water or non-abrasive detergents. Clean spills regularly before they become burnt on. Do not wash these parts in a dishwasher. After cleaning, check that the burners and their flame spreaders are dry before replacing correctly.
- Page 48 Care and cleaning Replacing the triple-ring wok and dual burners Carefully replace the burner parts as per the following Figs. Fit the flame spreader to the housing as shown by the arrow in the Figs.30a-30b. Make sure the burner is not able to rotate (Fig. 31). Check that: the ignitor is always clean to ensure trouble-free sparking.
-
Page 49: Care And Cleaning
Care and cleaning Cleaning the inside of your oven Do not use oven cleaner on catalytic panels. Remove the catalytic panels if additional oven cavity cleaning is required. See ‘Fitting and removing catalytic panels’ Do not use abrasive cleaners, cloths or pads to clean the enamel. To make cleaning easier, you can remove the side racks, the oven door, and the fat filter. - Page 50 Care and cleaning Cleaning the enamel cavity Clean the enamel on the inside of the oven when it has cooled down, using household detergents. You may use ‘off the shelf’ oven cleaners, if you carefully follow the manufacturers’ instructions. Important! Do not use oven cleaner on catalytic panels.
- Page 51 Care and cleaning Fitting and removing the sliding shelf supports When fitting the sliding shelf supports, make sure that you fit: the catalytic panels first. See ‘Fitting the catalytic panels’ . the side racks. the slides to the top wire of a shelf position. both sides of each pair of slides.
- Page 52 Care and cleaning Storage Drawer The drawer opens like a normal drawer. The drawer slides stop the drawer from sliding all the way out. To remove the drawer Open the drawer fully. Press the lever on the left guide rail down and the right guide rail up. Holding the levers, disengage and remove the drawer.
- Page 53 Care and cleaning Replacing the oven light bulbs The oven light bulbs (12V/20 W halogen) have a very long life, but if you should need to replace one, use only a replacement bulb purchased from your nearest Fisher & Paykel dealer and follow these steps.
- Page 54 Care and cleaning Removing and replacing the door glass panes for cleaning. Make sure you follow the precautions and instructions below very carefully. Replacing the glass panes and the door incorrectly may result in damage to the oven and may void your warranty.
-
Page 55: Removing The Door
Care and cleaning Removing the door Turn the oven off at the wall. Make sure Open the levers on the left and right you have prepared enough space for hinges to their full extent, as shown. resting the door and its glass panes on a clean, flat surface. - Page 56 Care and cleaning Remove the inner and middle glass pane Glass retainer Press down on both tabs (1) to release the Lift the inner pane (C) slightly (1), then glass retainer (2). gently slide out (2). Slide the middle pane (B) slightly towards yourself (1), then lift (2) and slide out (3).
- Page 57 Care and cleaning After cleaning, replace the glass panes When replacing the glass panes, make sure that: you replace all panes correctly, as shown. Each pane must be in the position described below in order to fit into the door and to ensure that the oven operates safely and correctly. you take extra care not to bump the edges of the glass against any object or surface.
- Page 58 Care and cleaning Angle-cut corner Take the inner pane (C), holding it with the angle-cut corner orientated as shown. Insert it in the uppermost pair of grooves (1), push it slightly towards yourself (2) and gently lower into place (3). Important! Make sure that the angle-cut corner of the inner pane (C) is at the bottom of the oven door, on the left-hand side.
- Page 59 Care and cleaning Clamp Clamp Glass retainer Position the glass retainer, as shown. It should sit on the bottom edge of the outer glass (A). Check that the clamps of the glass retainer are not deformed or damaged. “Click” Glass retainer Gently push the glass retainer back into place.
- Page 60 Care and cleaning Refit the door Notch Hold the door firmly. Insert the hinge tongues into the slots, making sure that the notches on both sides drop into place as shown. Open the door to its full extent. Fully close the levers on the left and right hinges, as shown.
-
Page 61: Troubleshooting
Troubleshooting Problem Possible solutions A burner does not light. Check the cooker is switched on at the wall. Check the gas supply valve is turned on and the supply to the house is working. You should hear the gas when you turn a burner on. Check the gas bottle is not empty. -
Page 62: Warranty And Service
Warranty and service Before you call for service or assistance ... Check the things you can do yourself. Refer to the installation instructions and your user guide and check that: Your product is correctly installed. You are familiar with its normal operation. If after checking these points you still need assistance, please refer to the Service &... - Page 66 www.fi sherpaykel.com Copyright © Fisher & Paykel 2014. All rights reserved. The product specifications in this booklet apply to the specific products and models described at the date of issue. Under our policy of continuous product improvement, these specifications may change at any time. You should therefore check with your Dealer to ensure this booklet correctly describes the product currently available.
Need help?
Do you have a question about the OR90SDBGFX and is the answer not in the manual?
Questions and answers