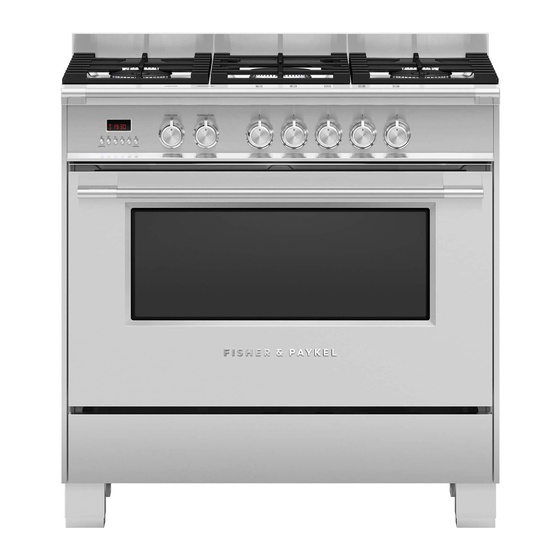
Fisher & Paykel OR90 Series Installation Manual
Dual fuel freestanding cooker
Hide thumbs
Also See for OR90 Series:
- Installation instructions and user manual (44 pages) ,
- Using manual (22 pages) ,
- Installation manual (21 pages)

Related Manuals for Fisher & Paykel OR90 Series


Summary of Contents for Fisher & Paykel OR90 Series
- Page 1 FREESTANDING COOKER OR90 Dual Fuel models INSTALLATION GUIDE GB IE 591554B / 1105508-ß1 11.18...
-
Page 2: Safety And Warnings
SAFETY AND WARNINGS IMPORTANT SAFETY INSTRUCTIONS WARNING! Electrical Shock Hazard This appliance must be installed and serviced only Before carrying out any work on the by a suitably qualified and registered person, and in electrical section of the appliance, it must be accordance with the current editions of the following disconnected from the mains electricity supply. -
Page 3: General Installation Information
GENERAL INSTALLATION INFORMATION Cleaning and servicing Replacement parts Service should only be performed by an authorised technician. Only authorised replacement parts may be used in performing service on the cooker. When removing appliance for cleaning and/or service: Replacement parts are available from factory authorised parts distributors. ... -
Page 4: Parts Supplied For Installation
PARTS SUPPLIED FOR INSTALLATION PARTS SUPPLIED FOR INSTALLATION 1/2” cylindrical Anti-tip bracket (1) Screws and plastic connector and sleeve anchors (2) fibre washer (1) TOOLS NEEDED FOR INSTALLATION (NOT SUPPLIED WITH THE APPLIANCE) IMPORTANT! THIS APPLIANCE MUST BE INSTALLED BY A QUALIFIED INSTALLER. ... -
Page 5: Model Identification
MODEL IDENTIFICATION Model features may vary OR90 MODELS OR90SCG4 OR90SDG4 OR90SCG6 OR90SDG6 PRIOR TO INSTALLATION Unpacking and handling Inspect the cooker to verify that there is no shipping damage. If any damage is detected, call the shipper and initiate a damage claim. Fisher & Paykel is not responsible for shipping damage. DO NOT discard any packing material until the cooker has been inspected. -
Page 6: Product Dimensions
PRODUCT DIMENSIONS NOTE: Model features may vary Optional kickstrip is available (purchased separately) FRONT SIDE OR90 DUAL FUEL PRODUCT DIMENSIONS Overall height of cooker min. 898 max 946 (from floor to top of cooktop, excluding grates and optional backguard) Overall width of cooker Overall depth of cooker (from front of cooker to rear of backguard, excluding handles and dials) Height of optional backguard from top of cooktop... -
Page 7: Clearance Dimensions
CLEARANCE DIMENSIONS Note The cooker must be installed by a suitably qualified technician and in compliance with local safety standards. This cooker has class “2/1” overheating protection so that it can be installed next to a cabinet If the cooker is installed adjacent to ... - Page 8 FITTING THE OPTIONAL BACKGUARD LOCATION OF ELECTRICAL SUPPLY Backguard Remove the screws and spacers on the rear of the cooktop. Assemble the backguard as shown and fix onto the back of the cooker using the same screws and spacers. Fix the backguard onto the cooker using the screws provided.
-
Page 9: Ventilation Requirements
VENTILATION REQUIREMENTS A suitable ventilation hood may be installed above the cooker. Fisher & Paykel has a choice of ventilation hoods designed to match the rest of our kitchen appliance family. See fisherpaykel.com or your local dealer for more details. Hood (inc. -
Page 10: Fitting The Adjustable Feet
FITTING THE ADJUSTABLE FEET Fitting the adjustable feet Fitting the adjustable feet covers (optional) The adjustable feet must be fitted to the base of the cooker before use. If using the adjustable feet covers fit these while the cooker is tipped over. Rest the rear of the cooker on a piece of the polystyrene packaging exposing the base for the fitting of the feet. -
Page 11: Moving The Cooker
MOVING THE COOKER IMPORTANT! When raising cooker to upright position always ensure two people carry out this manoeuvre to prevent damage to the adjustable feet. Be careful: do not lift the cooker by the oven door handle, the hob rail or by lifting the cooktop trim as this may damage the appliance. -
Page 12: Installing The Anti-Tip Bracket
INSTALLING THE ANTI-TIP BRACKET IMPORTANT! To restrain the cooker and prevent it tipping accidentally secure the cooker to the wall using the supplied anti-tip bracket. If installing the cooker above a plinth (without fitting the adjustable feet) revise the installation dimensions for the anti-tip bracket accordingly, considering that the feet have the following measurements: min 85mm - max 133mm. -
Page 13: Electrical Connection
ELECTRICAL CONNECTION IMPORTANT! This cooker must be connected to the mains power supply only by a suitably qualified person in accordance with current regulations. This cooker must be earthed. The appliance must be connected to the mains checking that the voltage corresponds to the value given in the rating plate and that the electrical ... -
Page 14: Connection Of The Power Supply Cable
CONNECTION OF THE POWER SUPPLY CABLE IMPORTANT! The power supply cable must be connected by an authorised service person DO NOT unscrew the screws fixing the cover plate behind the terminal block OR90SG6 MODELS ONLY 220-240V AC 220-240V AC cable clamp cable clamp 1 Unhook the terminal board cover by inserting a... -
Page 15: Gas Connection
GAS CONNECTION Gas supply The connection must be performed by an authorised person according to the relevant standards. This appliance is suitable for use with Natural Gas or LPG. The gas cooker is shipped from the factory set and adjusted for Natural Gas. - Page 16 GAS CONNECTION IMPORTANT! The connection must be performed by an authorised person according to the relevant standards. The gas supply must use the gas inlet pipe which is located at the left hand side at the rear of the appliance. IMPORTANT! Use two wrenches to tighten the connection.
-
Page 17: Leak Testing
FLAME TESTING The operation of the appliance must be tested when installation is completed. Turn on the appliance gas controls and light each burner individually and in combination. Check for a well defined blue flame without any yellow tipping. - If any abnormality is evident then check that the burner cap is located properly and the injector nipple is aligned correctly. -
Page 18: Gas Conversion
GAS CONVERSION Replacing the cooktop burner injectors Conversion to LP/Propane Gas 1 Remove the pan supports, the burner caps and the flame spreaders. Conversion to LPG 2 Using a wrench substitute the nozzle injectors with those most suitable for the kind of gas - This cooker can be used with Natural Gas or LPG. - Page 19 ADJUSTING THE MINIMUM BURNER SETTINGS Adjusting the cooktop burner minimums Check whether the flame spreads to all burner ports when the burner is lit with the gas tap set to the minimum position. If some ports do not light, increase the minimum gas rate setting. ...
-
Page 20: Final Checklist
FINAL CHECKLIST TO BE COMPLETED BY THE INSTALLER GENERAL OPERATION Placement of unit. All internal packing materials removed. Check below the cooktop grates and inside the oven. Specified clearance maintained to cabinet surfaces. If converted for use with ULPG, confirm that the test point adapter and cooktop Unit Level –... - Page 22 FISHERPAYKEL.COM © Fisher & Paykel Appliances 2018. All rights reserved. The product specifications in this booklet apply to the specific products and models described at the date of issue. Under our policy of continuous product improvement, these specifications may change at any time. You should therefore check with your Dealer to ensure this booklet correctly describes the product currently available.
Need help?
Do you have a question about the OR90 Series and is the answer not in the manual?
Questions and answers