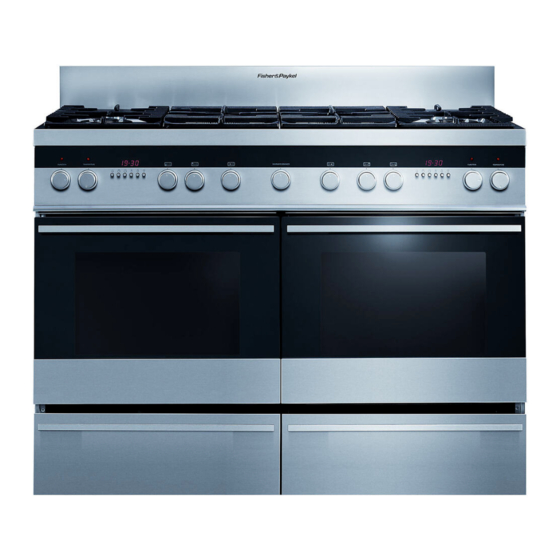
Fisher & Paykel FREESTANDING COOKER OR120 User Manual
Freestanding cooker double oven models
Hide thumbs
Also See for FREESTANDING COOKER OR120:
- Installation and use instructions manual (52 pages)

Subscribe to Our Youtube Channel
Related Manuals for Fisher & Paykel FREESTANDING COOKER OR120


Summary of Contents for Fisher & Paykel FREESTANDING COOKER OR120
-
Page 1: Installation Instructions
Installation instructions User guide Freestanding cooker OR120 double oven models GB IE... -
Page 3: Table Of Contents
Contents Safety and warnings Installation instructions Maintenance instructions Introducing your cooker Using your cooktop Cooktop troubleshooting Using your ovens for the first time Clock and timer Using your oven Cooking functions Automatic cooking Using the warmer drawer Care and cleaning... -
Page 4: Safety And Warnings
Safety and warnings Installation Electrical Shock Hazard Always disconnect the cooker from the mains electricity supply before carrying out any maintenance operations or repairs. Failure to do so may result in death or electrical shock. Cut Hazard Take care - panel edges are sharp. Failure to use caution could result in injury or cuts. - Page 5 Safety and warnings To connect the cooker to the mains, do not use adapters, reducers or branching devices as they can cause overheating and burning. This cooker must be connected to a suitable double pole control unit adjacent to the cooker. No diversity can be applied to this control unit.
- Page 6 Please keep the following guidelines in mind when you are using it: Explosion Hazard Do not store flammable materials such as gasoline near the cooktop. Do not store flammable material in the ovens or in the drawers. Do not spray aerosols near the cooktop during use.
- Page 7 Do not use an asbestos mat or decorative covers between the flame and the saucepan as this may cause serious damage to your cooktop. Do not place aluminium foil or plastic dishes on the cooktop burners. Do not let large saucepans or frying pans overlap the bench as this can deflect heat onto your benchtop and damage the surface.
-
Page 8: Installation Instructions
Installation instructions Fig. 1 Location The installation conditions, concerning protection against overheating of the surfaces adjacent to the cooker, must conform to Fig.3a or 3b. The appliance must be kept no less than 200 mm away from any side wall which exceeds the height of the hob surface (Fig. - Page 9 Installation instructions Class 1 Gas connection made using rubber hose which must be visible and easily inspected or using rigid or flexible metal pipe. Fig. 3a Class 2 Subclass 1 Gas connection made using rigid or flexible metal pipe. Fig. 3b...
- Page 10 Installation instructions 0 mm + 8 mm Levelling the cooker Important! Using the supplied adjustable feet is MANDATORY. For safety reasons and to ensure adequate ventilation, the cooker chassis MUST NOT sit directly on the floor, a plinth, or other support surface. The cooker is already fitted with six levelling feet.
- Page 11 Fig. 5a Correctly raising the cooker Fig. 5b Incorrectly moving the cooker Fig. 5c Incorrectly raising the cooker Installation instructions Moving the cooker Important! Two people must always raise the cooker, as shown, to prevent damaging the adjustable feet. Do not lift the cooker by the door handles. DO NOT DRAG the cooker.
- Page 12 Installation instructions Gas installation (GB & IE only) Important! This cooker uses NATURAL GAS only and cannot be used on any other gas without modification. This appliance is manufactured for conversion to LPG if required. If the injectors are not supplied they can be obtained from the After-Sales Service.
- Page 13 Notes: Flexible hoses can be used where the sited ambient temperature of the hose does not exceed 70°C. These hoses must be manufactured in accordance with BS669 part 1 and be of the correct construction for the type of gas being used. Gas hoses designed for natural gas MUST NOT be used for supplying LPG gas (LPG gas hoses can be identified by a either a red band or stripe on the rubber outer coating of the hose).
- Page 14 Installation instructions Connecting the feeder cable To connect the feeder cable to the cooker: Remove the four screws that hold shield “A” behind the cooker. Open the cable clamp “D” completely. Check the position of the U bolts on the terminal block “B”...
-
Page 15: Maintenance Instructions
‘Table for the choice of injectors’ . To replace the injectors: Remove pan supports and burners from the cooktop. Using a wrench, substitute the nozzle injectors “J” (figs. 8a - 8b - 8c) with those Fig. 8a most suitable for the kind of gas used. - Page 16 Maintenance instructions Setting the burner minimum Check whether the flame spreads to all burner ports when the burner is lit with the gas tap set to the minimum position. If some ports do not light, increase the minimum gas rate setting. Check whether the burner remains lit even when the gas tap is turned quickly from the maximum to the minimum...
- Page 17 Table for the choice of the Injectors Cat: II 2H 3+ Nominal BURNERS Power [kW] Semi-rapid 1,75 Triple ring wok 3,50 inner 1,00 (*) crown Dual outer 4,50 (#) crown (*): Power calculated with inner crown operating. (#): Power calculated with inner and outer crowns operating. Lubrication of the gas taps A qualified technician must lubricate the gas taps.
-
Page 18: Introducing Your Cooker
Introducing your cooker Thank you for buying a Fisher & Paykel freestanding cooker. Once it is installed and ready to use, you will want to know everything about it to make sure you get excellent results right from the start. This guide introduces you to all its special features. We recommend you read the whole guide before using your new cooker, for both safety and cooking success. -
Page 19: Using Your Cooktop
= closed valve = maximum aperture or flow = minimum aperture or flow You can choose to cook at any heat between Using your cooktop Fig. 11 Cooktop layout , but never between Fig. 12 Burner control knob and OFF. - Page 20 Using your cooktop Before using your cooktop Before using your new cooktop, please: Read this user guide, taking special note of the ‘Safety and warnings’ section. Make sure all controls are turned off. Lighting the cooktop Choose the control knob for the burner you want to use.
- Page 21 OFF. To use the inner and outer crowns together, adjust the flame anywhere between the If the cooktop does not light If the cooktop does not light, check that: The cooker is switched on. The gas is turned on.
- Page 22 Choosing a burner Use flat-bottomed pans, and make sure that they match your burner, as shown in the following table. A small pot on a large burner is not efficient. Diameters of pans which may be used on the cooktop Burners Semi-rapid...
-
Page 23: Cooktop Troubleshooting
Call your service person to service the cooker. If there is an electricity failure, you can still use your cooktop. Light the burners by holding a match close to the side of the burner and turning the control knob to the High position. Wait until the flame is... -
Page 24: Using Your Ovens For The First Time
Using your ovens for the fi rst time Function knob Before using your new oven, please: Read this user guide, taking special note of the ‘Safety and warnings’ section. Remove all accessories and packaging. Set the clock. The oven will not work until the clock has been set. Condition the oven: Put in the shelves and trays. -
Page 25: Clock And Timer
Buttons Timer Cooking time End of cooking time Manual position; and cancels the set program Decreases the number shown on the display or changes the volume of the beeps Increases the number shown on the display Illuminated symbols AUTO - flashing - oven in automatic position but not set AUTO - steady illumination - oven set for automatic cooking - timer in operation AUTO - flashing and timer beeping when you have set automatic cooking time -... -
Page 26: Using Your Oven
Using your oven Fig. 21 Function knob Select the function using the function knob. The oven lights will come on. Select the temperature using the temperature control knob. The oven temperature indicator light, above the temperature knob on the control panel, will glow until the oven has reached the set temperature, and then it will go out. -
Page 27: Cooking Functions
OVEN LAMP Only the oven light comes on. It remains on in all the cooking functions. BAKE The upper and lower heating elements come on. BAKE is the traditional method of cooking. It is best to cook on only one shelf at a time in this function. GRILL The grill at the top of the oven comes on. - Page 28 Cooking functions FAN BAKE The upper and lower heating elements and the fan come on. Important! Safe food handling: leave food in the oven for as short a time as possible before and after cooking or defrosting. This is to avoid contamination by organisms which may cause food poisoning. Take particular care during warmer weather.
-
Page 29: Automatic Cooking
Use automatic cooking to automatically turn the oven on, cook, and then turn the oven off. Check the clock shows the correct time. Select the function and temperature. The oven will come on. Decide how long the food will take to cook, allowing time for preheating if necessary. button. -
Page 30: Using Your Warmer Drawer
Using your warmer drawer Before using your warmer drawer, please: Condition it by heating it on maximum for about two hours. Wipe it out with a damp cloth and mild detergent, and dry thoroughly. Important! Always start with hot food. Safe food handling: leave food in the oven for as short a time as possible before and after cooking or defrosting. -
Page 31: Care And Cleaning
Cleaning the gas cooktop Maintenance Period • Clean gas cooktop as per following instructions. Daily • Remove all burner parts, and clean using a non-abrasive Monthly •... - Page 32 It is very important to check that the burner flame spreader and the cap have been correctly positioned. Failure to do so can cause serious problems. Note: to avoid damage to the electric ignition, do not try to light the cooktop when the burners are not in place.
- Page 33 Care and cleaning Replacing the triple-ring wok burner To replace the wok burner, fit the burner ring to the housing as shown by the arrow in the Fig. following. Make sure the burner is not able to rotate. Probe Ignitor Fig.
- Page 34 Care and cleaning Correct position of dual burners The DUAL burner must be correctly positioned; the burner rib must be fitted as shown by the arrows. Position the central small cap in its housing as shown by the arrows. Position the big cap in its housing as shown by the arrows.
- Page 35 Care and cleaning Cleaning the inside of your ovens Do not use abrasive cleaners, cloths or pads to clean the enamel. Fig.32 Removing the side racks Fig.33 Drop-down grill element To make cleaning easier, you can remove the side racks, the oven door, and the fat filter. Once you have removed the side racks, the top grill element also drops down to make cleaning easier.
- Page 36 Care and cleaning Cleaning the enamel cavity Clean the enamel on the inside of the oven when it has cooled down, using household detergents or an ammonia-based cleaner. You may use ‘off the shelf’ oven cleaners, if you carefully follow the manufacturers’ instructions. Cleaning the fat filter Clean the fat filter after every use.
- Page 37 Cleaning the oven door glass Do not use harsh abrasive cleaners or sharp metal scrapers to clean the oven door glass since they scratch the surface, which may result in shattering of the glass. The oven door has three panes of glass. To clean these, you need to remove the inner and middle panes.
- Page 38 Care and cleaning Remove the middle pane: Gently unlock the middle pane of glass from the bottom clamps by moving it as in Fig. 36b. Gently lift the bottom edge of the pane (arrow 1 in Fig. 36c) and remove it by pulling it out from the top clamps (arrow 2 in Fig.
- Page 39 Replacing the middle and inner panes of glass Make sure the door is locked open (see Figs 35a - 35c). Replace the middle pane: Check that the four rubber pads are in place (“M” in Fig. 37a). Check that you are holding the pane the correct way.
- Page 40 Care and cleaning Replace the inner pane: Check that the four rubber pads are in place (“D” in Fig. 38a). Check that you are holding the pane the correct way. You should be able to read the wording on it as it faces you. Insert the pane in the left “E”...
- Page 41 Removing the oven door(s) The oven door(s) can easily be removed as follows: Open the door to the full extent (Fig. 39a). Open the lever “A” completely on the left and right hinges (Fig. 39b). Hold the door (Fig.39c). Gently close the door until left and right hinge levers “A”...
- Page 42 Care and cleaning Removing the drawers Open the drawer completely (Fig. 40a). Move the lever of the left guide down and move the lever of the right guide up. Remove the drawer, while still holding the levers. Important! Warming drawer (left drawer only): Do not remove drawer while hot.
- Page 43 Care and cleaning Replacing the oven lamp Let the oven cavity and the heating elements cool down. Remove the protective cover “B”. Unscrew and replace the bulb “A” with a new one suitable for high temperatures (300°C) with the specifications: 230-240V 50 Hz, 25W, E14 Refit the protective cover, “B”.
-
Page 44: Warranty And Service
Warranty and service Before you call for service or assistance ... Check the things you can do yourself. Refer to the installation instructions and your user guide and check that: Your product is correctly installed. You are familiar with its normal operation. If after checking these points you still need assistance, please refer to the Service &... - Page 48 Copyright © Fisher & Paykel 2009. All rights reserved. The product specifications in this booklet apply to the specific products and models described at the date of issue. Under our policy of continuous product improvement, these specifications may change at any time.
Need help?
Do you have a question about the FREESTANDING COOKER OR120 and is the answer not in the manual?
Questions and answers