Table of Contents
Advertisement
Advertisement
Table of Contents

Related Manuals for Kaba E-PLEX 50XX SERIES


Summary of Contents for Kaba E-PLEX 50XX SERIES
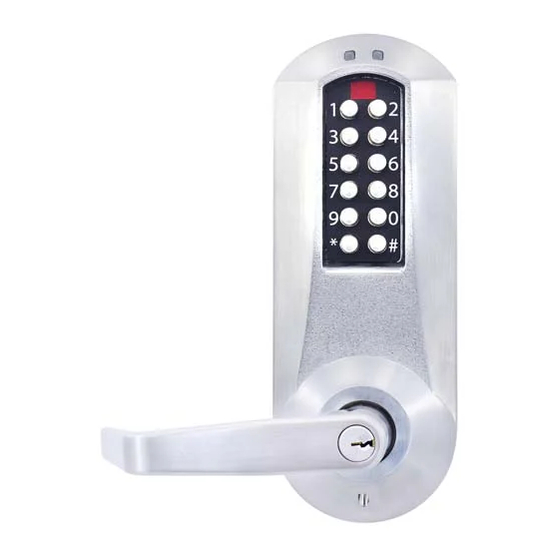
- Page 1 E-PLEX ® SERIES OPERATIONS MANUAL...
-
Page 2: Table Of Contents
TABLE OF CONTENTS States of the Lock ..........4 Factory Mode . - Page 3 Publisher. The information contained in this publication is accurate to the best of Kaba Access Control’s knowledge. Specifications are subject to change without notice. Legend •...
-
Page 4: States Of The Lock
States of the Lock Factory Mode The factory mode is one of three primary states of the E-Plex Lock. The main characteristics of this state are: • The E-Plex Lock opens only when the 8-digit master combination (1-2-3-4-5-6-7-8) is keyed in. •... -
Page 5: Pushbutton Programming Mode
® Default values of the E-Plex Lock programmable parameters Parameters Factory Default Values Date (MM/DD/YY) 01/01/00 Time (HH:MM) 00:00 Lock state Unprogrammed Lock ID 0000 Passage mode open time limit 9 hours Passage mode Disabled Lockout mode Disabled Unlock time 2 seconds Buzzer volume control Tamper shutdown time... -
Page 6: Reset Procedures
2. The general procedure for all programming functions is as follows: a. Put the lock in Programming Mode by pressing # Master Code # b. Use the Summary of Commands Table in the appendix section of this guide to enter the three digit command sequence (Command Type + Function Code), followed by #. -
Page 7: Procedure 1 - Program The Access Code Length
The lock will reset. A green light with corresponding high pitch tone indicates reset is complete and successful. Lock is now reset to the factory mode and the Master Code is now 1-2-3-4-5-6-7-8. *M-Unit is only applicable when using optional E-Plex software. PROCEDURE 1 - PROGRAM THE ACCESS CODE LENGTH Setting the length of Access Codes must be the first lock programmable func-... -
Page 8: Procedure 2 - Modify The Master User Access Code
PROCEDURE 2 - MODIFY THE MASTER USER ACCESS CODE Required User Level: Master 1. To change the factory code or current Master Code, follow the next three steps: 2. Put lock into Pushbutton Programming Mode. 3. Use the command, 000, for Master, then the new Master Code number. 4. -
Page 9: Procedure 4 - Program The Lock Id And Unlock Time
PROCEDURE 4 - PROGRAM THE LOCK ID AND UNLOCK TIME Assign an ID number to each lock for configuration and auditing purposes. This is an internal number (default 0000), and is the same as the door number. Unlock time is the length of time the door will remain unlocked when a correct code is entered before automatically re-locking itself. -
Page 10: Procedure 6 - Program The Lock For Tamper
6. Example of Complete Entry: 005#06#. 7. Enter another # to indicate the end of programming. 8. In this example, the lock will remain unlocked for six hours, starting from the time you activate it in Passage Mode. 9. You have now configured the duration of the Passage Mode period for that lock. -
Page 11: Procedure 7 - Programming The Lock For Keypad
In this example, the lock will now remain locked for 30 seconds after three wrong Access Codes have been entered. No codes, even valid ones or the Master Code, will work in the lock until that time period has elapsed. Only the mechanical override key will open the lock during the tamper shutdown. -
Page 12: User Levels
USER LEVELS Five different classifications of users can perform various operations at the lock. Master User - The Master User is the top-level manager who performs the initial lock setup activities and can program all lock functions. There is a maximum of one Master User per lock. -
Page 13: User Access Codes (Pins) - Examples
USER ACCESS CODES (PINs) - EXAMPLES Master Code User Code Length Sample User Codes Acceptable Unacceptable 00004992 4 digits 1000 0000 0005 1206 0001 00004992 5 digits 32000 00004 00006 00100 00044 00004992 6 digits 001041 000049 000046 400492 000048 00004992 7 digits 0005521... -
Page 14: Procedure 2 - Add / Modify A Manager Access Code
Required User Level: Master, Manager 1. Put the lock into Pushbutton Programming Mode. 2. Enter command 100# to add / modify a User Access Code. 3. Enter the User ID location followed by # - NNN#, we use 023# for example (Range = 000 to 299). -
Page 15: Procedure 3 - Add / Modify Service User Access Code
PROCEDURE 3 - ADD / MODIFY SERVICE USER ACCESS CODE A Service User is any person who needs access to the lock for a limited time period in order to perform a service, such as painting or repairs in the room or area. - Page 16 5x00/3x00 SERIES LIMITED WARRANTY Kaba Access Control warrants this product to be free from defects in material and workmanship under normal use and service for a period of three (3) years. Kaba Access Control will repair or replace, at our discretion, E-Plex 5x00 and 3x00 Series Locks found by Kaba Access Control analysis to be defective during this period.
- Page 19 Notes Notes...
- Page 20 Notes...
- Page 21 Notes...
-
Page 22: Procedure 5 - Delete Manager Access Codes
PROCEDURE 5 - DELETE MANAGER ACCESS CODES A Manager Code should be deleted from the lock if no longer needed, in order to free the code ID location to be assigned to another Manager User. Manager Codes that might be needed some time in the future should be de- activated rather than deleted. -
Page 23: Procedure 8 - Activate User Access Codes
Required User Level: Master, Manager 1. Put the lock into Pushbutton Programming Mode. 2. Enter Command 299# to delete all Access and Service User Codes. 3. Enter another # to indicate the end of programming. 4. You have now deleted all User Access and Service Codes, allowing you to re-assign Access Codes from 0000{0000} to 9999{9999}, in ID loca- tions from 001 through 299. -
Page 24: Procedure 10 - Activate Service User Access Code
PROCEDURE 10 - ACTIVATE SERVICE USER ACCESS CODE A Service User Access Code should be activated if it has been deactivated for a certain time period - during a Service User’s vacation, for example. Required User Level: Master, Manager 1. Put the lock into Pushbutton Programming Mode. 2. -
Page 25: Procedure 13 - De-Activate User Access Codes
Required User Level: Master, Manager 1. Put the lock into Pushbutton Programming Mode. 2. Enter Command 399# to activate / de-activate Passage Mode. 3. Enter the code where 1 = activate Passage Mode and 0 = de-activate Passage Mode. 4. Example of Complete Entry to activate Passage Mode 399#1#. 5. -
Page 26: Procedure 15 - De-Activate Service User Access Code
PROCEDURE 15 - DE-ACTIVATE SERVICE USER ACCESS CODES A Service User Access Code should be de-activated for a certain time period - during a Service User’s absence, for example. Required User Level: Master, Manager 1. Put the lock into Pushbutton Programming Mode. 2. -
Page 27: Procedure 18 - Perform Manual Diagnostics
9. Enter another # to indicate the end of programming. 10. If you still see the red LED, the lock has a problem. Call Kaba’s technical (800-849-TECH) support to help diagnose and fix the problem. -
Page 28: Procedure 19 - Latch Holdback Operation
The following procedures apply to the E-Plex 30xx locks only: PROCEDURE 19 - LATCH HOLDBACK OPERATION This operation is fairly similar to the Passage Mode operation where the lock can be put in the “latch holdback” mode temporarily to have free access with- out any codes but with the following differences: •... -
Page 29: Procedure 20 - Swingbolt Operation
To De-activate: Enter Command ###PIN where PIN is your Master or Manager code (or Privileged User code if setup as such using the E-Plex Standard Software). The lock will cycle the motor once and will prompt you with Green LED flashing to turn the lever back up to the home (horizontal) position to de-activate the holdback. - Page 30 2. You can also disengage the swingbolt using the mechanical override key by performing the following operation: insert the mechanical key in the lock override cylinder’s vertical slit and turn it clockwise to the horizontal position. With the key still in this horizontal position, turn the thumbturn clockwise to disengage the swingbolt which will fully retract down and will stay retract- ed.
-
Page 31: Summary Of Pushbutton Programming Commands
Summary of Pushbutton Programming Commands Name Command Description of Command Authorization 000 # ‘Modify Master User Access Code (lock’s Master activation)’ (Always 8 digits) Configure MMMMMMMM# MMMMMMMM# 001 # ‘Date setup’ (MM = 01 to 12; DD = 01 to 31; Master YY = 00 to 99) MMDDYY#... - Page 32 Summary of Pushbutton Programming Commands Name Command Description of Command Authorization Add/Modify 100 # ‘Add/Modify User Access Code’ NNN = spe- Master, Mgr Users cific User ID location (001 to 299) NNN # (Combination length can be 4 to 8 digits, UUUU {UUUU}# depending on access length LL setting) UUUU {UUUU}#...
- Page 33 Summary of Pushbutton Programming Commands Name Command Description of Command Authorization Activate 300 # ‘Activate User Access Code’ Master, Mgr Users NNN# NNN = specific User ID location (001 to 299) Master 301 # ‘Activate Manager Access Code’ NNN# NNN = specific User ID location (001 to 299) Master, Mgr 302 # ‘Activate Service User Access Code’...
-
Page 34: Visual Feedback Message Definitions
Visual Feedback Message Definitions Condition Parameters Green LED Red LED Duration Rate Valid pushbutton pressed 1/10 sec Once Timeout expired 1 sec Once Valid access 1 sec Once code keyed Access granted 1/10 sec 1 sec Access granted 1/10 sec 1 sec (battery low condition) Access denied... -
Page 35: User List Table
User List Table User # Access Code User Name User Type Optional, Easy-To-Use software called “E-Plex Standard” is also available for this product to program and maintain doors and users. For more information, go to www.e-plexlock.com... -
Page 36: Indiana Avenue Winston-Salem, Nc
Kaba Access Control 2941 Indiana Avenue Winston-Salem, NC 27105 USA Tel: (800) 849-8324 (336) 725-1331 Fax: (800) 346-9640 (336) 725-3269 www.kabaaccess.com www.e-plexlock.com PKG3219 0408...
Need help?
Do you have a question about the E-PLEX 50XX SERIES and is the answer not in the manual?
Questions and answers