Table of Contents
Advertisement
Advertisement
Table of Contents

Related Manuals for Kaba 5 00 Series


Summary of Contents for Kaba 5 00 Series
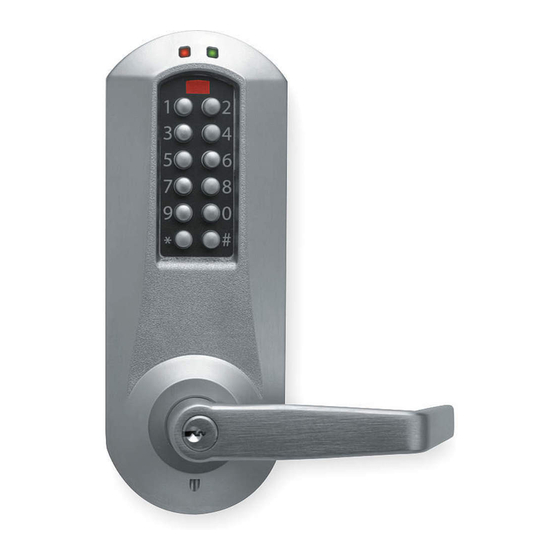
- Page 1 E-PLEX ® 5x00 CylindriCal installation instruCtions...
-
Page 2: Table Of Contents
Warnings and Cautions Important: Carefully inspect windows, doorframe, door, lights, etc. to ensure that the recommended procedures will not cause damage. Kaba Access Control’s warranty does not cover damages caused by installa- tion. Caution: Wear safety glasses when preparing door. -
Page 3: Tools Required
Model E5031 The E-Plex 5031 is a non-handed lock that is preassembled for left-hand installations. It is field reversible. TOOLS REQUIRED • ⁄ ” (7 mm) drill bit • Safety glasses • 1” (25 mm) wood chisel • Electric drill (variable speed) •... -
Page 4: Door Preparation
A. DOOR PREPARATION A-1 Place paper template (supplied) onto door and mark for holes. Drill the four ⁄ ” (7 mm) holes first. Next drill the 2 ⁄ ” (54 mm) cross bore hole. Drill the 1” (25 mm) hole last. ⁄... -
Page 5: Lock Handing
B. LOCK HANDING The E-Plex 5000 is a non-handed lock that is preassembled for left-hand door installations. B-1 Determine the hand of your door. For left hand doors, proceed to Section C. For right hand doors, follow steps in B-2. B-2 Remove the two connecting screws (a) from the cylindrical drive unit (b). -
Page 6: Installing Outside Unit Assembly
Note: Installing levers to the unit assemblies before mounting the unit assemblies may ease initial installation. D. INSTALLING OUTSIDE UNIT ASSEMBLY D-1 Slide the drive unit (a) into 2 ⁄ ” (54 mm) cross bore hole by depressing latch bolt (b) in slightly until the outside unit assembly (c) rests flush against the door. -
Page 7: Installing Inside Lever/Knob
E-3 Insert LectroBolt through the red inside housing hole marked with the lightening LectroBolt bolt symbol. here LectroBolt For now, only partially tighten the Lectro screw Bolt to keep the red collars in position. Then, insert and tighten the other three Mounting mounting bolts. -
Page 8: Changing Key-In-Lever/Knob (Kil/Kik) Cylinder
Kaba Peaks 1099 Medeco 20W200H1 Arrow C100, Sargent 10 LINE Marks G-2 Determine the proper tailpiece from the chart above for your KIL/KIK cylinder. You must use a Kaba tailpiece. The K 2 tailpiece is preassembled with the Kaba 1599. - Page 9 ® LIMITED WARRANTY Kaba Access Control warrants this product to be free from defects in material and workmanship under normal use and service for a period of three (3) years. Kaba Access Control will repair or replace, at our discretion, 5000 Series Locks found by Kaba Access Control analysis to be defective during this period.
-
Page 12: Installing / Removing Outside Lever/Knob
G-3 Assemble the required tailpiece (d) (supplied) with your KIL/KIK cylinder. All tailpieces must be installed vertically (with key removed from cylinder) for proper installation. G-4 Insert the KIL/KIK cylinder (a) into the outside lever/knob (b) and secure it with the cylinder retainer (c) and lever insert (e) (no insert on knobs). -
Page 13: Installing / Removing Outside Lever/Knob
Note: To remove the outside lever/knob from the outside unit assembly, follow step below. H-4 Insert one of the (supplied) keys (a) into the outside lever/knob (b) and rotate it counterclockwise 45 degrees. Insert 45º release tool (d) into the small hole (e) under lever/knob as shown. - Page 14 Insert the supplied tailpiece (e) vertically into the outside lever/knob (b) as shown. Make certain that you rotate the tailpiece so it will align with the inter- changeable core. For screw cap type cylinders (Schlage) (g), the tailpiece must be assembled to the cylinder first with the tailpiece vertically as shown.
-
Page 15: Installing The Battery Pack And Cover
Using two pairs of pliers, break the tailpiece to the desired length of the intended application by holding one pair of pliers on the good side of the score mark and a second pair on the other side of the score mark. Slowly move the 2nd pair of pliers up and down until the unneeded portion of the tailpiece breaks free. - Page 16 J-4 Reconnect the battery cable. Place the battery holder into the cover. Screw the back cover onto the inside housing, and ensure that the cable is not trapped under the edge of the cover. Caution: Over-tightening these screws could strip the threads in the housing or crack the cover.
-
Page 17: Programming And Software Settings
L. PROGRAMMING AND SOFTWARE SETTINGS: L-1 You must change the master Code from the factory default to another code to program the lock. For further information on how to manually program the E-Plex 3x00/5x00 Series Models, refer to the companion “E-Plex 3x00/5x00 Operation Manual.”... -
Page 18: Installing Rubber Bumpers
Caution: Check the operation of the latch by making sure that the deadlatch (a) stops against the strike (b) as shown and does not slide into the strike opening when the door is closed. If that situation occurs, then a total lockout may occur. - Page 19 Kaba Access & Data Systems Americas 2941 Indiana Avenue Winston-Salem, NC 27105 USA Tel: (800) 849-8324 (336) 725-1331 Fax: (800) 346-9640 (336) 725-3269 PKG2992 08-22 www.kaba-adsamericas.com...
Need help?
Do you have a question about the 5 00 Series and is the answer not in the manual?
Questions and answers