Table of Contents
Advertisement
Quick Links
Installation
Installation
and Operating
and Operating
Instructions
Instructions
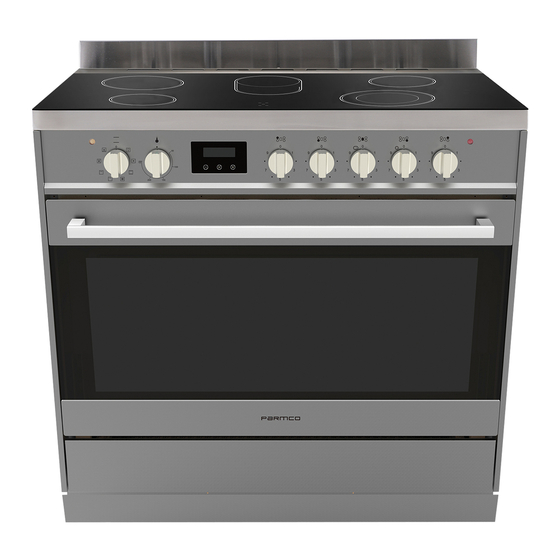
Model:
FS900SC
727609082022
The Warranty:
The Warranty is not valid:
Liability under this warranty will not be accepted for:
p: 09 573 5678
f: 09 573 5699
e: sales@parmco.co.nz
w: www.parmco.co.nz
New Zealand
Owned & Operated
New Zealand
for over 25 Years
Owned & Operated
for over 25 Years
727609082022
Advertisement
Table of Contents

Related Manuals for Parmco FS900SC


Summary of Contents for Parmco FS900SC
- Page 1 09 573 5678 f: 09 573 5699 e: sales@parmco.co.nz Installation Installation w: www.parmco.co.nz and Operating and Operating Instructions Instructions New Zealand Owned & Operated New Zealand for over 25 Years Owned & Operated for over 25 Years The Warranty:...
-
Page 2: Table Of Contents
Thank you and congratulations on purchasing your new Parmco appliance. Operation ........................10 All Parmco products are made to the highest quality and design standards. We are Before first use .........................10 sure you will enjoy your new appliance. Controlling the heating zones of the ceramic hob ............11... -
Page 3: How To Save Energy
S S A A F F E E T T Y Y I I N N S S T T R R U U C C T T I I O O N N S S S S A A F F E E T T Y Y I I N N S S T T R R U U C C T T I I O O N N S S ... -
Page 4: Unpacking
DESCRIPTION OF THE APPLIANCE UNPACKING DISPOSAL OF THE APPLIANCE During transportation, Old appliances should not protective packaging was simply be disposed of with used to protect the appliance normal household waste, against any damage. but should be delivered to a collection and recycling centre for electric and After unpacking, please dispose of all electronic equipment. - Page 5 To fit the rear panel/splashback,slide the lugs on the bottom of the panel into the matching slots on rear of stove and fix with screws provided. cabinets cabinets...
-
Page 6: Operation
OPERATION OPERATION Zone heating indicator Before first use If the temperature of a heating zone exceeds 65 Remove packaging and empty the drawer.Clean the interior of the oven with degree this is signalled by an indicator which lights warm soapy water and wipe clean with moistened cloth or sponge. Wipe clean the cooktop. - Page 7 OPERATION OPERATION directly press the button 2, At power on, displayed “12.00", your setting is saved. flashes. The current time can be set with button 1 and 3, 5 secondsafter the time has been set ,the new data will be saved . Button1 Button2 Button3...
- Page 8 OPERATION OPERATION end of cooking time End of cooking time cooking end of cooking time end of cooking time: End of cooking time = current time + cooking time End of cooking time automatically change to 5:00. set either the end of cooking time.
- Page 9 OPERATION OPERATION Fan Forced Static Grill end of cooking time- At this function, allows the oven to be When the “combined grill” is active it heating up in a forced way with the enables grilling with the grill and with the thermofan, which is in the central part of top heater switched on at the same time.
- Page 10 OPERATION OPERATION Use of the grill Changing the Oven Lamp The grilling process operates through infrared rays emitted onto the dish by the incandescent grill heater. IMPORTANT Before any maintenance is started Never use screwdrivers or other In order to switch on the grill you need to: involving electrical parts, the utensils to remove the light cover.
-
Page 11: Cleaning And Maintenance
CLEANING AND MAINTENANCE CLEANING AND MAINTENANCE Door removal Removal of the internal glass By ensuring proper cleaning and Caution ! In order to obtain easier access to the oven maintenance of your oven, you can panel Do not use cleaning products containing chamber for cleaning , it is possible to have a significant influence on the abrasive materials for the cleaning and... -
Page 12: Baking In The Oven
BAKING IN THE OVEN BAKING IN THE OVEN Baking Table is for cakes and loaves disconnect the mains plug call the service centre Type of pastry Guide level Temp (℃) Guide level Temp Baking time some minor faults can be fixed by referring to the instructions given in the table below. (℃) (from down (from down... - Page 13 BAKING IN THE OVEN BAKING IN THE OVEN Roasting table Attention when roasting ! Roasting Roasting tables indicate suggested Weight Shelf Temp Roasting Temp Roasting Type of meat Best heating mode for each type of temperatures,guide levels and roasting (℃) (℃)...
- Page 14 BAKING IN THE OVEN BAKING IN THE OVEN BAKING IN THE OVEN Tips for grilling Grill table Grilling should be carried out with the Type of meat for grill Weight Shelf Temp (℃) Grill time Grilling oven door closed. position (in grams) (in min.) (from...
-
Page 15: Technical Information
All electrical work should be carried out by a suitably qualified and authorized electrician. No alterations or willful changes in the electricity supply should be carried out. Type FS900SC The fixing line connected must be equipped with the all-pole disconnection device Dimensions:...
Need help?
Do you have a question about the FS900SC and is the answer not in the manual?
Questions and answers