
Related Manuals for Kogan KAVACROBVWA


Summary of Contents for Kogan KAVACROBVWA
- Page 2 Safety Precautions..........................2 Product Application..........................2 Components of the Cleaner......................2 Introduction............................3 Panel..............................3 Function Information on Panel....................3 Product Layout..........................4 Installation of Docking Station and Charging................4 Docking Station..........................4 Manual Charging..........................5 Automatic Charging........................5 Assembly & Disassembly of Cleaning of Dust Bin...............6 Assembly & Disassembly of Dust Bin...................6 Cleaning of Dust Bin and Blower....................7 Main and Side Brush Maintenance....................7 Assembly &...
- Page 3 Do not attempt to perform repairs on this unit yourself. There are no user • serviceable parts inside. Do not touch the power cord or accessories with a wet hand, as this may • result in an electric shock. Do not allow any body parts to enter into the brush/wheel mechanisms of •...
- Page 4 SPEED: Speed button START/STOP: Start/stop cleaning CHARGE: Return back to docking station. POWER: Power/charge indicator To turn the vacuum on, please press the START/STOP button for 2 seconds to start it up. Wait until the POWER light comes on, then press START/STOP to start the robot vacuum cleaning.
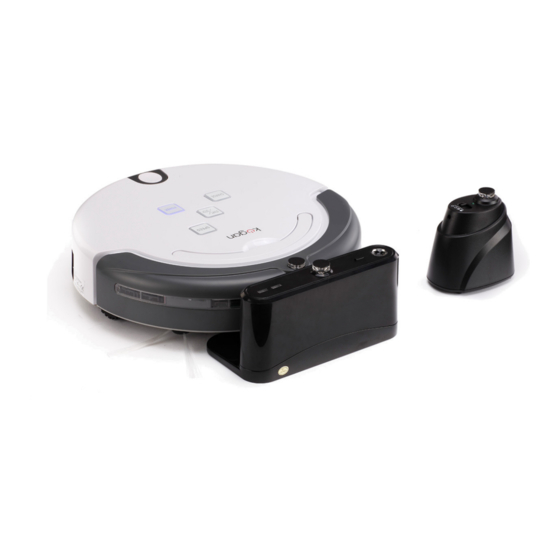
- Page 5 Power switch Dustbin button Handle Front bumper Function keys Infra-red signal receiver Auto-charging electrode Top of Main Body Battery cover Front wheel Left wheel Ground detection Floor brush sensor Main brush Dustbin Side cleaning brush Right wheel Mop pad DC socket Power switch Bottom of Main Body 1.
- Page 6 3. The cleaner cannot search for the docking station for recharging if the infra-red signal transmitting window of the docking station is covered. 4. Connect the output terminal of the adapter with the DC socket of the docking station (refer to Fig 2). Fig.
- Page 7 Extract the dust bin by pressing the button on it. (Refer to fig. 1 & 2) Fig. 1 Fig. 2 2. Press the ellipse button on the dust bin, and the blow will pop up automatically (refer to fig. 3). Fig.
- Page 8 1. Firstly, dump the dust, then clean dust bin with a dust brush (refer to Fig 1). Fig. 1 2. Pope the blower up, then clean the air inlet/outlet with a dust brush (refer to Fig 2 and Fig 3) Fig.
- Page 9 1. Release the screw in the main shaft of the side brush before changing the side brush. 2. Press the side brush against the main shaft, then fasten the screw. (Refer to image, right) Clear hair or waste off the main brush to improve cleaning performance.
- Page 10 1. Clean the sensor and infrared transparent window with a cotton swab or soft cloth. 2. The ground detection sensor and infrared transparent window are in the bottom of the cleaner (refer to images below). 3. Please keep the transparent window clean as this will ensure the unit functions correctly at all times.
- Page 11 Take battery out of unit before disposing of the vacuum. • Please remember to turn off the switch before taking out the battery from • the main body or from the space isolator. Please do not expose battery to hot temperatures, nor to water. •...
- Page 12 1. Decorative light 2. Decorative light switch 3. Power indicator 4. Charging indicator 5. Signal transmitter 6. Charging positive pole 7. Charging negative pole 8. DC socket Decorative Turn on the decorative light to create a relaxing atmosphere. A Light small amount of essence can be poured into the light, which will release a nice aroma once it has been warmed.
- Page 13 1. Toggle Switch 2. Signal Head 3. Near-infrared Transmitting Head 4. Power Indicator The space isolator will block areas by sending out an infrared signal, which will prevent the vacuum from entering the areas. Toggle Switch You can switch the functionality by sliding the toggle switch between off, low, middle and high.
- Page 14 The isolator should be placed at the entrance to the room or stairs. • You can place the Space Isolator in position to stop the cleaner passing • through. Be sure to remove any obstacles from the area around the Space Isolator •...
- Page 15 • amount of usage The cleaner stopped working and no error Do not attempt to repair the vacuum yourself. Contact the • code is showing Kogan customer support team for information. Rated voltage: 14.4V Battery: Rechargeable battery Working hours: 60mins...
- Page 16 Rated voltage: Battery: 2 x AAA batteries (not included) Remote mode: ISM Frequency Band 2.4GHz Receiving & Transmitting distance: <5M Operating temp range: -10C ~ 45C Operating humidity range: <85RH Specifications: 120 x 55 x 25mm (LxWxH) Weight: 0.08kg Specifications: 200 x 51 x 102mm (LxWxH) Weight: 0.23kg...
Need help?
Do you have a question about the KAVACROBVWA and is the answer not in the manual?
Questions and answers