Table of Contents
Advertisement
Quick Links
Advertisement
Table of Contents

Related Manuals for Kogan SMARTERHOME LX12


Summary of Contents for Kogan SMARTERHOME LX12
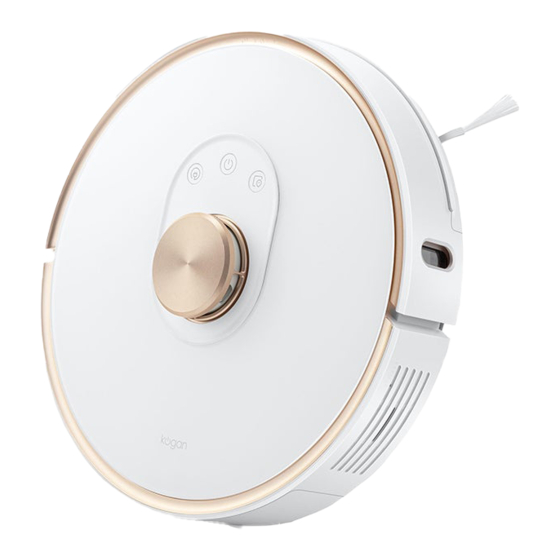
- Page 1 KOGAN SMARTERHOME™ LX12 ROBOT VACUUM WITH MOPPING FUNCTION KAVACRBL12A...
- Page 3 SAFETY & WARNINGS • This product is intended for floor cleaning use only in the home environment. Do not use it outdoors (such as open balcony), non-ground surface (such as sofas), commercial or industrial environments. • Do not use in a suspended environment (such as a duplex flat, open balcony, top of home) without a protective fence.
- Page 4 Battery and charging • Do not use any third-party batteries, chargers or charging bases. • Do not disassemble, repair or modify the battery or the charging base. • Do not place the charging base near a heat source (such as a radiator). •...
- Page 5 OVERVIEW Charging button • Short press to activate the charging function. Cleaning/Power button • Short press to activate the cleaning function. • Long press to power on or off. Partial cleaning button • Short press to activate partial cleaning. Wi-Fi Pairing/Reset •...
- Page 6 Laser distance sensor Speaker Infrared charger sensor/Infrared anti- Infrared wall collision sensor sensor/charger sensor Collision sensor Laser head cover Laser head cover pressure sensor Infrared wall sensor/charger sensor Dust box Dust box release Vent outlet Charging electrode Universal wheel Cliff sensor Side brush Driving wheel Rolling brush...
- Page 7 Dust box module Locate and install the filter screen before use. Dust box fastener Cleaning tool Dust box Dust box upper bracket Dust box filter screen Dust box lower bracket Dust box slipcover Release button...
- Page 8 2-in-1 dust & water tank Dust bin buckle Water inlet Release button Mop securing pads Release button...
- Page 9 Charging base Charging base indicator Signal emission zone Charging contact pins Front of charging base Power port Reverse side of charging base Charging base adapter...
- Page 10 INSTALLATION Place the charging base on a flat surface against a wall Against the wall Not against the wall Ensure that there is more than 1.2 meters clear space in front and more than 0.5 meters clear space on both sides of the charging base.
- Page 11 Long press the power button to switch the unit on. Press the charging key, and the machine will find the charging base automatically for charging. The colour of the power button indicates the remaining charge of the battery: • White light: Power >15% •...
- Page 12 Install App Download the “Kogan SmarterHome” app from the Play Store (Android) or App Store (iOS). Register If you do not have a Kogan SmarterHome™ account, register or sign in with a verification code sent by SMS. To register: Tap to enter registration page.
- Page 13 Set device in pairing mode When the device is first turned on, it may automatically enter pairing mode (the power button indicator may be flashing slowly). If not automatically in pairing mode when powered on, you can manually set the device in pairing mode by pressing and holding the Partial Cleaning and Charging buttons until the power button indicator flashes slowly.
- Page 14 Select “AP Mode” for the set-up type. Ensure that the device is in pairing mode, with the light flashing, and tap “Confirm light is slowly flashing”. Enter your Wi-Fi details. It is important that your SmarterHome™ device and the app are connected to the same Wi-Fi network during setup.
- Page 15 10. Follow the in-app prompts to continue AP Mode connection, which will pair your mobile phone to the device’s Wi-Fi hotspot to ensure a connection. Note: the Wi-Fi hotspot does not appear on your phone in the list of available networks, your device may not be set in AP Pairing Mode correctly.
- Page 16 Having trouble connecting? The prior steps detail the process for “AP Mode” connection. If that does not work for your connection, we suggest trying it again, and if still no success, attempting the following method for Standard (non-AP Mode) connection. Add device through network Once registered, tap “+”...
- Page 17 Notes: The device and the app have to use the same Wi-Fi network. • • The device is only compatible with 2.4Ghz networks. If neither Standard or AP Mode methods are successful, please contact kogan.com for assistance.
- Page 18 OPERATION Power on/off • Long press the power button to switch the unit on. The indicator of the power button turns on slowly and the machine enters the standby state. • When the machine is stationary, long press the power button to switch the unit off. The white light slowly extinguishes and the vacuum powers off.
- Page 19 Charging • Automatic mode: After cleaning, the machine will automatically find its way to the charging station. • Manual mode: In the pause state, press the Charging button to start charging. When the machine is charging, the orange indicator of the power button will be lit. The white breathing indicator will be on when the battery is full.
- Page 20 2. Moisten the mop pad and attach it to the unit using the hook & loop pads. Fill the tank with water and fasten the rubber lid onto the tank. 3. Insert the water tank assembly into the main unit. 4.
- Page 21 Cleaning mode After cleaning starts, the machine will scan the room, generate a map, and zone the room intelligently. During zone cleaning, it will firstly clean along the wall, plan the sweeping path and then clean each zone one by one in a zig-zag pattern, covering all zones in an orderly and efficient manner.
- Page 22 Partial cleaning • When the machine is on standby or pause, press the partial cleaning button to start partial cleaning. This mode can clean a 1.6m x 1.6m square area taking the machine as the centre position. After cleaning, the machine will automatically return to the starting position and stop working.
- Page 23 Fault condition • When abnormality occurs in the operation of the machine, the power button indicator flashes orange and a relevant voice prompt will sound. • For solutions, please refer to the "Troubleshooting" section below. Note: After 10 minutes under a fault condition without operation, the machine will automatically sleep.
- Page 24 Whole house cleaning • Click on the whole house cleaning in the mobile phone application, and the machine will perform the whole house cleaning. Room cleaning • Click on the room cleaning in the mobile phone application, add and set rooms, then select the room and execute cleaning.
- Page 25 CLEANING & CARE Main brush (weekly cleaning recommended 1. Turn over the machine, press down the fastener and remove the main brush cover. Take the main brush out and clean the main brush bearing. Cut any wound hair from the main brush with the cleaning tool as shown on the next page.
- Page 26 Using the cleaning tool...
- Page 27 Side brush (weekly cleaning recommended) Use a screwdriver to unscrew and clean the side brushes. Note: It is recommended to replace the side brushes every 3-6 months to ensure optimal cleaning. Battery The machine has built-in high-performance rechargeable lithium battery pack. For maintaining battery performance, please keep the machine in the charging dock for daily use.
- Page 28 Dust box and filter screen (weekly cleaning recommended) Press the dust box release button to remove it. Open the dust box fastener. Empty the dust box into a garbage receptacle.
- Page 29 Open the dust box cover and remove the mesh cover and HEPA filter screen. Shake debris off the filter and gently brush it with the cleaning tool. Note: It is recommended to replace the filter every 3-6 weeks.
- Page 30 Fill the dust box with clean water, close and shake it, then pour out the dirty water inside. Repeat this step several times until the dust box is clean. 2-in-1 dust & water tank (cleaning after every use is recommended) Press the release button and remove the water tank assembly.
- Page 31 Machine sensor Wipe the sensors of the machine with a soft and dry cloth, including: The four cliff sensors at the bottom of the machine. The wall sensor on the right side of the machine. The charging electrode at the bottom of the machine. The infrared charger sensor.
- Page 32 Charging base (monthly cleaning recommended) Wipe the charging clip with a soft and dry cloth. Firmware update • The firmware of the machine can be upgraded using the mobile app. Please connect to the charging base before upgrading and ensure that the battery is more than 15%.
- Page 33 TROUBLESHOOTING When abnormalities occur in the operation of the machine, the power button indicator flashes orange quickly and a voice prompt will sound. Refer to the table below for troubleshooting. Fault prompt Resolution Please check if the radar is covered and If the laser distance sensor is covered or move the machine to a new location to jammed by foreign matter, please remove the...
- Page 34 From the home page of the Google Home app, select the “+” icon to access the ‘Add and manage’ page. Select ‘Set up device’, then under the Works with Google banner, select ‘Have something already set up?’ Select the search bar and type ‘Smarter Home’ to locate the Kogan SmarterHome™ service.
- Page 35 Tap ‘Authorise’ to grant Google permission to access the SmarterHome™ app and your devices. From here, you will be prompted to sign into your SmarterHome™ account using either your email or mobile phone number, depending on which method you used to register your account.
- Page 36 Tap on any of the devices to view a list of available commands. Note: Please note that Google Home can only control the base/core functions of any compatible SmarterHome™ devices. To make full use of this product’s smart functionality, please use the Kogan SmarterHome™ app.
- Page 37 AMAZON ALEXA CONTROL Note: ou will need to have set up an Alexa account prior to linking your Kogan SmarterHome™ device. Adding “SmarterHome” to the Alexa app From the home page of the Alexa app, select the “ ” icon in the top-right and select Skills &...
- Page 38 Tap ‘Enable to Use’ to add the Kogan SmarterHome™ skill to Alexa. From here, you will be prompted to sign into your SmarterHome™ account using either your email or mobile phone number, depending on which method you used to register your account.
- Page 39 SmarterHome™ account. When your devices have successfully connected to the Alexa app, you will be able to control your Kogan SmarterHome™ devices via Alexa’s voice commands. Note: Please note that Alexa can only control the base/core functions of any compatible SmarterHome™...
- Page 40 ssue Solution The battery is low, please charge it before using it Cannot boot Ambient temperature is too low (less than 0°C) or too high (higher than 50°C). Unable to start cleaning The battery is low, please charge it before starting it There are too many obstacles near the charging stand.
- Page 41 SPECIFICATIONS Vacuum Name Parameter External size 350 x 350 x 98mm Battery type 5200mAh Product weight ~3.6kg Rated voltage 14.4V Rated power Charging base Name Parameter External size 145 x 140 x 99mm Rated power Rated input 24V - 1.2A Rated output 24V - 1.2A...
- Page 42 NOTES...
- Page 43 NOTES...
- Page 44 Need more information? We hope that this user guide has given you the assistance needed for a simple set-up. For the most up-to-date guide for your product, as well as any additional assistance you may require, head online to help.kogan.com...
Need help?
Do you have a question about the SMARTERHOME LX12 and is the answer not in the manual?
Questions and answers