Advertisement
Quick Links
Advertisement

Related Manuals for Kogan KAVACRBL16A


Summary of Contents for Kogan KAVACRBL16A
- Page 1 KOGAN SMARTERHOME™ LX16 ROBOT VACUUM CLEANER WITH MOP ATTACHMENT KAVACRBL16A...
- Page 2 Safety & Warnings Components Overview Assembly Before Use Connect to the SmarterHome™ App Operation Cleaning & Care Google Home Control Amazon Alexa Control Troubleshooting Specifications Notes...
- Page 3 SAFETY & WARNINGS Ensure to read all instructions and warnings in this user guide prior to first use. Retain this user guide for future reference. • The vacuum can be used by adults and by persons with reduced physical, sensory, or mental capabilities, or lack of experience and knowledge if they have been given supervision or instruction concerning the use of the vacuum in a safe way and understand the hazards involved.
- Page 4 • When transporting the vacuum, ensure that the appliance is turned off and the original packaging box is used for packaging. • The charging base is only suitable for charging the vacuum robot (KAVACRBL16A) with the battery supplied (Rating: 14.4V, 3000mAh, 43.2Wh). It is not suitable to charge any...
- Page 5 COMPONENTS A Robot vacuum cleaner (x1) B Charging base (x1) C Dustbin/water tank (x1) D Side brush (x2) E HEPA and sponge filters (x1) F Power adapter (x1) G Cleaning brush (x1) H Mopping support (x1) I Mop pad (x1) J User guide (x1)
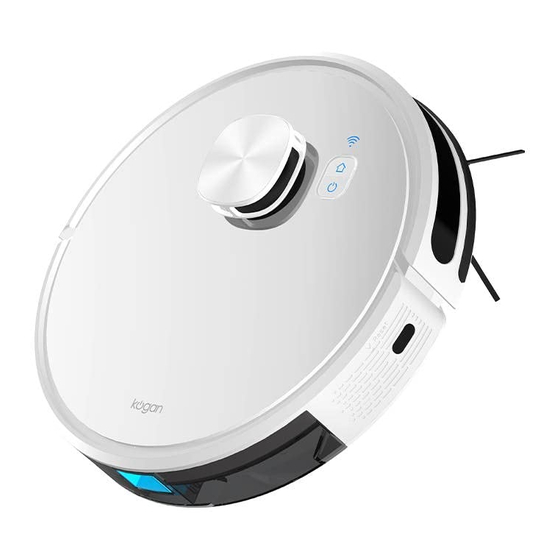
- Page 6 OVERVIEW Robot vacuum – Top view Wi-Fi indicator • Off: Wi-Fi not Home button connected Press to recharge/pause • Flashing: Ready to be paired Power button • On: Wi-Fi network • Press the button to connected start cleaning/pause Reset button •...
- Page 7 Robot vacuum – Side view Laser radar Bumper Infrared receiver sensor Robot vacuum – Bottom view Cliff sensor Charging contact Charging contact Universal wheel Side brush Side brush Battery cover Cliff sensor Drive wheel Rolling brush Dustbin...
- Page 8 Dustbin/water tank HEPA filter Filter cover Sponge filter Primary filter Water plug Dustbin button Dust ports...
- Page 9 ASSEMBLY 1. Remove the protective material from both sides of the vacuum. 2. Attach the left and right side brushes (L, R) to the corresponding letter on the underside of the vacuum. There should be a clicking sound when each side brush is secured.
- Page 10 4. Whilst pressing and holding the dustbin button, insert the dustbin/water tank into the vacuum. 5. If using the mopping function, install the mop pad on the mop support, then insert the mop support into the dustbin/water tank. 6. Ensure there is a 50cm clearance either side, and 150cm clearance in front of the charging base.
- Page 11 BEFORE USE Checks to the area Ensure there are no loose wires or cables scattered on the ground. This is to prevent the vacuum becoming entangled or dragged along. Ensure all fragile items, those easy to topple, dangerous items, and valuables are removed. This is to prevent items being damaged and personal injuries.
- Page 12 CONNECT TO SMARTERHOME™ APP Install App Download the ‘Kogan SmarterHome’ app from the Play Store (Android) or App Store (iOS). Play Store (Android) App Store (iOS) To register: 1. If you already have a SmarterHome account, select ‘Log In’. To register a new account, select ‘Sign Up’.
- Page 13 Set device in pairing mode When the device is first turned on, it may automatically enter pairing mode (the Wi-Fi indicator will be flashing slowly). If not automatically in pairing mode when powered on, you can manually set the device in pairing mode by pressing and holding the home and power buttons simultaneously for three seconds until the Wi-Fi indicator is flashing slowly.
- Page 14 6. Follow the in-app prompts to continue AP Mode connection, which will pair your mobile phone to the device’s Wi-Fi hotspot to ensure a connection. This may be named ‘SL-KoganSmart’, ‘SmartLife-XXXX’, or another similar name. Note: If the Wi-Fi hotspot does not appear on your phone in the list of available networks, your device may not be set in AP Pairing Mode correctly.
- Page 15 OPERATION App interface Name Description Forbidden edit Allows users to mark areas they wish the vacuum not to enter Allows users to adjust chosen areas as ‘rooms’. This can be useful Room edit when organising and prioritising different areas in the house to clean. Setting Allows users to adjust the various settings of the vacuum Cleaning time...
- Page 16 Electricity Displays the remaining battery level Tap to activate the default cleaning mode. The vacuum will clean Smart the entire area before returning to the charging base PIN N GO Allows users to pinpoint a spot where the vacuum should clean Select room Allows users to select a set room to clean Zone...
- Page 17 Mapping and general cleaning Cleaned area Once the vacuum is powered, press the power button. On first use, the vacuum will start mapping out the area then begin cleaning. This map will be remembered by the vacuum on subsequent cleans. As an area is cleaned, the app will display the trail the vacuum has cleaned.
- Page 18 Designating rooms To set up areas on the maps to rooms, tap ‘Room edit’ on the app interface. Name Description Merge Allows users to merge two rooms into one Split Allows users to split an area and set up two rooms Reset Removes all set rooms Name...
- Page 19 Cleaning selected rooms To clean a certain area on the map, tap ‘Select room’ on the app interface and tap on the map to choose which room/rooms you wish the vacuum to clean. Notes: • Ensure the vacuum has created the map of the area prior. •...
- Page 20 Restricting cleaning areas If there are certain areas you wish to prevent the vacuum from entering: 1. Tap ‘Forbidden edit’ on the app interface. A highlighted box will appear on the map. 2. Adjust the size and location of the box to the area the vacuum is not permitted to enter.
- Page 21 Settings This allows users to adjust various settings or activate other functions of the vacuum. Notable settings are listed as below. Name Description • Turning on manual mode allows the user to control the movement of the vacuum. The app will open a directional pad whereby users can press and hold the desired direction they wish the vacuum to go.
- Page 22 Record Allows users to view records of previous cleans. Consumables Displays the approximate remaining service life of the filters and management brushes. • Activating the do not disturb mode turns off voice prompts, any scheduled cleans, and dust collection functions. Do not disturb switch •...
- Page 23 Emptying the dustbin 1. Press and hold the dustbin button to remove the dustbin. 2. Press and hold the dustbin button, then open the dustbin and empty.
- Page 24 CLEANING & CARE Ensure the vacuum is turned off before cleaning. Only remove and reattach the components outlined in this user guide when cleaning. Do not completely disassemble the vacuum. Rolling brush The rolling brush should be cleaned once a week. 1.
- Page 25 Side brushes The side brushes should be cleaned once a week. 1. Turn over the vacuum and pull out the side brushes vertically. 2. Use the cleaning brush to clear dust and tangled debris, then reattach the side brushes. 3. Press and reattach the left and right side brush (L, R) against the corresponding letters on the bottom of the vacuum.
- Page 26 Dustbin The dustbin should be cleaned once a week. 1. Lift the filter cover and remove the HEPA filter and sponge layer. 2. Flush the primary filter, HEPA filter, sponge and dustbin under a water tap. Use your fingers to flush through harder to reach areas. 3.
- Page 27 Cliff sensors The cliff sensors should be cleaned once a month. Gently wipe the sensor with a soft dry cloth. Charging contacts The charging contacts should be cleaned once a month. Gently wipe the charging contacts with a soft dry cloth. Storage Store the vacuum in a cool, dry place.
- Page 28 Note: You will need to have set up a Google Home account prior to linking your Kogan SmarterHome™ device. Adding ‘SmarterHome’ to the Google Home app 1. From the home page of the Google Home app, select the ‘+’ icon (top left corner, see arrow in the below screenshot) to access the ‘Add and manage’...
- Page 29 3. Select the search bar and type ‘Smarter Home’ to locate the Kogan SmarterHome™ service. 4. From here, you will be prompted to sign into your SmarterHome™ account using either your email or mobile phone number, depending on which method you used to register your account.
- Page 30 Tap on any of the devices to view a list of available commands. Note: Please note that Google Home can only control the base/core functions of any compatible SmarterHome™ devices. To make full use of this product’s smart functionality, please use the Kogan SmarterHome™ app.
- Page 31 AMAZON ALEXA CONTROL Note: You will need to have set up an Alexa account prior to linking your Kogan SmarterHome™ device. Adding ‘SmarterHome’ to the Alexa app 1. From the home page of the Alexa app, select the ‘ ’ icon in the bottom-right and select ‘Skills &...
- Page 32 3. Tap ‘Enable to Use’ to add the Kogan SmarterHome™ skill to Alexa. 4. From here, you will be prompted to sign into your SmarterHome™ account using either your email or mobile phone number, depending on which method you used to register your account.
- Page 33 7. Once connected, the app will perform a search and display the devices linked to your SmarterHome™ account. When your devices have successfully connected to the Alexa app, you will be able to control your Kogan SmarterHome™ devices via Alexa’s voice commands.
- Page 34 • The Wi-Fi connection is abnormal. Reset the The vacuum cannot be Wi-Fi settings, ensure you have the latest version of the connected to the Kogan SmarterHome™ app™, and try to connect to the Kogan SmarterHome™ Wi-Fi network again. app.
- Page 35 Error voice prompt Solution Error 1: Insert the The vacuum is unable to clean when the dustbin is taken out. dustbin Reinstall the dustbin. Error 2: Put the Pick up the vacuum and move it to a flat surface. Restart the machine on the floor vacuum.
- Page 36 SPECIFICATIONS Vacuum Dimensions 320 x 320 x 93mm Net weight 2.8kg Battery capacity 3200mAh Rated voltage 14.4V Rated power Charging time 300 minutes Dustbin capacity 250ml Water tank capacity 240ml...
- Page 37 NOTES...
- Page 40 Need more information? We hope that this user guide has given you the assistance needed for a simple set-up. For the most up-to-date guide for your product, as well as any additional assistance you may require, head online to help.kogan.com...
Need help?
Do you have a question about the KAVACRBL16A and is the answer not in the manual?
Questions and answers