Table of Contents
Advertisement
Quick Links
Advertisement
Table of Contents

Related Manuals for Kogan SMARTERHOME G60


Summary of Contents for Kogan SMARTERHOME G60
- Page 1 KOGAN SMARTERHOME™ G60 ROBOT VACUUM WITH MOPPING FUNCTION KAVACRBG60A...
-
Page 3: Safety And Warnings
SAFETY & WARNINGS Attention Although children over the age of 8 and those with physical, sensory or mental dysfunction or those without relevant experience can use this product, but they need to be used in a safe manner under supervision or guidance and understand the hazards involved. Children should not play with this product. - Page 4 Product safety matters Warning • This product is limited to the original battery cradle and adapter. • Do not use this product if the host and accessories of the product are found to be damaged. • Do not touch the power plug or product when your hands are wet.
- Page 5 Remove all consumables Grasping the front shell and Non-original adaptation is before use. lifting the robot is prohibited. strictly prohibited the Please hold the body with charging base is used to both hands to lift vacuum charge the machine or will cleaner.
-
Page 6: Components List
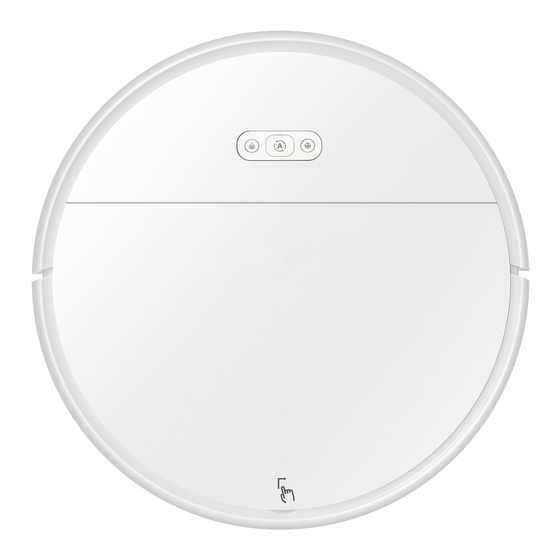
COMPONENTS LIST Main Unit x1 Charge base x1 Power Adapter x1 Water tank x1 Manual x1 Side brush x4 Mop for robot x1 Remote control x1 Mid brush x1 Tip: The battery has been installed in the robot. - Page 7 OVERVIEW Front Bumper Spot Clean Auto Charging Turn ON (Press 2 second)/Automatic Clean (Press once) Cover Switch Bottom Sensor Main Wheel Right Brush Left Brush Air Outlet Right Brush Left Wheel Water Tank Outlet Brush...
- Page 8 Dust Box Press Button Cover Cover Filter Charging Dust Box Charge Light Adaptor Input Chip Pole Piece Chip Pole Piece...
-
Page 9: Installation
INSTALLATION Dust Box Installation • Take out with the handler, put in right place Handler Mop Install The back of the machine shall be placed upside down. Open the fixed switch and replace the middle brush. Tear the protective pastes and reveal the magic paste’s rubber surface Let the rubber surface downward and keep the back of the machine clean... - Page 10 Install App Download the “Kogan SmarterHome” app from the Play Store (Android) or App Store (iOS). Register If you do not have a Kogan SmarterHome™ account, register or sign in with a verification code sent by SMS. To register: Tap to enter registration page.
- Page 11 Set device in pairing mode When the device is first turned on, it may automatically enter pairing mode (the indicator light will be continuously flashing). If not, you can manually set the device in pairing mode while the sweeping robot is in standby mode by long-presssing “hold”...
-
Page 12: Operation
OPERATION Please take out the foam strip and clean the area around the robot. Foam Foam Ground for Use Products are applicable to the Scope of application following ground environment: Wood Marble... - Page 13 Inapplicable Scope • Not suitable for use in extremely hot (+60°C or higher) or extremely cold (-5°C or lower) environments. • Only use for indoor. • Cannot be used in a suspended environment without a protective fence. • Do not use in wet or flammable, explosive or corrosive environments.
- Page 14 2. Standing by The machine is in standby mode and both LEDs are on at the same time. State change: If the machine is not operated, the machine will automatically shut down after 5 minutes in standby. Short press the auto button once, the buzzer will sound once and the automatic cleaning mode will be entered after a delay of 3 seconds.
- Page 15 Auto cleaning route 4. Cleaning at fixed time In cleaning state at fixed time, LED light will be on when it cleans at a fixed time. Cleaning at fixed time mode is suitable for cleaning a small dirty area at home. The machine cleans this area in a bow shape, stops after the cleaning and enters the automatic recharging mode.
- Page 16 5. Charging mode In charging state, automatic cleaning mode, LED light will flash, indicating charging. When it is full of electricity, automatic cleaning LED light will be on. The following functions are available while robot is charging. Press the auto button or the spot button on the top of the machine, the buzzer will sound once and the machine will enter the automatic cleaning mode or the spot cleaning mode after exiting the charging stand.
- Page 17 2. Self-Charging When the battery is lower it will automatically start searching for charge base around the machine. 3. Manual charging Connect the power adapter directly to the machine and output. Fill the robot for 12 hours when charging for the first time. For daily using, store the machine on the charging stand and ensure that the charging stand is powered on.
- Page 18 App Control Operation Tips: App transmission distance depends on your Wi-Fi signal Power off Button • Press "Power Off" Button, to turn off the robot. Stand By • Press the "standby", pause the robot into standby mode Auto Button • Press "Auto", buzzer rings once, the robot will enter to auto cleaning mode.
- Page 19 Schedule Button • Press "Add Schedule", enter schedule page to set a cleaning time. • Select a time you wanted and save it. • Click "save" on the top right corner. • Click "√"to cancel the schedule. Remote Control Power button In the standby mode, press the button to enter the sleep state, press twice to enter standby mode.
- Page 20 Spot clean In standby or other working state, press to enter the spot cleaning mode, which is suitable for areas where garbage is concentrated and the robot performs cleaning for 3-5 minutes in the designated area. Auto clean In standby mode or other working state, press the button to enter the automatic cleaning mode.
-
Page 21: Cleaning And Care
CLEANING & CARE Clean Side Brush Use a cleaning brush to clean the rubbish on the sides. If you have more hair on the side, use scissors to carefully cut the hair. Installation steps: Sweep the hole in the bottom of the base and press Disassembly steps: Grab the brush on both sides of the sweep and pull it out with a little force. - Page 22 Tip: After removing the dust box, check the dust suction port of the box and robot, if the box is blocked by foreign objects, clean it. After cleaning, the filter and dust box must be fully dried and then can be re-used, otherwise it will affect the dust absorption effect and service life.
- Page 23 GOOGLE HOME CONTROL Note: You will need to have set up a Google Home account prior to linking your Kogan SmarterHome™ device. Select "Menu" and then "Home Control". In the "Home Control" screen, select the "+" icon in the bottom right.
- Page 24 Set Up New Device Add and Manage Device Assign Room Update Home Control...
- Page 25 ALEXA Note: You will need to have set up an Alexa account prior to linking your Kogan SmarterHome™ device. Select "Menu" and then "Skills". Search for the app and enable it. Login to your SmarterHome™ account with your email address or mobile number.
- Page 26 Login to App Discover Devices Setup Device...
-
Page 27: Specifications
SPECIFICATIONS Voltage 7.4V Rated power Battery type Lithium battery 4400mAh Battery capacity ≤6 hours Charging time ≥90 minutes Working time Temperature range 10°C ~ 45°C Humidity range ≤90%RH Dust bin capacity 350ml Noise ≤65dB Size 310 x 310 x 83mm... -
Page 28: Troubleshooting
TROUBLESHOOTING Under the fault state, the machine will stop working. Automatic LED, LED light of fixed time will flash at the same time, the buzzer will make an alarm. The alarm instructions are as follows. Failure mode Failure reminding Troubleshooting Check whether the left Left ground sensor LED flash 1 time, buzzer... - Page 29 NOTES...
- Page 30 This is a Quick Start Guide and we hope that this has given you the assistance needed for a simple set-up. For the most up-to-date guide for your product, as well as any additional assistance you may require, head online to help.kogan.com...
Need help?
Do you have a question about the SMARTERHOME G60 and is the answer not in the manual?
Questions and answers
Who does kogen g60 mop function works?cant find any button on remote or app?please guide in detail
The Kogan G60 mop function works by attaching a mop cloth to the bottom of the machine. To set it up:
1. Place the machine upside down.
2. Open the fixed switch and replace the middle brush if needed.
3. Remove the protective film from the magic paste and ensure the rubber side is facing down.
4. Clean the machine’s back to remove dust and water.
5. Stick the magic paste to the back, avoiding the water outlet.
6. Attach the mop.
The mop can be reused after cleaning.
If there are no buttons on the remote or app, you can start the vacuum using the physical button on the device itself, as it supports one-button press operation without WiFi.
This answer is automatically generated