Advertisement
Quick Links
Advertisement

Related Manuals for Kogan SMARTERHOME LX15


Summary of Contents for Kogan SMARTERHOME LX15
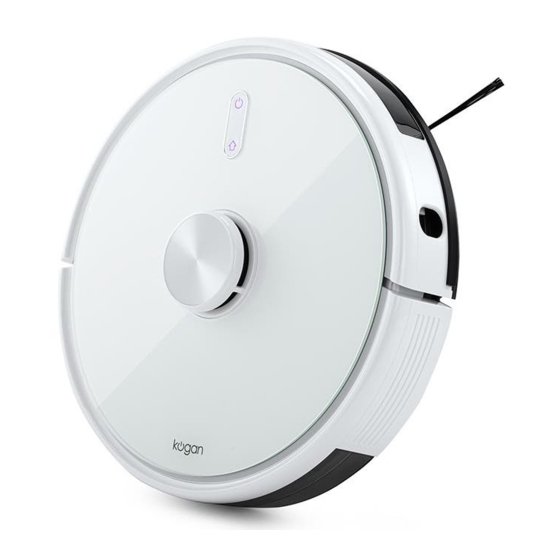
- Page 1 KOGAN SMARTERHOME™ LX15 ROBOT VACUUM CLEANER WITH UV AND MOP KAVACRBL15A...
-
Page 3: Safety And Warnings
SAFETY & WARNINGS • Read all the instructions in this user guide before use. • The robot is used for domestic use only and cannot be used for outdoor such as commercial or industrial environment. • Do not use the robot in places such as penthouse, open terrace, and furniture top without protective fence. - Page 4 Do not abandon used batteries arbitrarily. Used batteries should be disposed of by professional recycling agency. • If the power cable is damaged, cease use immediately. Contact Kogan.com • Ensure the robot is shut down during transportation. It is recommended to use original packaging for transportation.
- Page 5 COMPONENTS 2-in-1 Electrically Robot (x1) Charging Base (x1) Controlled Water Tank (x1) Left Side Brush (x2) HEPA Filter (x1) Mopping Cloth (x1) Right Side Brush (x2) Sponge Filter (x1) Cleaning Brush with Knife (x1) Adapter (x1) User Guide (x1)
- Page 6 OVERVIEW Robot On/Off/Sweep Recharge/Pause/Local Cleaning Filter Screen Cover Wall Sensor Dustbin Button Map Reset Button Upgrade Port...
- Page 7 Robot Sensor LDS Laser Ranging Sensor Anti-Collision Sensor for Radar Infrared Recharging Sensor Anti-Collision Sensor Anti-Drop Sensor Charging Contact Universal Wheel Side Brush Battery Cover Driving Wheel Rolling Brush Rolling Brush Cover Buckle...
-
Page 8: Charging Base
Charging Base Power Indicator Light Signal Emission Area Charging Base Pins Catching Groove Cover Plate Wire Slot Wrapping Post Power Adapter Port... -
Page 9: Installation
INSTALLATION Install Charging Base Connect power cable and fold the excess wire into the wire slot Place charging base against the wall and connect to a power supply. Ensure to leave space more than 0.5m on both sides of the charging base and more than 1.5m in the front. - Page 10 Keep the charging base out of direct sunlight. Direct sunlight will interfere with recharging signal. Consequently, the robot may be unable to return to the charging base. Do not move the charging base arbitrarily. If the charging base is relocated, the robot may lose the map to the charging base and fail to return to the base.
- Page 11 Install Mopping Module Step 1: Paste the Mopping Cloth. • Paste the mopping cloth flatly on the bottom of the 2-in-1 Electric Controlled Water Tank. Note: Ensure to clean the mopping cloth after every use. Step 2: Fill the water tank. •...
- Page 12 Step 3: Install the mopping module. • Replace the dustbin into the water tank and place the handle in the slot. • Press and hold the button in the middle of the tank. Push the tank horizontally along the rear part of the robot as shown in the image. You will hear a “click” sound.
- Page 13 Install App Download the “Kogan SmarterHome” app from the Play Store (Android) or App Store (iOS). Register If you do not have a Kogan SmarterHome™ account, register or sign in with a verification code sent by SMS. To register: Tap to enter registration page.
- Page 14 Set device in pairing mode When the device is first turned on, it may automatically enter pairing mode which is indicated by purple light blinking slowly. If not automatically in pairing mode when powered on, you can manually set the device in pairing mode by pressing the key and key simultaneously for 3 seconds until a voice...
- Page 15 Select “AP Mode” for the set-up type. Ensure that the device is in pairing mode, with the light flashing, and tap “Confirm light is slowly flashing”. Enter your Wi-Fi details. It is important that your SmarterHome™ device and the app are connected to the same Wi-Fi network during setup.
- Page 16 10. Follow the in-app prompts to continue AP Mode connection, which will pair your mobile phone to the device’s Wi-Fi hotspot to ensure a connection. Note: If the Wi-Fi hotspot does not appear on your phone in the list of available networks, your device may not be set in AP Pairing Mode correctly.
- Page 17 Having trouble connecting? The prior steps detail the process for “AP Mode” connection. If that does not work for your connection, we suggest trying it again, and if still no success, attempting the following method for Standard (non-AP Mode) connection. Add device through network Once registered, tap “+”...
- Page 18 Notes: The device and the app have to use the same Wi-Fi network. • • The device is only compatible with 2.4Ghz networks. If neither Standard or AP Mode methods are successful, please contact kogan.com for assistance.
-
Page 19: Operation
OPERATION Start/Shutdown • To start the robot, long press key for 3 seconds. The first time it is turned on, the indicator light will be purple. Once connected to the SmarterHome™ app, the indicator light turns blue. The light will stay blue until the Wi-Fi is reset or the robot is disconnected from the app. - Page 20 Recommendations: • Do not move the robot casually or frequently when it is cleaning. If it is required to move the robot, ensure to put the robot back in the original position. • When the robot starts again, it will try to reposition itself. After successful repositioning, it will follow the planned path and continue to work.
- Page 21 User-defined Area Cleaning Use the app to set the size and location of the area you want to clean. You can set one or more areas. The robot would clean as per your preference. Restricted Area Set one or more restricted areas using mobile app. The robot will not sweep restricted areas. The robot may enter a restricted area due to positioning errors and abnormal sensors.
-
Page 22: Partial Cleaning
Schedule Cleaning You can schedule cleaning on the app by tapping the Timer icon. The robot will start cleaning automatically at the appointed time and return to the charging base after cleaning. Partial Cleaning When the robot cannot be controlled by the mobile app, remove the robot and place at the point where you want to clean. - Page 23 DND mode In the DND mode, the robot will neither sweep the floor nor issue a voice automatically. To start the DND mode, tap the Do not disturb switch icon in the app. Adjust the Suction Power You can adjust the suction power to Quiet, Auto, or Strong using the app.
- Page 24 Adjust the Water Flow Tap the Water regulation icon in the app to adjust the water flow to Low, Middle, and High level.
- Page 25 UVC FUNCTION In the app, under the Setting, tap the UV Sterilization icon to turn on the Ultraviolet C (UVC) function. UVC Mode • The UVC mode cannot be turned on during start-up, charging, recharging, standby, pause, sleep, failure/error, low power, shutdown, autonomous shutdown. •...
- Page 26 CHARGING Automatic Mode The robot will return to the charging base automatically after work. Manual Mode Place the robot back to the charging base. Under suspended state, short press key to start recharging. If the robot is successfully connected to the app, then press the recharge icon in the app. The indicator light will be flashing blue colour.
- Page 27 Tips • If the robot does not start due to low battery, charge the robot on the charging base. The robot will be started automatically. The robot can work normally only when the battery level is greater than 20%. • The robot will return to the charging base automatically if the battery level is less than 20% and will be powered off.
- Page 28 ” icon to access the ‘Add and manage’ page. Select ‘Set up device’, then under the Works with Google banner, select ‘Have something already set up?’ Select the search bar and type ‘Smarter Home’ to locate the Kogan SmarterHome™ service.
- Page 29 Tap ‘Authorise’ to grant Google permission to access the SmarterHome™ app and your devices. From here, you will be prompted to sign into your SmarterHome™ account using either your email or mobile phone number, depending on which method you used to register your account.
- Page 30 Tap on any of the devices to view a list of available commands. Note: Note that Google Home can only control the base/core functions of any compatible SmarterHome™ devices. To make full use of this product’s smart functionality, please use the Kogan SmarterHome™ app.
- Page 31 AMAZON ALEXA CONTROL Note: You will need to have set up an Alexa account prior to linking your Kogan SmarterHome™ device. Adding “SmarterHome” to the Alexa app From the home page of the Alexa app, select the “ ” icon in the top-right and select Skills &...
- Page 32 SmarterHome™ account. When your devices have successfully connected to the Alexa app, you will be able to control your Kogan SmarterHome™ devices via Alexa’s voice commands. Note: Alexa can only control the base/core functions of any compatible SmarterHome™ devices. To make full use of this product’s smart functionality, please...
-
Page 33: Cleaning And Care
CLEANING & CARE Rolling Brush Turn over the robot. Press the buckle on the rolling brush cover to take out the rolling brush. Buckle Main Brush Remove dust outside and inside the rolling brush using cleaning brush. Place the rolling brush into the cover. Press the buckle on the rolling brush cover to fix tightly. - Page 34 Dustbin Press the button on the dustbin and pull out the dustbin. Open and clean the dustbin.
- Page 35 Filters Remove the filter gauze, sponge and HEPA. Clean the removed filter gauze. Clean the Sponge and HEPA filters under water. Shake off the water droplets and dry it naturally. Use it after it has completely dried. Install it back in this sequence: filter gauze > sponge > HEPA. Filter Gauze Button Filter Cover...
- Page 36 Mopping Module When the robot has finished working, press the button in the middle of the water tank to remove the mopping module. Pull the water tank out. Note: Ensure to remove the mopping module when the robot is being charged or left unused.
- Page 37 Sensors Follow the below instructions for regular cleaning of sensor: Disconnect from the charging base and power supply when cleaning the sensor. Clean the sensor using a soft cloth. Clean the following sensors: • Clean the three anti-dropping sensors which is located at the back of the robot.
- Page 38 Battery • The robot is furnished with lithium-ion batteries. To maintain battery performance, keep the robot charged for daily use. • If the robot is left unused for a long time, shut down and store it properly. • Charge the batteries at least every 3 months to avoid damaging batteries due to excessive discharge Firmware Upgrade Upgrade the robot’s firmware using the app.
-
Page 39: Troubleshooting
TROUBLESHOOTING Problem Solution • In case of low battery level, place the robot on the charging base. The robot will be started automatically The robot cannot be started after it has been 80% charged. See the Operation section of this user guide. •... - Page 40 Prompt Tone Solution Do not trigger the cleaning when the dustbin Error 1: I cannot find the dust collector. has been removed. The top radar is covered or placed in an Error 2: Check if the radar on top has been open area.
-
Page 41: Specifications
SPECIFICATIONS Robot Dimensions 350 x 350 x 110mm Weight 3.8kg Li-Battery 5200mAh Rated Voltage 14.4V Rated Power Charging Base Dimensions 160 x 143 x 80mm Rated Power... - Page 42 NOTES...
- Page 43 NOTES...
- Page 44 Need more information? We hope that this user guide has given you the assistance needed for a simple set-up. For the most up-to-date guide for your product, as well as any additional assistance you may require, head online to help.kogan.com...
Need help?
Do you have a question about the SMARTERHOME LX15 and is the answer not in the manual?
Questions and answers