Table of Contents
Advertisement
Advertisement
Table of Contents

Related Manuals for Exerpeutic 7102


Summary of Contents for Exerpeutic 7102
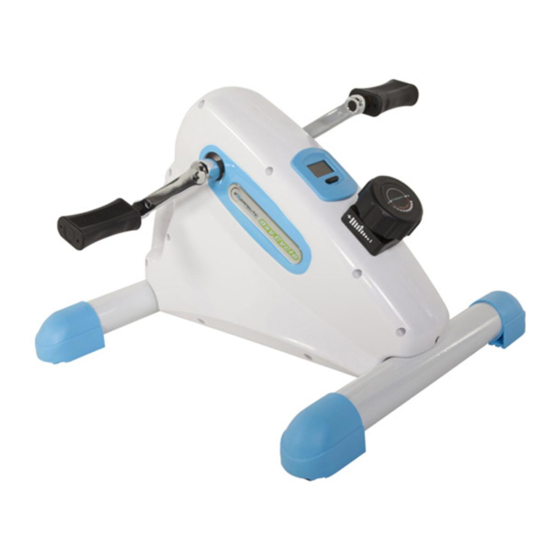
- Page 1 Portable Mini Bike OWNER’S Item #7102 MANUAL...
-
Page 2: Table Of Contents
TABLE OF CONTENTS SERVICE ------------------------------------------------------------------------- 2 IMPORTANT LABELS -------------------------------------------------------- 3 PRODUCT SAFETY ----------------------------------------------------------- 4 PART DRAWING --------------------------------------------------------------- 5 PART LIST ----------------------------------------------------------------------- 6 INCLUDED HARDWARE & TOOLS -------------------------------------- 7 ASSEMBLY ---------------------------------------------------------------------- 8 COMPUTER --------------------------------------------------------------------- 11 OPERATING THE TENSION CONTRIL KNOB ------------------------ 12 WORKOUT PRINCIPAL ------------------------------------------------------ 13 EXERCISES --------------------------------------------------------------------- 14 WARM UP ----------------------------------------------------------------------- 16... -
Page 3: Service
SERVICE IMPORTANT: FOR NORTH AMERICA ONLY To request product service and order replacement parts, please call our customer service department at: 1-866-924-1688 Monday through Friday, 8:00 AM-5:00 PM Pacific Standard Time, service@paradigmhw.com or email us at: Please visit our website at www.paradigmhw.com. Please have the following information ready when requesting for service: Your name Phone number... -
Page 4: Important Labels
IMPORTANT LABELS... -
Page 5: Product Safety
PRODUCT SAFETY Basic precautions should always be followed, including the following safety instructions when using this equipment: Read all instructions before using this equipment. If any part of the cable/wire is stripped or damaged, STOP using the portable mini bike immediately. Do not operate the portable mini bike in a wet or moist environment. -
Page 6: Part Drawing
PART DRAWING... -
Page 7: Part List
PART LIST Description Qty No. Description 001 Main Frame 1 018 Plastic Cap 002 Stabilizer Ø50x1.5tx380 2 019 Bolt M4x10mm 003 Non-slip Mat 500x600 1 020 Bolt M5x10mm 004 End Cap for Stabilizer 4 021 Bearing Bracket 005R Right Cover 1 022 Spring 1.0txØ10x50mm 005L Left Cover 1 023 Round Magnet... -
Page 8: Included Hardware & Tools
INCLUDED HARDWARE & TOOLS (13) Spring Washer M8 (14) Bolt M8x16mm 6 PCS 6 PCS Allen Wrench with Phillips Screwdriver Multi Hex 1 PC Tool 1 PC... -
Page 9: Assembly
ASSEMBLY Hold the unit in an upright position. The Tension Control Knob (11) side facing up. Then insert the Stabilizer (2) into the Main Frame (1) and align bolt holes. Attach the Stabilizer (2) to the Main Frame (1) with three M8 Spring Washers (13) and three M8x16mm Bolts (14). - Page 10 ASSEMBLY Insert the other Stabilizer (2) into the Main Frame (1) and align bolt holes. Attach the Stabilizer (2) to the Main Frame (1) with three M8 Spring Washers (13) and three M8x16mm Bolts (14). Tighten bolts with the Allen Wrench with Phillips Screwdriver provided.
- Page 11 ASSEMBLY Insert the pedal shaft of Left Foot Pedal (15L) into threaded hole in the Left Crank (17L). Turn the pedal shaft by hand in the counterclockwise direction until snug. Note: DO NOT turn the pedal shaft in the clockwise direction, doing so will strip the threads.
-
Page 12: Computer
COMPUTER COMPUTER BUTTON FUNCTIONS: Push the button to turn on the display. Push the button to select each function. Push the button for 3 seconds to clear all functions to zero except the ODO function. COMPUTER DISPLAY FUNCTIONS & MEASURING RANGE: SCAN: Automatically displays each function every 6 seconds. -
Page 13: Operating The Tension Contril Knob
OPERATING THE TENSION CONTROL KNOB 8-LEVEL TENSION CONTROL KNOB The resistance can be adjusted by turning the tension control knob. To increase the resistance, turn the tension control knob in a clockwise direction. To decrease the resistance, turn the tension control knob in a counterclockwise direction. -
Page 14: Workout Principal
WORKOUT PRINCIPAL Personal goals includes shaping, strengthening, available time, present fitness level, previous injuries, and cardiovascular. By using this product correctly and on a regular basis, you can achieve your goals. Available time is one of a major element in determining what we do in our daily lives. -
Page 15: Exercises
EXERCISES How to use your Portable Mini Bike. When using the portable mini bike, the proper way to exercise is to set the desired resistance by turning the Tension Control Knob, and then pedaling to get the best results. Pedaling at excessive speeds or applying excessive force will damage the product or injury to persons. - Page 16 EXERCISES Leg Exercise For use as a lower body device-place the portable mini bike on a level and non-slip surface prior to use, and sit comfortable in a chair with the portable mini bike directly in front of you such that the knee joint is not flexed less than 90 degrees.
-
Page 17: Warm Up
WARM UP Quadriceps Stretch With one hand against a wall for balance, reach behind you and pull your right foot up. Bring your heel as close to your buttocks as possible. Hold for 15 counts and repeat with left foot up. Inner Thigh Stretch Sit with the soles of your feet together with your knees pointing outward. -
Page 18: Warranty
WARRANTY Paradigm Health & Wellness, Inc. warrants to the original purchaser that this product is free from defects in material and workmanship when used for the purpose intended, under the conditions that it has been installed and operated in according to Paradigm’s Owner’s Manual. -
Page 19: Fax Form
FAX FORM PARADIGM PARTS REQUEST FAX FORM Please fax this form to (1-626-810-2166) OR YOU CAN EMAIL CUSTOMER SERVICE REQUESTS TO service@paradigmhw.com NAME: _______________________________________________________ ADDRESS: ____________________________________________________ CITY ______________ STATE ______________ ZIP ___________________ TELEPHONE: (Day) _____________________________________________ (Night) ____________________________________________ (Email Address) ____________________________________ SERIAL#: __________________________________________ MODEL#: __________________________________________ PURCHASE DATE: ______________________________________________...
Need help?
Do you have a question about the 7102 and is the answer not in the manual?
Questions and answers